Page 2 - GENERAL SAFETY RULES; PERSONAL SAFETY; TOOL USE AND CARE; SERVICE
2 – English GENERAL SAFETY RULES DANGER: READ AND UNDERSTAND TOOL LABELS AND MANUAL. Failure to follow warnings could result in DEATH or SERIOUS INJURY. SAVE THESE INSTRUCTIONSWORK AREA Keep your work area clean and well lit. Cluttered benches and dark areas invite accidents. Do not operate powe...
Page 3 - SPECIFIC SAFETY RULES; OPERATION
3 – English SPECIFIC SAFETY RULES Know your pneumatic tool. Read operator’s manual carefully. Learn its applications and limitations, as wellas the specific potential hazards related to this tool.Following this rule will reduce the risk of electric shock,fire, or serious injury. Always wear eye ...
Page 4 - AIR SUPPLY AND CONNECTIONS; LOADING TOOL; SAVE THESE INSTRUCTIONS
4 – English SPECIFIC SAFETY RULES Do not drive fasteners on top of other fasteners or with the tool at an overly steep angle as this may cause deflection of fasteners which could cause injury. Do not drive fasteners close to the edge of the workpiece as the wood may split, allowing the fastener ...
Page 5 - SYMBOLS; SYMBOL; NOTICE
5 – English SYMBOLS Some of the following symbols may be used on this tool. Please study them and learn their meaning. Proper interpreta-tion of these symbols will allow you to operate the tool better and safer. SYMBOL NAME DESIGNATION/EXPLANATION Safety Alert Indicates a potential personal injury h...
Page 6 - GLOSSARY OF TERMS; FEATURES; PRODUCT SPECIFICATIONS; ASSEMBLY
6 – English GLOSSARY OF TERMS Activate (operating controls) To move an operating control so that it is in a position that allows the tool to be actuated or that satisfies one requirement for the tool to be actuated. Actuate (tool) To cause movement of the tool component(s) intended to drive a fasten...
Page 7 - APPLICATIONS; PREPARING THE TOOL FOR USE
7 – English DANGER: Do not use oxygen, combustible gases, or bottled gases as a power source for this tool. The tool will explode and cause death or serious injury. WARNING: Do not allow familiarity with tools to make you careless. Remember that a careless fraction of a second is sufficient to infli...
Page 8 - ADJUSTING THE EXHAUST; LOADING THE TOOL WITH NAILS
8 – English OPERATION ADJUSTING THE EXHAUST See Figure 4, page 13. The adjustable exhaust on the end cap of the tool allows the operator to direct the exhaust according to operator preference. To adjust, turn the exhaust cap in the desired direction. CONNECTING THE TOOL TO AN AIR SUPPLY See Figure 5...
Page 9 - USING THE SELECTABLE TRIGGER; SINGLE SEQUENTIAL ACTUATION MODE
9 – English OPERATION USING THE SELECTABLE TRIGGER See Figures 7 - 9, page 14. WARNING: Never wedge or hold back the workpiece contact mechanism during operation of the tool. Doing so could result in possible serious injury. This tool is shipped from the factory with the actuation mode selector set ...
Page 10 - REMOVING NAILS FROM THE TOOL; CLEARING A JAMMED NAIL; MAINTENANCE; GENERAL MAINTENANCE
10 – English OPERATION DEPTH-OF-DRIVE ADJUSTMENT See Figure 10, page 14. The depth-of-drive of the nail may be adjusted. It is advis-able to test the depth on a scrap workpiece to determine the required depth for the application. To determine depth-of-drive, first adjust the air pressure and drive a...
Page 11 - LUBRICATION; COLD WEATHER OPERATION
11 – English MAINTENANCE With the dry-fire lockout disengaged, perform the steps below: Press the workpiece contact against a workpiece to ensure that it moves smoothly. With the workpiece contact depressed, pull the trigger. The trigger should move smoothly, without binding. Select the single...
Page 13 - RÈGLES DE SÉCURITÉ GÉNÉRALES; SÉCURITÉ PERSONNELLE
2 – Français RÈGLES DE SÉCURITÉ GÉNÉRALES DANGER : LIRE ET VEILLER À BIEN COMPRENDRE LES AUTOCOLLANTS APPOSÉS SUR L’OUTIL ET LE MANUEL. Le non respect de cet avertissement pourrait entraîner des BLESSURES GRAVES ou MORTELLES. CONSERVER CES INSTRUCTIONSLIEU DE TRAVAIL Garder le lieu de travail prop...
Page 14 - RÈGLES DE SÉCURITÉ PARTICULIÈRES; UTILISATION
3 – Français Apprendre à connaître l’outil pneumatique. Lire attentivement le manuel d’utilisation. Apprendre les applications et les limites de l’outil, ainsi que les risques spécifiques relatifs à son utilisation. Le respect de cette règle réduira les risques de choc électrique, d’incendie et de...
Page 15 - CHARGEMENT DE L’OUTIL; CONSERVER CES INSTRUCTIONS
4 – Français RÈGLES DE SÉCURITÉ PARTICULIÈRES Les outils pneumatiques sont conçus pour uneutilisation à une main. Ne pas tenir l’outil par la face avant du chargeur. Tenir les mains, la tête et toute autrepartie du corps à distance du point d’éjection des clous,près du chargeur, afin d’éviter des ...
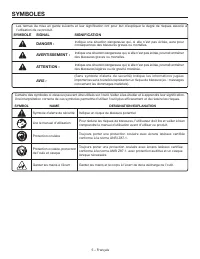
Page 16 - SYMBOLES; SYMBOLE
5 – Français SYMBOLES Les termes de mise en garde suivants et leur signification ont pour but d’expliquer le degré de risques associé à l’utilisation de ce produit. SYMBOLE SIGNAL SIGNIFICATION DANGER : Indique une situation dangereuse qui, si elle n’est pas évitée, aura pour conséquences des blessu...
Page 17 - GLOSSAIRE; CARACTÉRISTIQUES; FICHE TECHNIQUE
6 – Français GLOSSAIRE Activer (commandes de l’outil) Mettre une commande sur une position déclenchant ou permettant de déclencher l’outil Actionner (outil) Causer le mouvement des pièces conçues pour chasser le clou. Système de déclenchement Gâchette, déclencheur par contact et / ou autre commande ...
Page 18 - PRÉPARATION DE L’OUTIL POUR LE TRAVAIL
7 – Français DANGER : N e p a s u t i l i s e r d e l ’ o x y g è n e o u d e s g a z combustibles ou en bouteille pour alimenter l’outil. L’outil exploserait, causant des blessures graves ou mortelles. AVERTISSEMENT : Ne pas laisser la familiarité avec les outils faire oublier la prudence. Ne pas o...
Page 19 - RÉGLAGE DE L’ÉCHAPPEMENT; CHARGEMENT DES CLOUS
8 – Français UTILISATION RÉGLAGE DE L’ÉCHAPPEMENT Voir la figure 4, page 13. L’échappement réglable du dessus de l’outil permet à l’opérateur d’orienter l’échappement selon sa préférence. Pour orienter l’échappement, tourner le capuchon dans la direction désirée. RACCORDEMENT DE L’OUTIL À UNE SOURCE...
Page 20 - DÉCLENCHEMENT PAR SÉQUENCE UNIQUE; DÉCLENCHEMENT PAR CONTACT; RÉGLAGE DE LA PRESSION D’AIR
9 – Français UTILISATION AVERTISSEMENT : Utiliser des clous mesurant au moins 1,65 mm (0,065 po) diamètre de la tige. Ne pas respecter cette directive peut faire en sorte que les clous soient expulsés prématurément. Ne pas utiliser de clous en acier trempé avec des outils pneumatiques. Cela peut use...
Page 21 - RETRAIT DE CLOUS DE L’OUTIL; DÉBLOCAGE D’UNE AGRAFE; ENTRETIEN; ENTRETIEN GÉNÉRAL
10 – Français UTILISATION Pour le test, utiliser une pression de 90 à 95 psi. Augmenter ou réduire la pression d’air de manière à obtenir le réglage minimum permettant d’exécuter le travail uniformément.Il est possible d’obtenir la profondeur désirée simplement en réglant la pression d’air. Si un ré...
Page 22 - LUBRIFICATION; UTILISATION PAR TEMPS FROID
11 – Français ENTRETIEN Si l’outil est équipé d’un mécanisme de verrouillage detir à vide, il faudra déverrouiller cette caractéristique ououvrant légèrement le magasin ou en tirant sur le levierde désengagement. Lorsque le mécanisme de verrouillage est désengagé, exécuter les étapes suivantes : ...
Page 23 - DÉPANNAGE; PROBLÈME; ACCESSOIRES; NOTE : ILLUSTRATIONS COMMENÇANT SUR 13
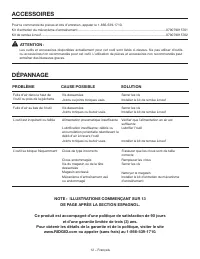
12 – Français DÉPANNAGE PROBLÈME CAUSE POSSIBLE SOLUTION Pour la commande de pièces et kits d’entretien, appeler le 1‑866‑539‑1710.Kit d’entretien du mécanisme d’entraînement .................................................................................................079079015701Kit de remise à ...
Page 24 - REGLAS DE SEGURIDAD GENERALES; GUARDE ESTAS INSTRUCCIONES; SEGURIDAD PERSONAL; EMPLEO Y CUIDADO DE LA HERRAMIENTA
2 – Español REGLAS DE SEGURIDAD GENERALES PELIGRO: LEA Y COMPRENDA LAS ETIQUETAS DE LAS HERRAMIENTAS Y EL MANUAL. La inobservancia de los avisos de advertencia podría causar la MUERTE o LESIONES SERIAS . GUARDE ESTAS INSTRUCCIONES ÁREA DE TRABAJO Mantenga limpia y bien iluminada el área de trabajo...
Page 25 - REGLAS DE SEGURIDAD ESPECÍFICAS; FUNCIONAMIENTO; SERVICIO
3 – Español Familiarícese con su herramienta neumática. Lea cuidadosamente el manual del operador. Aprenda sus usos y limitaciones, así como los posibles peligros específicos de esta herramienta. Con el cumplimiento de esta regla se reduce el riesgo de una descarga eléctrica, incendio o lesión ser...
Page 26 - SUMINISTRO DE AIRE Y CONEXIONES; CÓMO CARGAR LA HERRAMIENTA
4 – Español REGLAS DE SEGURIDAD ESPECÍFICAS Es importante el método de disparo elegido. Estudie el manual, en el cual se describen las diferentes formasde disparar. Las herramientas neumáticas están diseñadas para usarlas con una sola mano. No sujete la herramienta por el frente del cargador. ...
Page 27 - SÍMBOLOS; SÍMBOLO
5 – Español SÍMBOLOS Es posible que se empleen en este producto algunos de los siguientes símbolos. Le suplicamos estudiarlos y aprender su significado. Una correcta interpretación de estos símbolos le permitirá utilizar mejor y de manera más segura el producto. SÍMBOLO NOMBRE DENOMINACIÓN/EXPLICACI...
Page 28 - GLOSARIO DE TÉRMINOS; CARACTERÍSTICAS; ESPECIFICACIONES DEL PRODUCTO; ARMADO
6 – Español GLOSARIO DE TÉRMINOS Activar (los controles de accionamiento) Es mover un control de accionamiento de manera que quede en una posición en la cual se accione la herramienta o cumpla con un requisito necesario para accionar la misma. Accionar (la herramienta) Es producir el movimiento de l...
Page 30 - AJUSTE DEL ESCAPE
8 – Español FUNCIONAMIENTO AJUSTE DEL ESCAPE Vea la figura 4, página 13. El escape ajustable, situado en la tapa extrema de la her‑ramienta, permite al operador dirigirlo en la dirección de‑seada. Para ajustarlo, gire la tapa del escape en la dirección deseada. CÓMO CONECTAR LA HERRAMIENTA A UN SUMI...
Page 31 - MODO DE ACCIONAMIENTO SECUENCIAL
9 – Español FUNCIONAMIENTO ADVERTENCIA: N o u t i l i c e c l a v o s d e u n v á s t a g o m e n o r d e 1,65 mm (0,065) de diámetro. Si lo hace, los clavos podrían salirse de la herramienta de manera prematura. No use clavos reforzados con herramientas neumáticas. Esto podría hacer que el canal im...
Page 32 - AJUSTE DE LA PROFUNDIDAD DE; MANTENIMIENTO; MANTENIMIENTO GENERAL
10 – Español FUNCIONAMIENTO AJUSTE DE LA PROFUNDIDAD DE INTRODUCCIÓN Vea la figura 10, página 14. Puede ajustarse la profundidad de introducción del clavo. Se recomienda probar la profundidad de introducción en un pedazo de desecho para determinar la profundidad requerida en cada caso en particular....
Page 33 - LISTA DE CONTROL DIARIA OBLIGATORIA; LUBRICACIÓN
11 – Español MANTENIMIENTO LISTA DE CONTROL DIARIA OBLIGATORIA Vea las figuras 8 a 10, página 15. Desconecte el suministro de aire de la herramienta y retire todos los sujetadores. Verifique todos los tornillos, tuercas, pernos y vástagos de la herramienta. Si hay alguno suelto, debe ser ajustad...
Page 34 - SOLUCIÓN DE PROBLEMAS; PROBLEMA; ACCESORIOS
12 – Español SOLUCIÓN DE PROBLEMAS PROBLEMA CAUSA POSIBLE SOLUCIÓN ACCESORIOS Para pedir piezas y juegos de mantenimiento, llame al 1‑866‑539‑1710.Juego de mantenimiento del sistema impulsor ...............................................................................................079079015701Ju...
Page 40 - OPERATOR’S MANUAL; STRAIGHT FINISH NAILER; Customer Service Information:; Información sobre servicio al consumidor:
995000552 3-5-18 (REV:01) OPERATOR’S MANUAL MANUEL D’UTILISATIONMANUAL DEL OPERADOR STRAIGHT FINISH NAILER CLOUEUSE DE FINITION DROITECLAVADORA DE ACABADO RECTA R250SFF ONE WORLD TECHNOLOGIES, INC. P.O. Box 1427Anderson, SC 29622 USA 1-866-539-1710 www.RIDGID.com RIDGID is a registered trademark o...