Page 2 - Contact information
België/ Belgique 0800 80 190 Gratis/Gratuit ß chat www.philips.com/suppor t България 00800 11 544 24 Česká republika 800 142 840 Bezplatný hovor Danmark 3525 8759 Lokalt opkald ß chat www.philips.com/suppor t Deutschland 0800 000 7520 (kostenfrei) ß chat www.philips.com/suppor t Ελλάδα 0 0800 3122 1...
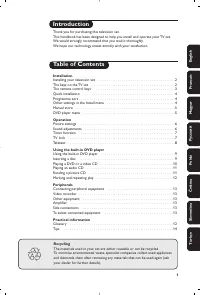
Page 3 - Contents
EN 3 En gl is h 1 Get started 4 TV tour 4 Important 7 Environmental efforts 9 Position the TV 10 Help and support 11 2 Use your TV 12 Controls 12 Watch TV 15 Watch a connected device 18 Ambilight 19 Browse PC through DLNA 20 Browse Net TV 22 Rent online video 24 3 Use more of your TV 26 Enjoy HbbTV ...
Page 4 - Get started; TV tour; Remote control
EN 4 1 Get started TV tour Remote control To adjust the volume. To switch TV channels. To open or close the Home menu . In the Home menu, access connected devices, picture and sound settings, and other useful features. To open or close the Source menu . In the Source menu, access connected devices. ...
Page 7 - Important; Safety
EN 7 En gl is h Important Safety Read and understand all instructions before you use your TV. If damage is caused by failure to follow instructions, the warranty does not apply. Risk of electric shock or fire! Never expose the TV to rain or water. Never place liquid containers, such as vases, near...
Page 8 - Screen care
EN 8 Risk of overheating! Never install the TV in a confined space. Always leave a space of at least 4 inches or 10 cm around the TV for ventilation. Ensure that curtains or other objects never cover the ventilation slots on the TV. Risk of injury, fire or power cord damage! Never place the TV o...
Page 9 - Environmental efforts; Energy efficiency
EN 9 En gl is h Environmental efforts Energy efficiency Philips continuously focuses on lowering the environmental impact of our innovative consumer products. We aim our efforts towards environmental improvements during manufacturing, reduction of harmful substances, energy-efficient use, end-of-lif...
Page 10 - Position the TV; Placement; Wall mount
EN 10 Your product contains batteries covered by the European Directive 2006/66/EC, which cannot be disposed of with normal household waste. Please inform yourself about the local rules on separate collection of batteries because correct disposal helps to prevent negative consequences for the enviro...
Page 11 - Location; Lock the TV; Help and support; Use Help
EN 11 En gl is h For 47 inch to 55 inch TVs: Before you wall mount the TV, find the correct length of screw. To find the length of screw, add the thickness of your wall mount to the screw length, as shown in the graphic. Location A range of TV settings are applied to suit the location of the TV. Sho...
Page 12 - Use your TV; Controls; TV controls; Indicators
EN 12 2 Use your TV Controls TV controls 1. +/-: Increase or decrease volume. 2. AMBILIGHT : Switch Ambilight on or off. Ambilight is available on certain models only. 3. ( Home ): Access the Home menu. Press again to launch an activity in the Home menu. Confirm an entry or selection. 4. CH +/- : Sw...
Page 13 - Batteries
EN 13 En gl is h 4. ( Home ): Access the Home menu. 5. ( Navigation buttons ): Navigate through menus and select items. 6. CH - / CH + ( Previous/Next ): Switch channels, navigate through menu pages, tracks, albums or folders. 7. OK : Confirm an entry or selection. 8. ( Back ): Return to the previou...
Page 15 - Watch TV; Switch TV on or off
EN 15 En gl is h Watch TV Switch TV on or off Switch the TV on Press the power switch at the base of the TV to the ON position. If the TV is in standby, press on the remote control. Note: There is a short delay before the TV responds. Tip: If you cannot find your remote control and want to switc...
Page 17 - Use smart picture settings
EN 17 En gl is h Use TV programme guide options You can customise the displayed information to: Remind you when programmes start Display only preferred channels 1. In the programme guide, press OPTIONS . 2. Select one of these settings, then press OK : [Set reminder] : Set programme reminders....
Page 18 - Watch a connected device; Add new device
EN 18 Watch a connected device Add new device Notes: Before you watch a connected device, you must add its icon to the Home menu. See Connect your TV > Connect device (Page 45). If you connect an HDMI-CEC compliant device to the TV through an HDMI connector and switch it on, the device is aut...
Page 19 - Ambilight; What you can do
EN 19 En gl is h Press OPTIONS to access or exit the following picture options: [Show info] : Display the file information. [Stop] : Stop slideshow. [Rotate] : Rotate the file. [Repeat] : Repeat the slideshow. [Play once] : Play the file once. [Shuffle off] / [Shuffle on] : Enable or dis...
Page 20 - Browse PC through DLNA
EN 20 Switch on 1. Press ADJUST . 2. Select [Ambilight] , then press OK . 3. To switch Ambilight on or off, select [On] or [Off] . You can also press AMBILIGHT on the TV to switch Ambilight on or off. Change settings In the Ambilight menu, you can access more Ambilight settings. 1. While you watch T...
Page 21 - Enable sharing on Windows Media
EN 21 En gl is h You will also need to set up the network connection: Connect your TV and the computer to the same home network. See Connect your TV > Computers and the Internet (Page 53). Switch on your computer and the router. Proceed to set up a media sharing server with Windows Media Play...
Page 22 - Play files from computer; Browse Net TV
EN 22 Play files from computer Note: Before you play multimedia content from the computer, make sure that the TV is connected to the home network, and the media server software is properly set up. 1. Switch on the computer and the router. 2. Switch on your TV. 3. Press on the remote control. 4. Sele...
Page 23 - Options
EN 23 En gl is h Notes: You can lock Net TV Applications (Apps) with a 4 digit pin-code. All adult Apps can be locked as one selection. When you lock an adult Application, the advertisements and Web pages not adapted for Net TV remain accessible. Connect the TV to the Internet On your home netwo...
Page 24 - Rent online video
EN 24 Select P+ and P- to scroll up and down on a web page. Zoom page To zoom in and out on an Internet page, press OPTIONS and select [Zoom page] . Use the slider bar to set the enlargement. To scroll through an Internet page, use the Navigation buttons to jump from highlight to highlight. Reload p...
Page 26 - Enjoy HbbTV; Access HbbTV; Navigate HbbTV pages; HbbTV text
EN 26 3 Use more of your TV Enjoy HbbTV What you can do Some broadcasters of digital channels offer interactive HbbTV (Hybrid Broadcast Broadband TV). With HbbTV, broadcasters combine their normal TV programme with all kinds of information or entertainment. You can browse this information interactiv...
Page 27 - Smart USB recording; Installation
EN 27 En gl is h Smart USB recording What you can do With this TV, you can pause a live TV broadcast from a digital channel. Connect a USB hard disk to your TV and you can pause the live broadcast. If your TV is connected to the Internet, you can also set a programmed recording of a digital broadcas...
Page 29 - Manage recordings; View Teletext; Select a page
EN 29 En gl is h Record a programme You can schedule a recording of an upcoming programme for today or a few days from today (maximum of 8 days away). To schedule a recording, press and select [Programme guide] . At the programme guide page, select the channel and programme you wish to record. Pre...
Page 30 - Set locks and timers; Clock
EN 30 [Dual screen] / [Full screen] : Enable or disable dual screen teletext. Dual screen splits the current channel or source to the left of the screen, with teletext on the right. [T.O.P. overview] : Table Of Pages (T.O.P.) teletext broadcasts allow you to jump from one subject to another with...
Page 31 - Sleeptimer
EN 31 En gl is h Change the clock mode The clock mode is automatically synchronised to the Coordinated Universal Time (UTC). If your TV cannot receive UTC transmissions, change the clock mode to [Manual] . 1. While you watch TV, press . 2. Select [Setup] > [TV settings] > [Preferences] . 3. Se...
Page 33 - Set Scenea lounge light; Set universal access; Switch on
EN 33 En gl is h Set Scenea lounge light When the TV is in standby, you can switch on Ambilight and create a lounge light effect with your wallpaper. Ambilight is available on certain models only. When the TV is in standby, press AMBILIGHT on the front of the TV. Note: It can take more than 5 second...
Page 34 - Use EasyLink; What you need
EN 34 Use EasyLink What you can do Get the most out of your HDMI-CEC compliant devices with Philips EasyLink enhanced control features. If your HDMI-CEC compliant devices are connected through HDMI, you can control them at the same time with your TV remote control . Note: Other brands describe HDMI-...
Page 35 - Control devices simultaneously
EN 35 En gl is h Control devices simultaneously If you connect multiple HDMI-CEC devices that support this setting, all the devices respond to the TV remote control. Caution: This is an advanced setting. Devices that do not support this setting will not respond to the TV remote control. 1. Press . 2...
Page 36 - Retain picture quality; Maximize video display; Hear another device at TV standby
EN 36 Retain picture quality If your TV picture quality is affected by the picture-processing features of other devices, switch on Pixel Plus Link. To switch on Pixel Plus Link 1. Press . 2. Select [Setup] > [TV settings] > [EasyLink] . 3. Select [Pixel Plus link] > [On] , then press OK . M...
Page 37 - Set up your TV; Settings assistant; More picture settings
EN 37 En gl is h 4 Set up your TV Settings assistant Use the settings assistant to guide you through the picture and sound settings. 1. While you watch TV, press . 2. Select [Setup] > [Quick picture and sound settings] , then press OK . 3. Select [Start] , then press OK . 4. Follow the onscreen i...
Page 38 - Reset to factory settings; Channels; Reorder and rename
EN 38 Digital TV channels can stream several audio languages. If multiple languages are available, select the preferred language. 1. Press . 2. Select [Setup] > [Channel settings] or [Satellite settings] > [Language] . 3. Select one of the following settings, then press OK : [Primary audio] ...
Page 39 - Update channel list
EN 39 En gl is h Update channel list When the TV was switched on for the first time, a full installation of channels was performed. You can automatically add or remove digital channels or manually update channels. Note : If you are prompted to enter a code, enter '8888'. Automatic update To automati...
Page 40 - Install digital and satellite channels
EN 40 Step 2: Search and store new TV channels 1. In the [Analogue: Manual installation] menu, select [Find channel] , then press OK . 2. Select one of the following options: Press the Navigation buttons or Numeric buttons to manually enter the channel frequency. Select [Search] then press OK to...
Page 41 - Reinstall channels
EN 41 En gl is h Reinstall channels ATTENTION: This feature is intended for dealers and service personnel. You can copy channel lists from one Philips TV to another through a USB storage device. You do not need to search for channels or install them again on the second TV. The channel list file is s...
Page 42 - TV demo; Update software; TV software
EN 42 Menu language 1. While you watch TV, press . 2. Select [Setup] > [TV settings] > [Preferences] > [Menu language] . 3. Select a menu language from the list, then press OK . Other settings TV demo Start a demo to find out more about your TV's features. Note: Demos are not supported on M...
Page 43 - Onscreen Help; Reinstall the TV
EN 43 En gl is h Update from digital broadcast When available, your TV can receive software updates through digital broadcasts. A message appears prompting you to update the software. We strongly recommend that you update the software when prompted. Follow the instructions on screen. Note: If you ch...
Page 44 - About cables; Cable quality; HDMI
EN 44 5 Connect your TV About cables Cable quality Overview Before you connect devices to the TV, check the available connectors on the device. Connect the device to the TV with the highest quality connection available. Good quality cables ensure a good transfer of picture and sound. The connections...
Page 45 - SCART
EN 45 En gl is h SCART A SCART cable combines video and audio signals. SCART connectors can handle RGB video signals but cannot handle high-definition (HD) TV signals. VGA Use this connection to display PC content on the TV. For video and sound, use the VGA and AUDIO IN connectors. Connect devices O...
Page 46 - Blu-ray or DVD disc player; TV receiver
EN 46 Blu-ray or DVD disc player Connect the disc player with an HDMI cable to the TV. Connect the disc player with a component cable (Y Pb Pr) and an audio L/R cable to the TV. TV receiver Connect the satellite or digital TV receiver with an antenna cable to the TV. (SAT is available on certain mod...
Page 48 - Recorder
EN 48 Recorder Connect the recorder with an antenna cable to the TV. (SAT is available on certain models only.) Connect the recorder with a SCART cable to the TV. Connect the recorder with a component cable (Y Pb Pr) and an audio L/R cable to the TV. Downloaded From TV-Manual.com Manuals
Page 49 - Game console
EN 49 En gl is h Game console The most practical connectors for a game console are on the side of the TV. However, you can also use the connectors at the back of the TV. For the best gaming experience, set the TV to game mode. 1. Press ADJUST . 2. Select [Smart picture] > [Game] , then press OK ....
Page 50 - Home theatre system
EN 50 Home theatre system Connect the home theatre with an HDMI cable and an optical or coaxial audio cable to the TV. (Optical audio output is available on certain models only.) Connect the home theatre with a SCART cable to the TV. Connect the home theatre with a component cable (Y Pb Pr) and an a...
Page 51 - Digital camera; Digital camcorder
EN 51 En gl is h Digital camera Connect the digital camera with a USB cable to the TV. Digital camcorder Connect the digital camera with an HDMI cable to the TV. Connect the digital camcorder with a component cable (Y Pb Pr) and an audio L/R cable to the TV. Downloaded From TV-Manual.com Manuals
Page 52 - Connect more devices; External hard disk; Computer
EN 52 Connect more devices External hard disk Connect the external hard disk with a USB cable to the TV. Computer Connect the computer with an HDMI cable to the TV. Connect the computer with a DVI-HDMI cable to the TV. Downloaded From TV-Manual.com Manuals
Page 53 - Computers and the
EN 53 En gl is h Connect the computer with a VGA cable and an audio cable to the TV. Computers and the Internet What you can do Network benefits If you connect your TV to a computer network with storage devices such as computers, you can play the photos, music and videos on your devices. See Use you...
Page 54 - Connect; Wireless LAN ready
EN 54 Connect 1. Switch on the router and switch on its DHCP setting. 2. With the ethernet cable, connect the router to the TV. Alternatively, you can also connect the router to the TV wirelessly, through a wireless USB adaptor (not included). See Connect your TV > Computers and the Internet >...
Page 56 - Common interface
EN 56 Start projecting To start projecting the PC screen on the TV, click on the small TV-like icon in the taskbar at the bottom right of the PC screen. Your PC screen appears on your TV screen. Stop projecting To stop projecting, click on the TV icon again. Project your PC: Help To read the Wi-Fi M...
Page 57 - Watch CAM services
EN 57 En gl is h 1. Switch off the TV. 2. Follow the directions printed on the CAM and insert the CAM into the Common Interface at the side of the TV. 3. Push the CAM in as far as it will go, then wait for the CAM to be activated. This takes a few minutes. To prevent digital services from being deac...
Page 58 - Troubleshooting; Contact Philips; General TV; TV channel
EN 58 6 Troubleshooting Contact Philips Warning: Do not attempt to repair the TV yourself. This may cause severe injury, irreparable damage to your TV or void your warranty. If you cannot resolve your problem, refer to the frequently asked questions (FAQs) for this TV at www.philips.com/support . Yo...
Page 59 - Picture
EN 59 En gl is h Picture The TV is on, but there is no picture or the picture is distorted: Make sure that the antenna is properly connected to the TV. Make sure that the correct device is selected as the display source. Make sure that the external device or source is properly connected. There...
Page 61 - Product; Power and reception; Display resolutions
EN 61 En gl is h 7 Product specifications Power and reception Power Mains power : AC 220-240 V~, 50/60 Hz Standby power consumption : <0.15 W Ambient temperature: 5 to 40 degrees Celsius For power consumption, see the product specifications at www.philips.com/support . Reception Antenna...
Page 62 - Multimedia
EN 62 Multimedia Supported multimedia connections USB (FAT or DOS-formatted; Mass Storage Class compliant with 500mA only) SD card (Videostore) Ethernet LAN RJ-45 Supported image files JPEG (*.jpg) Supported audio/video files Multimedia file names must not exceed 128 characters. Supported au...
Page 63 - Connectivity; Dimensions
EN 63 En gl is h Connectivity Rear EXT 1: SCART (RGB/CVBS) Component and Audio: Y Pb Pr, Audio L/R Service port: SERV.U Headphones: stereo 3.5mm mini-jack SAT: F-pin (Satellite). Available on certain models only. Bottom Ethernet LAN RJ-45 DIGITAL AUDIO OUT: Optical HDMI 1 - 3 AUDIO...
Page 64 - Help version
EN 64 Use your TV legend to note the weight of the TV with stand. Use your TV legend to note the dimensions of your TV (with and without the stand). Use your TV legend to note the thickness of your TV (with and without the stand). Help version UMv 3139 137 04512- 20110322 Downloaded From TV-Manual.c...
Page 65 - Index
EN 65 En gl is h 8 Index A age rating - 31 analogue channels, fine-tune - 40 analogue channels, subtitles - 32 audio language - 37 C CAM, enable - 57 CAM, insert - 56 CAM, see Conditional Access Module - 56 care - 8 channel list - 16 channels, favourites - 16 channels, fine-tune (analogue) - 40 chan...
Page 68 - Notice
Pixel characteristics This LCD product has a high number of colour pixels. Although it has effective pixels of 99.999% or more, black dots or bright points of light (red, green or blue) may appear constantly on the screen. This is a structural proper ty of the display (within common industr y standa...
Page 69 - Declaration of Conformity; Copyright; Recto; Information about how to; How the switchover affects; When does switchover happen?; Visit us at
DLNA , the DLNA Logo and DLNA CERTIFIED are trademarks, service marks or cer tification marks of the Digital Living Network Alliance. HDMI, the HDMI logo and High-Definition Multimedia Interface are trademarks or registered trademarks of HDMI licensing LLC in the United States and other countries. K...


 Philips 14PT6107_58
User Manual
Philips 14PT6107_58
User Manual
 Philips 15PF5121
User Manual
Philips 15PF5121
User Manual
 Philips 15PT6807_01
User Manual
Philips 15PT6807_01
User Manual
 Philips 19PFL3403_10
User Manual
Philips 19PFL3403_10
User Manual
 Philips 19PFL5403S_60
User Manual
Philips 19PFL5403S_60
User Manual
 Philips 19PFL5522D
User Manual
Philips 19PFL5522D
User Manual
 Philips 19PFL5602D
User Manual
Philips 19PFL5602D
User Manual
 Philips 20PF4110
User Manual
Philips 20PF4110
User Manual
 Philips 20PF4110S
User Manual
Philips 20PF4110S
User Manual
 Philips 20PF5121
User Manual
Philips 20PF5121
User Manual
 Philips 20PFL5122
User Manual
Philips 20PFL5122
User Manual
 Philips 20PFL5522D
User Manual
Philips 20PFL5522D
User Manual
 Philips 22PFL5403(D)(S)
User Manual
Philips 22PFL5403(D)(S)
User Manual
 Philips 23PF5320
Manual
Philips 23PF5320
Manual
 Philips 23PF5321
User Manual
Philips 23PF5321
User Manual
 Philips 23PFL5322
User Manual
Philips 23PFL5322
User Manual
 Philips 24HFL2839T
User Manual
Philips 24HFL2839T
User Manual
 Philips 24HFL2849T
User Manual
Philips 24HFL2849T
User Manual
 Philips 26PFL3312S_60
User Manual
Philips 26PFL3312S_60
User Manual