Philips 42PFL6805H - Manuals
Philips 42PFL6805H TV – User Manual, Manual in PDF format online.
Manuals:
User Manual Philips 42PFL6805H


Summary
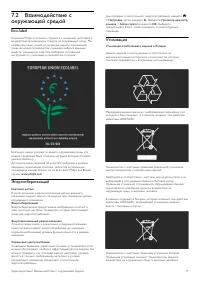
1 1.1 !"#"$% &"'%() *'+%& (,$,-.+%&" Econova ! (,$,-.+%&%/ Econova "# $%&'()( *+$,+'-+).$/ "$(%0 12(0%34($)"+%0 $&"2(%(**&5 )(6*&,&700 , + )+8'( 9*+:0)(,.*& $*090). *(7+)0"*&( ",0/*0( *+ &823'+;43; $2(-3 . <)&...
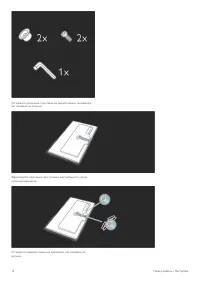
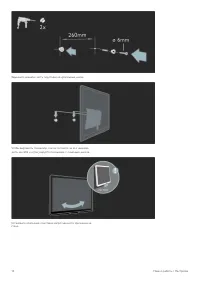
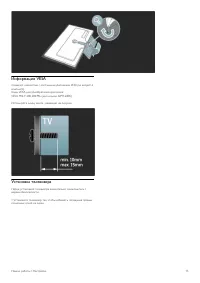
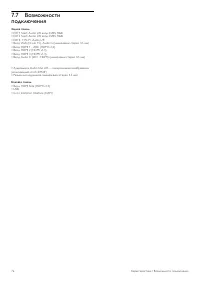
!"#$%&'()* VESA !"#"$%&'( )'$*")+%* ) ,-)+",,.* /("0#",%"* VESA ( ," $1'2%+ $ /'*0#"/+ ). !"#$ VESA #%& '()"*(+,+-)& .(+'%+-)& : VESA MIS-F 200,200,M6 ( #%& /"#+%) 42PFL6805) 01'"%2345,+ #%)-4 6)-,7 , 4.737--48 -7 ()14-....
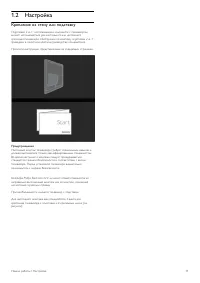
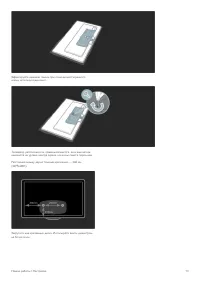
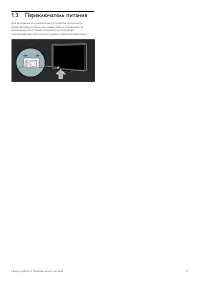
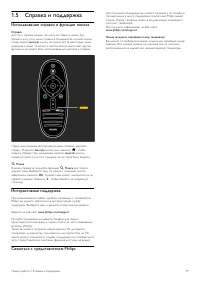
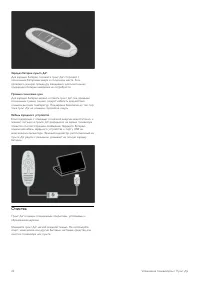
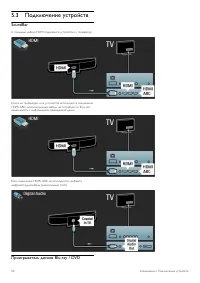
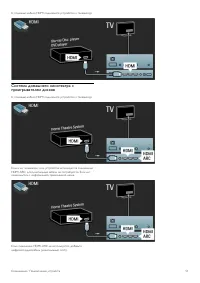
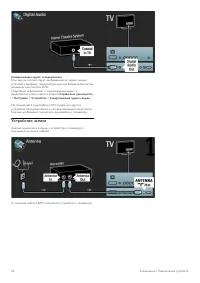
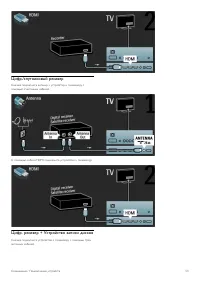
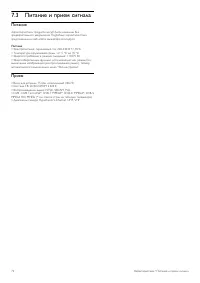
1.5 !"#$%&$ ' "())*#+&$ ,-"(./0(%$1'* -"#$%&' ' 231&4'' "('-&$ !"#$%&$ !"#$%& ' #&()*'+ ,"-." &"/%01$2 13 4/)*."4" ,+.5 . !/6 &(6,"4" 7"#$%&) * ,+.5 #&()*'1 * 8"/291.#$*+ #/%0)+* ,"-.&...
Manual Philips 42PFL6805H


Summary
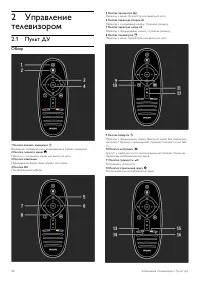
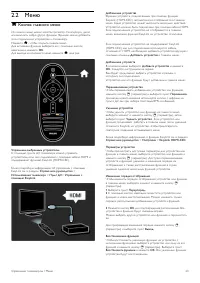
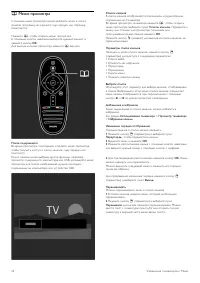
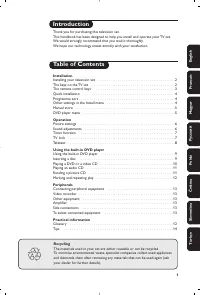
1 1.11.21.31.41.5 2 2.12.22.32.4 3 3.13.23.33.43.53.6 4 4.14.24.34.4 5 5.15.25.35.45.5 6 6.16.26.36.46.56.6 7 7.17.27.37.47.57.67.77.8 Contents To begin 5 TV tour 5Setting up 11Power switch 17Register your TV 18Help and support 19 Use your TV 20 Remote control 20Menus 23Watch TV 27Watch a connected ...
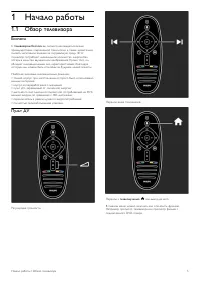
1 1.1 To begin TV tour Econova With this Econova TV , you can enjoy best-in -class technology and minimise your environmental impact. This is a TV with the lowestenergy consumption without compromising on picture and soundquality. Packed with environmental innovations for a better future. Most impor...
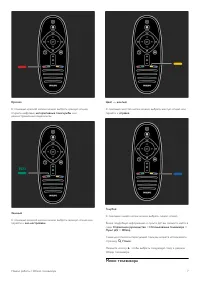
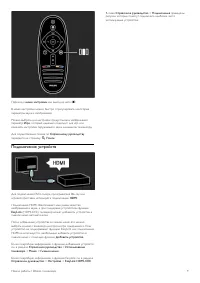
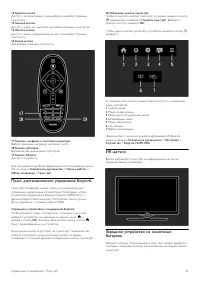
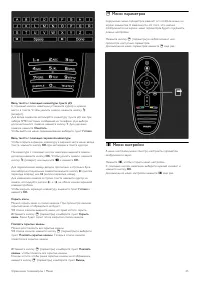
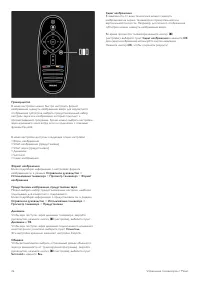
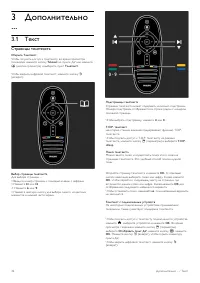
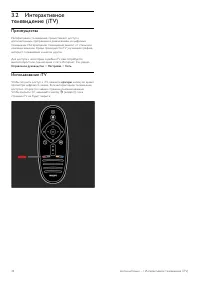
Red With the red key, you select the red option or open digital Interactive TV services or some TV demonstration clips. Green With the green key, you select the green option or the Eco settings . Yellow With the yellow key, you select the yellow option or the Help menu . Blue With the blue key, you ...
Philips TVs Manuals
-
 Philips 14PT6107_58
User Manual
Philips 14PT6107_58
User Manual
-
 Philips 15PF5121
User Manual
Philips 15PF5121
User Manual
-
 Philips 15PT6807_01
User Manual
Philips 15PT6807_01
User Manual
-
 Philips 19PFL3403_10
User Manual
Philips 19PFL3403_10
User Manual
-
Philips 19PFL3403_10
Quick Guide
-
 Philips 19PFL5403S_60
User Manual
Philips 19PFL5403S_60
User Manual
-
 Philips 19PFL5522D
User Manual
Philips 19PFL5522D
User Manual
-
 Philips 19PFL5602D
User Manual
Philips 19PFL5602D
User Manual
-
 Philips 20PF4110
User Manual
Philips 20PF4110
User Manual
-
 Philips 20PF4110S
User Manual
Philips 20PF4110S
User Manual
-
 Philips 20PF5121
User Manual
Philips 20PF5121
User Manual
-
 Philips 20PFL5122
User Manual
Philips 20PFL5122
User Manual
-
 Philips 20PFL5522D
User Manual
Philips 20PFL5522D
User Manual
-
 Philips 22PFL5403(D)(S)
User Manual
Philips 22PFL5403(D)(S)
User Manual
-
 Philips 23PF5320
Manual
Philips 23PF5320
Manual
-
 Philips 23PF5321
User Manual
Philips 23PF5321
User Manual
-
 Philips 23PFL5322
User Manual
Philips 23PFL5322
User Manual
-
 Philips 24HFL2839T
User Manual
Philips 24HFL2839T
User Manual
-
 Philips 24HFL2849T
User Manual
Philips 24HFL2849T
User Manual
-
 Philips 26PFL3312S_60
User Manual
Philips 26PFL3312S_60
User Manual