Page 2 - Contents
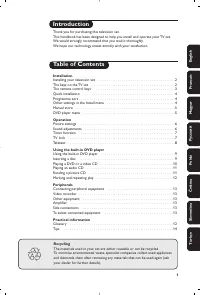
Contents 1 Your new TV 3 1.1 Pause TV and recordings 3 1.2 EasyLink 3 2 Setting up 4 2.1 Read safety 4 2.2 TV stand and wall mounting 4 2.3 Tips on placement 4 2.4 Power cable 4 2.5 Antenna cable 5 3 Connections 6 3.1 Tips on connections 6 3.2 EasyLink HDMI CEC 7 3.3 Common interface - CAM 8 3.4 Set...
Page 3 - Your new TV; Pause TV and recordings
1 Your new TV 1.1 Pause TV and recordings If you connect a USB Hard Drive, you can pause and record abroadcast from a digital TV channel. Pause your TV and answer that urgent phone call or simply takea break during a sports match, while the TV stores the broadcaston the USB Hard Drive. You can start...
Page 4 - Setting up; Read safety; TV stand and wall mounting; TV stand; Wall mounting; Tips on placement
2 Setting up 2.1 Read safety Read the safety instructions first before you use the TV. In Help, go to Safety and care > Safety . 2.2 TV stand and wall mounting TV stand You can find the instructions for mounting the TV stand in theQuick Start Guide that came with the TV. In case you lost thisguid...
Page 5 - Power cable; Antenna cable
2.4 Power cable - Insert the power cable into the POWER connector on the back of the TV. - Make sure the power cable is securely inserted in the connector.- Make sure that the power plug, in the wall socket, is accessibleat all times.- When you unplug the power cable, always pull the plug, neverpull...
Page 6 - Connections; Tips on connections; Connectivity guide; Antenna; Scart
3 Connections 3.1 Tips on connections Connectivity guide Always connect a device to the TV with the highest qualityconnection available. Also, use good quality cables to ensure agood transfer of picture and sound. If you need help to connect several devices to the TV, youcan visit the Philips TV con...
Page 7 - EasyLink HDMI CEC; EasyLink
Audio Out - Optical Audio Out - Optical is a high quality sound connection. Thisoptical connection can carry 5.1 audio channels. If your device,typically a Home Theatre System (HTS), has no HDMI ARCconnection, you can use this connection with the Audio In -Optical connection on the HTS. The Audio Ou...
Page 8 - Common interface - CAM; CAM; Satellite receiver
One-touch play When you play an HDMI-CEC compliant device, the TVswitches on from standby and switches to the correct source. One-touch standby When you press on the TV remote control, the TV and all HDMI-CEC compliant devices switch to standby mode. System audio control If you connect an HDMI-CEC...
Page 9 - Home Theatre System - HTS; Connect HTS
Next to the antenna connection, add an HDMI cable to connectthe device to the TV.Alternatively, you can use a SCART cable if the device has noHDMI connection. Auto switch off Switch off this automatic timer, if you only use the remotecontrol of the Set-top box. Do this to prevent the TV fromswitchin...
Page 10 - Problems with HTS sound; DVD player
Audio Out offset If you cannot set a delay on the Home Theatre System, you canset the TV to sync the sound. You can set an offset thatcompensates the time necessary for the Home Theatre Systemto process the sound of the TV picture. You can set the value insteps of 1ms. Maximum setting is 12ms. The A...
Page 11 - Game console; HDMI; USB Hard Drive; What you need; Installation
If the DVD player is connected with HDMI and has EasyLinkCEC, you can operate the player with the TV remote control. 3.9 Game console HDMI For best quality, connect the game console with an High speedHDMI cable to the TV Video-Audio LR / Scart Connect the game console with a composite cable (CVBS) a...
Page 12 - Computer; Connect
2. Switch on the USB Hard Drive and the TV. 3. When the TV is tuned to a digital TV channel, press (Pause). Trying to pause will start the formatting. Follow the instructions on screen. When the USB Hard Drive is formatted, leave it connectedpermanently. Warning The USB Hard Drive is formatted exc...
Page 13 - Settings; Headphones
Alternatively, you can use a DVI to HDMI adapter to connectthe PC to HDMI and an audio L/R cable (mini-jack 3.5mm) toAUDIO IN L/R on the back of the TV. Settings Ideal monitor setting If your computer is added as a Computer type of device in theSource menu (the list of connections), the TV is set to...
Page 14 - Switch on; On or Standby
4 Switch on 4.1 On or Standby Make sure you plugged in the mains power on the back of theTV before you switch on the TV.If the red indicator light is off, press the power button on theside of the TV to put the TV in standby - the red indicator willlight up. With the TV in standby, press on the rem...
Page 15 - Remote control; Key overview; Top
5 Remote control 5.1 Key overview Top 1. Standby / On To switch the TV On or back to Standby. 2. Playback keys - Play , to playback. - Pause , to pause playback - Stop , to stop playback - Rewind , to rewind - Fast forward , to go fast forward - Record , to record now 3. TV GUIDE To ...
Page 16 - Cleaning
5.2 IR sensor The TV can receive commands from a remote control that usesIR (infrared) to send commands. If you use such a remotecontrol, always make sure you point the remote control at theinfrared sensor on the front of the TV. 5.3 Batteries 1. Slide the battery door in the direction shown by the ...
Page 17 - TV channels; Watching TV channels; Switch channels; Channel list
6 TV channels 6.1 Watching TV channels Switch channels To watch TV channels, press . The TV tunes to the TV channel you last watched. Alternatively, press to open the Home menu and select TV and press OK . To switch channels, press or . If you know the channel number, type in the number ...
Page 18 - Picture format
Rename channels You can rename channels in the channel list. 1. Select the channel you want to rename in one of the channellists.2. Press OPTIONS . 3. Select Rename and press OK . Lock a channel To prevent children from watching a channel or a programme,you can lock channels or lock age rated prog...
Page 19 - Subtitles and languages
Select a Text page To select a page . . . 1. Enter the page number with the number keys.2. Use the arrow keys to navigate.3. Press a colour key to select a colour-coded subject at thebottom of the screen. Text sub-pages A Text page number can hold several subpages. The subpagenumbers are shown on a ...
Page 20 - Channel installation; Update channels
To show subtitles when the broadcasted programme is not inyour language — the language you set for the TV,select Automatic . Also, this setting will show subtitles when you mute the sound with . For analogue channels, subtitles must be made available in Text . Subtitles for digital channels There ...
Page 24 - TV guide; Using the TV guide; Tune to a programme; Recordings
7 TV guide 7.1 Using the TV guide What you need With the TV guide you can view a list of the current andscheduled TV programmes of your channels. Depending onwhere the TV guide information (data) is coming from, analogueand digital channels or only digital channels are shown. Not allchannels offer T...
Page 25 - Sources; Sources list
8 Sources 8.1 Sources list In the list of connections - the Source menu - you can find thedevices connected to the TV.From this Source menu, you canswitch to a device. Sources menu To open the Sources menu, press SOURCES . To switch to a connected device, select the device with thearrows (left) ...
Page 26 - Timers and clock; Sleep timer
9 Timers and clock 9.1 Sleep timer With the sleep timer, you can set the TV to switch to standbyautomatically after a preset time. To set the sleep timer . . . 1. Press and select Setup and press OK . 2. Select TV settings > General settings > Sleep timer . With the slider bar you can set th...
Page 27 - From a USB connection
10 Your photos, videosand music 10.1 From a USB connection What you need You can view your photos or play your music and videos from aconnected USB flash drive or USB Hard Drive. From a USB device With the TV switched on, plug in a USB flash drive or USB HardDrive to one of the USB connections. The ...
Page 29 - Pause TV
11 Pause TV 11.1 Pause TV You can pause a TV broadcast and resume watching it later.Only digital TV channels can be paused. You must connect aUSB Hard Drive to buffer the broadcast. You can pause abroadcast for a maximum time span of 90 minutes. Pause or resume a broadcast To pause a broadcast, pres...
Page 30 - Recording; Record now; Watch a recording
12 Recording 12.1 What you need To record a TV programme you need . . . - a connected USB Hard Drive formatted on this TV - digital TV channels installed on this TV (the channels you watchwith Watch TV) - to receive channel information for the built-in TV guide 12.2 Record a programme Record now To ...
Page 31 - Picture; Picture style
13 Settings 13.1 Picture Picture style For easy picture adjustment, you can select a preset setting with Picture style . 1. While watching a TV channel, press OPTIONS to open the Options menu. 2. Select Picture and sound in the menu bar and select Picture style . 3. Select a style and press OK . T...
Page 32 - Game or computer
3. Press (right) and select On or Off . 4. Press , repeatedly if necessary, to close the menu. Digital Crystal Clear With Digital Crystal Clear , you can fine-tune each pixel to match the surrounding pixels and produce a brilliant, high-definition image. 1. Press and select Setup and press OK ...
Page 33 - Format and edges; Sound; Sound style
13.3 Format and edges Picture format If black bars appear on top and bottom or on both sides of thepicture, you can adjust the picture format to a format that fillsthe screen. To change the picture format . . . 1. While watching a TV channel, press to open the Picture format menu. 2. Select a form...
Page 34 - Speakers
Advanced sound settings Auto volume levelling With Auto volume leveling , you can set the TV to automatically level out sudden volume differences. Typically at the beginning ofadverts or when you are switching channels. To switch on or off . . .1. Press and select Setup and press OK . 2. Select TV...
Page 35 - TV placement
to TV speakers if necessary. To set the TV speakers . . . 1. Press and select Setup and press OK . 2. Select TV settings > Sound > Sound output . 3. Press (right) and select Off , TV speakers , EasyLink or EasyLink autostart . 4. Press , repeatedly if necessary, to close the menu. To swi...
Page 36 - Specifications; Environmental; Saving energy; Reception for PxHxxx9 / PxTxxx9
14 Specifications 14.1 Environmental Saving energy The Eco settings bundle the settings that help the environment. While you are watching TV channels, press to open Eco settings . Active settings are marked with a . You can mark or unmark each setting with the OK key. Press again to close Eco ...
Page 37 - Display; Type; Dimensions and weights_43x9
- Analogue video playback : NTSC; SECAM; PAL- Digital video playback : MPEG2 SD/HD (ISO/IEC 13818-2);MPEG4 SD/HD (ISO/IEC 14496-10)- Digital audio playback (ISO/IEC 13818-3) 14.3 Display Type Diagonal screen size :- 32Pxx43x9 : 81 cm / 32 inch- 40Pxx43x9 : 102 cm / 40 inch- 50Pxx43x9 : 127 cm / 50 i...
Page 39 - Software; Software update; Update from USB; Software version
15 Software 15.1 Software update Update from USB It might be necessary to update the TV software. You need acomputer and a USB memory device to upload the software onthe TV. Use a USB memory device with 256MB free space.Make sure that write protection is switched off. 1. Start the update on TV To st...
Page 58 - Troubleshooting; Channels
16 Troubleshooting andsupport 16.1 Troubleshooting Channels No digital channels found during the installation See the technical specifications to make sure that your TVsupports DVB-T or DVB-C in your country.Make sure that all cables are properly connected and that thecorrect network is selected. Pr...
Page 59 - Register
Select a non 'Auto' picture format. Picture position is incorrect Picture signals from some devices may not fit the screencorrectly. Check the signal output of the connected device. Computer picture is not stable Make sure that your PC uses the supported resolution andrefresh rate. Sound No sound or...
Page 60 - Consumer Care / Repair
16.5 Consumer Care / Repair For support and repair, call the Consumer Care hotline in yourcountry. Find the telephone number in the printeddocumentation that came with the TV.Or consult our website www.philips.com/support . TV model number and serial number You might be asked to provide the TV produ...
Page 61 - Safety and care; Safety
17 Safety and care 17.1 Safety Important Read and understand all safety instructions before you use theTV. If damage is caused by failure to follow instructions, thewarranty does not apply. Secure the TV from falling over Always use the supplied wall bracket to secure the TV fromfalling over. Mount ...
Page 62 - Screen care
Lightning storms Disconnect the TV from the power outlet and antenna beforelightning storms.During lightning storms, never touch any part of the TV, powercord or antenna cable. Risk of hearing damage Avoid using earphones or headphones at high volumes or forprolonged periods of time. Low temperature...
Page 63 - Dolby; MHEG software
18 Terms of use,copyrights and licenses 18.1 Terms of use 2014 © TP Vision Europe B.V. All rights reserved. This product was brought to the market by TP Vision EuropeB.V. or one of its affiliates, hereinafter referred to as TP Vision,which is the manufacturer of the product. TP Vision is thewarranto...
Page 65 - Index
Page 66 - Contact information
Contact information Argentina 0800 444 7749Buenos Aires 0810 444 7782 België / Belgique 070 700 035 (0,15€/min.) Bosna i Hercegovina 033 941 251 (Lokalni poziv) Brazil 0800 701 0245Sao Paulo 2938 0245 Бълария 02 4916 273 (Национален номер) Česká republika 228880895 (Místní tarif) Danmark 3525 8314 D...