Page 2 - Preparation; IMPORTANT SAFETY NOTICE; Dear Panasonic Customer:
2-E NGLISH E NGLISH -3 Preparation IMPORTANT: THE MOULDED PLUG (U.K. only) FOR YOUR SAFETY, PLEASE READ THE FOLLOWING TEXTCAREFULLY. This appliance is supplied with a moulded three pin mains plug for yoursafety and convenience. A 13 amp fuse is fitted in this plug. Should the fuseneed to be replaced...
Page 3 - Precautions with regard to safety; WARNING; Contents
E NGLISH -5 Preparation Precautions with regard to safety WARNING If a problem occurs (such as no image or no sound) or if you noticesmoke or a strange smell coming from the projector, turn off the powerand disconnect the mains lead from the mains socket. B Do not continue to use the projector in su...
Page 4 - Caution
E NGLISH -7 Preparation 6-E NGLISH During a thunderstorm, do not touch the projector or the cable. B Electric shocks can result. Do not use the projector in a bath or shower. B Fire or electric shocks can result. Do not look into the lens while the projector is being used. B Strong light is emitted ...
Page 5 - Accessories
E NGLISH -9 Preparation 8-E NGLISH Do not short-circuit, heat or disassemble the batteries or place theminto water or fire. B Failure to observe this may cause the batteries to overheat, leak, explodeor catch fire, and burns or other injury may result. When inserting the batteries, make sure the pol...
Page 6 - Notes on use; Before use; Cautions when moving the projector
E NGLISH -11 Preparation 10-E NGLISH Notes on use In order to get the best picture quality Draw curtains or blinds over any windows and turn off anyfluorescent lights near the screen to prevent outside light orlight from indoor lamps from shining onto the screen. Do not touch the surfaces of the len...
Page 7 - Location and function of each part; Projector
E NGLISH -13 Preparation 12-E NGLISH # Connector panel cover (page 16) $ Air outlet port Do not cover this port. % Front adjustable legs(L/R) (page 23) & Air inlet ports, Air filter Do not cover these ports. ' Lamp unit holder (page 50) WARNING Do not place your hands or otherobjects close to th...
Page 8 - Remote control unit; Projector control panel
E NGLISH -15 Preparation 14-E NGLISH # RGB INPUT indicator (page 25)This indicator shows whether asignal is being input to the RGBinput connectors (RGB 1 IN/RGB2 IN). When an input signal isdetected, the indicatorilluminates. $ LAMP indicator (page 48)This indicator illuminates when itis time to rep...
Page 9 - Getting; Connector panel; Projection methods
E NGLISH -17 Getting s tar ted 16-E NGLISH Connector panel # MAIN POWER switch (pages 22 and 24) $ Power input socket (AC IN) (page 22)The accessory mains lead isconnected here.Do not use any mains lead otherthan the accessory mains lead. % SERIAL connector (pages 19, 20 and 60)This connector is use...
Page 10 - Connections; Notes on connections; Example of connecting to video equipments; Projector position; Projection distances
NOTE: B If the video signal source is connected using a cable with a BNC connector plug, use aBNC/RCA adapter (sold separately) to convert the cable end to an RCA plug-type jack. B If the signal cables are disconnected or if the power supply for thecomputer or video deck is turned off while the digi...
Page 11 - Example of connecting to computer; Preparation for the remote control unit
E NGLISH -21 Getting s tar ted 20-E NGLISH DIN 8-pin(male) Computer for control use Computer Computer Example of connecting to computer Monitor NOTE: B It is better to shut down the computer before turning off the MAINPOWER switch of the projector. B Do not input the signal to the RGB2 IN/RGB1 OUT c...
Page 12 - Basic; Turning on the power; Press the POWER button.; VIDEO; Adjusting the angle
E NGLISH -23 Basic O peration 22-E NGLISH Turning on the power Before turning on the power 1, Ensure that all components are connected properly. 2, Connect the accessory mains lead.3, Remove the lens cover. # ENTER FREEZE SHUTTER INDEX WINDOW PROJECTOR VOLUME D.ZOOM STD VIDEO INPUT POWER RGB MENU AU...
Page 13 - Turning off the power; P O W E R O F F
E NGLISH -25 Basic O peration 24-E NGLISH Turning off the power FREEZE SHUTTER INDEX WINDOW PROJECTOR VOLUME D.ZOOM STD VIDEO INPUT POWER RGB MENU AUTO SETUP ENTER # $ % Power indicator RGB input indicator Power indicator Power indicator status Red Illuminated The projector is in standby mode and im...
Page 14 - Useful
AUTO RGB IN E NGLISH -27 Useful functions 26-E NGLISH Correcting keystone distortion andautomatic positioning (AUTO SET UP) This projector detects its degree of tilt and the input signal. Keystone distortion and theposition of the image can then be corrected automatically in accordance with the inpu...
Page 15 - Still
E NGLISH -29 Useful functions 28-E NGLISH ENTER INDEX WINDOW PROJECTOR VOLUME STD VIDEO INPUT POWER RGB MENU AUTO SETUP SHUTTER FREEZE D.ZOOM ENTER PROJECTOR VOLUME D.ZOOM STD MENU AUTO SETUP SHUTTER FREEZE INDEX WINDOW B The picture will thenbe enlarged to 1.5times the normal size. The remote contr...
Page 16 - Adjustments; Menu screens; K E Y S T O N E
E NGLISH -31 Adjustments and settings 30-E NGLISH On-screen menus Menu screens The various settings and adjustments for this projector can be carried out byselecting the operations from on-screen menus.The general arrangement of these menus is shown below. MAIN MENU M E N U K E Y S T O N E P I C T U...
Page 17 - Menu operation guide; Returning a setting to the factory default; S T A N D A R D; B R I G H T 3 2
E NGLISH -33 Adjustments and settings 32-E NGLISH # Press the MENU button. The MAIN MENUscreen will bedisplayed. $ Press the F F or G G arrow buttons to select an item. Selected itemswill be displayedin blue. % Press the ENTER button to accept theselection. The selectedmenu screen oradjustmentscreen...
Page 18 - Correcting keystone distortion; Adjusting the picture; P I C T U R E M O D E S T A N D A R D; PICTURE MODE
E NGLISH -35 Adjustments and settings 34-E NGLISH Correcting keystone distortion Keystone distortion is corrected automatically when the projector’s automaticsetup function is used, but this correction will not apply if the screen itself istilted. In such cases, you can correct the keystone distorti...
Page 20 - POSITION; Adjusting the position; P O S I T I O N; ASPECT
E NGLISH -39 Adjustments and settings 38-E NGLISH Use the F and G buttons on the projector or remote control unit toselect an item, and then use the I and H buttons to change the setting for that item.For items with bar scales, press theENTER button or the I or H buttons to display the adjustmentscr...
Page 21 - RESIZING; FRAME LOCK; Changing the display language; E N G L I S H
E NGLISH -41 Adjustments and settings 40-E NGLISH RESIZING This should normally be set to “ON”.(This setting is only for signalswhich have lower resolutions thanthe LCD panels. Refer to page 58for details.) ON The pixel resolution of the inputsignal is converted to the sameresolution as the LCD pane...
Page 22 - Option settings; B A C K C O L O R B L U E
E NGLISH -43 Adjustments and settings 42-E NGLISH Use the F and G buttons on the projector or remote control unit toselect an item, then press the I or H buttons to change the setting. OSD ON The current input name is displayedin the top-right corner of the screenwhen the input signal is changed. OF...
Page 23 - LAMP RUNTIME; CONTROL KEY; Setting up the SECURITY function; S E C U R I T Y; INPUT PASSWD; AMEND PASSWD
44-E NGLISH luminance of the lamp is reduced, butthe projector uses less power, andthe operating noise is also reduced.This can help to extend the lamp’soperating life. If using the projector insmall rooms where high luminance isnot required, it is recommended thatyou set the LAMP POWER to “LOW”. LA...
Page 24 - Care; TEXT DISPLAY; T E X T C H A N G E
E NGLISH -47 Care and m aintenance When the TEMP indicator and theLAMP indicator are illuminated There are two indicators on the control panel of the projector which giveinformation about the operating condition of the projector. These indicatorsilluminate or flash to warn you about problems that ha...
Page 25 - Cleaning and replacing the air filter; Cleaning
E NGLISH -49 Care and m aintenance 48-E NGLISH Cleaning and replacing the air filter If the air filter becomes clogged with dust, the internal temperature of theprojector will rise, the TEMP indicator will flash and the projector power willturn off. The air filter should be cleaned every 100 hours o...
Page 26 - Lamp unit replacement procedure; Replacing the lamp unit; Warning
E NGLISH -51 Care and m aintenance 50-E NGLISH Lamp unit replacement procedure # Turn off the MAIN POWERswitch according to theprocedure given in “Turning offthe power” on page 24, andthen disconnect the mains leadplug from the mains socketand check that the area aroundthe lamp unit has cooled down....
Page 27 - Before calling for service; L A M P R U N T I M E 1 8 2 0 H
E NGLISH -53 Care and m aintenance 52-E NGLISH Before calling for service Before calling for service, check the following points. Problem Possible cause Page Power does notturn on. No pictureappears. The picture isfuzzy. COLOR is toolight or TINT ispoor.No sound canbe heard. The remotecontrol unitdo...
Page 28 - Cleaning and maintenance
E NGLISH -55 Care and m aintenance 54-E NGLISH The picture doesnot displaycorrectly. Picture fromcomputer doesnot appear. Problem Possible cause B The signal format (TV system) may not be setcorrectly. B There may be a problem with the video tape orother signal source. B A signal which is not compat...
Page 29 - Other; Specifications
E NGLISH -57 Other s 56-E NGLISH During YP B P R input/output: Y: 1.0 V [p-p], 75 Ω P B ,P R : 0.7 V [p-p], 75 Ω During RGB input/output: R.G.B.: 0.7 V [p-p], 75 Ω G.SYNC: 1.0 V [p-p], 75 Ω HD/SYNC: TTL, automatic plus/minus polaritycompatible VD: TTL, automatic plus/minus polaritycompatible VIDEO I...
Page 30 - Appendix; Connector pin wiring
E NGLISH -59 Other s 58-E NGLISH Appendix *1 The “i” appearing after the resolution indicates an interlaced signal.*2 The following symbols are used to indicate picture quality. AA Maximum picture quality can be obtained.A Signals are converted by the image processing circuit before picture is proje...
Page 31 - Using the SERIAL connector; Connection; Control commands
E NGLISH -61 Other s 60-E NGLISH Using the SERIAL connector The serial connector which is on the side connector panel of the projectorconforms to the RS-232C interface specification, so that the projector can becontrolled by a personal computer which is connected to this connector. Connection Pin la...
Page 32 - Trademark acknowledgements; Dimensions; LCD Projector; Operating Instructions; Commercial Use
62-E NGLISH These Operating Instructions are printed on recycled paper. Trademark acknowledgements B VGA and XGA are trademarks of International Business MachinesCorporation. B Macintosh is a registered trademark of Apple Computer, Inc. B S-VGA is a registered trademark of the Video Electronics Stan...


 Panasonic PT-AE100E
User Manual
Panasonic PT-AE100E
User Manual
 Panasonic PT-AE2000E
User Manual
Panasonic PT-AE2000E
User Manual
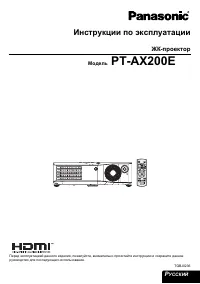 Panasonic PT-AX200E
User Manual
Panasonic PT-AX200E
User Manual
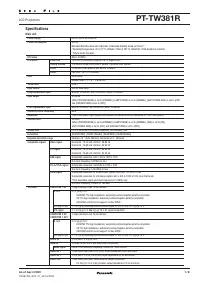 Panasonic PT-TW381R
User Manual
Panasonic PT-TW381R
User Manual
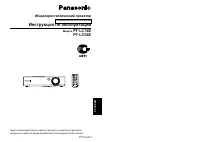 Panasonic PT-LC56E
Manual
Panasonic PT-LC56E
Manual
 Panasonic PT-LM2E
Manual
Panasonic PT-LM2E
Manual
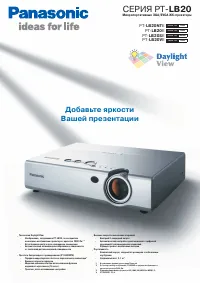 Panasonic PT-LB20E
Manual
Panasonic PT-LB20E
Manual
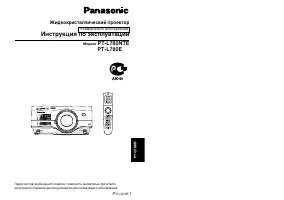 Panasonic PT-L780NTE
Manual
Panasonic PT-L780NTE
Manual
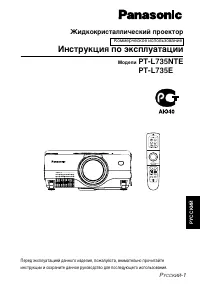 Panasonic PT-L735NTE
Manual
Panasonic PT-L735NTE
Manual