Panasonic NN ST23QM - Manuals
Panasonic NN ST23QM – Manual in PDF format online.
Manuals:
Manual Panasonic NN ST23QM


Summary
6 Thank you for purchasing a Panasonic appliance. Panasonic Corporation Osaka, Japan Authorized Representative in EU Panasonic Marketing Europe GmbH, Panasonic Testing Centre Winsbergring 15, 22525 Hamburg, Germany Importer for UK Panasonic UK, a branch of Panasonic Marketing Europe GmbH Maxis 2, We...
7 Examine your microwave oven Unpack the oven, remove all packing material, and examine the oven for any damage such as dents, broken door latches or cracks in the door. If you find any damage, notify your dealer immediately. Do not install a damaged microwave oven. Guarantee Your receipt is your gu...
8 Placement of your oven This oven is intended for counter-top use only. It is not intended for built-in use or for use inside a cupboard.1. Place the oven on a flat and stable surface more than 85 cm above the floor. 2. When this oven is installed, it should be easy to isolate the appliance from th...
Panasonic Manuals
-
 Panasonic RB F10
User Manual
Panasonic RB F10
User Manual
-
 Panasonic SC HTB200
User Manual
Panasonic SC HTB200
User Manual
-
 Panasonic CS Z25UFRAW CU Z25UBRA
Manual
Panasonic CS Z25UFRAW CU Z25UBRA
Manual
-
Panasonic CS Z25UFRAW CU Z25UBRA
Installation Manual
-
 Panasonic CS Z50UFRAW CU Z50UBRA
User Manual
Panasonic CS Z50UFRAW CU Z50UBRA
User Manual
-
 Panasonic DMW BLK22
User Manual
Panasonic DMW BLK22
User Manual
-
Panasonic DMW BLK22
Manual
-
 Panasonic NI WL55
Manual
Panasonic NI WL55
Manual
-
 Panasonic DMP BD903
Manual
Panasonic DMP BD903
Manual
-
Panasonic DMP BD903
User Manual
-
Panasonic DMP BD903
Installation Manual
-
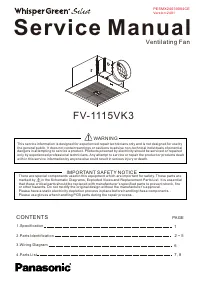 Panasonic FV-1115VK3
User Manual
Panasonic FV-1115VK3
User Manual
-
 Panasonic EH NA0J
Manual
Panasonic EH NA0J
Manual
-
 Panasonic FV 30BG3
Manual
Panasonic FV 30BG3
Manual
-
 Panasonic RE7 59
User Manual
Panasonic RE7 59
User Manual
-
 Panasonic NE C1275
Manual
Panasonic NE C1275
Manual
-
 Panasonic RG T810LHA
User Manual
Panasonic RG T810LHA
User Manual
-
 Panasonic CF SR
User Manual
Panasonic CF SR
User Manual
-
 Panasonic RZ B110W
User Manual
Panasonic RZ B110W
User Manual
-
 Panasonic RZ B310W
User Manual
Panasonic RZ B310W
User Manual