Page 2 - The product must be grounded.; SAFETY INSTRUCTIONS; Make sure the power cord is installed; WARNING; Please observe strictly; HƯỚNG DẪN AN TOÀN; Sản phẩm phải được nối đất.; CẢNH BÁO
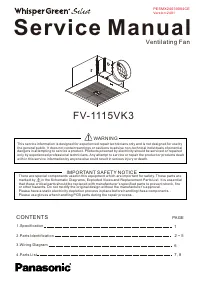
The degrees of injury or damage that can occur when the instructions are ignored and if the product is not used properly have been classified and described by the following indications. The following instructions should be strictly observed in order to prevent injury to the users and other people, o...
Page 3 - INSTALLATION INSTRUCTIONS; HƯỚNG DẪN LẮP ĐẶT; do đó gây ra hỏa hoạn.
Do avoid the back-flow of gas into the room from the open flue of flammable gas or other open-fire appliances. Otherwise, unreliable installation may be caused and thus the product may fall off, resulting in injuries. Do not install the product as the method which is not approved in the instruction....
Page 4 - CAUTION
4 Please ensure two persons perform the installation of the product. Do not reconstruct this product. CAUTION Components must be installed tightly. Do fix this product tightly. Otherwise, it may cause damage to the product or personal injury. The special-purpose or dedicated parts, such as mounting ...
Page 5 - INSTALLATION REQUIREMENTS; YÊU CẦU LẮP ĐẶT
Do not install onto slanting ceiling. Prevent the water condensed in the duct pipe flow back into the body. Please make sure the product is installed horizontally and the deviation angle within the range as below figure. 5 Do not install the product in the places where the organic solvent is used. D...
Page 6 - SUPPLIED ACCESSORIES; the product would be damaged.; Vui lòng mua những bộ phận này trên thị trường.
6 SUPPLIED ACCESSORIES 4 6 1 1 1 1 1 1 2 3 2 3 2 1 3 4 5 6 7 8 9 10 11 12 Qty No. When you install plastic part, do not exert too much strength to fixing the screw, otherwise, the product would be damaged. The product is not provided with power cord, all-pole switch and leakage protection switch. Pl...
Page 7 - Confirmation before installation; PART NAME AND DIMENSIONS; Xác nhận trước khi lắp đặt
7 Unit: mm 1.Install this product over 200 mm apart from curtains or other flammable materials. (When the mounting hole is adjacent to curtains or other flammable materials, ensure that more than 250 mm gap is required between the hole edge and wall.) 1. Confirmation before installation Wall Product...
Page 8 - HOW TO INSTALL; WORK BEFORE INSTALLATION; CÔNG VIỆC CẦN THỰC HIỆN TRƯỚC KHI LẮP ĐẶT
8 2. Preparation before installation HOW TO INSTALL 1. Connecting power cord To avoid electric shock or fire, do not remove the PCB cover. Wiring sketch Terminal cutaway view Conductor Conductor Insulation 8 mm Figure 2 Figure 1 Spring slice Earth Power cord 44± 1 Unit: mm Please select 60227 IEC 53...
Page 12 - CÁCH LẮP ĐẶT
12 Ceiling Suspender 333 185 Unit: mm Cross screwdriver (not longer than 150 mm) Self-tapping screw 4×20 No buckled Buckled Locating slot of the adapter Suspension bracket screw hole The screws for fixing the main body to the ceiling board should go through the hole of the suspension brackets, other...
Page 15 - Please observe the following when using the batteries.
15 Please back the remote control to the holder. Replace the battery cover. (2) Open the battery cover. Knob 38 mm [Close] status [Open] status Rotate the knob “ ” rightward to the “ ”position. Open two 8 holes in the bathroom wall as shown below. And install the controller holder. Do not short circ...
Page 16 - Does the fan revolve normally?; CHẠY THỬ
16 TEST RUN STANDBY button In the standby status, this product still requires power consumption of 0.5 W. If the product will not be in use for a long time, the all-pole power switch should be turned off to disconnect the power supply for the purpose of energy saving. HEAT button VENT button Heating...
Page 18 - HOW TO USE TIMER FUNCTION; CÁCH SỬ DỤNG CHỨC NĂNG HẸN GIỜ
18 If you press and hold the button, the running time will keep changing. 2 After the running time is set once, the system will automatically memorize the last running time of each mode. HOW TO USE TIMER FUNCTION For running time adjusted DRY COOL mode DRY HOT mode VENT. mode HEAT mode Default setti...
Page 19 - HOW TO USE AIR DIRECTION FUNCTION; CÁCH SỬ DỤNG CHỨC NĂNG ĐIỀU HƯỚNG GIÓ
19 Air direction cannot be set in the ventilation mode. AUTO mode MANUAL mode Each mode will automatically memorize the air direction position set this time. MANUAL mode: To fix the baffle plate angle, press the button when the baffle plate turns to the required position. The baffle plate will stop,...
Page 20 - HOW TO USE HEATING FUNCTION; CÁCH SỬ DỤNG CHỨC NĂNG SƯỞI ẤM
20 Use when you feel cold in a bath Before taking a bath, start the heating function to warm the bathroom beforehand. 5 This product will stop automatically when the set time is up. HOW TO USE HEATING FUNCTION The indicators of HEAT and default setting time (15 MIN.) light on, then turn off automati...
Page 21 - HOW TO USE DRYING FUNCTION; This appliance is intended only for drying; Thiết bị này chỉ để sấy hàng dệt được giặt nước.; CÁCH SỬ DỤNG CHỨC NĂNG HONG KHÔ
21 Use when you need to dry the bathroom or clothes (Initial settings) 1 4 This product will stop automatically when the set time is up. Press the button to start the DRY HOT mode. It will switch to the DRY COOL mode if you press this button again. HOW TO USE DRYING FUNCTION The indicators of COOL o...
Page 22 - Blinking slow: On for 1 second and off for 1 second; MODE BUTTON PANEL ON MAIN BODY; BẢNG NÚT CHẾ ĐỘ TRÊN THÂN MÁY CHÍNH
22 2 1 1. The MODE button can be used to switch among the following functions: HEAT VENT. STANDBY 2. Conditions of the filter cleaning indicator and running indicator. Blinking fast: On for 0.5 seconds and off for 0.5 seconds Blinking slow: On for 1 second and off for 1 second When the remote contro...
Page 23 - USE AND MAINTENANCE INSTRUCTIONS; HƯỚNG DẪN SỬ DỤNG VÀ BẢO TRÌ
23 USE AND MAINTENANCE INSTRUCTIONS Do not clean the heating part or let water flow into the electric motor or electrical parts. Otherwise, may lead to electric shock. To avoid low-temperature scalding, do not directly blow the same part of the body with hot wind for a long time (2 hours or above). ...
Page 24 - Nếu nuốt phải pin, hãy tìm sự trợ giúp
24 USE AND MAINTENANCE INSTRUCTIONS When you clean this product, please wear gloves. Otherwise, may lead to injury. Otherwise, may lead to electric shock. If the product will not be in use for a long time, please use the “all-pole power switch” to disconnect the power supply. If you will not use thi...
Page 25 - Cleaning Precautions; MAINTENANCE; Wipe the front panel with a soft cloth.; Vệ sinh cụm màn che và bộ lọc; BẢO TRÌ
25 Cleaning the filter: 1. Do not wash the filter with water, because water may destroy the anti-microbial performance of the filter; do not use a wire brush or any other hard tool to clean the filter, lest the filter would be damaged. 2. When the filter cleaning indicator at the receiving part of t...
Page 26 - Press and hold the MODE button at the receiving; ANTIBACTERIAL FUNCTION
26 MAINTENANCE . Press and hold the MODE button at the receiving part of the unit body for 3 seconds. A “beep” means the filter cleaning indication is cleared. (The accumulated time of the filter cleaning indication will be reset, and the time will be accumulated again.) Clear the filter cleaning in...
Page 27 - WIRING DIAGRAM; customer consultation service center or your distributor.; TROUBLESHOOTING; khách hàng của Panasonic hoặc nhà phân phối của bạn.; XỬ LÝ SỰ CỐ
27 WIRING DIAGRAM Mode button panel on main body Remote control The filter cleaning indicator blinks quickly It’s time to clean the filter Clean the filter Remote control does not work The batteries may be exhausted Replace the batteries Contact Panasonic customer consultation service center or your...
Page 28 - SPECIFICATIONS; Lớp cách điện E; THÔNG SỐ KỸ THUẬT
Issue date: 03/2023 Panasonic Corporation 2020 2023 P0720-2033 30BG34201B Web Site: http://www.panasonic.com Power consumption and rated current are obtained when the baffle plate is under 90° and the test ambient temperature is 40 °C. The power consumption of Dry Cool is 32 W. Noise value is the we...