Page 2 - SPECIFICATIONS; SAFETY WARNINGS; General power tool safety warnings; Save all warnings and instruc-
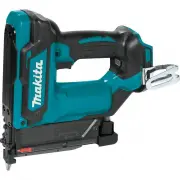
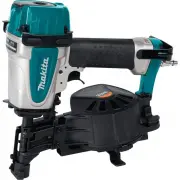
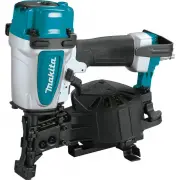
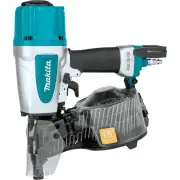
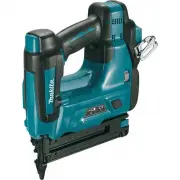
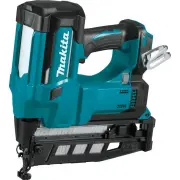
2 ENGLISH ENGLISH (Original instructions) SPECIFICATIONS Model: XTP02 Pin nail size ø0.6 mm (0.024″) x 15, 18, 19, 25, 30, 35 mm (5/8, 11/16, 3/4, 1, 1-3/16, 1-3/8″) Pin nail magazine capacity 100 pcs. Dimensions without hook (L x W x H) 257 mm (10-1/8″) x 79 mm (3-1/8″) x 226 mm (8-7/8″) Rated volt...
Page 3 - Cordless nailer safety warnings
3 ENGLISH 7. If devices are provided for the connection of dust extraction and collection facilities, ensure these are connected and properly used. Use of dust collection can reduce dust-related hazards. Power tool use and care 1. Do not force the power tool. Use the correct power tool for your appl...
Page 4 - Symbols; Important safety instructions for; SAVE THESE INSTRUCTIONS.
4 ENGLISH 15. Use only fasteners specified in this manual. The use of any other fasteners may cause malfunction of the tool. 16. Do not tamper with the tool or attempt to use it for other than driving fasteners. 17. Do not operate the tool without fasteners. It shortens the service life of the tool....
Page 5 - FUNCTIONAL; Installing or removing battery; Tool / battery protection system
5 ENGLISH FUNCTIONAL DESCRIPTION CAUTION: Always be sure that the tool is switched off and the battery cartridge is removed before adjusting or checking function on the tool. Installing or removing battery cartridge CAUTION: Always switch off the tool before installing or removing of the battery car...
Page 6 - Indicating the remaining battery; Adjusting the depth of pin-nailing
6 ENGLISH Indicator lamps Remaining capacity Lighted Off Blinking Charge the battery. The battery may have malfunctioned. NOTE: Depending on the conditions of use and the ambient temperature, the indication may differ slightly from the actual capacity. Indicating the remaining battery capacity Count...
Page 7 - Lighting up the lamp; ASSEMBLY; Loading the pin nailer
7 ENGLISH A B 1 ► 1. Adjuster 2 1 3 ► 1. Too deep 2. Flush 3. Too shallow Lighting up the lamp CAUTION: Do not look in the light or see the source of light directly. Pull the switch trigger or actuate the contact element to light up the lamp. The lamp keeps on lighting while pull- ing the switch tri...
Page 8 - Nose adapter; Hook; OPERATION; Testing the safety system
8 ENGLISH 4. After loading pin nails, push back the magazine in place until it clicks. To remove pin nails, follow the installation procedures in reverse. Nose adapter CAUTION: Always make sure that your fingers are not placed on the switch trigger or the contact element and the battery cartridge is...
Page 9 - Driving pin nails; Anti dry fire mechanism; Checking remaining pin nails
9 ENGLISH Test safety systems for possible fault before operation as follows. 1. Unload pin nails from the tool and keep the maga - zine opened. 2. Install the battery cartridge and release the trigger lock. 3. Only pull the switch trigger without touching the contact element against the material. 4...
Page 10 - Removing jammed pin nails; MAINTENANCE; MAKITA LIMITED ONE; Warranty Policy
10 ENGLISH Removing jammed pin nails WARNING: Always make sure that the battery cartridge is removed before removing jammed pin nails. Take out pin nails that remain inside the magazine. Remove three screws with the hex wrench that are securing the driver guide cover. Take the jammed nails from the ...
Page 11 - ESPECIFICACIONES; ADVERTENCIAS DE; Advertencias generales de; Conserve todas las advertencias
11 ESPAÑOL ESPAÑOL (Instrucciones originales) ESPECIFICACIONES Modelo: XTP02 Tamaño del clavo delgado ø0,6 mm (0,024″) x 15, 18, 19, 25, 30, 35 mm (5/8, 11/16, 3/4, 1, 1-3/16, 1-3/8″) Capacidad del cartucho de clavos delgados 100 pzas. Dimensiones sin el gancho (La x An x Al) 257 mm (10-1/8″) x 79 m...
Page 13 - GUARDE ESTAS; Símbolos; Instrucciones importantes de
13 ESPAÑOL 4. Desconecte la herramienta de la fuente de alimentación cuando el clavo se atasque en la herramienta. Al extraer algún clavo que se haya atascado, la clavadora podría activarse acciden- talmente si ésta se encuentra conectada. 5. Tenga precaución al extraer un clavo atas- cado. El mecan...
Page 14 - DESCRIPCIÓN DEL; Instalación o extracción del
14 ESPAÑOL (2) Evite guardar el cartucho de batería en un cajón junto con otros objetos metálicos, tales como clavos, monedas, etc. (3) No exponga el cartucho de batería al agua o la lluvia. Un cortocircuito en la batería puede causar un flujo grande de corriente, sobrecalenta - miento, posibles que...
Page 15 - Indicación de capacidad restante de
15 ESPAÑOL Sistema de protección para la herramienta/batería La herramienta está equipada con un sistema de pro - tección de la herramienta/batería. Este sistema corta en forma automática el suministro de energía al motor para prolongar la vida útil de la herramienta y la batería. La herramienta se ...
Page 16 - Botón de bloqueo del gatillo
16 ESPAÑOL Estado del indicador de batería Capacidad restante de la batería Encendido Apagado Parpadeando 50% a 100% 20% a 50% 0% a 20% Cargar la batería Botón de bloqueo del gatillo interruptor PRECAUCIÓN: Antes de insertar el cartucho de batería en la herramienta, compruebe siem- pre y cerciórese ...
Page 17 - MONTAJE; Cargado de la clavadora
17 ESPAÑOL 1 ► 1. Luz NOTA: Utilice un paño seco para quitar la suciedad de la lente de la lámpara. Tenga cuidado de no rayar la lente de la lámpara ya que la iluminación podría disminuir. NOTA: Aunque la lámpara esté encendida al redu- cirse la potencia residual de la batería, la clavadora podría n...
Page 18 - Gancho; Almacenamiento de la llave; OPERACIÓN; Prueba del sistema de seguridad
18 ESPAÑOL 4 3 1 2 ► 1. Hendidura 2. Protuberancia 3. Adaptador de boquilla 4. Soporte Gancho PRECAUCIÓN: No cuelgue el gancho del cinturón. El dejar caer la clavadora debido a que el gancho se soltó accidentalmente, podría causar un disparo no intencional y ocasionar lesiones personales. El gancho ...
Page 19 - Clavado de clavos delgados; Mecanismo contra el disparo en
19 ESPAÑOL Si la herramienta opera en los casos 3 y 4 anteriores, los sistemas de seguridad están defectuosos. Deje de usar la herramienta de inmediato y comuníquese con el centro de servicio de su localidad. Clavado de clavos delgados ADVERTENCIA: Mantenga el elemento de contacto colocado firmement...
Page 20 - MANTENIMIENTO; GARANTÍA LIMITADA DE; Ésta Garantía no aplica para México
20 ESPAÑOL 1 2 ► 1. Ventana de visualización 2. Indicador Extracción de clavos delgados atascados ADVERTENCIA: Asegúrese siempre de que el cartucho de batería haya sido extraído antes de retirar los clavos delgados atascados. Saque los clavos delgados que permanezcan en el interior del cartucho. Ret...
Page 24 - WARNING; productos químicos son:; Makita Corporation
Some dust created by power sanding, sawing, grinding, drilling, and other construction activities contains chemicals known to the State of California to cause cancer, birth defects or other reproductive harm. Some examples of these chemicals are: • lead from lead-based paints, • crystalline silica f...