Page 2 - SPECIFICATIONS; Applicable battery cartridge and charger; SAFETY WARNINGS; IMPORTANT; WARNING; To reduce the risk of fire, electric shock
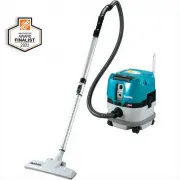
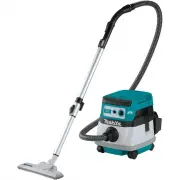
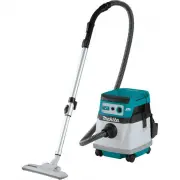
2 ENGLISH ENGLISH (Original instructions) SPECIFICATIONS Model: XCV17 Capacity Filter bag 6.0 L (1.6 gal.) Dust bag 5.5 L (1.5 gal.) Maximum air volume With hose ø28 mm (1-1/8″) x 1.0 m (39-3/8″) 2.0 m 3 /min (70.6 cu.ft/min) With hose ø32 mm (1-1/4″) x 1.0 m (39-3/8″) 2.2 m 3 /min (77.7 cu.ft/min) ...
Page 3 - SAVE THESE
3 ENGLISH 6. Do not handle appliance with wet hands. 7. Do not put any object into open- ings. Do not use with any opening blocked; keep free of dust, lint, hair, and anything that may reduce air flow. 8. Keep hair, loose clothing, fingers, and all parts of body away from openings and moving parts. ...
Page 4 - ADDITIONAL; Battery tool use and care; your finger on the switch or energiz
4 ENGLISH ADDITIONAL SAFETY RULES 1. Read this instruction manual and the charger instruction manual care- fully before use. 2. Do not vacuum the following: • Flammable liquid (kerosene, gasoline, solvents such as ben- zine, thinner, etc.) • Hot substances that are burning or smoking (cigarettes, ma...
Page 5 - Liquid ejected from the; Symbols; Important safety
5 ENGLISH 6. Under abusive conditions, liquid may be ejected from the battery; avoid contact. If contact acciden- tally occurs, flush with water. If liq - uid contacts eyes, additionally seek medical help. Liquid ejected from the battery may cause irritation or burns. 7. Do not use a battery pack or...
Page 6 - ucts specified by Makita.; Installing; Tips for maintaining maximum; FUNCTIONAL; Installing or removing battery
6 ENGLISH For preparation of the item being shipped, consulting an expert for hazardous material is required. Please also observe possibly more detailed national regulations. Tape or mask off open contacts and pack up the battery in such a man- ner that it cannot move around in the packaging. 11. Fo...
Page 7 - Appliance / battery protection system; Switch box position
7 ENGLISH Appliance / battery protection system The appliance is equipped with a appliance / battery protec- tion system. This system automatically cuts off power to the motor to extend appliance and battery life. The appliance will automatically stop during operation if the appliance or battery is ...
Page 8 - Adjusting belts; Carrying hook
8 ENGLISH Adjusting belts The tightness of the shoulder belts, upper and lower belts can be adjusted. Put your arms through the shoul - der belts first then fasten the lower and upper belts. To tighten, pull the end of the strap as illustrated. To loosen, pull up the end of the fastener. Lower belt ...
Page 9 - LED light; Hose band; Hose hook
9 ENGLISH LED light LED light is installed in the head of the switch box to ease the operations in dark places. Press button to turn the light on. To turn off, press button again. CAUTION: Do not look in the light or see the source of light directly. Never aim the light to other people's eyes. NOTE:...
Page 10 - Dust beating system; ASSEMBLY; Assembling hose
10 ENGLISH Dust beating system Dust goes down when you pull the lever or walk with wearing the cleaner. This system helps the cleaner maintaining the suction power. 1 2 3 ► 1. Lever 2. Filter bag/dust bag 3. Board NOTE: This function works when the cleaner is switched off and the filter bag/dust bag...
Page 12 - Connecting the tool
12 ENGLISH For the aluminum bending pipe / aluminum straight pipe (Only for the model with ø38 mm hose and front cuff 38) Shoulder the vacuum cleaner body then twist and insert the pipe into the front cuff. To disconnect, twist and extract it. 1 2 3 4 4 ► 1. Front cuff 38 2. Aluminum bending pipe 3....
Page 13 - Attaching bent pipe assembly
13 ENGLISH 1 2 ► 1. Front cuff 22 2. Front cuff 24 When using ø28 mm dust extraction hose 1. Attach the front cuff to the hose for dust extraction. When connecting the front cuff, make sure that it is securely screwed on the hose. 2. Connect the front cuff to the tool's extraction outlet. 1 2 3 ► 1....
Page 14 - Installing filter bag / dust bag
14 ENGLISH 1 2 3 ► 1. Hose 2. Bent pipe assembly 3. Sleeve Installing filter bag / dust bag Optional accessory CAUTION: Do not use a damaged filter bag. Always use the vacuum cleaner with the filter bag properly installed. Otherwise the vacuumed dust or particles may be exhausted from the cleaner an...
Page 15 - OPERATION
15 ENGLISH 2. Insert the filter bag into the slit on the upper side of the room as illustrated. 1 2 ► 1. Slit 2. Filter bag When using the dust bag, insert the brim of the dust bag into the slit. 2 1 3 ► 1. Slit 2. Brim 3. Dust bag 3. Align the hole of the filter bag with the hose cuff and push the ...
Page 17 - MAINTENANCE; Cleaning the HEPA filter; Cleaning the dust bag
17 ENGLISH MAINTENANCE CAUTION: Always be sure that the appliance is switched off and the battery cartridge is removed before attempting to perform inspection or maintenance. NOTICE: Never use gasoline, benzine, thinner, alcohol or the like. Discoloration, deformation or cracks may result. To mainta...
Page 18 - Cleaning the clog; Cleaning the room for filter bag/; Removing the board
18 ENGLISH NOTICE: Wet dust bag lowers the vacuuming per- formance as well as the life of the motor. Cleaning the clog When cleaning the clog, remove the hose or the exten- sion wand, or the bent pipe assembly to check inside. Removing/attaching the snap-on type bent pipe assembly To remove, pull th...
Page 19 - Attaching the board; OPTIONAL; MAKITA LIMITED
19 ENGLISH The board is supported by three springs. If the springs came off from the board or the lever, reattach them as illustrated. 1 2 3 ► 1. Spring for board 2. Spring for lever 3. Projection NOTE: Attach the springs securely so that the springs touch the root of the projections. Attaching the ...
Page 20 - ESPECIFICACIONES; Cartucho de batería y cargador aplicables; ADVERTENCIAS DE; INSTRUCCIONES; GUARDE ESTAS; No lo utilice sobre superficies
20 ESPAÑOL ESPAÑOL (Instrucciones originales) ESPECIFICACIONES Modelo: XCV17 Capacidad Bolsa del filtro 6,0 L (1,6 gal.) Bolsa recolectora de polvo 5,5 L (1,5 gal.) Volumen de aire máximo Con manguera con ø28 mm (1-1/8″) x 1,0 m (39-3/8″) 2,0 m 3 /min (70,6 cu.ft/min) Con manguera con ø32 mm (1-1/4″...
Page 22 - REGLAS DE
22 ESPAÑOL 25. No modifique ni intente reparar el aparato ni el paquete de baterías salvo como se indique en las ins- trucciones para el uso y cuidado. GUARDE ESTAS INSTRUCCIONES. Este aparato está diseñado para uso comercial. REGLAS DE SEGURIDAD ADICIONALES 1. Lea cuidadosamente este manual de ins-...
Page 23 - Símbolos
23 ESPAÑOL 8. Los niños deben supervisarse para asegurar que ellos no empleen los aparatos como juguete. Uso y cuidado de la herramienta a batería 1. Evite un arranque accidental. Asegúrese de que el interruptor esté en la posición apagada antes de conectar el paquete de bate- rías, levantar el apar...
Page 24 - causar un flujo grande de corriente,; Instalar las baterías en productos que no; Consejos para alargar al máximo
24 ESPAÑOL Instrucciones importantes de seguridad para el cartucho de batería 1. Antes de utilizar el cartucho de batería, lea todas las instrucciones e indicacio- nes de precaución en el (1) el cargador de batería, (2) la batería, y (3) el pro- ducto con el que se utiliza la batería. 2. No desarme ...
Page 25 - Instalación o extracción del; Sistema de protección del aparato/
25 ESPAÑOL DESCRIPCIÓN DEL FUNCIONAMIENTO PRECAUCIÓN: Asegúrese siempre de que el aparato esté apagado y que el cartucho de la batería haya sido extraído antes de realizar cual- quier ajuste o revisión del funcionamiento del aparato. Instalación o extracción del cartucho de batería PRECAUCIÓN: Apagu...
Page 26 - Posición de la caja del interruptor
26 ESPAÑOL Indicación de la capacidad restante de la batería Únicamente para cartuchos de batería con el indicador 1 2 ► 1. Luces indicadoras 2. Botón de verificación Oprima el botón de verificación en el cartucho de la batería para que indique la capacidad restante de la batería. Las luces indicado...
Page 27 - Gancho de sujeción
27 ESPAÑOL Correas para hombro 1 2 ► 1. Correa 2. Sujetador Correa superior 2 1 ► 1. Correa 2. Sujetador Gancho de sujeción Siempre agarre el gancho de sujeción cuando manipule el cuerpo de la aspiradora. 1 ► 1. Gancho de sujeción Accionamiento del interruptor La potencia de succión puede cambiarse ...
Page 28 - MONTAJE
28 ESPAÑOL Abrazadera de la manguera La abrazadera de la manguera puede utilizarse para sujetar la manguera o la boquilla amplia. Para fijar la manguera al cuerpo de la aspiradora, pase la abrazadera de la manguera a través de la ranura en el cuerpo. Usted puede fijar la abrazadera de la man - guera...
Page 31 - Conexión de la herramienta; Al utilizar la manguera de extracción
31 ESPAÑOL Conexión de la herramienta NOTA: Si el conjunto de tubo curvo está acoplado a la manguera, extráigalo primero. Para conectar una herramienta a la aspiradora, hacen falta la manguera especificada y/o accesorios adiciona - les. Dependiendo del modelo de aspiradora, necesitará reemplazar la ...
Page 32 - Instalación de la bolsa del filtro/
32 ESPAÑOL Al utilizar manguera de ø38 mm con boca delantera 38 1. Inserte girando la junta o la boca delantera a la pieza de entrada de la manguera, dependiendo de la herramienta que se vaya a conectar. 2. Conecte la boca delantera a la salida de extrac- ción de la herramienta. 4 1 3 2 ► 1. Junta 2...
Page 34 - OPERACIÓN
34 ESPAÑOL 3. Alinee el orificio de la bolsa del filtro con la boca de la manguera y empuje la parte de cartón hasta el tope. Asegúrese de que la arandela de goma en la bolsa del filtro esté por encima del reborde en la boca de la manguera. 1 1 11 4 3 2 ► 1. Arandela de goma en la bolsa del filtro 2...
Page 35 - MANTENIMIENTO; Limpieza del filtro HEPA
35 ESPAÑOL 3. Reemplace la bolsa del filtro cuando esté llena. Abra la tapa y extraiga la bolsa del filtro. Jale la tira en el lado de la abertura para cerrar la bolsa del filtro y desechar la bolsa del filtro completa. 1 ► 1. Tira Cuando utilice una bolsa recolectora de polvo, retire la bolsa recol...
Page 38 - GARANTÍA LIMITADA DE; Ésta Garantía no aplica para México
38 ESPAÑOL ACCESORIOS OPCIONALES PRECAUCIÓN: Estos accesorios o aditamen- tos están recomendados para utilizarse con su producto de Makita especificado en este manual. El uso de cualquier otro accesorio o aditamento puede ocasionar riesgo de lesiones personales. Use los accesorios o aditamentos sólo...
Page 40 - Makita Corporation
Some dust created by power sanding, sawing, grinding, drilling, and other construction activities contains chemicals known to the State of California to cause cancer, birth defects or other reproductive harm. Some examples of these chemicals are: • lead from lead-based paints, • crystalline silica f...