Page 2 - SPECIFICATIONS; Applicable battery cartridge and charger; SAFETY WARNINGS; General power tool safety warnings; Save all warnings and instruc-
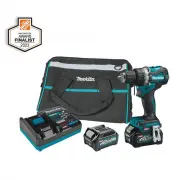
2 ENGLISH ENGLISH (Original instructions) SPECIFICATIONS Model: GFD02 Drilling capacities Steel 13 mm (1/2") Wood Auger bit: 38 mm (1-1/2") Self-feed bit: 38 mm (1-1/2”) Hole saw: 51 mm (2”) Fastening capacities Wood screw 10 mm x 90 mm (3/8" x 3-1/2") Machine screw M6 (1/4") No ...
Page 4 - Cordless driver drill safety warnings; SAVE THESE INSTRUCTIONS.; Symbols; Important safety instructions for
4 ENGLISH Service 1. Have your power tool serviced by a qualified repair person using only identical replacement parts. This will ensure that the safety of the power tool is maintained. 2. Never service damaged battery packs. Service of battery packs should only be performed by the manufacturer or a...
Page 5 - FUNCTIONAL; Installing or removing battery
5 ENGLISH 9. Do not use a damaged battery. 10. The contained lithium-ion batteries are subject to the Dangerous Goods Legislation requirements. For commercial transports e.g. by third parties, forwarding agents, special requirement on pack- aging and labeling must be observed. For preparation of the...
Page 6 - Indicating the remaining battery; Tool / battery protection system; Electric brake
6 ENGLISH Indicating the remaining battery capacity Press the check button on the battery cartridge to indi - cate the remaining battery capacity. The indicator lamps light up for a few seconds. 1 2 ► 1. Indicator lamps 2. Check button Indicator lamps Remaining capacity Lighted Off Blinking 75% to 1...
Page 7 - Lighting up the front lamp
7 ENGLISH Lighting up the front lamp CAUTION: Do not look in the light or see the source of light directly. Pull the switch trigger to light up the lamp. The lamp keeps on lighting while the switch trigger is being pulled. The lamp goes out approximately 10 seconds after releasing the switch trigger...
Page 8 - Adjusting the fastening torque; ASSEMBLY; Installing or removing driver bit/
8 ENGLISH Adjusting the fastening torque 3 2 1 ► 1. Adjusting ring 2. Graduation 3. Arrow The fastening torque can be adjusted in 22 levels by turning the adjusting ring. Align the graduations with the arrow on the tool body. You can get the minimum fas - tening torque at 1 and maximum torque at mar...
Page 9 - Installing driver bit holder; OPERATION; Screwdriving operation
9 ENGLISH Installing driver bit holder Optional accessory 1 2 ► 1. Driver bit holder 2. Driver bit Fit the driver bit holder into the protrusion at the tool foot on either right or left side and secure it with a screw. When not using the driver bit, keep it in the driver bit holders. Driver bits 45 ...
Page 10 - Drilling in metal; MAINTENANCE; OPTIONAL; MAKITA LIMITED WARRANTY
10 ENGLISH Drilling in metal To prevent the drill bit from slipping when starting a hole, make an indentation with a center-punch and hammer at the point to be drilled. Place the point of the drill bit in the indentation and start drilling. Use a cutting lubricant when drilling metals. The excep- ti...
Page 11 - ESPECIFICACIONES; Cartucho de batería y cargador aplicables; ADVERTENCIAS DE; Advertencias generales de seguridad; Conserve todas las advertencias
11 ESPAÑOL ESPAÑOL (Instrucciones originales) ESPECIFICACIONES Modelo: GFD02 Capacidades de taladrado Acero 13 mm (1/2") Madera Broca de barrena: 38 mm (1-1/2″) Broca de autoalimentación: 38 mm (1-1/2″) Sierra perforadora: 51 mm (2″) Capacidades de apriete Tornillo para madera 10 mm x 90 mm (3/8...
Page 13 - GUARDE ESTAS INSTRUCCIONES.
13 ESPAÑOL 8. Mantenga los mangos y superficies de asi - miento secos, limpios y libres de aceite o grasa. Los mangos y superficies de asimiento resbalosos no permiten una manipulación segura ni el control de la herramienta en situaciones inesperadas. 9. Cuando vaya a utilizar esta herramienta, evit...
Page 14 - GUARDE ESTAS
14 ESPAÑOL Símbolos A continuación se muestran los símbolos utilizados para la herramienta. volts o voltios corriente directa o continua velocidad sin carga revoluciones o alternaciones por minuto, frecuencia de rotación diámetro Instrucciones importantes de seguridad para el cartucho de batería 1. ...
Page 15 - Instalación o extracción del; Indicación de la capacidad restante
15 ESPAÑOL 3. Cargue el cartucho de batería a una tempera- tura ambiente de 10 °C - 40 °C (50 °F - 104 °F). Si un cartucho de batería está caliente, déjelo enfriar antes de cargarlo. 4. Cuando no utilice el cartucho de batería, sáquelo de la herramienta o del cargador. 5. Cargue el cartucho de bater...
Page 17 - Cambio de velocidad; Ajuste de la torsión de apriete
17 ESPAÑOL 1 A B ► 1. Palanca del interruptor de inversión Cambio de velocidad PRECAUCIÓN: Coloque siempre la palanca de cambio de velocidad exactamente en la posi- ción correcta. Si usted utiliza la herramienta con la palanca de cambio de velocidad puesta a medias entre la posición “1” y “2”, la he...
Page 18 - MONTAJE; Instalación o extracción de la punta; Instalación del portabrocas; Instalación de la empuñadura lateral
18 ESPAÑOL MONTAJE PRECAUCIÓN: Asegúrese siempre de que la herramienta esté apagada y el cartucho de batería haya sido extraído antes de realizar cualquier trabajo en la misma. Instalación o extracción de la punta de destornillador/broca de taladro 1 2 3 ► 1. Mandril 2. Cerrar 3. Abrir Gire el mandr...
Page 19 - OPERACIÓN; Operación de atornillado; MANTENIMIENTO
19 ESPAÑOL OPERACIÓN PRECAUCIÓN: Siempre inserte completa- mente el cartucho de batería hasta que quede asegurado en su lugar. Si puede ver el indicador rojo del lado superior del botón, esto indica que no ha quedado completamente asegurado. Insértelo por completo hasta que el indicador rojo no pued...
Page 20 - GARANTÍA LIMITADA DE MAKITA; Ésta Garantía no aplica para México
20 ESPAÑOL ACCESORIOS OPCIONALES PRECAUCIÓN: Estos accesorios o aditamen- tos están recomendados para utilizarse con su herramienta Makita especificada en este manual. El empleo de cualquier otro accesorio o aditamento puede conllevar el riesgo de lesiones personales. Utilice los accesorios o aditam...
Page 24 - Makita Corporation
Some dust created by power sanding, sawing, grinding, drilling, and other construction activities contains chemicals known to the State of California to cause cancer, birth defects or other reproductive harm. Some examples of these chemicals are: • lead from lead-based paints, • crystalline silica f...