LG MS4042XRS - Manuals
User Manual LG MS4042XRS


Summary
CONTENTS CONTENTS 3 IMPORTANT SAFETY INSTRUCTIONS 7 BEFORE USE 7 Unpacking & Installing 9 Microwave-Safe Utensils 10 Control Panel 11 Setting Clock 11 More/Less 11 Energy Saving 11 Quick Start 12 HOW TO USE 12 Timed Cooking 12 Microwave Power Levels 13 Child Lock 13 Sensor Cook 14 Sensor Cook Me...
WARNING This is the safety alert symbol. This symbol alerts you to potential hazards that can kill or hurt you and others. All safety messages will follow the safety alert symbol and either the word “WARNING” or “CAUTION”. These word means : CAUTION WARNING This symbol will alert you to hazards or u...
4 IMPORTANT SAFETY INSTRUCTIONS 9 I t is hazardous for anyone other than a competent person to carry out any service or repair operation that involves the removal of a cover which gives protection against exposure to microwave energy. 10 W hen the appliance is operated in the combination mode, child...
LG Microwaves Manuals
-
 LG MA3884VGS
User Manual
LG MA3884VGS
User Manual
-
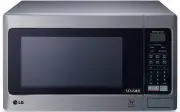
 LG MH-6048S
Manual
LG MH-6048S
Manual
-
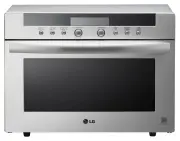
 LG MH-6048SS
Manual
LG MH-6048SS
Manual
-
 LG MH-685HD
User Manual
LG MH-685HD
User Manual
-
 LG MHES1738F
User Manual
LG MHES1738F
User Manual
-
LG MHES1738N
User Manual
-
 LG MJ3966ABS
User Manual
LG MJ3966ABS
User Manual
-
 LG MS2042U
User Manual
LG MS2042U
User Manual
-
 LG MS2044VS
User Manual
LG MS2044VS
User Manual
-
 LG MS2336DB
User Manual
LG MS2336DB
User Manual
-
 LG MS2536DB
User Manual
LG MS2536DB
User Manual
-
 LG MS2540SRB
User Manual
LG MS2540SRB
User Manual
-
 LG MS2596OB
User Manual
LG MS2596OB
User Manual
-
 LG MS2596OS
User Manual
LG MS2596OS
User Manual
-
 LG MS2596OW
User Manual
LG MS2596OW
User Manual
-
 LG MS3840SR
User Manual
LG MS3840SR
User Manual
-
 LG MS3840SRB
User Manual
LG MS3840SRB
User Manual
-
 LG MS3840SRSK
User Manual
LG MS3840SRSK
User Manual
-
 LG MS3842XRL
User Manual
LG MS3842XRL
User Manual
-
 LG MS3848XRSK
User Manual
LG MS3848XRSK
User Manual