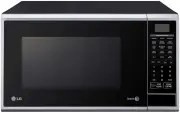
Page 2 - A very safe appliance; Warning
2 You cannot operate your oven with the door open due to the safety interlocks built into the door mechanism. These safety interlocks automatically switch off any cooking activity when the door is opened; which in the case of a microwave oven could result in harmful exposure to microwave energy. It ...
Page 3 - CONTENTS
3 PRECAUTIONS 2 CONTENTS 3 UNPACKING & INSTALLING 4 FEATURE DIAGRAM 6 CONTROL PANEL 6 OPERATING INSTRUCTIONS 7 SETTING CLOCK 7 MORE/LESS 7 CONTENTS TIMED COOKING 8 2 STAGE TIMED COOKING 8 MICROWAVE POWER LEVELS 8 CHILD LOCK 9 SENSOR COOK OPERATION INSTRUCTION 9 SENSOR COOK 9 SENSOR COOK MENU INS...
Page 4 - UNPACKING & INSTALLING
4 UNPACKING & INSTALLING Place your oven on a flat, level surface but make sure there is at least 20 cm of space on the top, rear and sides so there is air flow for ventilation. Exhaust outlets are located in the back and side of your oven. Blocking the outlets can damage your oven. KEEP MOISTUR...
Page 6 - FEATURE DIAGRAM
6 NOTE: A beep sounds when a pad on the control panel is touched to indicate setting has been entered. FEATURE DIAGRAM CONTROL PANEL Remove your Microwave Oven and all material from the shipping carton. Your oven will be packed with the following materials: Glass Turntable .........................1...
Page 7 - OPERATING INSTRUCTIONS; QUICK START; SETTING CLOCK
MORE/LESS By using the ( ) + or ( ) - keys, KEEP MOISTURE AUTO COOK, AUTO REHEAT, TIMED COOK program can be adjusted to cook food for a longer. or shorter time Pressing ( ) + will add 10 seconds to the cooking time each time you press it. Pressing ( ) - will subtract 10 seconds of cooking time each ...
Page 8 - MICROWAVE POWER LEVELS; STAGE TIMED COOKING
8 OPERATING INSTRUCTIONS (CONT’D) MICROWAVE POWER LEVELS Your microwave oven is equipped with eleven power levels to give you maximum flexibility and control over cooking. The table below will give you some idea of which foods are prepared at each of the various power levels.* The chart below shows ...
Page 9 - CHILD LOCK; SENSOR COOK
9 OPERATING INSTRUCTIONS (CONT’D) CHILD LOCK This is a unique safety feature that prevents unwanted oven operation such as used by children. Once the CHILD LOCK is set, no cooking can take place. If the CHILD LOCK was already set and you touched another cooking pad, the word L shows in the display. ...
Page 10 - SENSOR COOK MENU INSTRUCTIONS - VEGETABLE
10 Menu Code 1 Instructions SENSOR COOK MENU INSTRUCTIONS - VEGETABLE Wash & pat potatoes dry with paper towel. Pierce each potato 3 times with a fork. Place potatoes around the outer edge of the turntable. After cooking potatoes should still be firm. Wrap in foil and stand. Jacket Potato Potato...
Page 11 - SENSOR COOK MENU INSTRUCTIONS - RICE / PASTA
11 Menu Code 1 Instructions SENSOR COOK MENU INSTRUCTIONS - RICE / PASTA White Rice 1 / 2 - 2 cups Rice : Room Water : Room 3 - 5 Wash the rice under cold water until the water runs clear. Place the rice and water in a microwave-safe rice cooker or 3-litre bowl. Cover with lid or double layer of pla...
Page 12 - SENSOR COOK MENU INSTRUCTIONS - DESSERT
12 Menu Code Instructions SENSOR COOK MENU INSTRUCTIONS - DESSERT 2 1. Place the butter in a basin and melt on full for about 1- 1 1 / 2 minutes. 2. Mix together the sugar, cocoa and flour. Beat together the egg and milk. Stir into the flour mixture, together with the butter, walnuts and raisins. 3....
Page 13 - SENSOR REHEAT; SENSOR REHEAT MENU INSTRUCTIONS
13 SENSOR REHEAT This feature allows you to reheat precooked room-temperature or refrigerated foods without selecting cooking times and power levels. This feature has 6 categories : dinner plate, rice, soup, casserole, risotto, pizza. 1. Touch STOP/CLEAR. 2. Touch DINNER PLATE pad. ‘SE n S’ will sho...
Page 15 - AUTO COOK MENU INSTRUCTIONS
15 Menu Code 1 Instructions AUTO COOK MENU INSTRUCTIONS Corned Beef 1.0 - 2.0 kg Refrigerated 15 - 20 2 Fruity Beef topside beef 125 ml fruit chutney 1 tbs oil 1 tbs Worcestershire Sauce 1 tbs curry powder 2 tbs mustard powder 1 tbs sweet sherry Sauce 1 1 / 2 cups stuffing mix Water to mix Seasoning...
Page 18 - AUTO REHEAT MENU INSTRUCTIONS
18 OPERATING INSTRUCTIONS (CONT’D) AUTO REHEAT Your oven’s menu has been preprogrammed to automatically reheat food. Tell the oven what you want and how many items there are. Then let your microwave oven reheat your selections.Be sure to close the door before selecting categories. 1. Touch STOP/CLEA...
Page 19 - QUICK DEFROST; QUICK DEFROST MENU INSTRUCTIONS
19 QUICK DEFROST Three Quick Defrost sequences are preset in the oven. The Quick Defrost feature provides you with the express defrosting method for 500g frozen foods. The oven automatically sets the defrosting time for each food. NOTE: The oven will beep during the DEFROST CYCLE.At this time open t...
Page 20 - KEEP MOISTURE MENU INSTRUCTIONS
20 KEEP MOISTURE 1. Touch STOP/CLEAR. 2. Touch KEEP MOISTURE. one time. then ‘Sc-1’ willshows in the display. To reheat Chilled Pizza KEEP MOISTURE MENU INSTRUCTIONS Weight Initial Standing Time Category Menu Instructions Limit Temperature (minutes) Reheat Chilled pizza 0.3~0.6kg Refrigerated 1. Pou...
Page 22 - AUTO DEFROST
22 AUTO DEFROST Three defrost sequences are preset in the oven. The defrost feature provides you with the best defrosting method for frozen foods. The cooking guide will show you which defrost sequence is recommended for the food you are defrosting.With the Auto Defrost feature, the oven automatical...
Page 23 - AUTO DEFROST MENU INSTRUCTIONS
23 OPERATING INSTRUCTIONS (CONT’D) Menu Code Instructions AUTO DEFROST MENU INSTRUCTIONS 1 Remove the meat completely from it’s wrapping. Place the mince onto a microwave- safe rack over a plate or shallow dish. During the program the oven will beep and display turn food over. At this point remove t...
Page 25 - COOKING TIPS
25 OPERATING INSTRUCTIONS (CONT’D) Meat 1. No special techniques are required. Meat should be prepared as with conventional cooking. Season if desired. Always thoroughly defrost meat before cooking. 2. Place the meat on a microwave roasting rack or microwave-proof plate and place on the turntable. 3...
Page 26 - Fish
26 OPERATING INSTRUCTIONS (CONT’D) COOKING TIPS (continued) Fish 1. Arrange fish in a large shallow non-metallic dish or casserole. 2. Cover with pierced microwave plastic wrap or casserole lid. 3. Place the dish on the turntable. 4. Cook according to the instructions in the Fresh Fish Cooking Chart...
Page 29 - MICROWAVE-SAFE UTENSILS; CAUTION
29 MICROWAVE-SAFE UTENSILS Never use metal or metal trimmed utensils in your microwave oven Microwaves cannot penetrate metal. They will bounce off any metal object in the oven and cause arcing, an alarming phenomenon that resembles lightning. Most heat resistant non metallic cooking utensils are sa...
Page 30 - FOOD CHARACTERISTICS & MICROWAVE COOKING
30 FOOD CHARACTERISTICS & MICROWAVE COOKING Keeping an eye on things The recipes in this book have been formulated with great care, but your success in preparing them depends on how much attention you pay to the food as it cooks. Always watch your food while it cooks. Your microwave oven is equi...
Page 31 - To Clean Your Oven
31 FOOD CHARACTERISTICS & MICROWAVE COOKING Stirring Stirring is one of the most important of all microwaving techniques. In conventional cooking, food is stirred for the purpose of blending. Microwaved food, however, is stirred in order to spread and redistribute heat. Always stir from the outs...
Page 32 - SAFETY PRECAUTIONS; WARNING; subsequent DAMAGE to the OVEN.
SAFETY PRECAUTIONS 32 WARNING Please ensure cooking times are correctly set as over cooking may result in FIRE and subsequent DAMAGE to the OVEN. 1 Do not attempt to tamper with, or make any adjustments or repairs to the door, control panel, safety interlock switches or any other part of the oven. R...
Page 34 - This appliance must be earthed; MODEL
3 4 TECHNICAL SPECIFICATIONS PLUG WIRING INFORMATION The wires in this mains lead are colored in accordance with the following codes BLUE ~ Neutral BROWN ~ Live GREEN & YELLOW ~ Earth Warning This appliance must be earthed *IEC 60705 RATING STANDARD Specifications subject to change without prior...
Page 35 - LG MICROWAVE OVEN; MANUFACTURER'S WARRANTY; TERMS OF WARRANTY
3 5 LG MICROWAVE OVEN MANUFACTURER'S WARRANTY Complete the details on this form and retain in the event of warranty service being required (purchase receipt attached). PURCHASER’S NAME ADDRESS CITY STATE POST CODE RETAILER’S NAME ADDRESS CITY STATE POST CODE MODEL NO SERIAL NO DATE OF PURCHASE INVOI...
Page 36 - LGEAP