Page 3 - TABLE OF CONTENTS
3 TABLE OF CONTENTS 4 PRODUCT FEATURES 5 SAFETY INSTRUCTIONS 5 IMPORTANT SAFETY INSTRUCTIONS 9 PRODUCT OVERVIEW 9 Parts9 Accessories 10 INSTALLATION 10 Installation Parts and Tools10 Installation Overview11 Product Specifications12 Choosing the Proper Location13 Unpacking and Removing Shipping Bolts...
Page 4 - PRODUCT FEATURES
4 PRODUCT FEATURES PRODUCT FEATURES INVERTER DIRECT DRIVE MOTOR The inverter motor, which is directly connected to the tub, produces little noise and vibration and offers great durability and a long lifespan. TUB CLEAN Cleaning of the tub on a regular monthly basis using Tub Clean can help keep the ...
Page 5 - SAFETY INSTRUCTIONS; READ ALL INSTRUCTIONS BEFORE USE; Your safety and the safety of others are very important.; WARNING; WARNING; INSTALLATION
5 SAFETY INSTRUCTIONS ENGLISH SAFETY INSTRUCTIONS READ ALL INSTRUCTIONS BEFORE USE Your safety and the safety of others are very important. We have provided many important safety messages in this manual and on your appliance. Always read and follow all safety messages. This is the safety alert symbo...
Page 6 - OPERATION
6 SAFETY INSTRUCTIONS • When installing or moving the appliance, be careful not to pinch, crush, or damage the power cord. • Do not install the appliance in humid spaces. • Keep packing materials out of the reach of children. Packaging material can be dangerous for children. There is a risk of suffo...
Page 7 - MAINTENANCE
ENGLISH • Under certain conditions, hydrogen gas may be produced in a hot-water system that has not been used for two weeks or more. HYDROGEN GAS IS EXPLOSIVE. If the hot-water system has not been used for such a period, before using the appliance turn on all hot water faucets and let the water flow...
Page 8 - BASIC SAFETY PRECAUTIONS; CAUTION; including the following:; SAVE THESE INSTRUCTIONS
8 SAFETY INSTRUCTIONS BASIC SAFETY PRECAUTIONS • Do not dry unwashed items in the appliance. • Unplug the appliance before cleaning to avoid the risk of electric shock. • Items that have been soiled with substances such as cooking oil, vegetable oil, acetone, alcohol, petroleum, kerosene, spot remov...
Page 9 - PRODUCT OVERVIEW; Parts; Included Accessories
9 PRODUCT OVERVIEW ENGLISH PRODUCT OVERVIEW Parts 1 Shipping bolts 5 Tub 9 Drain pump filter 13 Liquid detergent dispenser cap 2 Power cord 6 Door 10 Lower cover 14 Liquid softener dispenser cap 3 Power button 7 Drain hose 11 Leveling feet 15 Control panel 4 Drum light 8 Drain pump 12 Auto Dispense ...
Page 10 - Installation Parts and Tools; Tools Needed; Installation Overview
10 INSTALLATION INSTALLATION Installation Parts and Tools Tools Needed Adjustable Pliers Carpenter's Level Installation Overview Please read the following installation instructions first after purchasing this product or transporting it to another location. Choosing the proper Choosing the proper loc...
Page 11 - Product Specifications
11 INSTALLATION ENGLISH Product Specifications The appearance and specifications listed in this manual may vary due to constant product improvements. Model LUWM101HWA Electrical requirements 120 VAC @ 60 Hz Min. / Max. water pressure 20 – 120 psi (138–827 kPa) Dimensions 23 5/8 in (W) x 26 1/2 in (D...
Page 12 - Choosing the Proper; Power Outlet; Flooring; Floor Installation
12 INSTALLATION Choosing the Proper Location Install the washer on a solid floor that is strong and rigid enough to support the weight of the washer, even when fully loaded, without flexing or bouncing. If the floor has too much flex, you may need to reinforce it to make it more rigid. If the floor ...
Page 13 - Unpacking and Removing
13 INSTALLATION ENGLISH Unpacking and Removing Shipping Bolts 1 Lift the washer off the foam base. After removing the carton and shipping material, lift the washer off the foam base. Make sure the plastic tub support comes off with the base and is not stuck to the bottom of the washer.If you must la...
Page 14 - Connecting the Water Lines
14 INSTALLATION Connecting the Water Lines 1 Check the fittings and seals. Inspect the threaded fitting on each hose and make sure there is a rubber seal in place in both ends of each hose to prevent leaking. Rubber seal Rubber seal Rubber seal Rubber seal Water hose (to water Water hose (to water i...
Page 15 - Connecting the Drain Hose; Option 2: Laundry Tub
15 INSTALLATION ENGLISH Connecting the Drain Hose NOTE • The drain hose should always be properly secured. Failure to properly secure the drain hose can result in flooding and property damage. • The drain must be installed in accordance with any applicable local codes and regulations. • Make sure th...
Page 16 - Leveling the Washer
16 INSTALLATION Leveling the Washer The drum of your new washer spins at very high speeds. To minimize vibration, noise, and unwanted movement, the floor must be a level, solid surface. The slope beneath the washer should not exceed 1 inch, and all four leveling feet must rest firmly on the floor. N...
Page 17 - Connecting to the Power; Testing the Washer
17 INSTALLATION ENGLISH Connecting to the Power Supply The washer should be plugged into a 120 VAC, 60 Hz grounded 3-prong outlet. Plug in the washer. WARNING • Do not use a worn or damaged power cord or power plug. Replace or repair it immediately. Failure to do so may result in death, fire, electr...
Page 18 - Using the Washer
18 OPERATION OPERATION Using the Washer WARNING • To reduce the risk of fire, electric shock, or injury to persons, read the SAFETY INSTRUCTIONS before operating this appliance. 1 Sort Laundry and Load the Washer Sort laundry by fabric type, soil level, color and load size, as needed. Open the door ...
Page 19 - Sorting Laundry; Grouping Similar Items; Colors; Fabric Care Labels
19 OPERATION ENGLISH Sorting Laundry CAUTION • The washer can be fully loaded, but the drum should not be tightly packed with items. The door of the washer should close easily. • Use the Bulky/Large cycle for buoyant or nonabsorbent items such as pillows or comforters. Failure to follow this caution...
Page 20 - Loading the Washer; Using the Auto Dispense Function
20 OPERATION Loading the Washer • Check and empty pockets. Paper clips, coins, matches, etc. can damage clothing and the washer. • Close zippers and hooks, and tie drawstrings to prevent snagging or tangling of clothes. • Pretreat heavily stained areas for best results. • Combine large and small ite...
Page 22 - Dispensing Detergent Manually
22 OPERATION CAUTION • Do not place or store laundry products, such as detergent, bleach, or liquid fabric softener, on top of the washer or dryer. Wipe up any spills immediately. These products can damage the machine's finish and controls. • Remove the Auto Dispense tray only when refilling or repl...
Page 23 - Control Panel; Control Panel Features
23 OPERATION ENGLISH Control Panel Control Panel Features 1 Cycle Category The dots indicate the current category screen. Swipe the display left or right to show Everyday Cycles, Special Cycles, Dry Cycles(Optional), Download Cycles, and My Pattern.Use My Pattern for cycles you use frequently. If yo...
Page 24 - Wash Cycles
24 OPERATION Wash Cycles Wash cycles are designed for the best wash performance for each type of load. Select the cycle that best matches the load contents for maximum wash performance and fabric care. For best results, follow the fabric care labels on your garments. See the Sorting Laundry section ...
Page 26 - Cycle Guide
26 OPERATION Cycle Guide ●= available option, =default setting Cycle Cycle Options Wash Temp Spin Speed Soil Level Delay Wash Extra Rinse Normal Turbo Wash Extra Hot Extra High Heavy ● ● Prewash Hot Very High Warm High Normal Fresh Care Cold Medium Tap Cold Low Light Very Low Speed Wash ● ● Hot Warm...
Page 29 - Cycle Modifier Buttons; Soil; Rinse; Spin
29 OPERATION ENGLISH Cycle Modifier Buttons Each cycle has default settings that are selected automatically. Customize these settings using the cycle modifier buttons. Press the button for the desired modifier to open the modifier's screen. The washer automatically adjusts the water level for the ty...
Page 30 - Add Option; Add Drying
30 OPERATION 5 Add Option Option settings may be different depending on the cycle. Turbo Wash Adding the Turbo Wash™ option reduces the cycle time while still providing similar wash performance to the same cycle without Turbo Wash™. NOTE • The Turbo Wash™ option cannot be used with all cycles. • Tur...
Page 31 - Drying Cycle Guide
31 OPERATION ENGLISH Drying Cycle Guide ●= available option, =default setting Cycle Cycle Options Wash Temp Spin Speed Soil Level Delay Wash Extra Rinse Normal Air Cooling Extra High ● Normal Very High Damp High Energy saving Speed Time Drying (30/60/90/120 min) Outdoor Air Cooling ● Normal Damp Hig...
Page 32 - Special Cycles/Features; Delay Wash
32 OPERATION Special Cycles/Features After selecting a cycle, press the buttons to select additional features for your load. Delay Wash Once you have selected the cycle and other settings, press this button to delay the start of the wash cycle. Each press of the button increases the delay time by 1 ...
Page 33 - Drying Tips; Drying Time Guide
33 OPERATION ENGLISH Drying Tips Use the sensor dry cycles to dry most loads. Electronic sensors measure the temperature of the exhaust to increase or decrease drying temperatures for faster reaction time and tighter temperature control. • Cold water tap must be left on during drying cycles. • This ...
Page 34 - Settings; Control Lock; Locking the Control Panel; Remote Start; Using Remote Start
34 OPERATION Settings Swipe down the display to open the Settings screen. Touch More Settings to reveal the entire Settings menu. Control Lock This option disables the controls and can prevent children from changing cycles or operating the machine. The feature does not lock the door. Once the Contro...
Page 35 - Changing Default Dispense Amounts
35 OPERATION ENGLISH X Auto Dispense Use this button to setup and control the Auto Dispense function. • When the Refill Alarm is turned on, it sends a message when the detergent or softener need refilling. • The default settings are configured to automatically dispense 2.4 oz (70 ml) of detergent an...
Page 37 - Switching Between Main and Mini
37 OPERATION ENGLISH Switching Between Main and Mini Washer When the Main Washer and Mini Washers are paired, this function allows you to switch the controls between the two washers. Swipe down to open the Settings screen to select Main Washer or Mini Washer. NOTE • This feature is available only wh...
Page 38 - Download Cycles; Downloading Cycles Using an
38 OPERATION Download Cycles This feature allows you to download new and specialized cycles that are not included in the appliance's standard cycles.The appliance must be connected to the internet through a home Wi-Fi network to download cycles. Downloading Cycles Using an Application Follow these i...
Page 39 - SMART FUNCTIONS; LG ThinQ Application; Installing LG ThinQ Application
39 SMART FUNCTIONS ENGLISH SMART FUNCTIONS LG ThinQ Application The LG ThinQ application allows you to communicate with the appliance using a smartphone. Installing LG ThinQ Application Search for the LG ThinQ application from the Google Play Store or Apple App Store on a smart phone. Follow instruc...
Page 40 - FCC Notice; Open Source Software Notice Information
40 SMART FUNCTIONS FCC Notice The following notice covers the transmitter module contained in this product.This equipment has been tested and found to comply with the limits for a Class B digital device, pursuant to Part 15 of the FCC Rules. These limits are designed to provide reasonable protection...
Page 41 - Smart DiagnosisTM Function; Using LG ThinQ to Diagnose Issues
41 SMART FUNCTIONS ENGLISH Smart Diagnosis™ Function This feature is only available on models with the or logo.Use this feature to help you diagnose and solve problems with your appliance. NOTE • For reasons not attributable to LGE’s negligence, the service may not operate due to external factors su...
Page 42 - Regular Cleaning; Care After Wash; Tub Clean Cycle
42 MAINTENANCE MAINTENANCE WARNING To reduce the risk of fire, electric shock, or injury to persons, read and follow this entire owner’s manual, including the Important Safety Instructions. • Unplug the washer before cleaning to avoid the risk of electric shock. Failure to follow this warning can ca...
Page 43 - Automatic Alert for Tub Clean
43 MAINTENANCE ENGLISH Cleaner Instructions Tub cleaner Place directly into washer drum. Lime scale removerLiquid chlorine bleachPowdered cleanerCleaning tablets NOTE • Never load laundry while using Tub Clean. The laundry may be damaged or contaminated with cleaning products. Make sure to run the T...
Page 44 - Cleaning the Door Seal
44 MAINTENANCE Cleaning the Door Seal Clean the door seal frequently (once a week) to prevent build-up of dirt. 1 Wear rubber gloves and protective goggles. 2 Dilute 3/4 cup (177 ml) of liquid chlorine bleach in 1 gallon (3.8 L) of water. 3 Wipe around the door seal (A). Soak a sponge or a soft clot...
Page 45 - Cleaning the Drain Pump
45 MAINTENANCE ENGLISH Cleaning the Drain Pump Filter The washer fails to drain if the drain pump filter is clogged. Periodically clean the drain filter to prevent clogging with foreign objects. WARNING • Opening the drain filter will result in water overflowing if there is water in the washer drum....
Page 46 - Cleaning Auto Dispense Tray
46 MAINTENANCE Cleaning Auto Dispense Tray Clean the Auto Dispense tray before refilling it or if detergent or softener have hardened with lack of use. 1 Press on the circle to open the lower cover as shown below. 2 Push in on the top of the Auto Dispense tray to slide it out and use the handle to r...
Page 47 - Care in Cold Climates; Storing the Washer
47 MAINTENANCE ENGLISH Care in Cold Climates Storing the Washer If the washer will not be used for an extended period of time and is in an area that could be exposed to freezing temperatures, perform the following steps to protect the washer from damage. 1 Turn off the water supply. 2 Disconnect hos...
Page 48 - TROUBLESHOOTING; FAQs: Frequently Asked Questions
48 TROUBLESHOOTING TROUBLESHOOTING FAQs: Frequently Asked Questions Q: Why does my washer make loud banging noises while it is filling with water? A: This is actually a problem with the plumbing in your home. When the water valve in the washer shuts off, it can cause pipes in your home to move, resu...
Page 49 - Before Calling for Service; Noises You Might Hear
49 TROUBLESHOOTING ENGLISH Before Calling for Service The washer is equipped with an automatic error-monitoring system to detect and diagnose problems at an early stage. If the washer does not function properly or does not function at all, check the following before you call for service. Noises You ...
Page 50 - Operation
50 TROUBLESHOOTING Operation Problem Possible Cause Solutions Water leaking Inlet hose connection is loose at faucet or washer. Check hoses for leaks, cracks and splits. Check and tighten hose connections. House drain pipes are clogged. The washer pumps out water very rapidly. Check for water backin...
Page 53 - Performance
53 TROUBLESHOOTING ENGLISH Performance Problem Possible Cause Solutions Wrinkling Washer not unloaded promptly. Always remove items from the washer as soon as the cycle is complete. Washer overloaded. The washer can be fully loaded, but the drum should not be tightly packed with items. The door of t...
Page 54 - Error Codes
54 TROUBLESHOOTING Error Codes Error Code Possible Cause Solutions Washer fills with water slowly or not at all, or [IE] Water supply faucets are not fully open. Make sure that the water faucets are fully open. Water line hoses are kinked, pinched, or crushed. Make sure that the hoses are not kinked...
Page 63 - MANUAL DEL PROPIETARIO; LAVADORA PRINCIPAL; mantengalo al alcance para futuras referencias
ESPAÑOL www.LGSIGNATURE.com MANUAL DEL PROPIETARIO LAVADORA PRINCIPAL Lea el manual del propietario detenidamente previo a operar la lavadora y mantengalo al alcance para futuras referencias . LUWM101HWA Copyright © 2017-2024 LG Electronics Inc. Todos los Derechos Reservados.
Page 65 - TABLA DE CONTENIDOS
3 TABLA DE CONTENIDOS 4 CARACTERÍSTICAS DEL PRODUCTO 5 INSTRUCCIONES DE SEGURIDAD 5 INSTRUCCIONES DE SEGURIDAD IMPORTANTES 9 CARACTERÍSTICAS DEL PRODUCTO 9 Partes9 Accesorios 10 INSTALACIÓN 10 Partes y Herramientas de Instalación10 Introducción a la Instalación11 CARACTERÍSTICAS DEL PRODUCTO12 Eligi...
Page 66 - CARACTERÍSTICAS DEL PRODUCTO
4 CARACTERÍSTICAS DEL PRODUCTO CARACTERÍSTICAS DEL PRODUCTO MOTOR DIRECTO DE PROPULSIÓN INVERSA El motor invertido, que está conectado directamente al tambor, produce poco ruido y vibración y ofrece gran durabilidad y una larga vida útil. LIMPIEZA DE LA CUBA La limpieza regular del tambor, mensualme...
Page 67 - LEA TODAS LAS INSTRUCCIONES PREVIO AL USO; Su seguridad y la de los demás es muy importante.; ADVERTENCIA; ADVERTENCIA; básicas de seguridad, incluyendo las siguientes:; INSTALACIÓN; INSTRUCCIONES DE SEGURIDAD
5 INSTRUCCIONES DE SEGURIDAD ESPAÑOL LEA TODAS LAS INSTRUCCIONES PREVIO AL USO Su seguridad y la de los demás es muy importante. Hemos proporcionado varios mensajes de seguridad importantes en este manual y en su electrodoméstico. Siempre lea y acate todos los mensajes de seguridad. Este es el símbo...
Page 68 - OPERACIÓN
6 INSTRUCCIONES DE SEGURIDAD • Al instalar o mover el electrodoméstico, sea cuidadoso de no presionar, aplastar o dañar el cable de alimentación. • No instale el electrodoméstico en espacios húmedos. • Mantenga los materiales de empaque lejos del alcance de los niños. Los materiales de embalaje pued...
Page 69 - MANTENIMIENTO; INSTRUCCIONES DE CONEXIÓN A TIERRA
7 INSTRUCCIONES DE SEGURIDAD ESPAÑOL • Bajo ciertas condiciones, puede que se produzca gas hidrógeno en un sistema de agua caliente que no se ha utilizado por dos semanas o más. EL GAS HIDRÓGENO ES EXPLOSIVO. Si el sistema de agua caliente no se ha utilizado en dicho período, encienda los grifos de ...
Page 70 - ADVERTENCIAS BÁSICAS DE SEGURIDAD; PRECAUCIÓN; GUARDE ESTAS INSTRUCCIONES
8 INSTRUCCIONES DE SEGURIDAD ADVERTENCIAS BÁSICAS DE SEGURIDAD • No seque artículos que no han sido lavados en el electrodoméstico. • Desconecte el electrodoméstico previo a su limpieza para evitar el riesgo de una descarga eléctrica. • Artículos que han sido manchados con sustancias como aceite de ...
Page 71 - Partes; Accesorios; Accesorios Incluídos
9 CARACTERÍSTICAS DEL PRODUCTO ESPAÑOL CARACTERÍSTICAS DEL PRODUCTO Partes 1 Pernos de transporte 5 Tambor 9 Filtro de la bomba de drenaje 13 Tapa del dispensador de detergente líquido 2 Cable de alimentación 6 Puerta 10 Cubierta baja 14 Tapa del dispensador de suavizante 3 Botón de encendido 7 Mang...
Page 72 - Partes y Herramientas de Instalación; Herramientas Necesarias; Introducción a la Instalación
10 INSTALACIÓN INSTALACIÓN Partes y Herramientas de Instalación Herramientas Necesarias Alicates Ajustables Nivel de Carpintería Introducción a la Instalación Por favor lea primero las siguientes instrucciones de instalación luego de haber comprado este producto o al transportarlo a una ubicación di...
Page 74 - Eligiendo la ubicación; Cable de alimentación; Suelo; Instalación en el Piso
12 INSTALACIÓN Eligiendo la ubicación adecuada Instale la lavadora en un piso sólido que sea lo suficientemente fuerte y rígido para soportar su peso, aún cuando esta esté completamente llena, sin que este se flexione. Si el piso es muy flexible, puede que necesite reforzarlo para hacerlo más rígido...
Page 75 - Desempacando y Removiendo
13 INSTALACIÓN ESPAÑOL Desempacando y Removiendo los Tornillos de Transporte 1 Levante la lavadora de la base de espuma. Luego de remover la caja de cartón y el material de embalaje, levante la lavadora de la base de espuma. Asegúrese de que el soporte plástico salga con la base y que no se atore en...
Page 76 - Conectando la línea de agua
14 INSTALACIÓN Conectando la línea de agua 1 Revise los conectores y sellos. Revise el conector roscado en cada manguera y asegúrese de que haya un sello de caucho en el extremo de cada una de ellas para prevenir fugas. Sello de caucho Sello de caucho Manguera de agua (para el ingreso de agua a la l...
Page 77 - Conectando la Manguera de; Opción 1: Tubo vertical
15 INSTALACIÓN ESPAÑOL Conectando la Manguera de Drenaje NOTA • La manguera de drenaje siempre debe estar correctamente asegurada. No asegurar apropiadamente la manguera de drenaje podría resultar en una inundación y en daños a la propiedad. • El drenaje debe estar instalado de acuerdo a los códigos...
Page 78 - Nivelando la Lavadora
16 INSTALACIÓN Nivelando la Lavadora El tambor de su nueva lavadora gira a velocidades Extrarrápidos. Para minimizar el ruido, la vibración, y los movimientos no deseados, la lavadora debe ser instalada en una superficie sólida. La pendiente debajo de la lavadora no debe exceder 1 pulgada, y las cua...
Page 79 - Conectado al Suministro de; Probando la lavadora
17 INSTALACIÓN ESPAÑOL Conectado al Suministro de Energía La lavadora debe estar conectada a un tomacorriente de 3 espigas de 120 VAC 60 Hz con conexión a tierra. Conecte la lavadora. ADVERTENCIA • No utilice un cable de alimentación o un enchufe dañado. Reemplacelo o repárelo inmediatamente. No seg...
Page 80 - Utilizando la lavadora
18 OPERACIÓN OPERACIÓN Utilizando la lavadora ADVERTENCIA • Para reducir el riesgo de incendios, descargas eléctricas o lesiones a personas, lea todas las INSTRUCCIONES DE SEGURIDAD previo a operar este electrodoméstico. 1 Organice la Ropa y Cargue la Lavadora. Clasifique sus prendas a lavar por tip...
Page 81 - Clasificando el Lavado; Agrupando Artículos Similares; Colores; Etiquetas de Cuidado de Telas
19 OPERACIÓN ESPAÑOL Clasificando el Lavado PRECAUCIÓN • La lavadora puede estar llena, pero el tambor no debe quedar saturado con artículos. La puerta de la lavadora debe cerrar facilmente. • Utilice el ciclo Voluminoso/Largo para artículos flotantes o no absorbentes, como almohadas o edredones. El...
Page 82 - Cargando la Lavadora; Utilización de la Función
20 OPERACIÓN Cargando la Lavadora • Revise y vacíe los bolsillos. Clips, monedas, cerillos, etc., podrían dañar las prendas y la lavadora. • Cierre las cremalleras y los ganchos, y amarre los cordones para prevenir que estos se enganchen o enreden en otras prendas. • Realice un pretaratamiento de la...
Page 84 - Dispensación Manual del Detergente
22 OPERACIÓN PRECAUCIÓN • No coloque ni almacene productos de lavandería, tales como detergente, blanqueador o suavizante líquido de telas en la parte superior de la lavadora o secadora. Limpie cualquier derrame inmediatamente. Estos productos pueden dañar el acabado y los controles de la máquina. •...
Page 85 - Panel de Control; Características del Panel de Control
23 OPERACIÓN ESPAÑOL Panel de Control Características del Panel de Control 1 Categoría de Ciclo Los puntos indican la pantalla de categoría actual. Deslice la pantalla hacia la izquierda o la derecha para mostrar Programas cotidianos, Programas especiales, Programas de secado(Opcional), Descargar Pr...
Page 86 - Ciclos de Lavado
24 OPERACIÓN Ciclos de Lavado Los ciclos de lavado están diseñados para alcanzar el desempeño óptimo en lavado para cada tipo de carga. Seleccione el ciclo que mejor se adapte al contenido de la carga para obtener el máximo rendimiento de lavado y el cuidado de la tela. Consulte las etiquetas de cui...
Page 88 - Guía del Ciclo
26 OPERACIÓN Guía del Ciclo ●= opción disponible =configuración predeterminada Ciclo Opciones del Ciclo Temperatura del lavado Velocidad de Centrífugado Nivel de Suciedad Retrasar lavado Enjuague Extra Normal Turbo Wash Muy caliente Extrarrápido Abundante ● ● Prelavado Caliente Muy rápido Tibia Rápi...
Page 91 - Botones Modificadores del; Suciedad; Centrifugado
29 OPERACIÓN ESPAÑOL Botones Modificadores del Ciclo Cada ciclo tiene configuraciones predeterminadas que se seleccionan automáticamente. Personalice dichas configuraciones con los botones de modificación de ciclos. Pulse el botón del modificador deseado para abrir la pantalla del modificador. La la...
Page 92 - Agregar Opción
30 OPERACIÓN 5 Agregar Opción Los ajustes de las opciones pueden ser diferentes dependiendo del ciclo. Lavado rápido Agregar la opción Turbo Wash™ reduce el tiempo del ciclo mientras provee un rendimiento de lavado similar que el que hubiese tenido sin él. NOTA • La opción Turbo Wash™ no puede ser u...
Page 93 - Guía del Ciclo de Secado
31 OPERACIÓN ESPAÑOL Guía del Ciclo de Secado ●= opción disponible =configuración predeterminada Ciclo Opciones del Ciclo Temperatura del lavado Velocidad de Centrífugado Nivel de Suciedad Retrasar lavado Enjuague Extra Normal Enfriamiento por aire Extrarrápido ● Normal Muy rápido Húmedo Rápido Ahor...
Page 94 - Características; Retrasar lavado
32 OPERACIÓN Ciclos Especiales/ Características Luego de haber seleccionado el ciclo, presione los botones para seleccionar características adicionales para su carga. Retrasar lavado Una vez ha seleccionado el ciclo y otros ajustes, presione este botón para retrasar el inicio del ciclo de lavado. Ca...
Page 95 - Sugerencias de Secado; Guía del Tiempo de Secado
33 OPERACIÓN ESPAÑOL Ciclos Especiales/ Características Luego de haber seleccionado el ciclo, presione los botones para seleccionar características adicionales para su carga. Retrasar lavado Una vez ha seleccionado el ciclo y otros ajustes, presione este botón para retrasar el inicio del ciclo de la...
Page 96 - Configuración; Bloqueo infantil; Bloqueando el Panel de Control; Inicio remoto; Utilizando el Inicio remoto
34 OPERACIÓN Configuración Deslice la pantalla hacia abajo para abrir la pantalla Configuración. Seleccione Más ajustes para mostrar el menú entero de Configuraciones. Bloqueo infantil Esta opción deshabilita los controles y puede impedir que los niños cambien de ciclos o utilicen la máquina. La fun...
Page 97 - Cambiando las Cantidades Dispensadas
35 OPERACIÓN ESPAÑOL X Dispensación automática Utilice este botón para configurar y controlar la función Dispensador Automático. • Cuando la Alarma de Recarga esté activada, ésta enviará un mensaje cuando el detergente o el suavizante necesite recargarse. • La configuración por defecto dispensará au...
Page 98 - Emparejado de la lavadora
36 OPERACIÓN Emparejado de la lavadora (Opcional) Seleccione ésta opción para (des)emparejar la Lavadora principal y Minilavadora. • La opción se encuentra disponible cuando la Lavadora principal se utiliza con la Minilavadora. 1 Presione el botón Encendido. 2 Deslícese por el menú hasta la pantalla...
Page 99 - Cambiando entre Lavadora principal; Manual de usuario
37 OPERACIÓN ESPAÑOL Cambiando entre Lavadora principal y Minilavadora Cuando la Lavadora Principal y la Minilavadora se encuentren emparejadas, esta función le permitirá cambiar los controles entre ambas. Deslícese hacia abajo para abrir la pantalla Configuración y seleccionar Lavadora principal o ...
Page 100 - Descargar programas; Descargar programas a través de la; Descargando Ciclos Directamente; Borrando un Ciclo Descargado
38 OPERACIÓN Descargar programas Esta función le permite descargar ciclos nuevos y especializados que no están incluidos en los ciclos estándar del dispositivo.El dispositivo debe estar conectado a Internet a través de una red Wi-Fi doméstica para descargar ciclos. Descargar programas a través de la...
Page 101 - FUNCIONES INTELIGENTES; FUNCIONES; Aplicación LG ThinQ; Cómo instalar la aplicación LG ThinQ; Especificaciones de Módulo LAN
39 FUNCIONES INTELIGENTES ESPAÑOL FUNCIONES INTELIGENTES Aplicación LG ThinQ La aplicación LG ThinQ le permite comunicarse con el electrodoméstico usando un teléfono inteligente. Cómo instalar la aplicación LG ThinQ Busque la aplicación LG ThinQ en la tienda Google Store o Apple Store desde un teléf...
Page 103 - Función Smart Diagnosis TM; Uso de LG ThinQ para diagnosticar
41 FUNCIONES INTELIGENTES ESPAÑOL Función Smart Diagnosis ™ (Diagnóstico Inteligente) Esta característica solo está disponible en el modelo con el logo o .Utilice esta función como ayuda para diagnosticar y resolver problemas con su electrodoméstico. NOTA • Por motivos no atribuibles a la negligenci...
Page 104 - Limpieza Regular; Cuidado Después del Lavado; Ciclo de Limpieza de la cuba
42 MANTENIMIENTO MANTENIMIENTO ADVERTENCIA Para reducir el riesgo de incendios, descargas eléctricas o lesiones a personas, lea y siga todo el manual del usuario, incluyendo las Instrucciones Importantes de Seguridad. • Desconecte la lavadora previo a su limpieza para evitar el riesgo de una descarg...
Page 105 - Alerta Automática para Limpieza de la cuba
43 MANTENIMIENTO ESPAÑOL Limpiador Instrucciones Limpiador de Tina Colóquelo directamente dentro del tambor de la lavadora. Limpiador AnticalBlanqueador líquido con cloroLimpiador en polvoTabletas de limpieza NOTA • Nunca cargue la lavadora mientra utiliza la Limpieza de la cuba. El lavado podría da...
Page 106 - Limpiando el Sello de la
44 MANTENIMIENTO Limpiando el Sello de la Puerta Limpie el sello de la puerta frecuentemente (una vez a la semana) para prevenir la acumulación de polvo. 1 Utilice guantes de goma y lentes protectores. 2 Diluya 3/4 de tasa (177 ml) de cloro líquido en 1 galón (3.8 L) de agua. Limpiando los Filtros d...
Page 107 - Limpiando el Filtro de la
45 MANTENIMIENTO ESPAÑOL Limpiando el Filtro de la Bomba de Drenaje La lavadora falla al drenar si el filtro de la bomba de drenaje está obstruido. Limpie periódicamente el filtro de drenaje para prevenir que este se obstruya con objetos extraños. ADVERTENCIA • Si hay agua en el tambor de la lavador...
Page 108 - Limpiando el Compartimiento
46 MANTENIMIENTO Limpiando el Compartimiento de Dispensación Automática Limpie el compartimiento de dispensación automática previo a rellenarlo o si el detergente o el suavizante se ha endurecido debido a la falta de uso. 1 Presione el círculo para abrir la cubierta inferior, como se ve más abajo. 2...
Page 109 - Cuidado en Climas Fríos; Almacenando la Lavadora; Cuando la Línea de Agua está
47 MANTENIMIENTO ESPAÑOL Cuidado en Climas Fríos Almacenando la Lavadora Si la lavadora no se utilizará por un largo período de tiempo y está en un área que puede estar expuesta a temperaturas bajo cero, siga los siguientes pasos para protegerla de cualquier daño. 1 Cierre el suministro de agua. 2 D...
Page 110 - RESOLUCIÓN DE PROBLEMAS; Preguntas Frecuentes
48 RESOLUCIÓN DE PROBLEMAS RESOLUCIÓN DE PROBLEMAS Preguntas Frecuentes P: Por qué mi lavadora hace ruidos fuertes mientras se está llenando de agua? R: Esto es un problema con la fontanería de su hogar. Puede que las pipas en su hogar se muevan cuando la válvula en la lavadora se apaga, resultando ...
Page 111 - Antes de Llamar a Servicio; Ruidos que Puede Escuchar
49 RESOLUCIÓN DE PROBLEMAS ESPAÑOL Antes de Llamar a Servicio La lavadora está equipada con un sistema automático de detección de errores para detectar y diagnosticar problemas en una etapa temprana. Si la lavadora no funciona correctamente o no funciona en absoluto, compruebe lo siguiente antes de ...
Page 112 - Operación
50 RESOLUCIÓN DE PROBLEMAS Operación Problema Posible Causa Solución Fuga de agua La conexión de la manguera de entrada está floja en el grifo o la lavadora. Revise que no hayan fugas, rajaduras o fracturas en las mangueras. Revise y apriete las conexiones de la manguera. Las pipas del drenaje del h...
Page 115 - Rendimiento
53 RESOLUCIÓN DE PROBLEMAS ESPAÑOL Rendimiento Problema Posible Causa Soluciones Arrugamiento El lavado no se retiró pronto. Siempre retire los artículos de la lavadora en cuanto el ciclo haya sido completado. Lavadora sobrecargada. La lavadora puede estar llena, pero el tambor no debe quedar satura...
Page 116 - Códigos de Error
54 RESOLUCIÓN DE PROBLEMAS Códigos de Error Código de Error Posible Causa Soluciones La lavadora se llena de agua muy lentamente, no lo hace en absoluto, o [IE] Los grifos de suministro de agua no están completamente abiertos. Asegúrese de que los grifos de agua estén completamente abiertos. Las man...
Page 124 - Para dudas o comentarios, visite
Centro de Información al Cliente LG Registre su producto en línea! www.LGSIGNATURE.com Para dudas o comentarios, visite www. LGSIGNATURE.com o llame al: 1-800-984-6306 U.S.A.


 LG F10B8LD0
Manual
LG F10B8LD0
Manual
 LG F10B8QD
Manual
LG F10B8QD
Manual
 LG F1443KDS
Manual
LG F1443KDS
Manual
 LG F4J6VN0W
Manual
LG F4J6VN0W
Manual
 LG F80B8MD
Manual
LG F80B8MD
Manual
 LG FH2C3WD
Manual
LG FH2C3WD
Manual
 LG FH2H3WDS2
Manual
LG FH2H3WDS2
Manual
 LG SWWE50N3
User Manual
LG SWWE50N3
User Manual
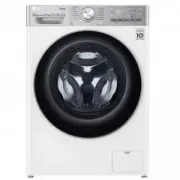 LG TW4V9RD9E
Manual
LG TW4V9RD9E
Manual
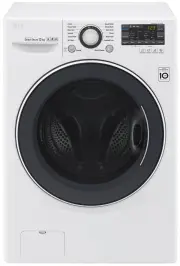 LG WD1013NDW
User Manual
LG WD1013NDW
User Manual
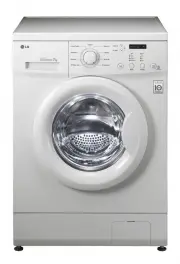 LG WD1200D
User Manual
LG WD1200D
User Manual
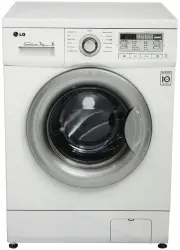 LG WD12021D6
User Manual
LG WD12021D6
User Manual
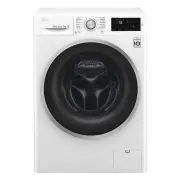 LG WD1207NCW
User Manual
LG WD1207NCW
User Manual
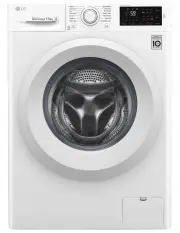 LG WD1275TC5W
User Manual
LG WD1275TC5W
User Manual
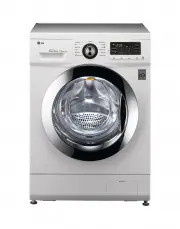 LG WD14022D6
User Manual
LG WD14022D6
User Manual
 LG WD14023D6
User Manual
LG WD14023D6
User Manual
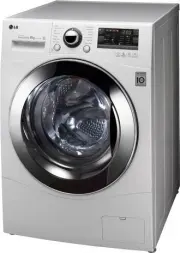 LG WD14024D6
User Manual
LG WD14024D6
User Manual
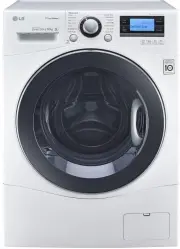 LG WD14071SD6
User Manual
LG WD14071SD6
User Manual
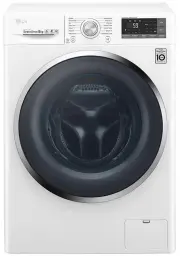 LG WD1408NCW
User Manual
LG WD1408NCW
User Manual