LG LSCG366ST - Manuals
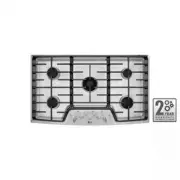
User Manual LG LSCG366ST


Summary
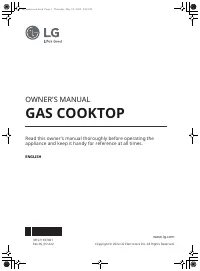
2 I N S TA L L AT I O N I N S T R U C T I O N S INSTALLATION SAFETY INSTRUCTIONS BEFORE YOU BEGIN Read these instructions completely and carefully. Installation of this cooktop must conform with local codes, or in the absence of local codes, with the National Fuel Gas Code, ANSI Z223.1/NFPA.54, late...
3 ENGLISH IN THE COMMONWEALTH OF MASSACHUSETTS PREPARING FOR INSTALLATION FOR YOUR SAFETY • This product must be installed by a licensed plumber or gas fitter. • When using ball type gas shut-off valves, they shall be the T-handle type. • A flexible gas connector, when used, must not exceed 3 feet i...
4 IMPORTANT: Remove all packing material and literature before connecting gas and electrical supply. • Have your cooktop installed by a qualified installer.• Your cooktop must be electrically grounded in accordance with local codes or, in the absence of local codes, in accordance with the National E...
LG Hobs Manuals
-
 LG CBGS3028S
User Manual
LG CBGS3028S
User Manual
-
LG CBGS3628S
User Manual
-
 LG HU641BAG
User Manual
LG HU641BAG
User Manual
-
 LG HU641DAG
User Manual
LG HU641DAG
User Manual
-
 LG LSCE305ST
User Manual
LG LSCE305ST
User Manual
-
 LG CBGJ3023D
User Manual
LG CBGJ3023D
User Manual
-
 LG CBGJ3023S
User Manual
LG CBGJ3023S
User Manual
-
 LG CBGJ3027S
User Manual
LG CBGJ3027S
User Manual
-
 LG CBGJ3623D
User Manual
LG CBGJ3623D
User Manual
-
 LG CBGJ3623S
User Manual
LG CBGJ3623S
User Manual
-
 LG CBGJ3627S
User Manual
LG CBGJ3627S
User Manual
-
 LG CBGS3028N
User Manual
LG CBGS3028N
User Manual
-
 LG CBGS3628N
User Manual
LG CBGS3628N
User Manual
-
 LG CBIH3013BE
User Manual
LG CBIH3013BE
User Manual
-
 LG CBIH3613BE
User Manual
LG CBIH3613BE
User Manual
-
 LG CBIS3618BE
User Manual
LG CBIS3618BE
User Manual
-
 LG LCE3010SB
User Manual
LG LCE3010SB
User Manual
-
 LG LCE3081ST
User Manual
LG LCE3081ST
User Manual
-
LG LCE3081ST
Manual