Page 2 - Warning
DLP PROJECTOR DLP PROJECTOR This projector complies with EMC Directive and R&TTE Directive. AT DE DK ES FI FR GB IT NL PL PT SE Warning - Class B (b) For a Class B Digital device or peripheral, the instructions furnished the user shall include the fol- lowing or similar statement, placed in a pr...
Page 3 - Contents; Installing and Composition; What do I do if the FM receiving signal is not good?; USB
Contents 3 Contents Disposal of your old appliance 1. When this crossed-out wheeled bin symbol is attached to a product it means the product is covered by the European Directive 2002/96/EC. 2. All electrical and electronic products should be disposed of separately from the municipal waste stream via...
Page 4 - Safety Instructions; Indoor Installation; Power; WARNING; Indoor Installation; NOTES
Safety Instructions 4 Safety Instructions Please take note of the safety instructions to prevent any potential accident or misuse of the projector. ● Safety Instructions are given in two forms as detailed below. WARNING : The violation of this instruction may cause serious injuries and even death. N...
Page 5 - Using; CAUTION concerning the Power Cord
Safety Instructions 5 Using WARNING If water is spilt into the projector unplug it from the power supply immediately and consult your Service Agent. This may cause an electric shock hazard or damage to the unit! Dispose of used batteries care- fully and safely. In the case of a battery being swal- l...
Page 7 - Names of parts; Main Body
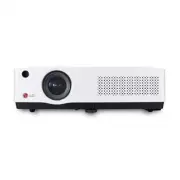
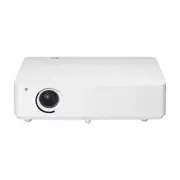
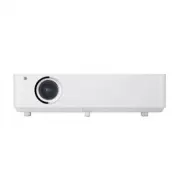
Speaker Air Outlet Names of parts 7 Names of parts Main Body * The projector is manufactured using high-precision technology. You may, however, see on the Projector screen tiny black points and/or bright points (red, blue, or green). This can be a normal result of the manufacturing process and does ...
Page 8 - Connecting Part
Names of parts 8 Connecting Part USB Headphone port IR (Remote control sensor) * Do not block the IR port for normal operation of remote control. * When using HDMI/USB connector at the same time, if the size of the jack connecting to the connector is too big, they may not be connected together. Plea...
Page 9 - CAUTION
Names of parts 9 Remote Control Installing Batteries INPUT Button KEYSTONE +, - Button MENU Button USB control Buttons AUTO Button VOLUME +, - Button CAUTION RISK OF EXPLOSION IF BATTERY IS REPLACED WITH AN INCORRECT TYPE. DISPOSE OF USED BATTERIES ACCORDING TO THE INSTRUCTIONS. MUTE Button RETURN B...
Page 10 - Accessories
Names of parts 10 Ceiling mount for projector Accessories Optional Extras * Contact your dealer to purchase these items. * Optional parts can be changed without notice to improve the quality of the product, and new optional parts can be added. ▪ Use a remote control up to 6 meters distance and 30 de...
Page 11 - Provide proper ventilation for this projector.; Installation Precautions
Installing and Composition 11 Installing and Composition Provide proper ventilation for this projector. • The projector is equipped with ventilation holes(intake) on the bottom and ventilation holes(exhaust) on the front. Do not block or place anything near these holes. Internal heat build-up may oc...
Page 12 - determines the actual size of the image.; projection distance based on the picture format; Basic Operation of the Projector
Installing and Composition 12 1. Place the projector on a sturdy and horizontal surface with the PC or AV source.2. Place the projector with the desired distance from the screen. The distance between the projector and the screen determines the actual size of the image. 3. Position the projector so t...
Page 13 - Kensington Security System
Installing and Composition 13 • This projector has a Kensington Security System Connector on the side panel. Connect the Kensington Security System cable as below. • For the detailed installation and use of the Kensington Security System, refer to the user’s guide included with the Kensington Securi...
Page 14 - Selecting input mode; Input List; Component; Turning on the Projector
Installing and Composition 14 Selecting input mode 1. Press the INPUT button on the top cover or the INPUT button on the remote control. 2. Selecting an input signal with the INPUT button will only change the projector only to connected inputs. You can change it to any inputs with the < , > button. ...
Page 15 - Connection; Connecting to a Desktop PC; * Refer to page 39 for resolutions the projector supports.; RGB IN; * You may have to change the resolution that your PC exports to; Connecting to a Video Source; VIDEO IN
Connection 15 Connection Connecting to a Desktop PC * You can connect the projector to a computer with VGA, SVGA, XGA, SXGA output. * Refer to page 39 for resolutions the projector supports. < How to connect > 1. Connect the RGB IN of the projector and the computer output port with a computer ...
Page 16 - Connecting to a DVD Player; * When connecting the component cable, match the jack colors
Connection 16 Connecting to a DVD Player < How to connect a Component source > 1. After connecting the Component cable of DVD Player to the RGB to Component cable, connect it to the RGB IN terminal of the projector. * When connecting the component cable, match the jack colors with the componen...
Page 17 - PICTURE Menu Options; Adjusting Picture Mode; Function; Picture mode
Function 17 PICTURE Menu Options 1. Press the MENU button. Then, move to PICTURE with the ∧ , ∨ , < , > buttons and press the ◉ OK button. 2. Press the ∧ , ∨ buttons to move to a desired function and press the ◉ OK button. 3. Press the < , > buttons to make a desired adjustment and then press the ◉ ...
Page 18 - Advanced Control Function; Picture Reset Function
Function 18 1. Press the MENU button. Then, move to PICTURE with the ∧ , ∨ , < , > buttons and press the ◉ OK button. 2. Press the ∧ , ∨ buttons to move to Advanced Control and press the ◉ OK button. 3. Move to a desired item with the ∧ , ∨ buttons. 4. Press the < , > buttons to make a desired adjus...
Page 20 - SCREEN Menu Options; To Change PJT Mode; Using Keystone Function
Function 20 SCREEN Menu Options 1. Press the MENU button. Then, move to SCREEN with the ∧ , ∨ , < , > buttons and press the ◉ OK button. 2. Press the ∧ , ∨ buttons to move to PJT Mode and press the ◉ OK button. 3. Move to a desired item with the ∧ , ∨ buttons and then press the ◉ OK button. • Select...
Page 21 - Using the Still Function; Auto Configure; Auto Configure Function
Function 21 1. Press the MENU button. Then, move to SCREEN with the ∧ , ∨ , < , > buttons and press the ◉ OK button. 2. Press the ∧ , ∨ buttons to move to RGB Config. and press the ◉ OK button. 3. Move to a desired item with the ∧ , ∨ buttons and then press the > button. 4. Press the ∧ , ∨ , < , > b...
Page 22 - AUDIO Menu Options; What is FM Wireless Audio?; Receiving range
Function 22 AUDIO Menu Options FM Wireless Audio is a function to send out audio signals from the projector using FM frequency (88.5 ~95.5 MHz). The frequency of Projector and FM receiver should be same in order to output the sound from FM receiver normally. The signal can be received by using FM re...
Page 23 - of receiving reception.; - If an obstacle is located near the projector and FM receiver.; Installing Instructions; • Please check the incoming audio signal.
Function 23 • If used in a medical institution, it may cause an error for medical equipments.Please do not use in a medical establishment. • Please maintain the distance between the projector and FM receiver within 1m. • The sound from FM receiver may not come out in the desired quality if the dista...
Page 26 - TIME Menu Options; OPTION Menu Options; Selecting Language
Function 26 * The sleep timer turns the projector off at the preset time. 1. Press the Q.MENU button on the remote control. 2. Press the ∧ , ∨ buttons to move to Sleep Timer . 3. Press the < , > buttons to select a desired preset time. • You can use this function through the MENU button. • To exit t...
Page 27 - Screen Capture Function
Function 27 1. Press the BLANK button on the remote control. • The screen turns off to a background color.• You can choose the background color. (Refer to ‘Selecting Blank image’ ) 2. Press any button to cancel the blank function. • To temporarily turn off the lamp, press BLANK on the remote control...
Page 28 - To adjust the brightness of the screen; To set the button light
Function 28 1. Press the MENU button. Then, move to OPTION with the ∧ , ∨ , < , > buttons and press the ◉ OK button. 2. Press the ∧ , ∨ buttons to move to Auto Power and press the ◉ OK button. 3. Press the ∧ , ∨ buttons to move to On and press the ◉ OK button. • On : Connecting DC cable to the proje...
Page 29 - INFORMATION Menu Options; To See The Projector Information
Function 29 Demo Mode Function Initial Setting Function INFORMATION Menu Options 1. Press the MENU button. Then, move to INFORMATION with the ∧ , ∨ , < , > buttons and press the ◉ OK button. 2. You can see the current information of the projector. • Press the MENU or RETURN button to exit the menu s...
Page 30 - To use the USB device; Connecting the USB device; Eject USB; Eject USB
Q-Menu Close 16:9 Off Aspect RatioPicture ModeSleep Timer Eject USB USB 30 * When you connect a USB device, this screen is displayed, automatically. In USB device, you can not add a new folder or delete the existing folder. ► Only a USB storage device is recognizable. Digital camera and mobile phone...
Page 31 - PHOTO List; • Unsupported file may appear as bitmap format.; Screen Components; photo
USB 31 PHOTO List * It is available to playback the photo file(*.jpg) in the USB device. The On Screen Display may be different from your set. Images are an example to assist with the projector operation. Supported photo file: *.JPG • You can play JPG files only.• Only baseline scan is supported amo...
Page 32 - Full Screen Menu
USB 32 Full Screen Menu 1. Press the USB button. Then, move to PHOTO LIST with the < , > buttons and press the ◉ OK button. 2. Press the ∧ , ∨ , < , > buttons to move to desired photo and press the ◉ OK button. 3. Press the ∧ , ∨ buttons to move to View and press the ◉ OK button. 4. The selected pho...
Page 33 - MUSIC List; The On Screen Display on your model may be slightly different.; the selected folder; MUSIC LIST; Bit rate range 8Kbps ~ 320Kbps
USB 33 MUSIC List * You can use the Music List menu to play MP3 files form a USB storage device. The On Screen Display on your model may be slightly different. Screen Components 1. Moves to upper level file2. Preview: Display the title/folder name of the music in the selected folder 3. Current page/...
Page 34 - Music Selection and Popup Menu
USB 34 Music Selection and Popup Menu 1. Press the USB button. Then, move to MUSIC LIST with the < , > buttons and press the ◉ OK button. 2. Press the ∧ , ∨ , < , > buttons to move to a desired music file and press the ◉ OK button. 3. Move to a desired item with the ∧ , ∨ buttons and then press the ...
Page 35 - MOVIE List; Supported Movie File; MOVIE LIST; Dolby
USB 35 MOVIE List * The movie list is activated once USB is detected. It is used when playing movie files on projector. Extension name Video Codec Maximum Resolution supported Frame Audio Codec Explanation AVI m4v Divx MPEG4 720X480 800X432 30P AC3 • Bit rate range 32Kbps ~ 640Kbps • Sampling rate 3...
Page 36 - Movie Selection and Popup Menu
USB 36 1. Moves to upper level folder2. Preview: Display the title/folder name of the movie in the selected folder 3. Current page/Total pages4. Total number of marked movies5. Corresponding buttons on the remote control Up Folder Duration Title Page 1/1 No Marked MOVIE LIST 704 x 396 668 MB Movie U...
Page 37 - Subtitle Language Group
USB 37 Option Menu Selection Playing the Movie 1. Press the USB button. Then, move to MOVIE LIST with the < , > buttons and press the ◉ OK button. 2. Press the ∧ , ∨ , < , > move to a desired movie file and press the ◉ OK button. 3. Press the ∧ , ∨ buttons to move to Play and press the ◉ OK button. ...
Page 39 - Signal; Information; Supported Monitor Display
Information 39 * The following table lists the display formats supported by the projector. * If the projector does not support the input signal, “Out of Range” message appears on the screen. * The projector supports DDC1/2B type as Plug & Play function. (Auto recognition of PC monitor) * PC sync...
Page 40 - Cleaning the lens; pass through the lens if the product is sprayed on lens directly.; Cleaning the Projector Case; unplug the projector first.; Maintenance
Information 40 Cleaning the lens If there is any dust or stain on the surface of the lens, you must always clean the lens. Use an air spray or cleaning cloth for prod- uct exterior, provided with the product, to lightly clean the product. Please use a recommended air spray or lens cleaning product. ...
Page 41 - How To Attach The Lens Cap To The Projector
Information 41 1 Find the lens cap and the strap that were sup- plied as accessories. 2 Insert the non-knot end of the strap into the hole at the bottom of the lens section of the projector. 3 Attach the strap at the hole of the projector into the hole of the lens cap, and then pass the lens cap thr...
Page 42 - Memo
Page 43 - Operating Condition; Channel Spacing : 200KHz; Specifications
Information 43 MODEL HS200 (HS200-JE) / HS200G (HS200G-JE) HS201 (HS201-JE) / HS201G (HS201G-JE) Resolution 800(Horizontal) x 600(Vertical)pixel Horizontal / Vertical Ratio 4:3(horizontal:vertical) Panel size 0.55 inches Screen size (Projection distance) 0.44 ~ 2.41m(15 ~ 80 inches) Projection Offse...
Page 44 - MODEL; LG Customer Information Center; CANADA
The model and serial number of the projector is located on the back or one side of the projector. Record it below should you ever need service. MODEL SERIAL LG Customer Information Center 1-800-243-00001-888-865-30261-888-542-2623 USA, Consumer User USA, Commercial User CANADA


 LG HU715QW
User Manual
LG HU715QW
User Manual
 LG PW800G
User Manual
LG PW800G
User Manual
 LG AF115
User Manual
LG AF115
User Manual
 LG AU810PB
User Manual
LG AU810PB
User Manual
 LG BD450
User Manual
LG BD450
User Manual
 LG BF50NST
User Manual
LG BF50NST
User Manual
 LG BF50RG
User Manual
LG BF50RG
User Manual
 LG BF60PST
User Manual
LG BF60PST
User Manual
 LG BG630
User Manual
LG BG630
User Manual
 LG BG650
User Manual
LG BG650
User Manual
 LG BU50NST
User Manual
LG BU50NST
User Manual
 LG BU50RG
User Manual
LG BU50RG
User Manual
 LG BU53PST
User Manual
LG BU53PST
User Manual
 LG BU53RG
User Manual
LG BU53RG
User Manual
 LG BU60PST
User Manual
LG BU60PST
User Manual
 LG BU70QGA
User Manual
LG BU70QGA
User Manual
 LG BX327
User Manual
LG BX327
User Manual