LG GTC0N - Manuals
User Manual LG GTC0N


Summary
Safety Instructions 11 CAUTION: The laser used in the writer can damage your eyes. Do not attempt to open the cover. To reduce the risk of electric shock, do not remove the cover (or back). There are no user-serviceable parts inside. Refer servicing to qualified service personnel. Use of controls or...
2 Contents CAUTION: CLASS 3B VISIBLE AND INVISIBLE LASER RADIATION WHEN OPEN AND INTERLOCKS DEFEATED.AVOID EXPOSURE TO THE BEAM. CLASS 1 LASER PRODUCT Safety Instructions 1 Introduction 3Using the Drive 4 Drive Connectors 7 Troubleshooting 8 Specifications 10 Information in this document is subject ...
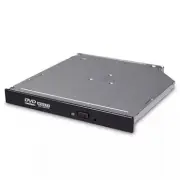
3 Introduction Drive Description This drive reads and writes to CD and DVD media. Features of the Drive • 12.7mm height internal slim Super Multi DVD Drive. • CD-R/RW, DVD-R/-R DL/ -RW/ +R/ +R DL/ +RW, DVD-RAM read and write compatible. • CD Family and DVD-ROM read compatible. • Active OPC (Running ...
LG Drives Manuals
-
 LG 177722-672
User Manual
LG 177722-672
User Manual
-
LG 191843-632
User Manual
-
LG 191843-680
User Manual
-
 LG 26K5382
User Manual
LG 26K5382
User Manual
-
LG 5185-1737
User Manual
-
LG 97P3694
User Manual
-
 LG AP70NS50
User Manual
LG AP70NS50
User Manual
-
 LG BE06LU10
User Manual
LG BE06LU10
User Manual
-
LG BE06LU10
Manual
-
 LG BE06LU11
User Manual
LG BE06LU11
User Manual
-
LG BE06LU11
Manual
-
 LG BE08LU20
User Manual
LG BE08LU20
User Manual
-
 LG BE12LU38
User Manual
LG BE12LU38
User Manual
-
 LG BE14NU40
User Manual
LG BE14NU40
User Manual
-
 LG BE16NU50
User Manual
LG BE16NU50
User Manual
-
 LG BH08LS20
User Manual
LG BH08LS20
User Manual
-
 LG BH10LS30
User Manual
LG BH10LS30
User Manual
-
 LG BH12LS30
User Manual
LG BH12LS30
User Manual
-
 LG BH12LS35
User Manual
LG BH12LS35
User Manual
-
 LG BH12LS38
User Manual
LG BH12LS38
User Manual