Page 2 - TABLE OF CONTENTS
2 TABLE OF CONTENTS 3 PRODUCT FEATURES 4 SAFETY INSTRUCTIONS 5 IMPORTANT SAFETY INSTRUCTIONS 9 PRODUCT OVERVIEW 9 Parts9 Accessories 10 INSTALLATION 10 Installation Overview10 Product Specifications11 Installation Location Requirements12 Clearances14 Leveling the Dryer15 Reversing the Door (DLEX4200...
Page 3 - PRODUCT FEATURES; Easy-Access Reversible Door; Flow SenseTM Duct Blockage Sensing System Indicator; Smart DiagnosisTM
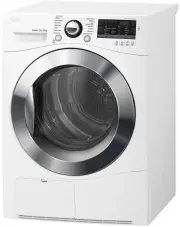
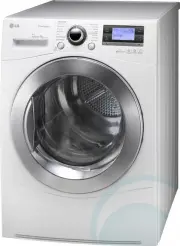
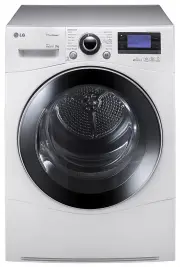
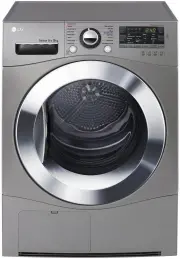
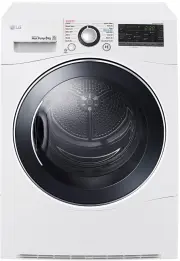
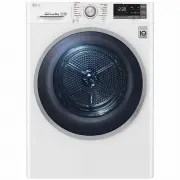
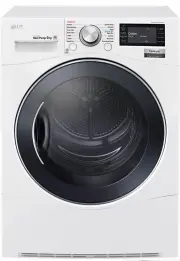
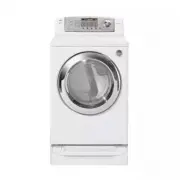
3 PRODUCT FEATURES ENGLISH PRODUCT FEATURES Easy-to-Use Control Panel Rotate the cycle selector knob to select the desired dry cycle. Add cycle options or adjust settings with the touch of a button. Easy-Access Reversible Door The wide-opening door provides easy access for loading and unloading. The...
Page 4 - SAFETY INSTRUCTIONS; READ ALL INSTRUCTIONS BEFORE USE; Your safety and the safety of others are very important.; WARNING; WARNING; WARNING
4 SAFETY INSTRUCTIONS SAFETY INSTRUCTIONS READ ALL INSTRUCTIONS BEFORE USE Your safety and the safety of others are very important. We have provided many important safety messages in this manual and on your appliance. Always read and follow all safety messages. This is the safety alert symbol. This ...
Page 5 - INSTALLATION
5 SAFETY INSTRUCTIONS ENGLISH IMPORTANT SAFETY INSTRUCTIONS WARNING To reduce the risk of explosion, fire, death, electric shock, scalding or injury to persons when using this product, follow basic precautions, including the following: INSTALLATION • Before use, the appliance must be properly instal...
Page 6 - OPERATION
6 SAFETY INSTRUCTIONS • Place the dryer at least 18 inches above the floor for a garage installation. • Do not use sheet metal screws or other fasteners which extend into the duct that could catch lint and reduce the efficiency of the exhaust system. Secure all joints with duct tape. • Use only rigi...
Page 8 - MAINTENANCE; Fire Hazard; SAVE THESE INSTRUCTIONS
8 SAFETY INSTRUCTIONS MAINTENANCE • Do not repair or replace any part of the appliance. All repairs and servicing must be performed by qualified service personnel unless specifically recommended in this Owner’s Manual. Use only authorized factory parts. • Do not disassemble or repair the appliance b...
Page 9 - PRODUCT OVERVIEW; Parts
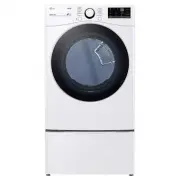
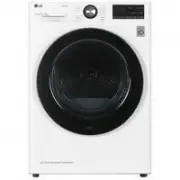
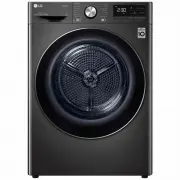
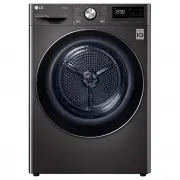
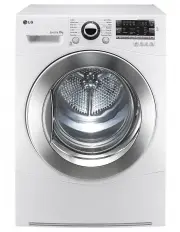
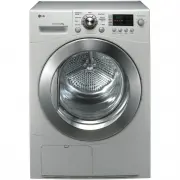
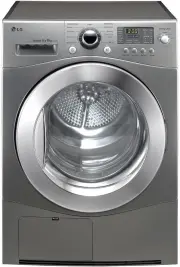
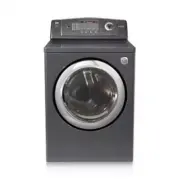
9 PRODUCT OVERVIEW ENGLISH PRODUCT OVERVIEW Parts DLEX4200*, DLGX4201*, DLEX4000*, DLGX4001*, DLE3600*, DLG3601* DLEX4500*, DLGX4501* Control panel Reversible door Leveling feet Lint filter Control panel Reversible door Leveling feet Lint filter Gas connection (gas models) Exhaust Duct Outlet Power ...
Page 10 - Installation Overview
10 INSTALLATION INSTALLATION Installation Overview Please read the following installation instructions first after purchasing this product or transporting it to another location. Check and choose the proper location Level the dryer Vent the dryer Product Specifications The appearance and specificati...
Page 11 - Installation Location Requirements
11 INSTALLATION ENGLISH Installation Location Requirements WARNING • Read all installation instructions completely before installing and operating your dryer. It is important that you review this entire manual before installing and using your dryer. Detailed instructions concerning electrical connec...
Page 12 - Clearances; Installation Spacing for Recessed Area or Closet Installation
12 INSTALLATION Clearances 1"* (25 mm) 14" max.* (356 mm) 18" min.* (457 mm) 14" max.* (356 mm) 18" min.* (457 mm) 30 - 30 1/8" (761 - 765mm) 5"** (127 mm) 1"* (25 mm) 30 - 30 1/8" (761 - 765mm) 5"** (127 mm) 24 in. 2* (155 cm 2 ) 2* (310 cm 2 ) 3" * (76 m...
Page 14 - Leveling the Dryer
14 INSTALLATION Leveling the Dryer NOTE • Adjust the leveling feet only as far as necessary to level the dryer. Extending the leveling feet more than necessary may cause the dryer to vibrate. • To ensure that the dryer provides optimal drying performance, it must be level. To minimize vibration, noi...
Page 15 - Reversing the Door; Tools Required; Door Reversal Instructions
15 INSTALLATION ENGLISH Reversing the Door (DLEX4200*, DLGX4201*, DLEX4000*,DLGX4001*, DLE3600*, DLG3601*) Tools Required • Phillips screwdriver • Large flat blade screwdriver (recommended for hinge screws if they are tight or your Phillips screwdriver is worn) • Small flat blade screwdriver (for li...
Page 18 - Installing the Side Vent Kit; Option 1: Side Venting
18 INSTALLATION Installing the Side Vent Kit WARNING To reduce the risk of serious injury, death or property damage, follow basic precautions, including the following: • Use long-sleeved gloves and safety glasses. • Use a heavy metal vent. • Do not use plastic or thin foil ducts. • Clean old ducts b...
Page 19 - Stacking the Dryer; Stacking Kit Installation
19 INSTALLATION ENGLISH Stacking the Dryer Stacking Kit Installation This stacking kit includes: • Two (2) side rails • One (1) front rail • Four (4) screws Tools Needed for Installation: • Phillips screwdriver WARNING To reduce the risk of electrical shock, fire, explosion, property damage, serious...
Page 20 - Venting the Dryer; Ductwork
20 INSTALLATION Venting the Dryer WARNING To reduce the risk of fire or explosion, electric shock, property damage, injury to persons or death when using this appliance, follow basic safety precautions, including the following: • Do not crush or collapse ductwork. • Do not allow ductwork to rest on ...
Page 21 - Routing and Connecting Ductwork; Correct Venting
21 INSTALLATION ENGLISH Routing and Connecting Ductwork NOTE Follow the guidelines below to maximize drying performance and reduce lint buildup and condensation in the ductwork. Ductwork and fittings are NOT included and must be purchased separately. • Use 4-inch (10.2 cm) diameter rigid, semi-rigid...
Page 22 - Connecting the Inlet Hose
22 INSTALLATION Connecting the Inlet Hose (Steam Models) The dryer must be connected to the cold water tap using the new water supply hose. Do not reuse old hoses. 1 Check the rubber seal at each end of the inlet hoses. Two ru ber seals are supplied with each inlet hose. They are used for preventing...
Page 23 - Connecting Gas Dryers; Electrical Requirements for Gas; Gas Supply Requirements; Connecting the Gas Supply
23 INSTALLATION ENGLISH Connecting Gas Dryers WARNING To reduce the risk of fire or explosion, electric shock, property damage, injury to persons, or death when using this appliance, follow requirements including the following: Electrical Requirements for Gas Models Only • Do not, under any circumst...
Page 24 - High-Altitude Installations
24 INSTALLATION NOTE • In the Commonwealth of Massachusetts: This product must be installed by a licensed plumber or gas fitter. When using ball-type gas shut off valves, they shall be T-handle-type. A flexible gas connector, when used, must not exceed 3 feet. This dryer is configured from the facto...
Page 25 - Connecting Electric Dryers; Electrical Requirements for
25 INSTALLATION ENGLISH Connecting Electric Dryers WARNING To reduce the risk of fire or explosion, electric shock, property damage, injury to persons, or death when using this appliance, follow requirements including the following: Electrical Requirements for Electric Models Only • The wiring and g...
Page 27 - Four-Wire Direct Wire
27 INSTALLATION ENGLISH Four-Wire Direct Wire • A UL-listed strain relief is required. • Use UL-listed 4-wire #10 AWG- minimum copper conductor cable. Allow at least 5 ft. (1.5 m) of wire to allow for removal and reinstallation of the dryer. 1 Remove 5-inch (12.7 cm) of the outer covering from the w...
Page 28 - Three-Wire Power Cord
28 INSTALLATION Three-Wire Power Cord • A 3-wire connection is NOT permitted on new construction after January 1, 1996. • A UL-listed strain relief is required. • Use a 30-amp, 240-volt, 3-wire, UL-listed power cord with #10 AWG- minimum copper conductor and closed loop or forked terminals with uptu...
Page 29 - Three-Wire Direct Wire
29 INSTALLATION ENGLISH Three-Wire Direct Wire • A 3-wire connection is NOT permitted on new construction after January 1, 1996. • A UL-listed strain relief is required. • Use UL-listed 3-wire, #10 AWG- minimum copper conductor cable. Allow at least 5 ft. (1.5 m) length to allow for removal and inst...
Page 30 - Final Installation Check; Testing Dryer Heating
30 INSTALLATION Final Installation Check Once you have completed the installation of the dryer and it is in its final location, confirm proper operation with the following tests and Installation Test (Duct Check). Testing Dryer Heating GAS MODELS Close the dryer door and press the Power button to tu...
Page 32 - Restricted or Blocked Airflow; Error Codes
32 INSTALLATION Restricted or Blocked Airflow Avoid long runs or runs with multiple elbows or bends. Excess or crushed transition duct Too many elbows or exhaust too long Check for blockages and lint buildup. Lint buildup or blockage Make sure the ductwork is not crushed or restricted. Crushed or da...
Page 33 - Using the Dryer
33 OPERATION ENGLISH OPERATION WARNING • To reduce the risk of fire, electric shock, or injury to persons, read the SAFETY INSTRUCTIONS before operating this appliance. Using the Dryer 1 2 3 4 5 6 Clean the Lint Filter If the lint filter has not already been cleaned, lift out the filter and remove t...
Page 34 - Check the Lint Filter Before; Sorting Laundry; Fabric Care Labels; Loading the Dryer
34 OPERATION Check the Lint Filter Before Every Load Always make sure the lint filter is clean before starting a new load; a clogged lint filter will increase drying time. To clean, pull the lint filter straight up and roll any lint off the filter with your fingers. Push the lint filter firmly back ...
Page 35 - Control Panel
35 OPERATION ENGLISH Control Panel Non-Steam Models (DLE3600 * , DLG3601 * ) Steam Models (DLEX4000 * , DLGX4001 * ) Steam Models (DLEX4200 * , DLGX4201 * , DLEX4500 * , DLGX4501 * ) NOTE • Model numbers can be found on the cabinet inside the door.
Page 38 - Cycle Guide; Sensor Dry Cycles; Manual Dry Cycles
38 OPERATION Cycle Guide Sensor Dry Cycles Sensor Dry cycles utilize LG’s unique dual sensor system to detect and compare the moisture level in clothes and in the air and adjust the drying time as needed to ensure superior results. The dryer automatically sets the dryness level and temperature at th...
Page 42 - Cycle Modifier Buttons; Option Buttons
42 OPERATION Cycle Modifier Buttons Sensor Dry cycles have preset settings that are selected automatically. Manual Dry cycles have default settings, but you may also customize the settings using the cycle modifier buttons. Press the button for that option to view and select other settings. Dry Level...
Page 43 - Special Functions; Control Lock; Drum Light; Steam Functions; The Steam SanitaryTM Cycle
43 OPERATION ENGLISH Special Functions Some cycle option buttons also activate secondary functions. These special functions are marked with an asterisk (*). Press and hold the option button marked with the special function to activate it. Control Lock Use this option to prevent unwanted use of the d...
Page 44 - The Steam Options
44 OPERATION The Steam Options The Reduce Static option injects steam late in the drying cycle to reduce the static electricity caused by dry fabrics rubbing together. NOTE • When Sensor Dry is selected with the Reduce Static option, the dry levels below Normal cannot be selected. • The Reduce Stati...
Page 45 - Steam Cycle Guide
45 OPERATION ENGLISH Steam Cycle Guide Steam Default Time Temp. Dry Level Fabric State Fabric Type Maximum Amount Steam Sanitary TM Turbo Steam 31 minutes High Dry Comforter Bedding Single (1 each) Children’s clothing 3 lbs. Steam Fresh TM Turbo Steam 10 minutes Med. High (between Medium and High) D...
Page 46 - SMART FUNCTIONS; LG ThinQ Application; Before Using LG ThinQ; Installing the LG ThinQ Application
46 SMART FUNCTIONS SMART FUNCTIONS LG ThinQ Application The LG ThinQ application allows you to communicate with the appliance using a smartphone. Before Using LG ThinQ 1 Use a smartphone to check the strength of the wireless router (Wi-Fi network) near the appliance.• If the distance between the app...
Page 47 - LG ThinQ Application Features; Using Remote Start
47 SMART FUNCTIONS ENGLISH LG ThinQ Application Features Dryer Cycle Download new and specialized cycles that are not included in the standard cycles on the appliance.Appliances that have been successfully connected can download a variety of specialty cycles specific to the appliance.Only one cycle ...
Page 48 - FCC RF Radiation Exposure Statement; Open Source Software Notice; FCC Notice
48 SMART FUNCTIONS FCC RF Radiation Exposure Statement This equipment complies with FCC radiation exposure limits set forth for an uncontrolled environment. This transmitter must not be co-located or operating in conjunction with any other antenna or transmitter.This equipment should be installed an...
Page 49 - Smart DiagnosisTM Function; Using LG ThinQ to Diagnose Issues
49 SMART FUNCTIONS ENGLISH Smart Diagnosis™ Function This feature is only available on models with the c or d logo. Use this feature to help you diagnose and solve problems with your appliance. NOTE • For reasons not attributable to LGE’s negligence, the service may not operate due to external facto...
Page 50 - Regular Cleaning
50 MAINTENANCE MAINTENANCE Regular Cleaning WARNING To reduce the risk of fire, electric shock, injury to persons, or death when using this appliance, follow basic precautions, including the following: • Unplug the dryer before cleaning. • Never use harsh chemicals, abrasive cleaners, or solvents to...
Page 51 - TROUBLESHOOTING; FAQs: Frequently Asked Questions
51 TROUBLESHOOTING ENGLISH TROUBLESHOOTING FAQs: Frequently Asked Questions Q: When I press a button, why does my dryer beep and then nothing happens? A: The Control Lock feature is turned on. To turn off Control Lock, turn the dryer on, then press and hold the button that has * Control Lock on or u...
Page 52 - Before Calling for Service; Operation
52 TROUBLESHOOTING Before Calling for Service This dryer is equipped with an automatic error-monitoring system to detect and diagnose problems at an early stage. If the dryer does not function properly or does not function at all, check the following before you call for service. Operation Problem Po...
Page 54 - Performance
54 TROUBLESHOOTING Performance Problem Possible Cause Solutions Greasy or dirty spots on clothes Fabric softener used incorrectly. • Confirm and follow the instructions provided with your fabric softener. Clean and dirty clothes are being dried together. • Use your dryer to dry only clean items. Soi...
Page 58 - WARRANTY
58 WARRANTY WARRANTY ARBITRATION NOTICE: THIS LIMITED WARRANTY CONTAINS AN ARBITRATION PROVISION THAT REQUIRES YOU AND LG TO RESOLVE DISPUTES BY BINDING ARBITRATION INSTEAD OF IN COURT, UNLESS YOU CHOOSE TO OPT OUT. IN ARBITRATION, CLASS ACTIONS AND JURY TRIALS ARE NOT PERMITTED. PLEASE SEE THE SECT...


 LG DC90V9V9W
Manual
LG DC90V9V9W
Manual
 LG DVH45-08W
User Manual
LG DVH45-08W
User Manual
 LG DVH5-08W
User Manual
LG DVH5-08W
User Manual
 LG DVH9-08B
User Manual
LG DVH9-08B
User Manual
 LG DVH9-09B
User Manual
LG DVH9-09B
User Manual
 LG DVH9-09W
User Manual
LG DVH9-09W
User Manual
 LG TD-C801H
User Manual
LG TD-C801H
User Manual
 LG TD-C8031E
User Manual
LG TD-C8031E
User Manual
 LG TD-C8035E
User Manual
LG TD-C8035E
User Manual
 LG TD-C80NPW
User Manual
LG TD-C80NPW
User Manual
 LG TDC901H
User Manual
LG TDC901H
User Manual
 LG TD-C902H
User Manual
LG TD-C902H
User Manual
 LG TD-C90NPE
User Manual
LG TD-C90NPE
User Manual
 LG TD-H802SJW
User Manual
LG TD-H802SJW
User Manual
 LG TD-H803CSW
User Manual
LG TD-H803CSW
User Manual
 LG TD-H901MW
User Manual
LG TD-H901MW
User Manual
 LG DLE0442G
User Manual
LG DLE0442G
User Manual
 LG DLE0442W
User Manual
LG DLE0442W
User Manual