Page 2 - What are Sensor Dr y and Time Dr y?
PRODUCT FEATURES TABLE OF CONTENTS 2 2 PART1 . SPECIFICATIONS ..................................................................................................................................................................................................................3 PART2 . IMPORTANT WARRANTY...
Page 3 - SPECIFICATIONS; Please refer to the rating label regarding detailed information.; ACCESSORIES
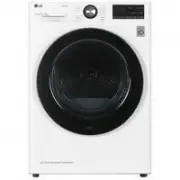
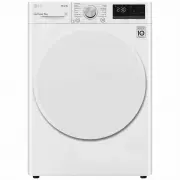
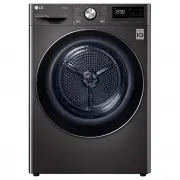
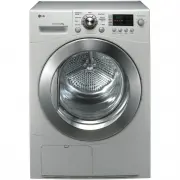
3 Part 1 SPECIFICATIONS ■ Type : Electric and Gas Dryer ■ Rating : Please refer to the rating label regarding detailed information. ■ Size : 27 x 29.9 x 38.7(inch) ■ Capacity : IEC 7.3cu.ft. (22.5 lb) ■ Weight : 126 Ibs (57.2 kg) Specifications are subject to change by manufacturer. ■ ACCESSORIES Dr...
Page 4 - Warranty Restriction:; coverage is effective for only 90 days.; IMPORTANT WARRANTY AND SAFETY INSTRUCTIONS; SEEKING WARRANTY ASSISTANCE
The Warranty for your Dryer is located at the end of this manual. Warranty Service isavailable by contacting your nearest LG Service Center. If this product is installed andoperated per this manual, LG will repair or replace any parts defective in material orworkmanship throughout the Warranty perio...
Page 5 - GROUNDING INSTRUCTIONS; IMPORTANT SAFETY INSTRUCTIONS
5 Part 2 IMPORTANT WARRANTY AND SAFETY INSTRUCTIONS 1) Read all instructions before using the appliance. 2) Do not dry articles that have come into contact with gasoline, dry-cleaning solvents, or other flammableor explosive substances, as they give off vapors thatcould ignite or explode. 3) Do not ...
Page 6 - • Keep flammable materials and vapors, such; WARNING
Part 2 6 IMPORTANT WARRANTY AND SAFETY INSTRUCTIONS • Do not try to light a match or cigarette, or turn on any gas or electrical appliance. • Do not touch any electrical switches. Do not use any phone in your building. • Clear the room, building or area of all occupants. • Immediately call your gas ...
Page 7 - INITIAL STEPS FOR INSTALLING YOUR DRYER; STEP 1; Positioning the Dryer.; Note
7 Part 3 INITIAL STEPS FOR INSTALLING YOUR DRYER The following instructions will help guide you through the initial steps of setting up your dryer for use.Please note that every section of this manual provides important information regarding the preparation anduse of your dryer, and it is important ...
Page 8 - STEP 2
8 Part 3 INITIAL STEPS FOR INSTALLING YOUR DRYER Once in position, adjust the leveling legs of the dryeruntil it is level from left to right and front to back.The leveling legs must remain firmly on the floorand the dryer should not rock. The maximum slopeof the dryer from left to right or front to ...
Page 9 - To reduce the risk of; ALTERNATE EXHAUST DIRECTIONS; Remove screw and exhaust duct.; STEP 3
9 Part 3 INITIAL STEPS FOR INSTALLING YOUR DRYER In addition to the following warnings, please referto manual section on Exhaust Requirements andMaintenance. IMPORTANT: To reduce the risk of fire, combustion, and gas accumulation, the dryermust be vented to the outdoors. Please follow theinstruction...
Page 10 - Confirm that the type of gas available in your laundry; For additional instruction on connecting the dryer to; STEP 4; Connection of Gas Supply; Burner input requirements; STEP 5; Electrical Plug Connections
1 0 Part 3 INITIAL STEPS FOR INSTALLING YOUR DRYER (Gas dryer only). In addition to the following,please refer to manual section on Gas Requirementsand Instructions. 1. Confirm that the type of gas available in your laundry room is appropriate for the dryer. The dryer is preparedfor Natural Gas with...
Page 11 - Confirming Heat Source in Gas Dryers; STEP 6; Preparation of the Dryer.; STEP 8
1 1 Part 3 INITIAL STEPS FOR INSTALLING YOUR DRYER Prior to the first use of this appliance, use all-purpose cleaning products or a solution of detergentand water, with damp cloth to remove from theinside of the dryer drum/drying compartment anydust or dirt that may have accumulated inside thedryer....
Page 12 - STEP 9
1 2 Part 3 INITIAL STEPS FOR INSTALLING YOUR DRYER The following instructions are applicable toinstallations of the dryer in a manufactured ormobile home. Any installation in a manufactured ormobile home must comply with the ManufacturedHome Construction and Safety Standards Title 24CFR, Part 32-80 ...
Page 13 - ACCESSORIES INSTALLATION; Screw both sides of the front kit.; Stacking Kit Installation Instructions
1 3 Part 4 ACCESSORIES INSTALLATION To ensure safe and secure installation, pleaseobserve the instructions below. Place washer firmly on a stable, even andsolid floor. Peel protective paper off the tape from thestacking kit side bracket. Fit the stacking kit side bracket firmly to theside of top pla...
Page 14 - Pedestal Installation Instructions; The pedestal accessory includes:; Tools Needed for Installation:
Place the dryer on the pedestal. Make sure the front and back feet are in the correct positions. The dryer feet will fit into the innermost positions as shown. 3 Part 4 ACCESSORIES INSTALLATION Pedestal Installation Instructions 1 The pedestal accessory includes: • Drawer divider (1) • Wrench (1) • ...
Page 15 - ELECTRICAL REQUIREMENTS FOR ELECTRIC DRYERS; a) This dryer must be connected to a grounded
1 5 Part 5 ELECTRICAL REQUIREMENTS FOR ELECTRIC DRYERS Following are additional instructions regarding electrical connections and requirements for electric dryers. Important Warning: To help prevent fire, electric shock, serious injury or death, the wiring and grounding must conform to the latest ed...
Page 16 - Grounding through the neutral conductor; • Screw power supply wire to the terminal block.; Green wire of power cord
1 6 Part 5 ELECTRICAL REQUIREMENTS FOR ELECTRIC DRYERS Use the instructions in this section if your home hasa 3-wire receptacle (NEMA type 10-30R) and youwill be using a UL listed, 120/240 volt minimum,30 amp, dryer power supply cord. Review the following options to determine the appropriate electri...
Page 17 - Option 1; a Power supply cord.
1 7 Part 5 ELECTRICAL REQUIREMENTS FOR ELECTRIC DRYERS Important : Grounding through the neutral conductor is prohibited for (1) new branch-circuit installations,(2) mobile homes, and (3) recreational vehicles, and(4) areas where local codes prohibit grounding throughthe neutral conductor. Prepare m...
Page 18 - Option 2; a Power Supply Cord; Option 3
1 8 1. Connect neutral wire(white) of power cord to center terminal block screw. 2. Connect ground wire of appliance and neutral wire of power cord to center terminal blockscrew. 3. Connect red and black wire to the left and right terminal block screws. 4. Make sure that the strain relief screw is t...
Page 19 - ELECTRICAL REQUIREMENTS FOR GAS DRYERS; Electrical Requirements for Your Dryer:; If it does not fit the outlet in your
1 9 Part 6 ELECTRICAL REQUIREMENTS FOR GAS DRYERS 120 Volt, 60 Hertz, with 3-Prong Grounding Plug Following are additional instructions regarding electrical connections and requirements for gas dryers. Important Warning: To help prevent fire, electric shock, serious injury or death, the wiring and g...
Page 20 - GAS REQUIREMENTS AND INSTRUCTIONS; instructions and WARNINGS.
2 0 Part 7 GAS REQUIREMENTS AND INSTRUCTIONS Following are important instructions and information concerning the requirements for the gas supply and service forgas dryers. Important Warning: The gas supply and service for a gas dryer must comply with all local codes and ordinances. In the absence of...
Page 21 - EXHAUST REQUIREMENTS AND MAINTENANCE; Number of; Recommended; Rigid Metal Duct; Use Only for Short Run; Ductwork; Exhaust Requirements and Instructions:
2 1 Part 8 EXHAUST REQUIREMENTS AND MAINTENANCE Following are important instructions and information concerning the exhaust requirements for your dryer. Warning: DO NOT exhaust dryer air into an enclosed and unventilated area, such as an attic, wall, ceiling, crawl space, chimney, gas vent, or conce...
Page 22 - Exhaust and Dryer Maintenance
2 2 Part 8 EXHAUST REQUIREMENTS AND MAINTENANCE Exhaust and Dryer Maintenance 1. After one year of use, the interior and complete exhaust system of the dryer should be examinedand cleaned if necessary. 2. Before one year of use, when drying performance has become unsatisfactory, please examine andcl...
Page 23 - OPERATING YOUR DRYER; Important Safety Instructions; No washer can completely remove oil.; Explosion Hazard; • Use this button for power on or off.; Power Button
2 3 Part 9 OPERATING YOUR DRYER Following are instructions for starting and using your new dryer. Please refer to specific sections of this manual formore detailed information. Important Warning: To reduce the risk of fire, electric shock, or injury to person, readthis entire manual, including the I...
Page 24 - Cycle Selection
2 4 Part 9 OPERATING YOUR DRYER • Press MORE TIME or LESS TIME until the desired drying time is set. • The Display shows the estimated time remaining.In addition to this, if thedryer has some problem, itdisplays error messages. Time change button is available only with ManualDry, Time Dry and Rack D...
Page 25 - To recall your stored CUSTOM PROGRAM; Status/Clean Filter/Wrinkle Care Indicator
2 5 Part 9 OPERATING YOUR DRYER 1. Child Lock Child Lock can be used to prevent your childrenfrom changing options on control panel while thedryer is running. When Child Lock is enabled, all the buttons will belocked and Child Lock glows.To enable Child Lock, Press and hold Rack Dry for3 seconds, A ...
Page 26 - Do not use this cycle with delicate fabrics.; Beeper; SMALL LOADS; Type of Load; • Dry item completely. Foam rubber pillows are; When using Air Dry
2 6 Part 9 OPERATING YOUR DRYER 3. Wrinkle Care This option helps to preventwrinkles in your laundry. When you select the wrinkle free option, the dryerwill periodically tumble for up to three hours afterthe cycle has completed. You can use this option in case that you can notremove laundry immediat...
Page 27 - To use a sensor dr y cycle; Starting your dryer; Heavy Work Clothes
2 7 Part 9 OPERATING YOUR DRYER 1. Before use • Clean lint screen before or after each cycle. • Place laundry into dryer and shut door. See Loading. • Turn the knob to select the drying cycle you want. The preset setting for Sensor Dry Cycles or ManualCycles will glow. The estimated or actual cycle ...
Page 28 - Clean lint filter; Clean the door and its opening; Maintenance; To use a manual dr y cycle; • Press TEMP. CONTROL until the desired; To stop your dryer at any time
Part 9 OPERATING YOUR DRYER 2 8 Clean lint filter Clean the lint filter after each use and check itbefore use. Not cleaning or emptying the filterwill increase drying time and energyconsumption, therefore dryer life expectancycould be shortened after all. 1. Open the doorand pull the filterstraight ...
Page 29 - TROUBLESHOOTING GUIDE; Problem:There are Greasy Spots on My Clothes
2 9 Part 10 TROUBLESHOOTING GUIDE Troubleshooting TipsSave time and money! Review the charts on the followingpages first and you may not need to call for service. 1.Problem:My Dr yer Won ’t Start • Is the dryer plugged in? • Is the fuse blown, or is the circuit breaker tripped? Confirm that the drye...
Page 30 - Problem:There is static in my clothes after dr ying
3 0 Part 10 TROUBLESHOOTING GUIDE 6.Problem:There is static in my clothes after dr ying Question What to Do 5.Problem:There is Lint on my Clothes Question What to Do Please refer to the manual section on cleaning the lint filter, and please confirm that thelint filter is clean. It is important that ...
Page 31 - Problem:It takes too long for my clothes to dr y
3 1 Part 10 TROUBLESHOOTING GUIDE 8.Problem:It takes too long for my clothes to dr y Question What to Do • Did you properly sort your loads of laundry? • Are you drying large loads of heavy fabrics? • Are the dryer controls properly set? • Is the lint filter clean before each new load of laundry? • ...
Page 32 - LG DRYER LIMITED WARRANTY – USA
Page 34 - Qué significa secado por sensor o secado por tiempo?
2 CARACTERÍSTICAS DEL PRODUCTO CONTENIDO PARTE 1. ESPECIFICACIONES. ............................................................................................................................................................................................................3 PARTE 2. GARANTÍA E INSTRU...
Page 35 - Nombre; ACCESORIOS
3 Parte 1 ESPECIFICACIONES ■ Nombre : Secadora Eléctrica y de Gas ■ Suministro de Energìa : Favor de consultar la etiqueta de medición referente a la información detallada ■ Tamaño : 27 x 29.9 x 38.7(inch) ■ Capacidad de la Secadora : IEC 7.3cu.ft. (22.5 lb) ■ Peso : 126 Ibs (57.2 kg) Las especifica...
Page 36 - BÚSQUEDA DE ASISTENCIA SOBRE LA GARANTÍA; Para su seguridad, debe seguir las recomendaciones de; Restricción de la Garantía :; Si la secadora es utilizada para otro propósito que no sea el uso
Parte 2 4 GARANTÍA E INSTRUCCIONES DE SEGURIDAD IMPORTANTES BÚSQUEDA DE ASISTENCIA SOBRE LA GARANTÍA ADVERTENCIA! Para su seguridad, debe seguir las recomendaciones de este manual. Para reducir el riesgo de incendio o explosión, o choque eléctrico, o paraprevenir daños a la propiedad, lesiones perso...
Page 37 - INSTRUCCIONES DE CONEXIÓN A TIERRA; INSTRUCCIONES DE SEGURIDAD IMPORTANTES
5 Parte 2 GARANTÍA E INSTRUCCIONES DE SEGURIDAD IMPORTANTES 1) Lea todas las instrucciones antes de usar el artefacto. 2) No seque artículos que hayan estado en contacto con gasolina, solventes para lavado en seco, o cualquierotra sustancia inflamable o explosiva, ya quedespiden vapores que pueden i...
Page 38 - ADVERTENCIA
Parte 2 6 GARANTÍA E INSTRUCCIONES DE SEGURIDAD IMPORTANTES • No intente encender un fósforo, o cigarrillo, o encender ningún artefacto de gas o eléctrico. • No toque ningún interruptor eléctrico. No use ningún teléfono en su casa o edificio. • Evacúe la habitación, edificio o el área de todos los o...
Page 39 - * La mayoría de las instalaciones requieren un; PASO 1; Nota
7 Parte 3 PASOS INICIALES PARA LA INSTALACIÓN DE SU SECADORA Las siguientes instrucciones le servirán de guía a través de los pasos iniciales para la preparación de susecadora para el uso. Por favor note que cada sección de este manual proporciona información importantesobre la preparación y uso de ...
Page 40 - PASO 2
8 Parte 3 PASOS INICIALES PARA LA INSTALACIÓN DE SU SECADORA Una vez en posición ajuste las patas niveladoras de lasecadora hasta que esté nivelada de izquierda aderecha y del frente hacia atrás. Las patasniveladoras deben permanecer firmes en el piso y lasecadora no debe mecerse. La máxima inclinac...
Page 41 - DIRECCIONES ALTERNAS PARA EL ESCAPE; PASO 3
9 Parte 3 PASOS INICIALES PARA LA INSTALACIÓN DE SU SECADORA Además de las siguientes advertencias, por favorrefiérase a la sección del manual sobre Requerimientos yMantenimientodel Escape. IMPORTANTE: Para reducir el riesgo de incendio, combustión y acumulaciónde gas, la secadora debe estar ventila...
Page 42 - PASO 5
1 0 Parte 3 PASOS INICIALES PARA LA INSTALACIÓN DE SU SECADORA (Secadora a Gas solamente). Además de lo siguiente, porfavor refiérase a la sección del manual sobreRequerimientos e Instrucciones del Gas. 1. Confirme que el tipo de gas disponible en su cuarto de lavado sea el adecuado para su secadora...
Page 43 - PASO 8; Flujo de Aire; PASO 7
1 1 Parte 3 PASOS INICIALES PARA LA INSTALACIÓN DE SU SECADORA Antes de usar por primera ves esta secadora, utiliceun producto limpiador para todo propósito, o unasolución de detergente y agua, con un paño húmedopara remover de la parte interior del tambor de lasecadora /compartimiento de secado cua...
Page 44 - NO ventile el ducto de escape hacia abajo; PASO 9
1 2 Parte 3 PASOS INICIALES PARA LA INSTALACIÓN DE SU SECADORA Las siguientes instrucciones se aplican ainstalaciones de la secadora en casas prefabricadas omóvil. La instalación en una casa prefabricada omóvil debe cumplir con los estándares de Seguridady Construcción de Casas Prefabricadas, Título...
Page 45 - Instrucciones de Instalaciòn para montar el Kit; Atornille los lados de la parte frontal del kit.
1 3 Parte 4 INSTALACIÒN DE ACCESORIOS ADVERTENCIA! Incorrect Installation can cause serious accidents. Una intalaciòn incorrecta puede causar accidentesserios. El peso de la secadora y la altura de la instalaciònhacen que montar el kit sea peligroso para unasola persona. Este procedimiento debe real...
Page 46 - El accesorio de pedestal incluye:; Parte 4
Coloque el electrodoméstico encima del pedestal. Asegúrese que los pies frentes y traseros se encuentren en las posiciones correctas. Las patas de la secadora coincidirán con las posiciones extremas interiores como indicado. 3 1 El accesorio de pedestal incluye: • Divisor de cajón (1) • Llave (1) • ...
Page 47 - Advertencia Importante:
1 5 Parte 5 REQUERIMIENTOS ELÉCTRICOS PARA SECADORAS ELÉCTRICAS Las siguientes son instrucciones adicionales sobre las conexiones y requerimientos eléctricos para las secadoraseléctricas. Advertencia Importante: Para ayudar a prevenir incendios, choque eléctrico, lesiones serias o muerte, el cablead...
Page 48 - • Atornille el cable de la alimentación al bloque
1 6 Parte 5 REQUERIMIENTOS ELÉCTRICOS PARA SECADORAS ELÉCTRICAS Utilice las instrucciones en esta sección si su casatiene un tomacorriente de 3-alambres (Tipo NEMA10-30R) y si usará un cordón de alimentación parasecadora listado por UL, de 120/240 voltios mínimoy de 30 amp. Revise las siguientes opc...
Page 49 - Contacto por conductor neutro esta; Opción 1
1 7 Parte 5 REQUERIMIENTOS ELÉCTRICOS PARA SECADORAS ELÉCTRICAS Importante : Contacto por conductor neutro esta prohibido por(1) nuevas instalciones de branch- circuito (2)las casas de mobiles (3) vehiculo recreacional y (4) areasdonde los codigos locales prohibe contactar por el conductorneutro. Pr...
Page 50 - Opción 2
Parte 5 REQUERIMIENTOS ELÉCTRICOS PARA SECADORAS ELÉCTRICAS 1 8 Si los códigos y ordenanzas locales permiten laconexión de un conductor estructura-tierra alalambre neutral, utilice estas instrucciones. Si loscódigos y ordenanzas locales no permiten laconexión de un conductor estructura-tierra alalam...
Page 51 - NO modifique el enchufe provisto con la; Si éste no encaja en el
1 9 Parte 6 REQUERIMIENTOS ELÉCTRICOS PARA SECADORAS A GAS 120 Voltios, 60 Hertz, con Enchufe de 3-Clavijas con Conexión a Tierra Las siguientes son instrucciones adicionales sobre las conexiones y requerimientos eléctricos para las secadoras a gas . Advertencia Importante: Para ayudar a prevenir in...
Page 52 - El suministro y servicio del gas para las
2 0 Parte 7 REQUERIMIENTOS E INSTRUCCIONES SOBRE EL GAS Las siguientes son instrucciones e información importante concernientes a los requerimientos para el suministro yservicio del gas para las secadoras a gas. Advertencia Importante: El suministro y servicio del gas para las secadoras a gas debe c...
Page 53 - Los materiales para la ventilación no son
2 1 Parte 8 REQUERIMIENTOS Y MANTENIMIENTO SOBRE EL ESCAPE Las siguientes son instrucciones e información importante concernientes a los requerimientos del escape para susecadora. Advertencia Importante: Para reducir el riesgo de incendio, combustión, o acumulación de gases combustibles, NO dirija e...
Page 54 - Mantenimiento del Escape y la Secadora; Limpieza de la Malla de Pelusa
2 2 Parte 8 REQUERIMIENTOS Y MANTENIMIENTO SOBRE EL ESCAPE Mantenimiento del Escape y la Secadora 1. Después de un año de uso, el interior y todo el sistema de escape de la secadora debe ser examinado ylimpiado si es necesario. 2. Antes de que transcurra un año de uso, si el rendimiento del secado h...
Page 55 - Peligro de Incendio; • Use este botón para encender o apagar el aparato.; Botón de encendido; SELECTOR DE CICLO
2 3 Parte 9 USANDO SU SECADORA Las siguientes son las instrucciones para encender y utilizar su nueva secadora. Por favor refiérase a las secciones especificas deeste manual para información más detallada. Advertencia Importante: Para reducir el riesgo de incendio, choque eléctrico, olesiones person...
Page 56 - • Pulse MORE TIME o LESS TIME hasta ajustar; Selección del ciclo; Temperatura; Medium High
2 4 Parte 9 USANDO SU SECADORA • Pulse MORE TIME o LESS TIME hasta ajustar el tiempo de secado deseado. • La pantalla muestra el tiempo restante estimado.Además de ello, si lasecadora tiene algúnproblema, apareceránmensaje de error en pantalla. El botón de cambio del tiempo está disponiblesólo con s...
Page 57 - Secado con Parrilla; PARA USAR LA PARRILLA DE SECADO; Indicador estado/limpiar filtro/cuidado arrugas; PROGRAMA PERSONALIZADO; Cambie DRY LEVEL y TEMP CONTROL.; Botones OPCIÓN; Temperatura Tiempo; Zapatos atléticos
2 5 Parte 9 USANDO SU SECADORA 1. Control paterno El control paterno puede usarse para evitar que sus niñoshagan un uso indebido del panel de control mientras lasecadora está funcionando.Cuando el control paterno está activado, todos losbotones estarán bloqueados y el botón del control paternose ilu...
Page 58 - Beeper de Secado Húmedo; Alarma; Características Predeterminadas del Ciclo Manual; Medium HIgh
Parte 9 USANDO SU SECADORA 2 6 3. Cuidado arrugas Esta opción le ayuda a evitar quequeden arrugas en sus prendas devestir. Cuando seleccione la opción libre de arrugas, la secadoradará vueltas periódicamente hasta 3 horas una vezcompletado el ciclo. Puede usar esta opción en casi de que no pueda sac...
Page 59 - Para usar un ciclo de secado por sensor; Arranque de seu secadora; Botón de arranque / pausa
2 7 Parte 9 USANDO SU SECADORA 1. Antes de usar • Limpie la pantalla de hilos antes y después de cada ciclo. • Coloque la colada en la secadora y cierre la puerta. Consulte el apartado de carga. • illegible parts - cannot read properly - please re-send 2. Carga • Determine el tamaño de la carga por ...
Page 60 - No es muy difìcil mantener cuidada su secadora.; Limpiar el filtro atrapapelusa; Mantenimiento; Para usar un ciclo de manual por sensor; • Pulse TEMP. CONTROL hasta que se ilumine el; Pausar o reiniciar. Para pausar la secadora en; Abra la puerta o pulse START/PAUSE una vez.; Para reiniciar la secadora
Parte 9 USANDO SU SECADORA 2 8 No es muy difìcil mantener cuidada su secadora. Todo lo que tiene que hacer es seguir lossiguientes pasos.Limpie el filtro y asegúrese de tenerlo limpioantes de cualquier uso.No limpiarlo ocasiona que el secado sea màstardado y gaste màs energìaSin seguir estas instruc...
Page 61 - GUÍA PARA LA SOLUCIÓN DE PROBLEMAS; Pregunta
2 9 Parte 10 GUÍA PARA LA SOLUCIÓN DE PROBLEMAS Consejos para la solución de problemasAhorre tiempo y dinero! Primero revise las tablas en las siguientesp áginas y quizás no necesite llamar a servicio. 4. Problema: Mi Secadora muestra "Error" Pregunta Qué Hacer Se muestra cuando el Thermisto...
Page 64 - GARANTÍA LIMITADA DE LA SECADORA LG-USA


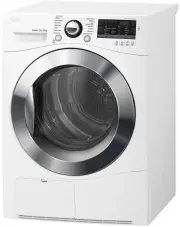
 LG DC90V9V9W
Manual
LG DC90V9V9W
Manual
 LG DVH45-08W
User Manual
LG DVH45-08W
User Manual
 LG DVH5-08W
User Manual
LG DVH5-08W
User Manual
 LG DVH9-09B
User Manual
LG DVH9-09B
User Manual
 LG DVH9-09W
User Manual
LG DVH9-09W
User Manual
 LG TD-C8031E
User Manual
LG TD-C8031E
User Manual
 LG TD-C80NPW
User Manual
LG TD-C80NPW
User Manual
 LG TD-C90NPE
User Manual
LG TD-C90NPE
User Manual
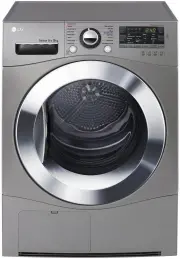
 LG TD-H802SJW
User Manual
LG TD-H802SJW
User Manual
 LG TD-H803CSW
User Manual
LG TD-H803CSW
User Manual
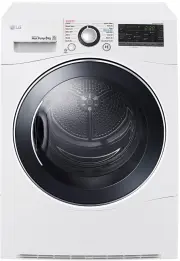
 LG DLE0442W
User Manual
LG DLE0442W
User Manual
 LG DLE1001W
User Manual
LG DLE1001W
User Manual
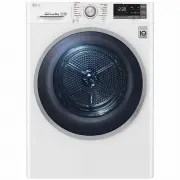
 LG DLE1101W
User Manual
LG DLE1101W
User Manual
 LG DLE1310W
User Manual
LG DLE1310W
User Manual
 LG DLE1501W
User Manual
LG DLE1501W
User Manual
 LG DLE2050W
User Manual
LG DLE2050W
User Manual
 LG DLE2101W
User Manual
LG DLE2101W
User Manual