Page 2 - EASY-ACCESS REVERSIBLE DOOR
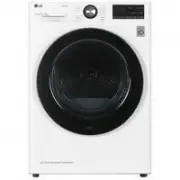
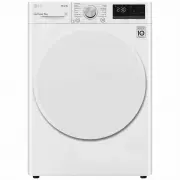
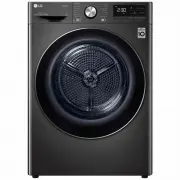
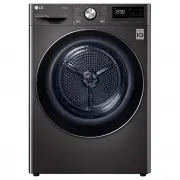
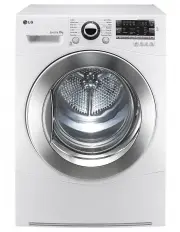
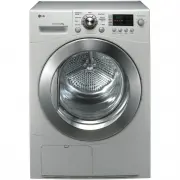
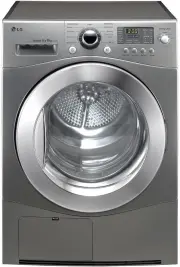
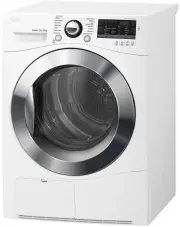
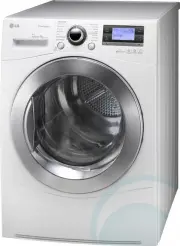
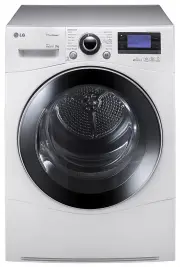
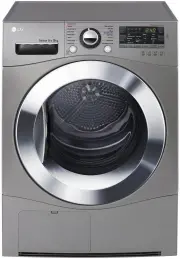
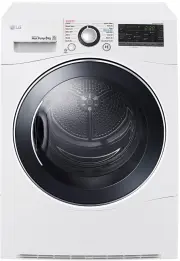
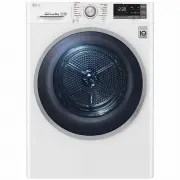
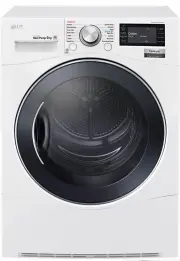
2 SPECIAL FEATURES EASY-TO-USE CONTROL PANEL Rotate the cycle selector knob to select the desired dry cycle. Add cycle options or adjust settings with the touch of a button. EASY-ACCESS REVERSIBLE DOOR The wide-opening door provides easy access for loading and unloading. The door hinge can be revers...
Page 3 - ENGLISH; READ ALL INSTRUCTIONS BEFORE USE; WARNING; Your Safety and the safety of others is very important.; DANGER
3 ENGLISH IMPORTANT SAFETY INSTRUCTIONS READ ALL INSTRUCTIONS BEFORE USE W WARNING For your safety, the information in this manual must be followed to minimize the risk of fire or explosion, electric shock, or to prevent property damage, injury to persons, or death. Your Safety and the safety of oth...
Page 9 - INTRODUCING YOUR DRYER; PARTS AND ACCESSORIES; Parts; Accessories; NOTE
9 ENGLISH INTRODUCING YOUR DRYER INTRODUCING YOUR DRYER PARTS AND ACCESSORIES Parts Accessories Terminal block access panel (Electric models) Control panel Leveling feet Reversible door Lint filter Gas connection location (Gas models) Power cord location(Gas models) Exhaust ductoutlet *ODMVEFEBDDFTT...
Page 10 - Control panel features
10 INTRODUCING YOUR DRYER Control panel features Following are instructions for starting and using your new dryer. Please refer to specific sections of this manual for more detailed information. W WARNING To reduce the risk of fire, electric shock, or injury to persons, read this entire manual, incl...
Page 11 - Display
11 ENGLISH Display The display shows the settings, estimated time remaining, options, and status messages for your dryer. When the dryer is turned on, the light in the display will illuminate. A &45*."5&%5*.&3&."*/*/( When the START/PAUSE button is pressed, the dryer will dis...
Page 12 - Preview installation order
12 INSTALLATION INSTRUCTIONS Preview installation order Checking and choosing the proper location Leveling the dryer Connecting Electric Dryers (Electric Dryer Type) Venting the Dryer Plugging in the power cord and grounding Connecting Gas Dryers (Gas Dryer Type) Test run INSTALLATION INSTRUCTIONS I...
Page 13 - Installation location requirements; Clearances; INSTALLATION SPACING FOR RECESSED AREA OR CLOSET INSTALLATION
13 ENGLISH INSTALLATION INSTRUCTIONS Installation location requirements W WARNING 3FBEBMMJOTUBMMBUJPOJOTUSVDUJPOTDPNQMFUFMZCFGPSFJOTUBMMJOHBOEPQFSBUJOHZPVSESZFS It is important that you review this entire manual before installing and using your dryer. Detailed instructions concerning electrical conn...
Page 14 - RECOMMENDED INSTALLATION SPACING FOR CABINET INSTALLATION; Leveling the dryer
14 INSTALLATION INSTRUCTIONS Clearances (cont.) RECOMMENDED INSTALLATION SPACING FOR CABINET INSTALLATION t For cabinet installation with a door, minimum ventilation openings in the top of the cabinet are required. *Required spacing **For side or bottom venting, JODIFT DNTQBDJOHJTBMMPXFE 28 (73.4 cm...
Page 15 - Reversing the door
15 ENGLISH INSTALLATION INSTRUCTIONS W WARNING t5PBWPJEEBNBHFUPUIFESZFSPSUIFEPPSTVQQPSUUIFEPPSXJUIBTUPPM PSCPYUIBUGJUTVOEFSUIFEPPSPSIBWFBOBTTJTUBOUTVQQPSUUIFXFJHIUPG the door. t"WPJEESPQQJOHUIFEPPSUPBWPJEEBNBHFUPUIFEPPSPSUIFGMPPS THE DRYER DOOR IS VERY LARGE AND HEAVY. Failure to follow the inst...
Page 16 - Installing the side vent kit; OPTION 1: SIDE VENTING
16 Installing the side vent kit W WARNING t6TFBIFBWZNFUBMWFOU t%POPUVTFQMBTUJDPSUIJOGPJMEVDU t$MFBOPMEEVDUTCFGPSFJOTUBMMJOHUIJTESZFS t5PSFEVDFUIFSJTLPGJOKVSZUPQFSTPOTBEIFSFUPBMM JOEVTUSZSFDPNNFOEFETBGFUZQSPDFEVSFTJODMVEJOHUIFVTFPGMPOHTMFFWFEHMPWFTBOETBGFUZHMBTTFT t'BJMVSFUPGPMMPXBMMPGUIFTBGFUZXBSOJO...
Page 17 - Venting the dryer
17 ENGLISH Venting the dryer W WARNING To reduce the risk of fire, electric shock, or injury to persons when using this appliance, follow basic precautions, including the following: t%POPUDSVTIPSDPMMBQTFEVDUXPSL Failure to follow these instructions can result in fire or death. t%POPUBMMPXEVDUXPSLUPS...
Page 18 - ROUTING AND CONNECTING DUCTWORK; Ductwork
18 INSTALLATION INSTRUCTIONS Venting the dryer (cont.) %FEVDUGU NGPSFBDIBEEJUJPOBMFMCPX*UJTOPUSFDPNNFOEFEUPVTFNPSFUIBOGPVS¡FMCPXT ROUTING AND CONNECTING DUCTWORK Follow the guidelines below to maximize drying performance and reduce lint buildup and condensation in the ductwork. Ductwork and fittings...
Page 19 - Connecting gas dryers; Electrical requirements for gas models only
19 ENGLISH Connecting gas dryers W WARNING To reduce the risk of fire, electric shock, or injury to persons when using this appliance, follow basic precautions, including the following: Electrical requirements for gas models only W WARNING To reduce the risk of fire, electric shock, or injury to per...
Page 20 - Connecting the gas supply
20 Connecting gas dryers (cont.) W WARNING To reduce the risk of fire, electric shock, or injury to persons when using this appliance, follow basic precautions, including the following: t*OTUBMMBUJPOBOETFSWJDFNVTUCFQFSGPSNFECZBRVBMJGJFE JOTUBMMFSTFSWJDFBHFODZPSUIFHBTTVQQMJFS Failure to do so can res...
Page 21 - Connecting electric dryers; Electrical requirements for electric models only
21 ENGLISH Connecting electric dryers W WARNING To help prevent fire, electric shock, serious injury, or death, the wiring and grounding must conform to the latest edition of the /BUJPOBM&MFDUSJDBM$PEF"/4*/'1"BOEBMMBQQMJDBCMFMPDBM regulations. Please contact a qualified electrician to ch...
Page 22 - USA only
22 INSTALLATION INSTRUCTIONS Connecting electric dryers (cont.) USA only W WARNING t$POOFDUUIFQPXFSDPSEUPUIFUFSNJOBMCMPDL&BDIDPMPSFE XJSFTIPVMECFDPOOFDUFEUPTBNFDPMPSTDSFX8JSFDPMPSJOEJDBUFEPONBOVBMJTDPOOFDUFEUPUIFTBNFDPMPSTDSFXJOCMPDL'BJMVSFUPGPMMPXUIFTFJOTUSVDUJPOTNBZSFTVMUJOBTIPSUPSPWFSMPBE t(S...
Page 23 - Four-wire connection for electric dryers: Direct wire
23 ENGLISH INSTALLATION INSTRUCTIONS Connecting electric dryers (cont.) USA only W WARNING t$POOFDUUIFQPXFSDPSEUPUIFUFSNJOBMCMPDL&BDIDPMPSFE XJSFTIPVMECFDPOOFDUFEUPTBNFDPMPSTDSFX8JSFDPMPSJOEJDBUFEPONBOVBMJTDPOOFDUFEUPUIFTBNFDPMPSTDSFXJOCMPDL'BJMVSFUPGPMMPXUIFTFJOTUSVDUJPOTNBZSFTVMUJOBTIPSUPSPWFS...
Page 25 - Three-wire connection for electric dryers: Direct wire
25 ENGLISH INSTALLATION INSTRUCTIONS Connecting electric dryers (cont.) USA only W WARNING t$POOFDUUIFQPXFSDPSEUPUIFUFSNJOBMCMPDL&BDIDPMPSFE XJSFTIPVMECFDPOOFDUFEUPTBNFDPMPSTDSFX8JSFDPMPSJOEJDBUFEPONBOVBMJTDPOOFDUFEUPUIFTBNFDPMPSTDSFXJOCMPDL'BJMVSFUPGPMMPXUIFTFJOTUSVDUJPOTNBZSFTVMUJOBTIPSUPSPWFS...
Page 26 - Special requirements for; Final installation check; Testing dryer heating
26 INSTALLATION INSTRUCTIONS Special requirements for manufactured or mobile homes Any installation in a manufactured or mobile home must comply with the Manufactured Home Construction and Safety Standards 5JUMF$'31BSUPS4UBOEBSE$"/$4";.)BOE local codes and ordinances. If you are uncertain wh...
Page 28 - Installation test; FTUSJDUFEPSCMPDLFEBJSGMPX; HS; t3FTFUDJSDVJUCSFBLFSPSSFQMBDFGVTF
28 INSTALLATION INSTRUCTIONS Installation test (Duct check) (cont.) 3FTUSJDUFEPSCMPDLFEBJSGMPX Avoid long runs or runs with multiple elbows or bends. t$IFDLUIFFSSPSDPEFCFGPSFZPVDBMMGPSTFSWJDF t$IFDLUIFEVDUDPOEJUJPO If the test displays four bars, check the exhaust system for re-strictions and damage...
Page 29 - Operating the dryer
29 ENGLISH HOW TO USE Operating the dryer 563/0/5)&%3:&3 Press the POWER button to turn on the dryer. The cycle LEDs will illuminate and a signal will TPVOEJGUVSOFEPO3FGFSUPQBHF 3 #&(*/$:$-& Press the START/PAUSE button to begin the cycle. The cycle can be paused at any time either b...
Page 30 - Sensor dry cycles; Cycle guide
30 HOW TO USE Sensor dry cycles Sensor dry cycles utilize LG’s unique dual sensor system to detect and compare the moisture level in clothes and in the air and adjust the drying time as needed to ensure superior results. The dryer automatically sets the dryness level and temperature at the recommend...
Page 31 - Sorting load; Fabric care labels; Loading the dryer; Loading tips
31 ENGLISH HOW TO USE Following are instructions for starting and using your new dryer. Please refer to specific sections of this manual for more detailed information. Check the lint filter before every load Always make sure the lint filter is clean before starting a new load; a clogged lint filter ...
Page 32 - Cycle setting buttons
32 HOW TO USE Cycle setting buttons Sensor dry cycles have preset settings that are selected automatically. Manual dry cycles have default settings, but you may also customize the settings using the cycle setting buttons. Press the button for that option to view and select other settings. DRY LEVEL ...
Page 33 - Custom program; To Recall a Custom Program:
33 ENGLISH HOW TO USE Custom program If you have a special combination of settings that you use frequently, you can save these settings as a CUSTOM PROGRAM. * To Save a Custom Program: 5VSOPOUIFESZFSBOEUVSOUIFDZDMFTFMFDUPSLOPCUPTFMFDUUIF desired cycle. 6TFUIFDZDMFTFUUJOHCVUUPOTUPBEKVTUUIFTFUUJOHTGPS...
Page 34 - MAINTENANCE; Regular cleaning; Cleaning the exterior
34 MAINTENANCE MAINTENANCE Regular cleaning W WARNING To reduce the risk of fire, electric shock, or injury to persons when using this appliance, follow basic precautions, including the following: t6OQMVHUIFESZFSCFGPSFDMFBOJOHUPBWPJEUIFSJTLPGFMFDUSJD TIPDL Failure to follow this warning can cause se...
Page 35 - TROUBLESHOOTING; Before calling for service
35 ENGLISH TROUBLESHOOTING TROUBLESHOOTING Before calling for service Your dryer is equipped with an automatic error-monitoring system to detect and diagnose problems at an early stage. If your dryer does not function properly or does not function at all, check the following before you call for serv...
Page 36 - SPECIFICATIONS
36 Before calling for service (cont.) 1SPCMFN 1PTTJCMF$BVTFT 4PMVUJPOT Drying time is not consistent t)FBUTFUUJOHTMPBETJ[FPSEBNQOFTTPG clothing is not consistent. t5IFESZJOHUJNFGPSBMPBEXJMMWBSZEFQFOEJOHPOUIFIFBUTFUUJOHUIFUZQF of heat used (electric, natural gas, or LP gas), the size of the load, the...
Page 37 - USING SMARTDIAGNOSIS
37 ENGLISH USING SMARTDIAGNOSIS TM USING SMARTDIAGNOSIS TM *GZPVFYQFSJFODFQSPCMFNTXJUIZPVSESZFSDBMM JO$BOBEB'PMMPXUIFDBMMDFOUFSBHFOUTJOTUSVDUJPOT and do the following steps when requested: 1SFTTUPUVSOPOUIFESZFS Do not press any other buttons or turn the cycle selector knob. 8IFOJOTUSVDUFEUPEPTPCZUIF...
Page 38 - LG Customer Information Center; MFBTFDBMMBOEDIPPTFUIF; Product Registration Information
38 WARRANTY Your LG Dryer will be will repaired or replaced, at LG’s option, if it proves to be defective in material or workmanship under normal VTFEVSJOHUIFXBSSBOUZQFSJPE i8BSSBOUZ1FSJPEwTFUGPSUICFMPXFòFDUJWFGSPNUIFEBUF i%BUFPG1VSDIBTFwPGPSJHJOBMDPOTVNFS purchase of the product. This warranty is g...
Page 39 - MANUAL DE PROPIETARIO; SECADORA; ESP
MANUAL DE PROPIETARIO SECADORA Antes de comenzar la instalacion, lea atentamente estas instrucciones. Esto simplifi cara la instalacion y asegurara que la secadora esta instalada en forma correcta y segura. Conserve estas instrucciones cerca de la secadora luego de la instalacion para futuras consult...
Page 40 - PANEL DE CONTROL FÁCIL PARA USAR; Ejecución de saneamiento de secadoras
2 CARACTERÍSTICAS ESPECIALES PANEL DE CONTROL FÁCIL PARA USAR Gire la perilla selectora de ciclos al ciclo de secado deseado. Añada los ajustes de ciclo o programe las opciones con el toque de un botón. PUERTA REVERSIBLE DE FÁCIL ACCESO La amplia puerta provee acceso para carga y descarga. Se puede ...
Page 41 - LEA TODAS LA INSTRUCCIONES ANTES DE USAR; ADVERTENCIA; Su Seguridad y la de los demás son de suma importancia.; PELIGRO
3 ESP AÑOL INSTRUCCIONES IMPORTANTES DE SEGURIDAD LEA TODAS LA INSTRUCCIONES ANTES DE USAR W ADVERTENCIA Por su seguridad, debe seguir la información indicada en este manual para minimizar el riesgo de incendio o explosión, descarga eléctrica, o para prevenir daños a la propiedad, lesiones personale...
Page 47 - LA INTRODUCCIÓN DE LA SECADORA; PARTES Y ACCESORIOS; Partes; Accesorios; NOTA; Accesorios incluidos
9 ESP AÑOL LA INTRODUCCIÓN DE LA SECADORA LA INTRODUCCIÓN DE LA SECADORA PARTES Y ACCESORIOS Partes Accesorios NOTA t1ØOHBTFFODPOUBDUPDPOFM%FQBSUBNFOUPEFBUFODJØOBMDMJFOUFEF-(FOFMOÞNFSP FO$BOBEÈTJ falta alguno de los accesorios. t1BSBTVTFHVSJEBEZDPOFMGJOEFBNQMJBSMBWJEBÞUJMEFTVMBWBEPSBVUJMJDFTØMPDPNQP...
Page 48 - Características del panel de control
10 LA INTRODUCCIÓN DE LA SECADORA Características del panel de control A continuación encontrará instrucciones para comenzar a usar su secadora nueva. Para más información por favor consulte las secciones específicas de este manual. W ADVERTENCIA Para reducir el riesgo de incendios, descargas eléctr...
Page 49 - Pantalla
11 ESP AÑOL LA INTRODUCCIÓN DE LA SECADORA Pantalla La pantalla muestra los ajustes, el tiempo restante estimado, las opciones y los mensajes de estado correspondientes a su secadora. Cuando se gira el secador, la luz en la exhibición iluminará. E 130(3"."1&340/"-*;"%0ŷ$6450. 130...
Page 50 - Vista previa del orden de instalación
12 INSTRUCCIONES PARA LA INSTALACIÓN Vista previa del orden de instalación Comprobación y elección de la ubicación adecuada Nivelación de la secadora Conexión de secadoras a gas (Tipo de secadoras gas) ventilación de la secadora Conexión del enchufe y la toma de tierra Cómo conectar las secadoras el...
Page 51 - Requisitos del lugar de instalación; Espacios de instalación
13 ESP AÑOL INSTRUCCIONES PARA LA INSTALACIÓN Requisitos del lugar de instalación W ADVERTENCIA 4JHBMBTJOTUSVDDJPOFTEFGVODJPOBNJFOUPZDVJEBEPJODMVJEBTFOFTUFNBOVBMZDPOTFHVJSÈRVFTVTFDBEPSBPGSF[DBVOTFSWJDJPGJBCMFZEVSBEFSP Es importante que revise todo este manual antes de instalar y usar su secadora. Se...
Page 52 - Nivelación de la secadora
14 Nivelación de la secadora W ADVERTENCIA t Para reducir el riesgo de lesiones personales, cumpla con todos los procedimientos de seguridad recomendados por la industria, incluyendo el uso de use guantes con NBOHBTMBSHBTZHBGBTEFTFHVSJEBE Si no se cumple con esta advertencia se podrán producir herid...
Page 53 - Inversion de la puerta
15 ESP AÑOL INSTRUCCIONES PARA LA INSTALACIÓN W ADVERTENCIA t1BSBFWJUBSEB×PTFOMBTFDBEPSBPFOMBQVFSUBTVKFUFEJDIB QVFSUBDPOVOUBCVSFUFPVOBDBKBEFVOUBNB×PBDPSEFPDPOTJHBVOBQPZPRVFTPQPSUFFMQFTPEFMBQVFSUB t&WJUFRVFMBQVFSUBTFDBJHBQBSBRVFOPTFQSPEV[DBOEB×PTFO la puerta o en el suelo. LA PUERTA DE LA SECADOR...
Page 54 - Instalación del kit de ventilación lateral; OPCIÓN 1: VENTILACIÓN LATERAL
16 Instalación del kit de ventilación lateral W ADVERTENCIA t6UJMJDFNBUFSJBMQBSBWFOUJMBDJØOEFNFUBMQFTBEP t/PVUJMJDFDPOEVDUPTEFQMÈTUJDPPBMVNJOJPEFMHBEP t-JNQJFMPTDPOEVDUPTBOUJHVPTBOUFTEFJOTUBMBSFTUB secadora. t1BSBSFEVDJSFMSJFTHPEFMFTJPOFTQFSTPOBMFTDVNQMBDPO todos los procedimientos de seguridad reco...
Page 55 - Cónexión del conducto de ventilación de la secadora
17 ESP AÑOL Cónexión del conducto de ventilación de la secadora W ADVERTENCIA Para reducir el riesgo de incendio, descargas eléctricas o heridas al usar su electrodoméstico, siga las precauciones básicas, incluyendo lo siguiente: t/PBQMBTUFOJEPCMFFMTJTUFNBEFDPOEVDUP Si no se siguen estas instruccion...
Page 56 - Sistema de conducto
18 INSTRUCCIONES PARA LA INSTALACIÓN Conexión del conducto de ventilación de la secadora (cont.) 3FTUFQJFT NQPSDBEBDPEPBEJDJPOBM/PTFSFDPNJFOEBVTBSNÈTEFDVBUSPDPEPTEF¡ DIRECCIONAMIENTO Y CONEXIÓN DEL SISTEMA DE CONDUCTO DE ESCAPE Siga las pautas indicadas más abajo para maximizar el desempeño de secad...
Page 57 - Conexión de secadoras a gas; Requisitos eléctricos para modelos a gas únicamente
19 ESP AÑOL INSTRUCCIONES PARA LA INSTALACIÓN Conexión de secadoras a gas W ADVERTENCIA Para reducir el riesgo de incendio, descargas eléctricas o heridas al usar su electrodoméstico, siga las precauciones básicas, incluyendo lo siguiente: Requisitos eléctricos para modelos a gas únicamente W ADVERT...
Page 58 - Conexión del suministro de gas
20 Conexión de secadoras a gas (cont.) W ADVERTENCIA Para reducir el riesgo de incendio, descargas eléctricas o heridas al usar su electrodoméstico, siga las precauciones básicas, incluyendo lo siguiente: t-BJOTUBMBDJØOZFMNBOUFOJNJFOUPEFCFOQSPWFFSTFQPSVO JOTUBMBEPSDBMJGJDBEPBHFODJBEFNBOUFOJNJFOUPPDP...
Page 59 - Cómo conectar las secadoras eléctricas; Requisitos eléctricos únicamente para modelos eléctricos
21 ESP AÑOL Cómo conectar las secadoras eléctricas W ADVERTENCIA Para ayudar a evitar incendios, descargas eléctricas, heridas graves o muerte, el cableado e instalación a tierra deben cumplir DPOMBÞMUJNBFEJDJØOEFM$ØEJHP&MÏDUSJDP/BDJPOBM"/4*/'1" y todas las regulaciones locales aplicable...
Page 64 - Requisitos especiales para viviendas; Revisión de instalación final; Revisión del flujo de aire; Revisión del nivelado
26 INSTRUCCIONES PARA LA INSTALACIÓN Requisitos especiales para viviendas móviles o prefabricadas Cualquier instalación en una vivienda móvil o prefabricada debe realizarse de conformidad con los Estándares de seguridad ZDPOTUSVDDJØOEFWJWJFOEBTQSFGBCSJDBEBT5ÓUVMP$'31BSUFPFTUÈOEBS$"/$4";.)ZDP...
Page 65 - Test de Instalación (conducto de comprobar)
27 ESP AÑOL INSTRUCCIONES PARA LA INSTALACIÓN Una vez haya instalado la secadora, haga este test para asegurarse de que las condiciones del sistema de evacuación son las adecuadas para el funcionamiento correcto de la secadora. Este test tiene como objetivo mostrarle si existe algún problema importa...
Page 66 - Test de Instalación; 'MVKPEFBJSFSFTUSJOHJEPPCMPRVFBEP; Código de error; Fallo del sensor de humedad.; PS; DPOFDUBSMBTTFDBEPSBTFMÏDUSJDBTwEF
28 INSTRUCCIONES PARA LA INSTALACIÓN Test de Instalación (conducto de comprobar) (cont.) 'MVKPEFBJSFSFTUSJOHJEPPCMPRVFBEP Evite funcionamientos prolongados o funcionamientos con múltiples formaciones de torceduras o codos. t Compruebe el código de error antes de llamar al servicio técnico t$PNQSVFCF...
Page 67 - CÓMO USAR; Funcionamiento de la secadora
29 ESP AÑOL CÓMO USAR CÓMO USAR Funcionamiento de la secadora &/$&/%&3-"4&$"%03" Presione el botón ENCENDIDO/APAGADO (POWER) para encender la secadora. Si se enciende, los -&%TEFDJDMPTFJMVNJOBSÈOZTFFNJUJSÈVOBWJTPTPOPSP$POTVMUFMBQÈHJOB 3 */*$*"3&-$*$-0 Presione...
Page 68 - Guía de ciclos
30 CÓMO USAR Ciclos de secado con sensor (sensor dry) Los ciclos de secado con sensor utilizan el sistema exclusivo de sensor doble de LG para detectar y comparar el nivel de humedad en las prendas y en el aire, y programar el tiempo de secado del modo necesario para asegurar resultados superiores. ...
Page 69 - Clasificación de cargas; Etiquetas de mantenimiento de las telas; Cómo cargar la secadora; Consejos útiles de carga
31 ESP AÑOL CÓMO USAR Revise el filtro de pelusa antes de cada uso Asegúrese siempre de que el filtro de pelusa esté limpio antes de iniciar una carga nueva; un filtro de pelusa bloqueado incrementará los tiempos de secado. Para limpiarlo, tire del filtro de pelusa verticalmente y, con los dedos, en...
Page 70 - Botones de ajuste de ciclos; Para añadir opciones de ciclo a un ciclo:; Funciones especiales; Para instalar el estante de secado
32 CÓMO USAR Botones de ajuste de ciclos Los ciclos de secado con sensor (sensor dry) tienen ajustes preprogramados que se seleccionan automaticamente. Los ciclos de csecado manual (manual dry) tienen ajustes predeterminados, pero pueden Personalizarse usando los botones de ajustes de ciclos. Apriet...
Page 71 - Programa personalizado; * Para guardar un programa personalizado:; Para recuperar un programa personalizado:
33 ESP AÑOL Programa personalizado CÓMO USAR Si tiene una combinacion especial de ajustes que usa con frecuencia, puede guardar estos ajustes a manera de PROGRAMA PERSONALIZADO (CUSTOM PROGRAM). * Para guardar un programa personalizado: &ODJFOEBMBTFDBEPSBZHJSFMBQFSJMMBTFMFDUPSBEFDJDMPTQBSB selec...
Page 72 - MANTENIMIENTO; Limpieza regular; Limpieza del exterior
34 MANTENIMIENTO MANTENIMIENTO Limpieza regular W ADVERTENCIA Para reducir el riesgo de incendio, descargas eléctricas o heridas al usar su electrodoméstico, siga las precauciones básicas, incluyendo lo siguiente: t%FTFODIVGFMBTFDBEPSBBOUFTEFMJNQJBSMBNJTNBQBSB FWJUBSFMSJFTHPEFEFTDBSHBTFMÏDUSJDBT Si ...
Page 73 - RESOLUCIÓN DE PROBLEMAS; Antes de llamar a mantenimiento
35 ESP AÑOL RESOLUCIÓN DE PROBLEMAS RESOLUCIÓN DE PROBLEMAS Antes de llamar a mantenimiento Su secadora está equipada con un sistema de monitoreo de errores automático para la detección y el diagnóstico de problemas en una etapa temprana. Si su secadora no funciona adecuadamente o no funciona en lo ...
Page 75 - ESPECIFICACIONES
37 ESP AÑOL ESPECIFICACIONES Antes de llamar a mantenimiento (cont.) 1SPCMFNB $BVTBTQPTJCMFT Soluciones La luz de REVISE EL FILTRO (CHECK FILTER) esta encendida durante el ciclo de secado t&MGJMUSPEFQFMVTBFTUÈDBTJBUBTDBEPPMMFOP t1BVTFFMDJDMPEFTFDBEPZMJNQJFFMGJMUSPEFQFMVTB La luz de FLOW SENSE TM...
Page 76 - UTILIZACIÓN DEL SMARTDIAGNOSISTM
38 UTILIZACIÓN DEL SMARTDIAGNOSIS™ UTILIZACIÓN DEL SMARTDIAGNOSIS™ 4JFYQFSJNFOUBBMHÞOQSPCMFNBDPOTVTFDBEPSBMMBNFBMOÞNFSP FO$BOBEÈ4JHBMBTJOTUSVDDJPOFTEF nuestro agente y estos pasos, cuando así se lo soliciten: 1VMTFFMCPUØOQBSBFODFOEFSMBTFDBEPSB/PQVMTFOJOHÞOPUSPCPUØOOJHJSFMBQFSJMMBEFMTFMFDUPSEFDJDMPT ...
Page 77 - -MBNFBM IPSBTBMEÓBEÓBTBMB×P; y seleccione la opción adecuada a partir del menú.; WJTJUFOVFTUSPTJUJP8FCFOIUUQXXXMHTFSWJDFDPN; Información de registro del producto
39 ESP AÑOL GARANTÍA Su secadora LG será reparada o reemplazada, a discreción de LG, si se comprueba que existe un defecto en el material o la mano de obra bajo condiciones de uso normales, durante el período de garantía (“Período de garantía”) establecido más abajo, vigente desde la fecha (“Fecha d...


 LG DC90V9V9W
Manual
LG DC90V9V9W
Manual
 LG DVH45-08W
User Manual
LG DVH45-08W
User Manual
 LG DVH5-08W
User Manual
LG DVH5-08W
User Manual
 LG DVH9-08B
User Manual
LG DVH9-08B
User Manual
 LG DVH9-09B
User Manual
LG DVH9-09B
User Manual
 LG DVH9-09W
User Manual
LG DVH9-09W
User Manual
 LG TD-C801H
User Manual
LG TD-C801H
User Manual
 LG TD-C8031E
User Manual
LG TD-C8031E
User Manual
 LG TD-C8035E
User Manual
LG TD-C8035E
User Manual
 LG TD-C80NPW
User Manual
LG TD-C80NPW
User Manual
 LG TDC901H
User Manual
LG TDC901H
User Manual
 LG TD-C902H
User Manual
LG TD-C902H
User Manual
 LG TD-C90NPE
User Manual
LG TD-C90NPE
User Manual
 LG TD-H802SJW
User Manual
LG TD-H802SJW
User Manual
 LG TD-H803CSW
User Manual
LG TD-H803CSW
User Manual
 LG TD-H901MW
User Manual
LG TD-H901MW
User Manual
 LG DLE0442G
User Manual
LG DLE0442G
User Manual
 LG DLE0442W
User Manual
LG DLE0442W
User Manual