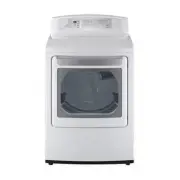
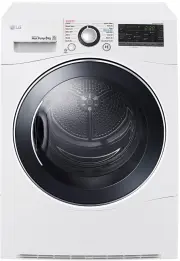
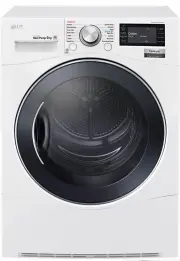
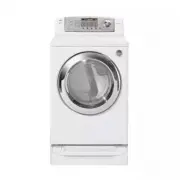
Page 2 - SPECIAL FEATURES; Easy-aCCEss rEVErsIBlE Door
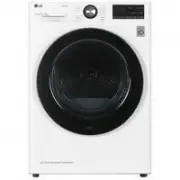
2 SPECIAL FEATURES Easy-to-UsE Control PanEl An entire selection of user-friendly functions make operating the dryer easy. Easy-aCCEss rEVErsIBlE Door The wide-opening door provides easy access for loading and unloading. The door hinge can be reversed to adjust for installation location. FloW sEnsE™...
Page 3 - ENGLISH; IMPORTANT SAFETY INSTRUCTIONS; READ ALL INSTRUCTIONS BEFORE USE; WarnInG; Your Safety and the safety of others is very important.; DanGEr; WHAT TO DO IF YOU SMELL GAS:
3 ENGLISH IMPORTANT SAFETY INSTRUCTIONS READ ALL INSTRUCTIONS BEFORE USE w WarnInG For your safety, the information in this manual must be followed to minimize the risk of fire or explosion, electric shock, or to prevent property damage, injury to persons, death. Your Safety and the safety of others...
Page 4 - BASIC SAFETY PRECAUTIONS; CALIFORNIA SAFE DRINkING WATER AND TOxIC ENFORCEMENT ACT
4 IMPORTANT SAFETY INSTRUCTIONS READ ALL INSTRUCTIONS BEFORE USE w WarnInG For your safety, the information in this manual must be followed to minimize the risk of fire or explosion, electric shock, or to prevent property damage, injury to persons, death. BASIC SAFETY PRECAUTIONS w WarnInG To reduce...
Page 5 - GROUNDING INSTRUCTIONS; SAFETY INSTRUCTIONS FOR INSTALLATION
5 ENGLISH IMPORTANT SAFETY INSTRUCTIONS READ ALL INSTRUCTIONS BEFORE USE w WarnInG For your safety, the information in this manual must be followed to minimize the risk of fire or explosion, electric shock, or to prevent property damage, injury to persons, death. GROUNDING INSTRUCTIONS w WarnInG Imp...
Page 7 - SAFETY INSTRUCTIONS FOR CONNECTING ELECTRICITY; SAVE THESE INSTRUCTIONS
7 ENGLISH IMPORTANT SAFETY INSTRUCTIONS READ ALL INSTRUCTIONS BEFORE USE w WarnInG For your safety, the information in this manual must be followed to minimize the risk of fire or explosion, electric shock, or to prevent property damage, injury to persons, death. SAFETY INSTRUCTIONS FOR CONNECTING E...
Page 8 - TABLE OF CONTENTS
8 TABLE OF CONTENTS 2 SPECIAL FEATURES 3 IMPORTANT SAFETY INSTRUCTIONS 3 What to Do if You Smell GaS 4 BaSic SafetY PrecautionS 4 california Safe DrinkinG Water anD toxic enforcement act 5 GrounDinG inStructionS 5 SafetY inStructionS for inStallation 7 SafetY inStructionS for connectinG electricitY ...
Page 9 - PARTS AND FEATURES; Components; notE
9 ENGLISH Parts anD FEatUrEs PARTS AND FEATURES Components notE • Contact LG Customer Service at 1-800-243-0000 (1-888-542-2623 in Canada) if any accessories are missing.• For your safety and for extended product life, use only authorized components. The manufacturer is not responsible for product m...
Page 10 - Control panel features
10 Parts anD FEatUrEs Control panel features Following are instructions for starting and using your new dryer. Please refer to specific sections of this manual for more detailed information. w WARNING: To reduce the risk of fire, electric shock, or injury to persons, read this entire manual, includi...
Page 11 - INSTALLATION INSTRUCTIONS; Preview installation order
11 ENGLISH INSTALLATION INSTRUCTIONS Preview installation order Checking and choosing the proper location leveling the dryer Connecting Electric Dryers (Electric Dryer type) Venting the Dryer Plugging in the power cord and grounding Connecting Gas Dryers (Gas Dryer type) Duct check test (refer to pa...
Page 12 - Installation location requirements; Clearances
12 InstallatIon InstrUCtIons Installation location requirements w WarnInG Read all installation instructions completely before installing and operating your dryer! It is important that you review this entire manual before installing and using your dryer. Detailed instructions concerning electrical c...
Page 13 - Leveling the dryer
13 ENGLISH InstallatIon InstrUCtIons Clearance (Cont.) recommended InstallatIon spacIng for cabInet InstallatIon • For cabinet installation with a door, minimum ventilation openings in the top of the cabinet are required. *Required spacing**For side or bottom venting, 2 inches (5.1 cm) spacing is al...
Page 14 - Reversing the door
14 InstallatIon InstrUCtIons w WarnInG • To avoid damage to the dryer or the door, support the door with a stool or box that fits under the door, or have an assistant support the weight of the door. • Avoid dropping the door to avoid damage to the door or the floor. THE DRYER DOOR IS VERY LARGE AND ...
Page 15 - Changing the dryer vent location
15 ENGLISH Changing the dryer vent location w WarnInG • Use a heavy metal vent.• Do not use plastic or thin foil duct.• Clean old ducts before installing this dryer.• To reduce the risk of personal injury, adhere to all industry recommended safety procedures including the use of long sleeved gloves ...
Page 16 - Venting the dryer
16 Venting the dryer w WarnInG To reduce the risk of fire, electric shock, or personal injury when using this appliance, follow basic precautions, including the following: • Do not crush or collapse ductwork. Failure to follow these instructions can result in fire or death. • Do not allow ductwork t...
Page 17 - ductwork; INCORRECT VENTING
17 ENGLISH InstallatIon InstrUCtIons Venting the dryer (cont.) Deduct 6 ft. (1.8 m) for each additional elbow. It is not recommended to use more than four 90° elbows. routIng and connectIng ductwork Follow the guidelines below to maximize drying performance and reduce lint buildup and condensation i...
Page 18 - Connecting gas dryers
18 Connecting gas dryers w WarnInG To reduce the risk of fire, electric shock, or personal injury when using this appliance, follow basic precautions, including the following: electrical requirements for gas models only w WarnInG To reduce the risk of fire, electric shock, or personal injury when us...
Page 20 - Connecting electric dryers
20 Connecting electric dryers w WarnInG To help prevent fire, electric shock, serious injury, or death, the wiring and grounding must conform to the latest edition of the National Electrical Code, ANSI/NFPA 70 and all applicable local regulations. Please contact a qualified electrician to check your...
Page 21 - USA only
21 ENGLISH InstallatIon InstrUCtIons Connecting electric dryers (cont.) USA only w WarnInG • Connect the power cord to the terminal block. Each colored wire should be connected to same color screw. Wire color indicated on manual is connected to the same color screw in block. Failure to follow these ...
Page 25 - Special requirements for; Testing Dryer Heating; GAS MODELS; Checking Airflow; NOTE
25 ENGLISH INSTALLATION INSTRUCTIONS Special requirements for manufactured or mobile homes Any installation in a manufactured or mobile home must comply with the Manufactured Home Construction and Safety Standards Title 24 CFR, Part 32-80 or Standard CAN/CSA0Z240 MH and local codes and ordinances. I...
Page 27 - Restricted or Blocked Airflow; HS
27 ENGLISH InstallatIon InstrUCtIons Installation test (Exhaust check) (cont.) Restricted or Blocked Airflow Avoid long runs or runs with multiple elbows or bends. Excess or crushed transition duct Too many elbows or exhaust too long Check for blockages and lint buildup. Make sure the ductwork is no...
Page 28 - HOW TO USE; Operating the dryer
28 notE HOW TO USE Operating the dryer TURN ON THE DRYER Press the POWER button to turn on the dryer. The cycle LEDs will illuminate and a signal will sound, if turned on. Refer to page 10. 3 BEGIN CYCLE Press the START/PAUSE button to begin the cycle. The cycle can be paused at any time either by o...
Page 29 - Cycle guide
29 ENGLISH hoW to UsE sensor dry cycles Sensor Dry cycles utilize LG’s unique dual sensor system to detect and compare the moisture level in clothes and in the air and adjust the drying time as needed to ensure superior results. The dryer automatically sets the dryness level and temperature at the r...
Page 30 - Check the lint filter before every; Loading the Dryer
30 hoW to UsE Following are instructions for starting and using your new dryer. Please refer to specific sections of this manual for more detailed information. Check the lint filter before every load Always make sure the lint filter is clean before starting a new load; a clogged lint filter will inc...
Page 31 - Cycle setting buttons
31 ENGLISH hoW to UsE Cycle setting buttons SENSOR DRY cycles have preset settings that are selected automatically. MANUAL DRY cycles have default settings, but you may also customize the settings using the cycle setting buttons. Press the button for that option to view and select other settings. To...
Page 32 - MAINTENANCE; Regular cleaning
32 MaIntEnanCE MAINTENANCE Regular cleaning w WarnInG To reduce the risk of fire, electric shock, or personal injury when using this appliance, follow basic precautions, including the following: • Unplug the dryer before cleaning to avoid the risk of electric shock. Failure to follow this warning ca...
Page 33 - TROUBLESHOOTING; Before calling for service
33 ENGLISH TROUBLESHOOTING Before calling for service Your dryer is equipped with an automatic error-monitoring system to detect and diagnose problems at an early stage. If your dryer does not function properly or does not function at all, check the following before you call for service. Problem Pos...
Page 34 - SPECIFICATIONS
34 SPECIFICATIONS Dryer models DLE4801W DLG4802W Description Dryer Electrical Requirements* Please refer to the rating label regarding detailed information. Gas Requirements* NG 4-10.5 inches WC LP: 8–13 inches WC (Gas Models only) Dimensions 26.4”(W) X 29.2” (D) X 43.7” (H), 51” (D with door open) ...
Page 35 - TO CONTACT LG ELECTRONICS BY; LG DRYER LIMITED WARRANTY - USA; appropriate option to locate your nearest LG; Product Registration Information
35 ENGLISH Your LG Dryer will be will repaired or replaced, at LG’s option, if it proves to be defective in material or workmanship under normal use, during the warranty period (“Warranty Period”) set forth below, effective from the date (“Date of Purchase”) of original consumer purchase of the prod...
Page 37 - MANUAL DE PROPIETARIO; secadora; secadora luego de la instalacion para futuras consultas.; ESP
MANUAL DE PROPIETARIO secadora antes de comenzar la instalacion, lea atentamente estas instrucciones. esto simplifi cara la instalacion y asegurara que la secadora esta instalada en forma correcta y segura. conserve estas instrucciones cerca de la secadora luego de la instalacion para futuras consult...
Page 38 - PANEL DE CONTROL FÁCIL PARA USAR
2 CARACTERÍSTICAS ESPECIALES PANEL DE CONTROL FÁCIL PARA USAR Una amplia selección de funciones sencillas de usar para facilitar la operación de la secadora. PUERTA REVERSIBLE DE FÁCIL ACCESO La amplia puerta provee acceso para carga y descarga. Se puede invertir el sentido de la puerta para adaptar...
Page 39 - LEA TODAS LA INSTRUCCIONES ANTES DE USAR; ADVERTENCIA; Su Seguridad y la de los demás son de suma importancia.; PELIGRO; QUÉ HACER SI HUELE GAS:
3 ESP AÑOL INSTRUCCIONES IMPORTANTES DE SEGURIDAD LEA TODAS LA INSTRUCCIONES ANTES DE USAR w ADVERTENCIA Por su seguridad, debe seguir la información indicada en este manual para minimizar el riesgo de incendio o explosión, descarga eléctrica, o para prevenir daños a la propiedad, lesiones personale...
Page 40 - PRECAUCIoNES báSICAS dE SEGURIdAd; (CALIfoRNIA SAfE dRINkING WAtERAtER ANd toxIC ENfoRCEmENt ACt)
4 INSTRUCCIONES IMPORTANTES DE SEGURIDAD LEA TODAS LA INSTRUCCIONES ANTES DE USAR w ADVERTENCIA Por su seguridad, se debe seguir la información indicada en este manual para minimizar el riesgo de incendio o explosión, descarga eléctrica, o para prevenir daños a la propiedad, lesiones personales o mu...
Page 41 - INStRUCCIoNES dE CoNExIóN A tIERRA; INStRUCCIoNES ImPoRtANtEImPoRtANtES PARA LA INStALACIóN
5 ESP AÑOL INSTRUCCIONES IMPORTANTES DE SEGURIDAD LEA TODAS LA INSTRUCCIONES ANTES DE USAR w ADVERTENCIA Por su seguridad, se debe seguir la información indicada en este manual para minimizar el riesgo de incendio o explosión, descarga eléctrica, o para prevenir daños a la propiedad, lesiones person...
Page 42 - INStRUCCIoNES ImPoRtANtES PARA LA INStALACIóN
6 INSTRUCCIONES IMPORTANTES DE SEGURIDAD LEA TODAS LA INSTRUCCIONES ANTES DE USAR w ADVERTENCIA Por su seguridad, se debe seguir la información indicada en este manual para minimizar el riesgo de incendio o explosión, descarga eléctrica, o para prevenir daños a la propiedad, lesiones personales o mu...
Page 43 - GUARdE EStAS INStRUCCIoNES
7 ESP AÑOL INSTRUCCIONES IMPORTANTES DE SEGURIDAD LEA TODAS LA INSTRUCCIONES ANTES DE USAR w ADVERTENCIA Por su seguridad, se debe seguir la información indicada en este manual para minimizar el riesgo de incendio o explosión, descarga eléctrica, o para prevenir daños a la propiedad, lesiones person...
Page 44 - TAbLA DE CONTENIDOS
8 TAbLA DE CONTENIDOS 2 CARACTERÍSTICAS ESPECIALES 3 INSTRUCCIONES IMPORTANTES DE SEGURIDAD 3 Qué hacer si huele gas 4 Precauciones básicas de seguridad 4 ley ejecutiva Para la seguridad del agua Potable y los tóxicos de california (california safe drinking Water and toxic enforcement act) 5 instruc...
Page 45 - PIEZAS Y CARACTERÍSTICAS; Componentes; NOTA
9 ESP AÑOL PIEZAS Y CARACTERÍSTICAS PIEZAS Y CARACTERÍSTICAS Componentes Ubicación del cable eléctrico (Modelos a gas) Salida del conducto de escape Panel de acceso del bloque terminal (Modelos eléctricos) Ubicación de la toma de gas (Modelos a gas) NOTA • Póngase en contacto con el Departamento de ...
Page 46 - Características del panel de control
10 PIEZAS Y CARACTERÍSTICAS Características del panel de control A continuación encontrará instrucciones para comenzar a usar su secadora nueva. Para más información por favor consulte las secciones específicas de este manual. w ADVERTENCIA: Para reducir el riesgo de incendios, descargas eléctricas ...
Page 47 - INSTRUCCIONES PARA LA INSTALACIÓN; Vista previa del orden de instalación
11 ESP AÑOL INSTRUCCIONES PARA LA INSTALACIÓN INSTRUCCIONES PARA LA INSTALACIÓN Vista previa del orden de instalación Comprobación y elección de la ubicación adecuada Nivelación de la secadora Conexión de secadoras a gas (Tipo de secadoras gas) ventilación de la secadora Conexión del enchufe y la to...
Page 48 - Requisitos del lugar de instalación; Espacios de instalación
12 INSTRUCCIONES PARA LA INSTALACIÓN Requisitos del lugar de instalación w ADVERTENCIA Siga las instrucciones de funcionamiento y cuidado incluidas en este manual y conseguirá que su secadora ofrezca un servicio fiable y duradero. Es importante que revise todo este manual antes de instalar y usar su...
Page 49 - Nivelación de la secadora
13 ESP AÑOL INSTRUCCIONES PARA LA INSTALACIÓN Espacios de instalación (Cont.) Separación recomendada para la inStalación en un habitáculo cerrado • Al realizar la instalación en un habitáculo cerrado debe haber salidas de ventilación mínimas en la parte superior e inferior del lugar. *Espacio requer...
Page 50 - Inversión de la puerta
14 INSTRUCCIONES PARA LA INSTALACIÓN w ADVERTENCIA • Para evitar daños en la secadora o en la puerta, sujete dicha puerta con un taburete o una caja de un tamaño acorde o consiga un apoyo que soporte el peso de la puerta. • Evite que la puerta se caiga para que no se produzcan daños en la puerta o e...
Page 52 - Cónexión del conducto de ventilación de la secadora
16 Cónexión del conducto de ventilación de la secadora w ADVERTENCIA Para reducir el riesgo de incendio, descargas eléctricas o heridas al usar su electrodoméstico, siga las precauciones básicas, incluyendo lo siguiente: • No aplaste ni doble el sistema de conducto. Si no se siguen estas instruccion...
Page 53 - Sistema de conducto; vENtILACIóN dE ESCAPE
17 ESP AÑOL INSTRUCCIONES PARA LA INSTALACIÓN Conexión del conducto de ventilación de la secadora (cont.) Reste 6 pies (1,8 m) por cada codo adicional. No se recomienda usar más de cuatro codos de 90°. direccionamiento y conexión del SiStema de conducto de eScape Siga las pautas indicadas más abajo ...
Page 54 - Conexión de secadoras a gas
18 INSTRUCCIONES PARA LA INSTALACIÓN Conexión de secadoras a gas w ADVERTENCIA Para reducir el riesgo de incendio, descargas eléctricas o heridas al usar su electrodoméstico, siga las precauciones básicas, incluyendo lo siguiente: requisitos eléctricos para modelos a gas únicamente w ADVERTENCIA Par...
Page 56 - Cómo conectar las secadoras eléctricas
20 Cómo conectar las secadoras eléctricas w ADVERTENCIA Para ayudar a evitar incendios, descargas eléctricas, heridas graves o muerte, el cableado e instalación a tierra deben cumplir con la última edición del Código Eléctrico Nacional, ANSI/NFPA 70 y todas las regulaciones locales aplicables. Por f...
Page 61 - Requisitos especiales para viviendas; comprobación del calentamiento; modELoS A GAS; revisión del flujo de aire
25 ESP AÑOL INSTRUCCIONES PARA LA INSTALACIÓN Requisitos especiales para viviendas móviles o prefabricadas Cualquier instalación en una vivienda móvil o prefabricada debe realizarse de conformidad con los Estándares de seguridad y construcción de viviendas prefabricadas, Título 24 CFR, Parte 32-80 o...
Page 62 - Test de Instalación (Comprobación del sistema de evacuación)
26 INSTRUCCIONES PARA LA INSTALACIÓN Una vez haya instalado la secadora, haga este test para asegurarse de que las condiciones del sistema de evacuación son las adecuadas para el funcionamiento correcto de la secadora. Este test tiene como objetivo mostrarle si existe algún problema importante en el...
Page 63 - Test de Instalación; flujo de Aire Restringido o bloqueado
27 ESP AÑOL INSTRUCCIONES PARA LA INSTALACIÓN Test de Instalación (Comprobación del sistema de evacuación) (cont.) flujo de Aire Restringido o bloqueado Evite funcionamientos prolongados o funcionamientos con múltiples formaciones de torceduras o codos. Conducto demasiado largo o muy torcido Tubería...
Page 64 - CÓMO USAR; Funcionamiento de la secadora
28 CÓMO USAR CÓMO USAR Funcionamiento de la secadora ENCENdER LA SECAdoRA Presione el botón EnCEnDIDo/APAGADo (PowER) para encender la secadora. Si se enciende, los LEDs de ciclo se iluminarán y se emitirá un aviso sonoro. Consulte la página 10. 3 INICIAR EL CICLo Presione el botón InICIo/PAUSA(STAR...
Page 65 - Guía de ciclos
29 ESP AÑOL CÓMO USAR ciclos de Secado con SenSor (SenSor dry) Los ciclos de SECADo Con SEnSoR utilizan el sistema exclusivo de sensor doble de LG para detectar y comparar el nivel de humedad en las prendas y en el aire, y programar el tiempo de secado del modo necesario para asegurar resultados sup...
Page 66 - Revise el filtro de pelusa antes de; Cómo cargar la secadora
30 CÓMO USAR Revise el filtro de pelusa antes de cada uso Asegúrese siempre de que el filtro de pelusa esté limpio antes de iniciar una carga nueva; un filtro de pelusa bloqueado incrementará los tiempos de secado. Para limpiarlo, tire del filtro de pelusa verticalmente y, con los dedos, enrolle cua...
Page 67 - Botones de ajuste de ciclos; Funciones especiales
31 ESP AÑOL CÓMO USAR Botones de ajuste de ciclos los ciclos de sEcado con sEnsoR (sEnsoR dRY) tienen ajustes preprogramados que se seleccionan automaticamente. los ciclos de sEcado manUal (manUal dRY) tienen ajustes predeterminados, pero pueden Personalizarse usando los botones de ajustes de ciclos...
Page 68 - MANTENIMIENTO; Limpieza regular
32 MANTENIMIENTO MANTENIMIENTO Limpieza regular w ADVERTENCIA Para reducir el riesgo de incendio, descargas eléctricas o heridas al usar su electrodoméstico, siga las precauciones básicas, incluyendo lo siguiente: • desenchufe la secadora antes de limpiar la misma para evitar el riesgo de descargas ...
Page 69 - RESOLUCIÓN DE PRObLEMAS; Antes de llamar a mantenimiento
33 ESP AÑOL RESOLUCIÓN DE PRObLEMAS Antes de llamar a mantenimiento Su secadora está equipada con un sistema de monitoreo de errores automático para la detección y el diagnóstico de problemas en una etapa temprana. Si su secadora no funciona adecuadamente o no funciona en lo absoluto, revise lo sigu...
Page 71 - ESPECIFICACIONES
35 ESP AÑOL ESPECIFICACIONES ESPECIFICACIONES UtILIzACIóN dEL SmArtdIAgNOSIS™ - Utilice esta función sólo cuando así se lo indique el agente del Centro de Atención al Cliente. La transmisión tiene un sonido similar a la de un fax, y no tiene ningún significado, excepto para el Centro de Atención al ...
Page 72 - PARA CoNtACtAR A LG ELECtRoNICS; GARANtÍA LImItAdA dE LA SECAdoRA LG – EE. UU.; para ubicar a su Centro de mantenimiento Autorizado LG; Información de registro del producto
36 Su secadora LG será reparada o reemplazada, a discreción de LG, si se comprueba que existe un defecto en el material o la mano de obra bajo condiciones de uso normales, durante el período de garantía (“Período de garantía”) establecido más abajo, vigente desde la fecha (“Fecha de compra”) de la c...
Page 76 - LG Customer Information Center
1-800-243-0000 usa 1-888-542-2623 canada LG Customer Information Center Register your product Online! www.lg.com 3828EL2001F_sp_110519.indd 40 5/19/11 2:59:09 PM


 LG DC90V9V9W
Manual
LG DC90V9V9W
Manual
 LG DVH45-08W
User Manual
LG DVH45-08W
User Manual
 LG DVH5-08W
User Manual
LG DVH5-08W
User Manual
 LG DVH9-08B
User Manual
LG DVH9-08B
User Manual
 LG DVH9-09B
User Manual
LG DVH9-09B
User Manual
 LG DVH9-09W
User Manual
LG DVH9-09W
User Manual
 LG TD-C801H
User Manual
LG TD-C801H
User Manual
 LG TD-C8031E
User Manual
LG TD-C8031E
User Manual
 LG TD-C8035E
User Manual
LG TD-C8035E
User Manual
 LG TD-C80NPW
User Manual
LG TD-C80NPW
User Manual
 LG TDC901H
User Manual
LG TDC901H
User Manual
 LG TD-C902H
User Manual
LG TD-C902H
User Manual
 LG TD-C90NPE
User Manual
LG TD-C90NPE
User Manual
 LG TD-H802SJW
User Manual
LG TD-H802SJW
User Manual
 LG TD-H803CSW
User Manual
LG TD-H803CSW
User Manual
 LG TD-H901MW
User Manual
LG TD-H901MW
User Manual
 LG DLE0442G
User Manual
LG DLE0442G
User Manual
 LG DLE0442W
User Manual
LG DLE0442W
User Manual