Page 2 - TABLE OF CONTENTS
TABLE OF CONTENTS 2 3 IMPORTANT SAFETY INSTRUCTIONS 3 READ ALL INSTRUCTIONS BEFORE USE 4 WARNING STATEMENTS 7 CAUTION STATEMENTS 9 PRODUCT OVERVIEW 9 Product Features 12 INSTALLATION 12 Before Installing 13 Choosing the Proper Location 17 Leveling the Appliance 17 Reversing the Door 20 Installing th...
Page 3 - IMPORTANT SAFETY INSTRUCTIONS; READ ALL INSTRUCTIONS BEFORE USE; WARNING
3 IMPORTANT SAFETY INSTRUCTIONS EN G LIS H IMPORTANT SAFETY INSTRUCTIONS READ ALL INSTRUCTIONS BEFORE USE Safety for a Dryer WARNING Fire HazardFailure to follow safety warnings exactly could result in serious injury, death or property damage. • Do not install a booster fan in the exhaust duct. • In...
Page 4 - Safety Messages; WARNING STATEMENTS; Installation; dryer airflow and increase the risk of fire.
4 IMPORTANT SAFETY INSTRUCTIONS Safety Messages Your safety and the safety of others are very important. We have provided many important safety messages in this manual and on your appliance. Always read and follow all safety messages. WARNING STATEMENTS WARNING • To reduce the risk of explosion, fir...
Page 5 - Operation
5 IMPORTANT SAFETY INSTRUCTIONS EN G LIS H • The appliance must be installed and electrically grounded by qualified service personnel in accordance with local codes. • Disconnect the power cord, house fuse or circuit breaker before installing or servicing the appliance.• When moving or installing th...
Page 7 - Maintenance; Grounding Instructions; CAUTION STATEMENTS; CAUTION
7 IMPORTANT SAFETY INSTRUCTIONS EN G LIS H • Do not put living animals such as pets inside the appliance.• Do not put any part of your body, such as your hands or feet, or metal objects under the appliance.• Do not let your hand get pinched when opening or closing the dryer door.• 'RQRWXVHUHSODFHPHQ...
Page 8 - SAVE THESE INSTRUCTIONS
8 IMPORTANT SAFETY INSTRUCTIONS SAVE THESE INSTRUCTIONS Installation • Install the appliance on a firm and level floor.• Store and install the appliance where it will not be exposed to temperatures below freezing or exposed to outdoor weather conditions. Operation • Clean the lint filter before or a...
Page 9 - PRODUCT OVERVIEW; Product Features; Front View
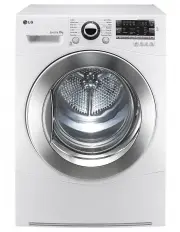
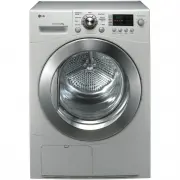
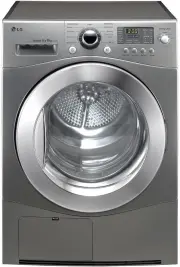
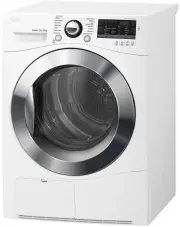
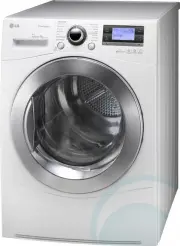
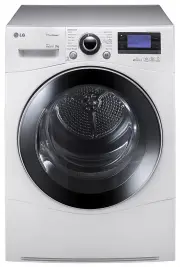
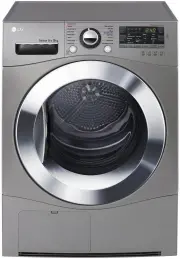
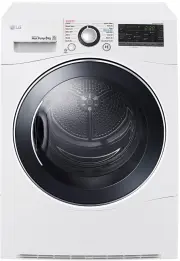
9 PRODUCT OVERVIEW EN G LIS H PRODUCT OVERVIEW Product Features The images in this guide may be different from the actual components and accessories, which are subject to change by the manufacturer without prior notice for product improvement purposes. Front View a Control Panel b Lint filters c Lev...
Page 10 - Product Specifications
10 PRODUCT OVERVIEW Product Specifications Model DL*X385** / DL*X420** DL*X450** Description Steam Dryer Electrical Requirements Please refer to the rating label for detailed information. Min. / Max. Water Pressure 20 - 120 psi (138 - 827 kPa) Dimensions (Width X Depth X Height) 27'' X 30 1/8'' X 39...
Page 11 - Accessories; Included Accessories; NOTE
11 PRODUCT OVERVIEW EN G LIS H Accessories Included Accessories a Y Connector (on some models) b Drying Rack (on some models) c Inlet Hose-Short (on some models) d Inlet Hose-Long (on some models) Optional Accessories (sold separately) a Pedestal b Stacking kit c Side vent kit (Kit No. 383EEL9001B) ...
Page 12 - INSTALLATION; Before Installing; Installation Overview
12 INSTALLATION INSTALLATION Before Installing Installation Overview Please read the following installation instructions first after purchasing this dryer or transporting it to another location. a Choose the proper location. b Level the appliance. c Vent the appliance. d Connect the inlet hose (for ...
Page 13 - Choosing the Proper; Exhaust; Flooring; Ambient Temperature
13 INSTALLATION EN G LIS H Choosing the Proper Location WARNING • Read all installation instructions completely before installing and operating the appliance. It is important that you review this entire manual before installing and using the appliance. Detailed instructions concerning electrical con...
Page 14 - Dimensions and Clearances; Installation Spacing for Recessed Area or Closet Installation
14 INSTALLATION Dimensions and Clearances The following clearances are recommended for the appliance.• Additional clearances should be considered for ease of installation and servicing.• Additional clearances should be considered on all sides of the dryer to reduce noise transfer. Installation Spaci...
Page 15 - Closet Ventilation Requirements
15 INSTALLATION EN G LIS H Closet Ventilation Requirements Closets with doors must have both an upper and lower vent to prevent heat and moisture buildup in the closet. One upper vent opening with a minimum opening of 48 sq. in. (310 cm 2 ) must be installed no lower than 6 feet above the floor. One...
Page 16 - Installation Spacing for Cabinet
16 INSTALLATION Installation Spacing for Cabinet For cabinet installation with a door, minimum ventilation openings in the top of the cabinet are required. - Description Dimension/Clearance A Depth of Ventilation Opening 2 7 Ȓ (178 mm) B Back Clearance 2 5 Ȓ (127 mm) C Depth 30 1/8 Ȓ (765 mm) D Fron...
Page 17 - Leveling the Appliance; Checking the Level; Adjusting the Leveling Feet; Reversing the Door; Tools Required
17 INSTALLATION EN G LIS H Leveling the Appliance WARNING • Use long-sleeved gloves and safety glasses.• The appliance is heavy. Two or more people are required when installing the appliance. Checking the Level Position the appliance in the final location and place a level across the top of the appl...
Page 18 - Door Reversal Instructions
18 INSTALLATION 2 While supporting the door, remove the 2 screws on the door hinge. Remove the door. 3 Turn the door upside down and line up the holes in the hinge with the holes on the opposite side of the cabinet. Reinstall the door with the screws removed in step 2. WARNING • Be sure to support t...
Page 20 - Installing the Vent Kit; Side Venting
20 INSTALLATION Installing the Vent Kit WARNING • Use long-sleeved gloves and safety glasses.• Use a heavy metal vent.• Do not use plastic or thin foil ducts.• Clean old ducts before installing the appliance. The appliance is configured to vent to the rear. It can also vent to the bottom or side. NO...
Page 21 - Stacking the Appliance; Venting the Dryer
21 INSTALLATION EN G LIS H Stacking the Appliance Tools Required • Phillips screwdriver Stacking Kit Installation WARNING • The weight of the appliance and the height of installation make this stacking procedure too risky for one person. Two or more people are required when installing the stacking k...
Page 22 - Ductwork; Routing and Connecting Ductwork; Correct Venting
22 INSTALLATION • If connecting to existing ductwork, make sure it is suitable and clean before installing the dryer. • Venting must conform to local building codes.• Use only 4-inch (10.2 cm) rigid, semi-rigid or flexible metal ductwork inside the dryer cabinet and for venting outside. • The exhaus...
Page 23 - Incorrect Venting; Connecting Gas Dryers; Electrical Requirements for Gas; Gas Supply Requirements; Connecting the Gas Supply
23 INSTALLATION EN G LIS H Incorrect Venting Connecting Gas Dryers WARNING • To reduce the risk of fire or explosion, electric shock, property damage, injury to persons, or death when using this appliance, follow requirements including the following. Electrical Requirements for Gas Models WARNING • ...
Page 24 - High-Altitude Installations; Connecting Electric Dryers; Electrical Requirements for Electric
24 INSTALLATION for the type of gas being used (natural gas or propane gas). • Use only a new stainless steel flexible connector and a new AGA-certified connector. • A gas shutoff valve must be installed within 6 ft. (1.8 m) of the dryer. • If necessary, the correct nozzle should be installed by a q...
Page 25 - Connecting the Water Inlet; How to Connect the Water Inlet
25 INSTALLATION EN G LIS H • The appliance has its own terminal block that must be connected to a separate 230 VAC, 60- Hertz, single-phase circuit, fused at 30 amperes. (The circuit must be fused on both sides of the line.) ELECTRICAL SERVICE FOR THE APPLIANCE SHOULD BE OF THE MAXIMUM RATE VOLTAGE ...
Page 26 - Final Installation Check
26 INSTALLATION 2 Check the type of installation and connect the hose to the faucet. Connect all water supply hoses tightly by hand and then tighten another 2/3 turn with pliers.• Type 1 : WITHOUT WASHER (The dryer does not share the faucet with the washing machine.)1) Connect the straight end of th...
Page 27 - Test Dryer Heating; Gas Models; Electric Models; Checking Airflow; Activating the Installation Test
27 INSTALLATION EN G LIS H Test Dryer Heating Gas Models Close the dryer door and press the Power button to turn the dryer on. Press the Time Dry and Start/Pause buttons to start the test. When the dryer starts, the igniter should ignite the main burner. NOTE • If all air is not purged from the gas ...
Page 28 - Check the Duct Condition; Error Codes
28 INSTALLATION 3 Press the Start/Pause button. • The appliance will start the test, which will last a few minutes. The heat will be turned on and the temperatures in the drum will be measured. 4 Check the display for results.• During the test cycle, monitor the Flow Sense TM display on the control ...
Page 29 - Restricted or Blocked Airflow; Check for blockages and lint buildup.
29 INSTALLATION EN G LIS H Restricted or Blocked Airflow Avoid long runs or runs with multiple elbows or bends. Check for blockages and lint buildup. Make sure the ductwork is not crushed or restricted. GAs Gas supply or service turned off. (Gas model only.) • Confirm that house gas shutoff and the ...
Page 30 - OPERATION; Before Use; Operation Overview
30 OPERATION OPERATION Before Use WARNING • To reduce the risk of fire, electric shock, or injury to persons, read the IMPORTANT SAFETY INSTRUCTIONS before operating this appliance. Operation Overview 1 Clean the Lint Filter• If the lint filter has not already been cleaned, lift out the filter and r...
Page 31 - Loading the Dryer; General Tips; Additional Operation Information
31 OPERATION EN G LIS H fingers. Push the lint filter firmly back into place. See Regular Cleaning for more information. Always ensure that the lint filter is properly installed before running the dryer. Running the dryer with a loose or missing lint filter will damage the dryer and articles in the ...
Page 32 - Options and Extra Functions; Control Lock; Locking/Unlocking the Control Panel
32 OPERATION Options and Extra Functions Your dryer includes several additional cycle options to customize cycles to meet your individual needs.Select the desired option after selecting the desired cycle and settings. NOTE • The LED for the option will light up when the option is selected. • To prot...
Page 33 - SMART FUNCTIONS; LG ThinQ Application; LG ThinQ Application Features; Installing LG ThinQ App and; Models with QR Code
33 SMART FUNCTIONS EN G LIS H SMART FUNCTIONS LG ThinQ Application The LG ThinQ application allows you to communicate with the appliance using a smartphone. LG ThinQ Application Features • Dryer Cycle - Download new and specialized cycles that are not included in the standard cycles on the appliance...
Page 34 - Using the Appliance Remotely; Remote Start; Using Remote Start; Download Cycle
34 SMART FUNCTIONS 3 Touch the add ( ~ ) button on the LG ThinQ app to connect your LG appliance. Follow the instructions in the app to complete the process. NOTE • You may be asked to provide a password to connect to the LG network (not your home network) during the Wi-Fi setup. The password is the...
Page 35 - Smart Diagnosis; Function
35 SMART FUNCTIONS EN G LIS H Wireless LAN Module Specifications Industry Canada Statement This device contains licence-exempt transmitter(s)/ receiver(s) that comply with Innovation, Science and Economic Development Canada’s licence- exempt RSS(s). Operation is subject to the following two conditio...
Page 37 - MAINTENANCE; Regular Cleaning; Cleaning the Exterior; Cleaning the Interior; Maintaining Ductwork; Cleaning the Lint Filter
37 MAINTENANCE EN G LIS H MAINTENANCE WARNING • Unplug the appliance before cleaning.• Never use harsh chemicals, abrasive cleaners, or solvents to clean the appliance. They will damage the finish. Regular Cleaning Cleaning the Exterior Proper care of your appliance can extend its life. The outside ...
Page 39 - TROUBLESHOOTING; FAQs; Frequently Asked Questions
39 TROUBLESHOOTING EN G LIS H TROUBLESHOOTING FAQs Frequently Asked Questions User Support Videos For further assistance, there are videos and tutorials available through the lg.com website. 1 On the lg.com/us home page, click on the Support menu tab to bring up the menu selections. Select Video Tut...
Page 40 - Before Calling for Service; Error Messages
40 TROUBLESHOOTING Before Calling for Service The dryer is equipped with an automatic error-monitoring system to detect and diagnose problems at an early stage. If the dryer does not function properly or does not function at all, check the following before you call for service. Error Messages Operat...
Page 42 - Performance
42 TROUBLESHOOTING Performance Drying time is not consistent. Heat settings, load size, or dampness of clothing is not consistent. • The drying time for a load will vary depending on the size of the load, the type of fabrics, the wetness of the clothes and the condition of the lint filter. Even an u...
Page 43 - Steam Functions
43 TROUBLESHOOTING EN G LIS H Steam Functions Excess static in clothes after drying. Fabric softener is not used or is used incorrectly. • Use a fabric softener or the Reduce Static option, if available, to reduce static electricity. Be sure to follow the manufacturer’s instructions. Clothes dried t...
Page 44 - Odors
44 TROUBLESHOOTING Odors Wi-Fi Drum does not turn during Steam Cycle. This is normal. • The drum is turned off so that the steam vapor remains in the drum. The drum will normally turn for about 2 seconds once a minute. Cannot see steam vapor at the beginning of cycle. This is normal. • Steam is rele...
Page 46 - LIMITED WARRANTY; CANADA; TERMS AND CONDITIONS
46 LIMITED WARRANTY LIMITED WARRANTY CANADA TERMS AND CONDITIONS ARBITRATION NOTICE: THIS LIMITED WARRANTY CONTAINS AN ARBITRATION PROVISION THAT REQUIRES YOU AND LG TO RESOLVE DISPUTES BY BINDING ARBITRATION INSTEAD OF IN COURT, UNLESS THE LAWS OF YOUR PROVINCE OR TERRITORY DO NOT PERMIT THAT, OR, ...
Page 47 - THIS LIMITED WARRANTY DOES; PROCEDURE FOR RESOLVING
47 LIMITED WARRANTY EN G LIS H THIS LIMITED WARRANTY DOES NOT COVER: • Service trips to i) deliver, pick up, or install or; educate on how to operate the Product; ii) correct wiring or plumbing; or iii) correct unauthorized repairs or installations of the Product; • Damage or failure of the Product ...
Page 53 - For inquiries or comments,
LG Customer Information Center Register your product Online! www.lg.com For inquiries or comments, visit www.lg.com or call: 1-800-243-0000 U.S.A. 1-888-542-2623 CANADA TUUGGwG]WGG~ SGuGZWSGYWYYGG`aZ]Ght


 LG DC90V9V9W
Manual
LG DC90V9V9W
Manual
 LG DVH45-08W
User Manual
LG DVH45-08W
User Manual
 LG DVH5-08W
User Manual
LG DVH5-08W
User Manual
 LG DVH9-08B
User Manual
LG DVH9-08B
User Manual
 LG DVH9-09B
User Manual
LG DVH9-09B
User Manual
 LG DVH9-09W
User Manual
LG DVH9-09W
User Manual
 LG TD-C801H
User Manual
LG TD-C801H
User Manual
 LG TD-C8031E
User Manual
LG TD-C8031E
User Manual
 LG TD-C8035E
User Manual
LG TD-C8035E
User Manual
 LG TD-C80NPW
User Manual
LG TD-C80NPW
User Manual
 LG TDC901H
User Manual
LG TDC901H
User Manual
 LG TD-C902H
User Manual
LG TD-C902H
User Manual
 LG TD-C90NPE
User Manual
LG TD-C90NPE
User Manual
 LG TD-H802SJW
User Manual
LG TD-H802SJW
User Manual
 LG TD-H803CSW
User Manual
LG TD-H803CSW
User Manual
 LG TD-H901MW
User Manual
LG TD-H901MW
User Manual
 LG DLE0442G
User Manual
LG DLE0442G
User Manual
 LG DLE0442W
User Manual
LG DLE0442W
User Manual