Page 2 - Safety Information; CAUTION
Getting Started 2 Getting Start e d 1 Safety Information CAUTION RISK OF ELECTRIC SHOCK DO NOT OPEN CAUTION: TO REDUCE THE RISK OF ELECTRIC SHOCK DO NOT REMOVE COVER (OR BACK) NO USER-SERVICEABLE PARTS INSIDE REFER SERVICING TO QUALIFIED SERVICE PERSONNEL. This lightning fl ash with arrowhead symbol...
Page 5 - Table of Contents
Table of Contents 5 1 2 3 4 5 Table of Contents 1 Getting Started 2 Safety Information 6 Unique Features 6 Accessories 6 Playable file Requirement 6 – MP3/WMA music file requirement 7 – Compatible USB Devices 7 – USB device requirement 8 Remote Control 9 Front Panel 10 Back Panel 2 Connecting 11 Con...
Page 6 - Unique Features; Portable In; USB; Accessories
Getting Started 6 Getting Start e d 1 Unique Features Portable In Listens to music from your portable device. (MP3, Notebook, etc) Radio Listens to the radio. USB Listens to music from your USB device. iPod/iPhone Listen to music from your iPod/iPhone device. Accessories Please check and identify th...
Page 7 - Compatible USB Devices
Getting Started 7 Getting Start e d 1 Compatible USB Devices MP3 Player : Flash type MP3 player. USB Flash Drive : Devices that support USB1.1 or USB2.0 The USB function of this unit does not support all USB devices. USB device requirement Devices which require additional program installatio...
Page 8 - Remote Control; Battery Installation
Getting Started 8 Getting Start e d 1 Remote Control Battery Installation Remove the battery cover on the rear of the Remote Control, and insert one (size AAA) battery with 4 and 5 matched correctly. • • • • • • a • • • • • • POWER : Switches the unit ON or OFF. EQ : Chooses sound impressions. ? : T...
Page 9 - Front Panel
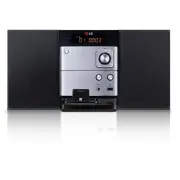
Getting Started 9 Getting Start e d 1 Front Panel 1 a iPod/iPhone Dock Connects an iPod/iPhone. b 1 / ! (Power ON/OFF) c Remote Sensor d OPEN Uses it when inserting or removing a CD. e Display Window f PRESET -/+ Selects preset numbers. TUNING -/+ Tunes in the desired radio. d / M (Play/Pause) Start...
Page 10 - Back Panel
Getting Started 10 Getting Start e d 1 Back Panel a Power cord b FM ANTENNA c SPEAKERS connector ( R/L ) CM1530-FP_AAUSLLK ENG 6426.indd 10 CM1530-FP_AAUSLLK ENG 6426.indd 10 2013-06-04 10:24:06 2013-06-04 10:24:06
Page 11 - Antenna Connection
Connecting 11 C onnecting 2 Connecting the speakers to the unit Connecting the speakers to the unit Connect the speaker cable plugs to the SPEAKER connector. Connect the red cable plug to the R connector and the the white one to the L connector. Color Speaker Red Front White Front Antenna Connection...
Page 12 - USB Connection; Note
Connecting 12 C onnecting 2 Optional Equipment Connection USB Connection Connect the USB Memory (or MP3 player, etc.) to the USB port on the front of the unit. 1 1 Removing the USB Device from the unit 1. Choose a different function/mode or press Z ENTER on the remote control or I on the unit twic...
Page 13 - Basic Operations; Selecting a folder
Operating 13 Operating 3 Basic Operations CD/ USB Operations 1. Insert the disc by pressing OPEN or connect the USB device to the USB port. 2. Select the CD or USB function by pressing FUNCTION on the remote control or FUNC. on the unit. 3. Select a track/file you want to play by pressing Cc/vV on t...
Page 14 - Other Operations; Programmed Playback; Turn off the sound temporarily; Auto Power Down
Operating 14 Operating 3 Other Operations Programmed Playback The program function enables you to store your favorite fi les from any disc or USB device. A program can contain 20 tracks/fi les. 1. Insert a CD or a USB and wait for it to be ordered. 2. Press PROGRAM/MEMO on the remote control in stop...
Page 15 - Radio Operations; Listening to the radio; Improving poor FM reception; Deleting all the saved stations
Operating 15 Operating 3 Radio Operations Listening to the radio 1. Press FUNCTION on the remote control or FUNC. on the unit until FM appears in the display window.The last received station is tuned in. 2. Auto tuning : Press TUN.-/+ on the remote control or TUNING -/+ on the unit for about 2 secon...
Page 16 - Sound adjustment; Setting the surround mode; Advanced Operations; Playing the iPod/iPhone; To connect iPod/iPhone to Dock
Operating 16 Operating 3 Sound adjustment Setting the surround mode This system has a number of pre-set surround sound fi elds. You can select a desired sound mode by using EQ . The displayed items for the Equalizer may be diff erent depending on sound sources and eff ects. On Display Description AU...
Page 17 - Compatible iPod/iPhone
Operating 17 Operating 3 To connect iPod/iPhone to USB cable 1. If you have correct 30 pin iPod/iPhone connection, use USB cable to connect your iPod/iPhone to the unit. 2. Turn the unit on. 3. Press FUNC. on the unit or FUNCTION on the remote control to select USB function. "USB iPod" will ...
Page 19 - Troubleshooting; Problem
Troubleshooting 19 T roubleshoo ting 4 Troubleshooting Problem Cause & Correction No Power. The power cord is not plugged in. Plug in the power cord. Check whether electricity failed. Check the condition by operating other electronic devices. No sound. Check whether you select right functi...
Page 20 - Trademarks and Licenses
Appendix 20 Appendix 5 Trademarks and Licenses “Made for iPod” ,“Made for iPhone” means that an electronic accessory has been designed to connect specifi cally to iPod, iPhone respectively, and has been certifi ed by the developer to meet Apple performance standards. Apple is not responsible for the...
Page 21 - Specifications
Appendix 21 Appendix 5 Specifications General Power supply Refer to the main label. Power consumption Refer to the main label. Net Weight 1.7 kg External dimensions ( W x H x D) 150 X 200 X 256 mm Operating conditions Temperature 5 °C to 35 °C (41 °F to 95 °F) Operating humidity 5 % to 85 % Bus Powe...
Page 22 - Maintenance; Handling the Unit
Appendix 22 Appendix 5 Maintenance Handling the Unit When shipping the unit Please save the original shipping carton and packing materials. If you need to ship the unit, for maximum protection, re-pack the unit as it was originally packed at the factory. Keeping the exterior surfaces clean Do not us...