Page 2 - Safety Information; CAUTION
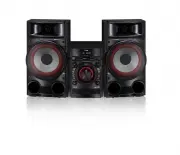
1 Getting Started Getting Started 2 Getting S tar ted 1 Safety Information CAUTION RISK OF ELECTRIC SHOCK DO NOT OPEN CAUTION: TO REDUCE THE RISK OF ELECTRIC SHOCK DO NOT REMOVE COVER (OR BACK) NO USER-SERVICEABLE PARTS INSIDE REFER SERVICING TO QUALIFIED SERVICE PERSONNEL. This lightning flash with...
Page 4 - Table of Contents; Getting Started
Table of Contents 4 Table of Contents 1 Getting Started 2 Safety Information 6 Unique Features 6 Accesories6 Playable file Requirement 6 – MP3/WMA music file requirement 7 – Compatible USB Devices 7 – USB device requirement 8 Remote Control 9 Front Panel 11 Rear Panel(CM4530) 12 Rear Panel(CM4630) 1...
Page 5 - Troubleshooting; Appendix
Table of Contents 5 1 2 3 4 5 4 Troubleshooting 26 Troubleshooting 5 Appendix 27 Specifications28 Speaker specifications29 Maintenance29 – Handling the Unit29 – Notes on Discs29 Trademarks and Licenses CM4630-FE_DAUSLLK_ENG_7539.indd 5 2013-02-18 11:55:41
Page 6 - Unique Features; USB Direct Recording; AUTO DJ; Radio; Accesories; Playable file; requirement
Getting Started 6 Getting S tar ted 1 Unique Features USB Direct Recording Records music to your USB device. AUTO DJ Blends the end of one song into the beginning of another for seamless playback. USB Listens to music from your USB device. Radio Listens to the radio. Made for iPod/iPhone Enjoys musi...
Page 7 - Compatible USB Devices
Getting Started 7 Getting S tar ted 1 Compatible USB Devices y MP3 Player : Flash type MP3 player. y USB Flash Drive : Devices that support USB2.0 or USB1.1. y The USB function of this unit does not support all USB devices. USB device requirement y Devices which require additional program installati...
Page 8 - Battery Installation; Remote Control
Getting Started 8 Getting S tar ted 1 Battery Installation Remove the battery cover on the rear of the Remote Control, and insert two (size AAA) batteries with 4 and 5 matched correctly • • • • • • a • • • • • • 1 (Power) : Switches the unit ON or OFF. B (Open/Close) : Opens and closes the disc tray...
Page 9 - Front Panel
Getting Started 9 Getting S tar ted 1 Front Panel CM4630-FE_DAUSLLK_ENG_7539.indd 9 2013-02-18 11:55:43
Page 14 - Connecting to; Attaching the speakers to the; Caution
2 Connecting Connecting 14 C onnecting 2 Connecting to speakers Attaching the speakers to the unit To connect the cable to the unit, press each plastic finger pad to open the connection terminals on the unit. Insert the wire and release the finger pad.Connect the black stripe of each wire to the ter...
Page 15 - Antenna Connection; Note; Optional Equipment; AUX IN Connection
Connecting 15 C onnecting 2 Antenna Connection Connect the supplied FM antenna for listening to the radio.Connect the FM wire antenna to the FM antenna connector. Be sure to fully extend the FM wire antenna. , Note Optional Equipment Connection AUX IN Connection Connect an output of auxiliary device...
Page 16 - USB Connection
3 Operating Connecting 16 C onnecting 2 USB Connection Connect the USB port of USB Memory (or MP3 player, etc.) to the USB port on the front of the unit. Removing the USB Device from the unit. 1. Choose a different function/mode or press I (Stop) twice in a row. 2. Remove the USB device from the uni...
Page 17 - Basic Operations; Other Operations; Programmed Playback; Displaying file information; Searching for a folder
3 Operating Operating 17 Oper ating 3 Basic Operations CD/USB Operations 1. Insert the disc by pressing B on the remote control or R on the unit. Connect the USB device to the USB port. 2. Select the CD or USB function by pressing FUNCTION on the remote control or FUNC. on the unit. 3. Select a trac...
Page 18 - Turn off the sound temporarily; DEMO; AUTO DJ playback
Operating 18 Oper ating 3 Turn off the sound temporarily Press MUTE @ on the remote control to mute your sound.You can mute your sound, for example, to answer the telephone, the “MUTE” will appear and blink in the display window.To cancel it, press MUTE @ again or change the volume level. Deleting a...
Page 19 - Listening to the sound from; Radio Operations; Listening to the radio
Operating 19 Oper ating 3 Listening to the sound from your external device The unit can be used to play the sound from many types of external device. (Refer to the page 15)1. Connect the external device to the AUX IN(L/R) connector of the unit. 2. Turn the power on by pressing 1 / ! (Power). 3. Sele...
Page 20 - Presetting the Radio Stations; Deleting all the saved stations
Operating 20 Oper ating 3 Presetting the Radio Stations You can preset 50 stations for FM.Before tuning, make sure to turn down the volume.1. Press FUNCTION on the remote control or FUNC. on the unit until FM appears in the display window. 2. Select the desired frequency by pressing TUNING-/+ on the...
Page 21 - Sound adjustment; Setting the surround mode; Setting the Clock; Setting the alarm
Operating 21 Oper ating 3 Sound adjustment Setting the surround mode This system has a number of pre-set surround sound fields. You can select a desired sound mode by using SOUND EFFECT on the remote control or LG EQ on the unit. The displayed items for the Equalizer may be different depending on so...
Page 22 - Sleep Timer Setting; Dimmer; Advanced Operations; Playing the iPod/iPhone
Operating 22 Oper ating 3 Sleep Timer Setting Press SLEEP on the remote control repeatedly to select delay time between 10 and 180 minutes. After delay time, the unit will turn off. (You can see the following order, 180 ->150 -> 120 -> 90 -> 80 -> 70 -> 60 -> 50 -> 40 -> 3...
Page 23 - Compatible iPod/iPhone
Operating 23 Oper ating 3 To Do this ON UNIT ON REMOTE Pause or restart T ST./MO. d / M Skip Y / U C / V Search Press and hold Y / U Press and hold C / V Move to the Previous menu - REPEAT (MENU) Move to the desired item - PRESET· FOLDER W / S Choose an item I Z ENTER Compatible iPod/iPhone The unit...
Page 24 - Recording to USB; Pausing recording; To select recording bit rate
Operating 24 Oper ating 3 Recording to USB You can record various sound sources to USB.1. Connect the USB device to the unit.2. Select a function by pressing FUNCTION on the remote control or FUNC. on the unit. One track/file recording - You can record to USB after playing a track/file you want. All...
Page 26 - Troubleshooting; Problem
4 Troubleshooting 5 Appendix Troubleshooting 26 Trouble shoo ting 4 Troubleshooting Problem Cause & Correction No Power. y The power cord is not plugged in. Plug in the power cord. y Check whether electricity failed.Check the condition by operating other electronic devices. No sound. y Check whe...
Page 27 - Specifications
5 Appendix Appendix 27 Appendix 5 Specifications General Model CM4630 CM4530 CM4430 CM4330 Power requirements Refer to the main label. Power consumption Refer to the main label. Dimensions ( W x H x D) 202 x 307 x 315 mm Net Weight (Approx.) 3.15 kg Operating temperature 5 °C to 35 °C (41 °F to 95 °...
Page 28 - Speaker specifications
Appendix 28 Appendix 5 Speaker specifications Front speaker Model CMS4630F CMS4530F (CM4530) CMS4530F (CM4430) CMS4330F Type 2 Way 2 Speaker Impedance 3 Ω 4 Ω Rated Input Power 250 W 160 W 150 W 90 W Max. Input power 500 W 320 W 300 W 180 W Net Dimensions ( W x H x D) 245 x 452 x 275 mm 232 x 352 x ...
Page 29 - Maintenance; Handling the Unit; Trademarks and
Appendix 29 Appendix 5 Maintenance Handling the Unit When shipping the unit Please save the original shipping carton and packing materials. If you need to ship the unit, for maximum protection, re-pack the unit as it was originally packed at the factory. Keeping the exterior surfaces clean Do not us...