LG BGE-123H - Manuals
LG BGE-123H Air Conditioner – User Manual in PDF format online.
Manuals:
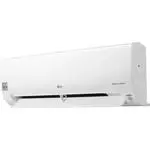
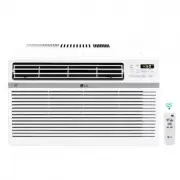
User Manual LG BGE-123H


Summary
2 Room Air Conditioner FOR YOUR RECORDS Write the model and serial numbers here:Model #Serial #You can find them on a label on the side of each unit.Dealer's NameDate Purchased ■ Staple your receipt to this page in the event you need itto prove date of purchase or for warranty issues. READ THIS MANU...
Owner’s Manual 3 ENGLISH Safety Precautions Safety Precautions To prevent injury to the user or other people and property damage, the following instructionsmust be followed. ■ Incorrect operation due to ignoring instruction will cause harm or damage. The seriousnessis classified by the following ind...
Otherwise the plug can become damaged. Do not remove, modify or immerse this plug. If this device trips, the cause should be corrected before further use. Periodically examine the cord for any damage. Do not use this product in the event the shields become exposed. Avoid shock hazard, this unit can ...
LG Air Conditioners Manuals
-
 LG B24TS
User Manual
LG B24TS
User Manual
-
LG B24TS
Manual
-
 LG B60LH
User Manual
LG B60LH
User Manual
-
 LG LB-H368GSS0
User Manual
LG LB-H368GSS0
User Manual
-
 LG LP0621WSR
User Manual
LG LP0621WSR
User Manual
-
 LG LP0721WSR
User Manual
LG LP0721WSR
User Manual
-
 LG LP0821GSSM
User Manual
LG LP0821GSSM
User Manual
-
 LG LP1021BHSM
User Manual
LG LP1021BHSM
User Manual
-
 LG LP1021BSSM
User Manual
LG LP1021BSSM
User Manual
-
 LG LP1419IVSM
User Manual
LG LP1419IVSM
User Manual
-
 LG LT1016CER
User Manual
LG LT1016CER
User Manual
-
 LG LT1216CER
User Manual
LG LT1216CER
User Manual
-
 LG LT-B2861HL
User Manual
LG LT-B2861HL
User Manual
-
 LG LW1016ER
User Manual
LG LW1016ER
User Manual
-
 LG LW1017ERSM
User Manual
LG LW1017ERSM
User Manual
-
 LG LW1017ERSM1
User Manual
LG LW1017ERSM1
User Manual
-
 LG LW1216ER
User Manual
LG LW1216ER
User Manual
-
 LG LW1217ERSM1
User Manual
LG LW1217ERSM1
User Manual
-
 LG LW1221HRSM
User Manual
LG LW1221HRSM
User Manual
-
 LG LW1223HR
User Manual
LG LW1223HR
User Manual