LG 32SR85U-W - Manuals
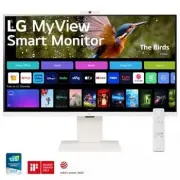
User Manual LG 32SR85U-W


Summary
2 Before reading this manual • Read this manual thoroughly before operating your Monitor, and keep it for future reference. • On the website you can download the manual including installation, using, troubleshooting, specifications, license etc and view its contents on your PC or mobile device. • Us...
3 • Never disassemble, repair or modify the power cord or AC adapter. - This may cause a fire or electric shock. • Use only the power cord supplied with the unit or another manufacturer's authorized cord. - Failure to do so may result in fire or electrical shock or damage to the product. • Use only ...
4 • If you smell smoke or other odors or hear a strange sound from the product unplug the power cord and contact LG Customer Service. - If you continue to use without taking proper measures, electrical shock or fire can occur. • If you dropped the product or the case is broken, turn off the product ...
LG Monitors Manuals
-
 LG 22MP410-B (22MP410-B)
User Manual
LG 22MP410-B (22MP410-B)
User Manual
-
 LG 24GL600F
User Manual
LG 24GL600F
User Manual
-
 LG 24MD4KL-B.AUS
User Manual
LG 24MD4KL-B.AUS
User Manual
-
 LG 27LQ615S
User Manual
LG 27LQ615S
User Manual
-
 LG 27MD5KL-B.AUS
User Manual
LG 27MD5KL-B.AUS
User Manual
-
 LG 27MP400-B
User Manual
LG 27MP400-B
User Manual
-
 LG 27UL500
User Manual
LG 27UL500
User Manual
-
 LG 27UL500WAUS
User Manual
LG 27UL500WAUS
User Manual
-
 LG 27UL850
User Manual
LG 27UL850
User Manual
-
 LG 27UP850N-W (27UP850N-W)
User Manual
LG 27UP850N-W (27UP850N-W)
User Manual
-
 LG 28MQ780-B
User Manual
LG 28MQ780-B
User Manual
-
 LG 32GN50R-B (32GN50R-B)
User Manual
LG 32GN50R-B (32GN50R-B)
User Manual
-
 LG 32GQ850-B (32GQ850-B)
User Manual
LG 32GQ850-B (32GQ850-B)
User Manual
-
 LG 32MN500M-B
User Manual
LG 32MN500M-B
User Manual
-
 LG 35WN75C
User Manual
LG 35WN75C
User Manual
-
 LG 38WN95C-WL
User Manual
LG 38WN95C-WL
User Manual
-
 LG E2060S
Manual
LG E2060S
Manual
-
 LG E2360V
Manual
LG E2360V
Manual
-
 LG UltraWide 34WP500-B
User Manual
LG UltraWide 34WP500-B
User Manual
-
 LG 16MQ70
User Manual
LG 16MQ70
User Manual