LG 24MP59HT-P - Manuals
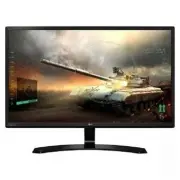
User Manual LG 24MP59HT-P


Summary
2 ENGLISH CONTENTS LICENSE ---------------------------- 3 ASSEMBLING AND PREPARING - 4 -Product Components -------------------------- 4 -Supported Drivers and Software -------------- 5 -Component and Button Description ---------- 6 How to Use the Joystick ButtonInput Connector -Moving and Lifting th...
3 ENG ENGLISH LICENSE Each model has different licenses. Visit www.lg.com for more information on the license. The following content is only applied to the monitor which is sold in Europe market and which needs to meet the ErP Directive:* This monitor is set to be turned off automatically in 4 hours...
4 ENG ENGLISH ASSEMBLING AND PREPARING Product Components Please check whether all the components are included in the box before using the product. If there are missing components, contact the retail store where you purchased the product. Note that the product and components may look different from ...
LG Monitors Manuals
-
 LG 24GL600F
User Manual
LG 24GL600F
User Manual
-
 LG 27MP400-B
User Manual
LG 27MP400-B
User Manual
-
 LG 27UL500
User Manual
LG 27UL500
User Manual
-
 LG 27UL850
User Manual
LG 27UL850
User Manual
-
 LG 28MQ780-B
User Manual
LG 28MQ780-B
User Manual
-
 LG 32MN500M-B
User Manual
LG 32MN500M-B
User Manual
-
 LG 35WN75C
User Manual
LG 35WN75C
User Manual
-
 LG 38WN95C-WL
User Manual
LG 38WN95C-WL
User Manual
-
 LG E2060S
Manual
LG E2060S
Manual
-
 LG E2360V
Manual
LG E2360V
Manual
-
 LG UltraWide 34WP500-B
User Manual
LG UltraWide 34WP500-B
User Manual
-
 LG 16MQ70
User Manual
LG 16MQ70
User Manual
-
 LG 19EN33S-B
User Manual
LG 19EN33S-B
User Manual
-
 LG 19MB35PM-B
User Manual
LG 19MB35PM-B
User Manual
-
 LG 20M35D-B
User Manual
LG 20M35D-B
User Manual
-
 LG 20M37D-B
User Manual
LG 20M37D-B
User Manual
-
 LG 20MK400H-B
User Manual
LG 20MK400H-B
User Manual
-
 LG 22BK430H-B
User Manual
LG 22BK430H-B
User Manual
-
 LG 22BL450Y-B
User Manual
LG 22BL450Y-B
User Manual
-
 LG 22LB4510
User Manual
LG 22LB4510
User Manual