Krups XP1500 - Manuals
Krups XP1500 – Manual in PDF format online.
Manuals:
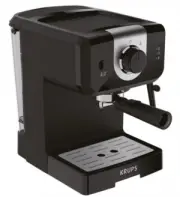
Manual Krups XP1500


Summary
6 IMPORTANT SAFEGUARDS When using electrical appliances, basic safety precautions shouldalways be followed to reduce the risk of fire, electric shock and/orinjury to persons, including the following: 1- Read all instructions and information in this instruction book and any other literature included ...
8 CAUTION This appliance is intended for household use only. Any servicingother, than cleaning and user maintenance should be performed byan authorized service representative.•To reduce the risk of fire or electric shock, do not remove the base. No user serviceable parts inside. Repair should be don...
9 CAUTION – PRESSURE Never open boiler cap (e1) or removefilter holder (e9) while your appliance isturned «on» or as long as there is pres-sure in the boiler container. Never move or remove the filter holderwhile the appliance is in operation andunder pressure. Please follow the instructions listedb...
Krups Manuals
-
 Krups Barista EA907D
Manual
Krups Barista EA907D
Manual
-
 Krups Opio XP3208
Manual
Krups Opio XP3208
Manual
-
 Krups 872
Manual
Krups 872
Manual
-
 Krups EA 8050
Manual
Krups EA 8050
Manual
-
 Krups IB95
Manual
Krups IB95
Manual
-
 Krups 3.21
Manual
Krups 3.21
Manual
-
 Krups BW600
Manual
Krups BW600
Manual
-
 Krups Waffle Iron
Manual
Krups Waffle Iron
Manual
-
 Krups 889
Manual
Krups 889
Manual
-
 Krups KB790
Manual
Krups KB790
Manual
-
 Krups ORCHESTRO DIALOG
Manual
Krups ORCHESTRO DIALOG
Manual
-
 Krups FNP1
Manual
Krups FNP1
Manual
-
 Krups XP 4050
Manual
Krups XP 4050
Manual
-
Krups EA 8025
Manual
-
Krups B95
Manual
-
 Krups F230
Manual
Krups F230
Manual
-
 Krups XP4050
Manual
Krups XP4050
Manual
-
 Krups KP1000
Manual
Krups KP1000
Manual
-
 Krups XP 4000
Manual
Krups XP 4000
Manual
-
 Krups XP2010
Manual
Krups XP2010
Manual