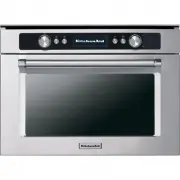
KitchenAid KOFCS60900 - Manuals

User Manual KitchenAid KOFCS60900


Summary
4 Important safety instructions YOUR SAFETY AND THAT OF OTHERS IS VERY IMPORTANT This manual and the appliance itself provide important safety warnings, to beread and observed at all times. This is the danger symbol, pertaining to safety, which alerts users topotential risks to themselves and others...
7 (e.g. rum, cognac, wine), remember that alcoholevaporates at high temperatures. As a result, there is arisk that vapours released by the alcohol may catchfire upon coming into contact with the electricalheating element. • Never use steam cleaning equipment.• Do not touch the oven during the pyroly...
8 After unpacking the oven,make sure that it has not beendamaged during transit andthat the oven door closesproperly.In the event of problems,contact the dealer or yournearest After-Sales Service. Toavoid any damage, onlyremove the oven from itspolystyrene foam base at thetime of installation. Prepa...
KitchenAid Ovens Manuals
-
 KitchenAid KOCCX 45600
User Manual
KitchenAid KOCCX 45600
User Manual
-
 KitchenAid KOCE500EBL
User Manual
KitchenAid KOCE500EBL
User Manual
-
 KitchenAid KOCE500EBS
User Manual
KitchenAid KOCE500EBS
User Manual
-
KitchenAid KOCE500EBS
Manual
-
 KitchenAid KOCE500ESS
User Manual
KitchenAid KOCE500ESS
User Manual
-
KitchenAid KOCE500ESS
Manual
-
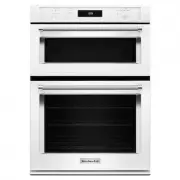 KitchenAid KOCE500EWH
User Manual
KitchenAid KOCE500EWH
User Manual
-
KitchenAid KOCE500EWH
Manual
-
KitchenAid KOCE500EWH
Installation Manual
-
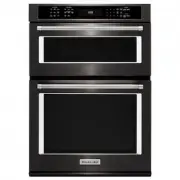
 KitchenAid KOCE507EBL
User Manual
KitchenAid KOCE507EBL
User Manual
-
 KitchenAid KOCE507EBS
User Manual
KitchenAid KOCE507EBS
User Manual
-
KitchenAid KOCE507EBS
Installation Manual
-
KitchenAid KOCE507EBS
Manual
-
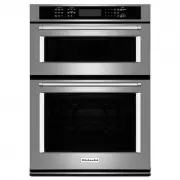 KitchenAid KOCE507ESS
User Manual
KitchenAid KOCE507ESS
User Manual
-
KitchenAid KOCE507ESS
Manual
-
KitchenAid KOCE507ESS
Installation Manual
-
 KitchenAid KOCE900HBS
User Manual
KitchenAid KOCE900HBS
User Manual
-
KitchenAid KOCE900HBS
Manual
-
KitchenAid KOCE900HBS
Installation Manual
-
 KitchenAid KOCE900HSS
User Manual
KitchenAid KOCE900HSS
User Manual