KitchenAid KMBT5011KSS - Manuals
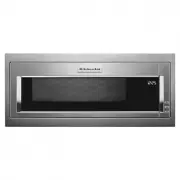
KitchenAid KMBT5011KSS Microwave – Troubleshooting Guide, Manual in PDF format online.
Manuals:
Troubleshooting Guide KitchenAid KMBT5011KSS
1

2

3

4

5

6

7

8

Summary
Page 3 - Major Appliance Limited Warranty
3 Major Appliance Limited Warranty Before contacting us to arrange service, some questions can be addressed without service. Please visit the "Troubleshooting" section at https://www.kitchenaid.com/owners for Troubleshooting help. In Canada, visit https://www.kitchenaid.ca/owners. HOW TO MAK...
Page 5 - Garantía limitada de electrodomésticos principales
5 Garantía limitada de electrodomésticos principales Antes de contactarnos para organizar la visita del servicio técnico, algunas preguntas pueden resolverse sin servicio técnico. Visite la sección "Solución de problemas" enhttps://www.kitchenaid.com/owners para obtener ayudar sobre Solución...
Page 7 - NOTES
Manual KitchenAid KMBT5011KSS
1

2

3

KitchenAid Microwaves Manuals
-
 KitchenAid KMBD104GSS
User Manual
KitchenAid KMBD104GSS
User Manual
-
KitchenAid KMBD104GSS
Installation Manual
-
KitchenAid KMBD104GSS
Manual
-
KitchenAid KMBD104GSS
Troubleshooting Guide
-
 KitchenAid KMBP100EBS
User Manual
KitchenAid KMBP100EBS
User Manual
-
KitchenAid KMBP100EBS
Manual
-
KitchenAid KMBP100EBS
Installation Manual
-
 KitchenAid KMBP100ESS
User Manual
KitchenAid KMBP100ESS
User Manual
-
KitchenAid KMBP100ESS
Manual
-
KitchenAid KMBP100ESS
Installation Manual
-
 KitchenAid KMBP107EBS
User Manual
KitchenAid KMBP107EBS
User Manual
-
KitchenAid KMBP107EBS
Manual
-
KitchenAid KMBP107EBS
Installation Manual
-
 KitchenAid KMBP107ESS
User Manual
KitchenAid KMBP107ESS
User Manual
-
KitchenAid KMBP107ESS
Manual
-
KitchenAid KMBP107ESS
Installation Manual
-
 KitchenAid KMBS104EBL
User Manual
KitchenAid KMBS104EBL
User Manual
-
KitchenAid KMBS104EBL
Installation Manual
-
KitchenAid KMBS104EBL
Manual
-
 KitchenAid KMBS104ESS
User Manual
KitchenAid KMBS104ESS
User Manual