KitchenAid KMBT5011KS - Manuals
KitchenAid KMBT5011KS Microwave – User Manual in PDF format online.
Manuals:
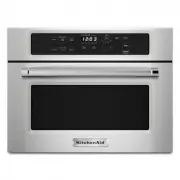
User Manual KitchenAid KMBT5011KS


Summary
2 MICROWAVE OVEN SAFETY When using electrical appliances basic safety precautions should be followed, including the following: IMPORTANT SAFETY INSTRUCTIONS SAVE THESE INSTRUCTIONS WARNING: To reduce the risk of burns, electric shock, fire, injury to persons, or exposure to excessive microwave energ...
3 IMPORTANT SAFETY INSTRUCTIONS SAVE THESE INSTRUCTIONS ■ Use the microwave oven only for its intended use as described in the manual. Do not use corrosive chemicals or vapors in the microwave oven. This type of oven is specifically designed to heat, cook, or dry food. It is not designed for industr...
4 Electrical Requirements Observe all governing codes and ordinances. Required: ■ A 120 V, 60 Hz, AC only, 15 or 20 A electrical supply with a fuse or circuit breaker Recommended: ■ A time-delay fuse or time-delay circuit breaker ■ A separate circuit serving only this microwave oven Electrical Shock...
KitchenAid Microwaves Manuals
-
 KitchenAid KMBD104GSS
User Manual
KitchenAid KMBD104GSS
User Manual
-
KitchenAid KMBD104GSS
Installation Manual
-
KitchenAid KMBD104GSS
Manual
-
KitchenAid KMBD104GSS
Troubleshooting Guide
-
 KitchenAid KMBP100EBS
User Manual
KitchenAid KMBP100EBS
User Manual
-
KitchenAid KMBP100EBS
Manual
-
KitchenAid KMBP100EBS
Installation Manual
-
 KitchenAid KMBP100ESS
User Manual
KitchenAid KMBP100ESS
User Manual
-
KitchenAid KMBP100ESS
Manual
-
KitchenAid KMBP100ESS
Installation Manual
-
 KitchenAid KMBP107EBS
User Manual
KitchenAid KMBP107EBS
User Manual
-
KitchenAid KMBP107EBS
Manual
-
KitchenAid KMBP107EBS
Installation Manual
-
 KitchenAid KMBP107ESS
User Manual
KitchenAid KMBP107ESS
User Manual
-
KitchenAid KMBP107ESS
Manual
-
KitchenAid KMBP107ESS
Installation Manual
-
 KitchenAid KMBS104EBL
User Manual
KitchenAid KMBS104EBL
User Manual
-
KitchenAid KMBS104EBL
Installation Manual
-
KitchenAid KMBS104EBL
Manual
-
 KitchenAid KMBS104ESS
User Manual
KitchenAid KMBS104ESS
User Manual