KitchenAid KEIPP 12020 - Manuals

User Manual KitchenAid KEIPP 12020


Summary
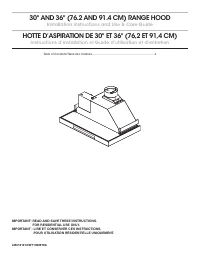
4 YOUR SAFETY AND THAT OF OTHERS ISHIGHLY IMPORTANT. This manual and the appliance itself provideimportant safety warnings, to be read and observedat all times. This is the attention symbol, pertaining tosafety, which alerts users to potential risks tothemselves and others. All safety warnings are p...
5 Scrapping of household appliances • This appliance is manufactured with recyclable or reusable materials. Dispose of it in accordancewith local waste disposal regulations. Beforedisposing of it, make it unusable by cutting off itspower supply cable. • For further information on the treatment, reco...
6 Disposal of packing The packing material is 100% recyclable and ismarked with the recycle symbol . The various parts of the packing must be disposed of responsiblyand in full compliance with local authorityregulations governing waste disposal. Disposal of the appliance - This appliance is marked i...
KitchenAid Range Hoods Manuals
-
 KitchenAid KEBDS90020
User Manual
KitchenAid KEBDS90020
User Manual
-
 KitchenAid KEBES60010
User Manual
KitchenAid KEBES60010
User Manual
-
 KitchenAid KEWPP90010
User Manual
KitchenAid KEWPP90010
User Manual
-
 KitchenAid KEWTP 90010
User Manual
KitchenAid KEWTP 90010
User Manual
-
 KitchenAid KEWVP 80010
User Manual
KitchenAid KEWVP 80010
User Manual
-
 KitchenAid KVIB602DSS
User Manual
KitchenAid KVIB602DSS
User Manual
-
 KitchenAid KVIB606DBS
User Manual
KitchenAid KVIB606DBS
User Manual
-
KitchenAid KVIB606DBS
Installation Manual
-
KitchenAid KVIB606DBS
Manual
-
 KitchenAid KVIB606DSS
User Manual
KitchenAid KVIB606DSS
User Manual
-
 KitchenAid KVUB400GSS
User Manual
KitchenAid KVUB400GSS
User Manual
-
KitchenAid KVUB400GSS
Installation Manual
-
KitchenAid KVUB400GSS
Manual
-
 KitchenAid KVUB406GSS
User Manual
KitchenAid KVUB406GSS
User Manual
-
KitchenAid KVUB406GSS
Installation Manual
-
KitchenAid KVUB406GSS
Manual
-
 KitchenAid KVUB600DSS
User Manual
KitchenAid KVUB600DSS
User Manual
-
 KitchenAid KVUB606DSS
User Manual
KitchenAid KVUB606DSS
User Manual
-
 KitchenAid KVUC600KSS
User Manual
KitchenAid KVUC600KSS
User Manual
-
KitchenAid KVUC600KSS
Installation Manual