KitchenAid KEBES60010 - Manuals
User Manual KitchenAid KEBES60010


Summary
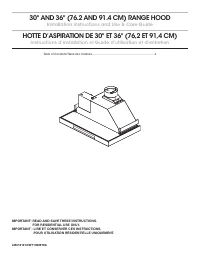
4 YOUR SAFETY AND THAT OF OTHERS ISHIGHLY IMPORTANT. This manual and the appliance itself provideimportant safety warnings, to be read andobserved at all times. This is the attention symbol, pertaining tosafety, which alerts users to potential risks tothemselves and others. All safety warnings are p...
5 • Do not use or leave the hood without its lampscorrectly installed - risk of electric shock. • Wear work gloves for all installation andmaintenance operations. • The product is not suitable for outdoor use. • When the hob is in use, accessible parts of thehood may become hot. • Never flame cook f...
6 After unpacking the appliance, check for anydamage caused during transport. In case ofproblems, contact the dealer or the After-SalesService. To avoid any damage, it is advisable toonly remove the appliance from the polystyrenebase just before installation. PREPARATION FOR INSTALLATION this applia...
KitchenAid Range Hoods Manuals
-
 KitchenAid KEBDS90020
User Manual
KitchenAid KEBDS90020
User Manual
-
 KitchenAid KEIPP 12020
User Manual
KitchenAid KEIPP 12020
User Manual
-
 KitchenAid KEWPP90010
User Manual
KitchenAid KEWPP90010
User Manual
-
 KitchenAid KEWTP 90010
User Manual
KitchenAid KEWTP 90010
User Manual
-
 KitchenAid KEWVP 80010
User Manual
KitchenAid KEWVP 80010
User Manual
-
 KitchenAid KVIB602DSS
User Manual
KitchenAid KVIB602DSS
User Manual
-
 KitchenAid KVIB606DBS
User Manual
KitchenAid KVIB606DBS
User Manual
-
KitchenAid KVIB606DBS
Installation Manual
-
KitchenAid KVIB606DBS
Manual
-
 KitchenAid KVIB606DSS
User Manual
KitchenAid KVIB606DSS
User Manual
-
 KitchenAid KVUB400GSS
User Manual
KitchenAid KVUB400GSS
User Manual
-
KitchenAid KVUB400GSS
Installation Manual
-
KitchenAid KVUB400GSS
Manual
-
 KitchenAid KVUB406GSS
User Manual
KitchenAid KVUB406GSS
User Manual
-
KitchenAid KVUB406GSS
Installation Manual
-
KitchenAid KVUB406GSS
Manual
-
 KitchenAid KVUB600DSS
User Manual
KitchenAid KVUB600DSS
User Manual
-
 KitchenAid KVUB606DSS
User Manual
KitchenAid KVUB606DSS
User Manual
-
 KitchenAid KVUC600KSS
User Manual
KitchenAid KVUC600KSS
User Manual
-
KitchenAid KVUC600KSS
Installation Manual