JVC LT-32BX19 - Manuals
JVC LT-32BX19 TV – Manual in PDF format online.
Manuals:
Manual JVC LT-32BX19


Summary
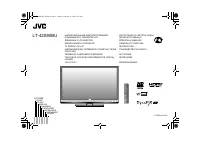
2 JVC • Follow this manual regarding setup! - Connect only to a 110-240 V, 50/60Hz AC outlet. • Make enough room for inserting and removing the power plug! • Place the TV as close to the outlet as possible! - The main power supply for this TV is controlled by inserting or removing the power plug. • ...
3 OK 16:9 Zoom • Insert the batteries Use two “AAA/R03” dry cell batteries. Insert the batteries from the · end, making sure the · and ª polarities are correct. “AAA/R03” Batteries Turn the volume off/on Change channel/page Channel selection Select the desired channel number. For Hyper Scan PR chang...
4 TV/VIDEO MENU/OK CHANNEL VOLUME MM MM MM MM MM VIDEO-2 VIDEO-2 R L V 1 2 Set up and connections Care when setting Hole for belt Belt (not provided) Screw (not provided) Power lamp ON : Lit (Blue) OFF : Unlit Power lamp lights while the TV is on. • “Power Lamp” (P. 11) Remote control sensor Switch ...
JVC TVs Manuals
-
 JVC AV-H323115A
User Manual
JVC AV-H323115A
User Manual
-
 JVC AV-H437115A
User Manual
JVC AV-H437115A
User Manual
-
 JVC AV-H557135A11
User Manual
JVC AV-H557135A11
User Manual
-
 JVC AV-H587115A
User Manual
JVC AV-H587115A
User Manual
-
 JVC AV-H657115A
User Manual
JVC AV-H657115A
User Manual
-
 JVC AV-HQ507115A
User Manual
JVC AV-HQ507115A
User Manual
-
 JVC AV-HQ557115A
User Manual
JVC AV-HQ557115A
User Manual
-
 JVC AV-HQ657115A
User Manual
JVC AV-HQ657115A
User Manual
-
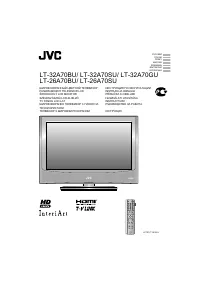 JVC LT-32A70SU
User Manual
JVC LT-32A70SU
User Manual
-
JVC LT-32A70SU
Manual
-
 JVC LT-32EX18
Manual
JVC LT-32EX18
Manual
-
JVC LT-42EX18
Manual
-
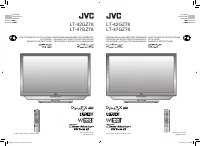 JVC LT-47GZ78
Manual
JVC LT-47GZ78
Manual
-
 JVC LT-Z32EX6
Manual
JVC LT-Z32EX6
Manual
-
 JVC LT-Z40SX6
Manual
JVC LT-Z40SX6
Manual
-
 JVC LT-Z32FX6
Manual
JVC LT-Z32FX6
Manual
-
 JVC LT-46Z70BU
Manual
JVC LT-46Z70BU
Manual
-
 JVC LT-42Z48
Manual
JVC LT-42Z48
Manual
-
 JVC LT-42S90BU
Manual
JVC LT-42S90BU
Manual
-
 JVC LT-42P80BU
Manual
JVC LT-42P80BU
Manual