Page 2 - Position And Reproduction Of Labels; IMPORTANT FOR LASER PRODUCTS; CLASS
2 ENGLISH How to reset your unit After detaching the control panel, press the reset button on the panel holder using a ball-point penor similar tool. This will reset the built-in microcomputer. NOTE: If you reset the unit during play, the playback mode selections(e.g. repeat play mode setting), you ...
Page 3 - BEFORE USE; • Do not raise the volume level too much, as this; CAUTION on Volume Setting:
3 ENGLISH WARNINGS • DO NOT install any unit in locations where; – it may obstruct the steering wheel and gearshift lever operations, as this may resultin a traffic accident. – it may obstruct the operation of safety devices such as air bags, as this may resultin a fatal accident. – it may obstruct ...
Page 4 - ENGLISH; CONTENTS
4 ENGLISH CONTENTS How to reset your unit ............................... 2 LOCATION OF THE BUTTONS ............ 5 Control panel ............................................. 5 Remote controller ...................................... 6 Preparing the remote controller ................ 7 BASIC OPERATI...
Page 5 - LOCATION OF THE BUTTONS; Control panel
5 ENGLISH LOCATION OF THE BUTTONS Control panel Refer to the pages in parentheses for details. 1 SRC (source) button (8, 64, 66, 72, 73) 2 • (standby/on/attenuator) button (8) • Control dial 3 Display window 4 Remote sensor 5 5 (up) button • Functions as the Play button for DVDs and VCDs. 6 0 (eject...
Page 6 - Remote controller
6 ENGLISH Remote controller 3 SETUP button (50)* 2 4 Basic sound setting buttonsSEL, +, and – • The +/– buttons normally function as the volume adjustment buttons. • The +/– buttons also function as the 2ndVOL +/– buttons when pressed withSHIFT (S) button. (41) 5 SHIFT (S) button 6 EQ (equalizer) bu...
Page 7 - Preparing the remote controller; Installing the battery; Remove the battery holder.; Return the battery holder.
7 ENGLISH Preparing the remote controller Before using the remote controller:• Aim the remote controller directly at the remote sensor on the main unit. Make sure there is noobstacle in between. • Do not expose the remote sensor to strong light (direct sunlight or artificial lighting). Installing th...
Page 8 - BASIC OPERATIONS; Turning on the power; To drop the volume in a moment; To turn off the power; TUNER
8 ENGLISH BASIC OPERATIONS Turning on the power 1 Turn on the power. Note on One-Touch Operation: When you select a source in step 2 below, the power automatically comes on. You do not haveto press this button to turn on the power. 2 Select the source. Each time you press the button,the source chang...
Page 9 - To cancel the display demonstration,; To activate the display demonstration,; Setting the clock
9 ENGLISH Canceling the displaydemonstration When shipped from the factory, displaydemonstration has been activated, and startsautomatically when no operations are done forabout 20 seconds.• It is recommended to cancel the demonstration before you use the unit for the first time. To cancel the displ...
Page 10 - Set the clock system.; Activating the level meter; Off
10 ENGLISH 5 Set the clock system. 1 Select “24H/12H.” 2 Adjust “24Hours” or “12Hours.” 6 Finish the setting. To check the current clock time when the unitis turned off, press DISP (D). The power turns on and the clock time is shownfor about 5 seconds, then the power turns off. Activating the level ...
Page 11 - RADIO OPERATIONS; Listening to the radio; Start searching for a station.; To stop searching before a station is received,; When using the remote controller
11 ENGLISH RADIO OPERATIONS Selected band appears. Lights up when receiving an FM stereobroadcast with sufficient signal strength. FM1 FM2 FM3 AM SRC The operations of this section are mainlyexplained using the buttons on the control panel.When the remote controller can be used for thesame operation...
Page 12 - Press and hold
12 ENGLISH FM1 FM2 FM3 AM SRC M MODE Searching for a station manually:Manual search 1 Select the band (FM1 – 3, AM). 1 Press SRC (source)repeatedly to select the tuner. 2 Press and hold SRC.Each time you press and holdthe button, the band changes. Note: This receiver has three FM bands (FM1, FM2,FM3...
Page 13 - Storing stations in memory; FM station automatic preset: SSM; Start automatic preset.
13 ENGLISH 2 Press and hold number button 5 while“Mode” is still on the display. Local FM stations with the strongest signals aresearched and stored automatically in the bandnumber you have selected (FM1, FM2, or FM3).These stations are preset in the number buttons—No.1 (lowest frequency) to No.6 (h...
Page 14 - Manual preset
14 ENGLISH 1 3 Press and hold the number button(in this example, 1) for more than2 seconds. 4 Repeat the above procedure to storeother stations into other presetnumbers. Notes: • A previously preset station is erased when a new station is stored in the same preset number. • Preset stations are erase...
Page 15 - Tuning in to a preset station; Selecting a preset station directly
15 ENGLISH Selecting a preset station using thepreset station list If you forget which stations are stored in whichpreset numbers, you can check the presetstation list, then select your desired station. 1 Select the band (FM1 – 3, AM). 1 Press SRC (source)repeatedly to select the tuner. 2 Press and ...
Page 16 - Changing the display pattern; When receiving an FM RDS station
16 ENGLISH Changing the display pattern By pressing DISP (D), you can change theinformation shown on the display. Each time you press the button,the display patterns change asfollows: D DISP Appears only whenselecting a preset stationnumber. Clock time • When receiving an AM or FM non-RDSstation • W...
Page 17 - RDS OPERATIONS; What you can do with RDS; To use Network-Tracking Reception
17 ENGLISH RDS OPERATIONS What you can do with RDS RDS (Radio Data System) allows FM stations tosend an additional signal along with their regularprogramme signals. For example, the stationssend their station names, as well as informationabout what type of programme they broadcast,such as sports or ...
Page 18 - Using TA Standby Reception; When the current source is FM,; When the current source is other than FM,
18 ENGLISH 1 Press and hold SEL (select) for morethan 2 seconds so that one of thePSM items appears on the display.(PSM: see pages 58 and 59.) 2 Press number button 4 to select“TUNER”—Tuner category of thePSM settings. The “PTY Stnby” (standby) setting screenappears on the display. 3 Select “AF-Regn...
Page 19 - Using PTY Standby Reception; To set PTY Standby Reception
19 ENGLISH Using PTY Standby Reception PTY Standby Reception allows the unit to switchtemporarily to your favorite programme (PTY:Programme Type) from any source except AMstations. To select your favorite PTY code for PTYStandby Reception When shipped from factory, PTY StandbyReception has been set ...
Page 20 - Searching your favorite programme; To store your favorite programme types,; To search your favorite programme type,; To store your favorite programme types
20 ENGLISH Searching your favorite programme You can search any one of the PTY codes.In addition, you can store your 6 favoriteprogramme types in the number buttons.When shipped from the factory, the following6 programme types have been stored in thenumber buttons (1 to 6). To store your favorite pr...
Page 21 - To search your favorite programme type; How to use the; or
21 ENGLISH 3 Press and hold the number buttonfor more than 2 seconds to store thePTY code selected into the presetnumber you want. Selected preset number flashes for a while. 4 Press and hold T/P for more than 2seconds to exit from this mode. To search your favorite programme type 1 Press and hold T...
Page 22 - Setting the TA volume level; To reactivate clock adjustment,
22 ENGLISH Setting the TA volume level You can preset the volume level for TA StandbyReception. When a traffic programme isreceived, the volume level automatically changesto the preset level.• See also “Changing the general settings (PSM)” on page 57. 1 Press and hold SEL (select) for more than2 sec...
Page 23 - The same programme can be received on different frequencies.
23 ENGLISH PTY codes News: News Affairs: Topical programmes expanding oncurrent news or affairs Info: Programmes which impart adviceon a wide variety of topics Sport: Sport events Educate: Educational programmes Drama: Radio plays Culture: Programmes on national orregional culture Science: Programme...
Page 24 - PLAYABLE DISCS; * Note on Region Code; Disc structure; DVD; Disc Type
ENGLISH 24 PLAYABLE DISCS • On some discs, the actual operations may be different from what is explained in this manual. • The following discs cannot be played back; – DVD-Audio, DVD-ROM, DVD-RAM, DVD-R, DVD-RW, CD-ROM, CD-I (CD-I Ready),Photo CD, etc.Playing back these discs will generate noiseand ...
Page 25 - MP3 discs; • About Dual Zone
ENGLISH 25 MP3 discs MP3 is an abbreviation of Motion Picture ExpertsGroup 1 (or MPEG-1) Audio Layer 3. MP3 issimply a file format with a data compression. Byusing MP3 format, one CD-R or CD-RW cancontain 10 times as much data as a regular CDcan. On an MP3 disc, files (also called “tracks” andboth w...
Page 26 - BASIC DISC PLAYBACK; Starting playback; Open the control panel.
ENGLISH 26 The following marks used in this manual indicatethe playable discs. BASIC DISC PLAYBACK Starting playback 1 Open the control panel. 2 Insert a disc into the loading slot. The disc loading lamp startflashing, and the unit draws inthe disc automatically. DO NOT insert a disc while the disc ...
Page 28 - To replay the previous scenes
ENGLISH 28 Press ¢ to go ahead to the beginning of the next chapter/track.Each time you press the button, thebeginning of the next chapter/trackis located (and played back). Press 4 to go back to the beginning of the current chapter/track.Each time you press the button, the beginning ofthe previous ...
Page 29 - On-screen guide icons; Locating a particular folder
ENGLISH 29 On-screen guide icons During play, the following guide icons mayappear for a while on the monitor. : Appears at the beginning of ascene containing multi-subtitlelanguages (for DVD only). : Appears at the beginning of ascene containing multi-audiolanguages (for DVD only). : Appears at the ...
Page 30 - DVD/VCD SPECIAL FUNCTIONS; E N G L I S H; S T; S T; Selecting audio languages; Select a desired subtitle language.
ENGLISH 30 DVD/VCD SPECIAL FUNCTIONS Ex. When the disc has 3 selections— English, French, Spanish and no subtitle (OFF) E N G L I S H E N G L I S H 1 / 3 1 / 3 E N G L I S H E N G L I S H 1 / 3 1 / 3 S T S T S T S T • For DVD: • For VCD: Ex. When the disc has 3 selections— English, French, and Spani...
Page 31 - Selecting multi-angle views; Select a desired view angle.; Menu operations; Press TOP MENU or MENU.; To return to the previous menu; If “
ENGLISH 31 Ex.: When the disc has 3 multi-angle views Notes: • When the pop-up window is shown, you can also select the audio languages (or audio channels) bypressing cursor buttons ( 5 / ∞ ). • For some DVDs and VCDs, changing the audio language (or audio channel) without using the discmenu is proh...
Page 32 - Select the item you want from the menu.; To resume the PBC function again,; Zoom in; Zoom in to the picture.
ENGLISH 32 While playing a VCD: The PBC (PlayBack Control) function allows youto operate the VCD using menus.When you start playback, a menu willautomatically appear on the monitor.• A menu may be a list of items, divided screens, or some moving pictures. Select the item you want from the menu. • Wh...
Page 33 - ADVANCED DISC OPERATIONS; Time Search; Move; Forward/Reverse Search; To resume normal speed,
ENGLISH 33 ADVANCED DISC OPERATIONS + TOP MENU RETURN REPEAT INTRO RANDOM OSD EQ S ZOOM SETUP SEL CH AM FM DVD – R I SUBTITLE AUDIO ANGLE 2ndVOL 2ndVOL 5 6 4 2 3 1 DISC ENTER MENU FOLDER PRESET DAB ATT SHIFT DUALZONE + DISC – +10 0 10 8 9 7 SHIFT (S) INTRO (I) RANDOM (R) 1 ¡ ENTER Number REPEAT OSD ...
Page 34 - To correct a mistake; Chapter Search
ENGLISH 34 OSD 6 4 5 ENTER S SHIFT TOP MENU INTRO RETURN SETUP I 5 6 4 2 3 1 DISC ENTER MENU + DISC – 0 8 9 7 5 ENTER 1 / 3 1 / 3 O F F 1 / 5 TITLE 33 TOTAL 1: 25: 58 CHAP 33 CHAP 5.1ch . 1 / 3 1 / 3 O F F 1 / 5 TITLE 33 TOTAL 1: 25: 58 CHAP 33 CHAP. CHAPTER _ 5.1ch 5 ENTER 2 Move to CHAP. (Chapter ...
Page 35 - Playing in various play modes; Repeat Play; Select the repeat mode you want.
ENGLISH 35 • For MP3: Notes: • On some DVDs, Repeat Play may be canceled by the disc itself. • On CD, VCD, and MP3 discs, Repeat Play mode cannot be turned off. • Repeat Play mode will be canceled when you start playing back a VCD with the PBC function. • TRACK: Current (or specified) track willbe r...
Page 36 - Random Play; Select the random mode you want.; Intro Scan; Select the intro scan mode you want.
ENGLISH 36 Random Play You can play back tracks on a disc (or in a folderfor MP3 discs) at random. • For VCD: While PBC (see page 32) is not in use. Select the random mode you want. The menu bar icon appears onthe monitor to show the selectedmode. Each time you press thebutton, the random modechange...
Page 37 - OSD DISC OPERATIONS; Basic procedure for DVD, VCD and CD
ENGLISH 37 OSD DISC OPERATIONS OSD 1 / 3 1 / 3 O F F 1 / 5 TITLE 33 TOTAL 1: 25: 58 CHAP 33 CHAP 5.1ch . 1 Disc type—DVD-VIDEO, VCD, CD 2 Audio signal format type (only for DVD) 3 Current title number (only for DVD) 4 Current chapter number (only for DVD) 5 Time information 6 Current operation mode—...
Page 38 - What you can do on the on-screen bars
ENGLISH 38 Select the Repeat Play modes. Eachtime you press cursor 5 or ∞ in step 4 , the repeat mode changes.• For available repeat modes, see page 35. Activate Time Search.Press the number buttons to enter theelapsed time to a particular point in step 4 . • For details, see page 33. Activate Chapt...
Page 39 - Basic procedure for MP3 discs; Operations from the remote controller:
ENGLISH 39 Basic procedure for MP3 discs While playing an MP3 disc, the following MP3CONTROL screen always shows on the monitor.By referring to this screen, you can easily operatethe MP3 disc.• Up to 32 characters can be shown for the file names on the monitor, while 64 characters onthe display of t...
Page 40 - DUAL ZONE OPERATIONS; Listening with headphones
ENGLISH 40 S SHIFT DUAL indicator appears. DVD DUALZONE Then DUAL ZONE OPERATIONS Listening with headphones By connecting headphones to the 2nd AUDIOOUT plug on the rear, you can listen to theplayback sound through the DVD/CD player whilelistening to another source (except AM) throughthe speakers.Yo...
Page 41 - On the control panel:; To cancel Dual Zone operations,
ENGLISH 41 M MODE 2 Adjust the headphone volumethrough the 2nd AUDIO OUT plug. 3 Operate the DVD/CD player using theremote controller by referring to themonitor screen. • When Dual Zone is in use, you can only operate the DVD/CD player using theremote controller. To control the other sources (except...
Page 42 - Basic disc playback; To stop playback; • When you insert a disc; To eject a disc; OTHER DISC OPERATIONS; To go to the next or previous chapter/tracks
42 ENGLISH In this section, you can learn how to use thebuttons on the control panel in order to operatethe DVD/CD player. Basic disc playback To stop playback Press ∞ (down). • This unit can remember the end point, and when you start playback again, playbackbegins from where it has been stopped.(Re...
Page 43 - To go to a chapter/track quickly
43 ENGLISH While playing an MP3 disc: While playing a VCD or CD: M MODE Locating a title/chapter/trackon a disc To locate a particular title/chapter/trackdirectly • For DVD: During play or pause—select a chapterWhile stopped—select a title • For VCD: While PBC (see page 32) is not in use. Press the ...
Page 44 - To select a folder and start playback
44 ENGLISH To skip to the next or previous folder Press 5 (up) while playing a disc to skip to the next folder.Each time you press the buttonconsecutively, the next folder islocated and the first track in thefolder starts playing. Press ∞ (down) while playing a disc to skip back to the previous fold...
Page 45 - Selecting playback modes; Track name
45 ENGLISH 3 4 5 6 2 1 3 4 5 6 2 1 To select a track and start playback 1 Press and hold 5 (up) or ∞ (down) so that the folder name list of the inserteddisc appears on the display. The name of the currentlyplaying folder will be highlightedon the display. 2 Press ¢ or 4 to show the track list of the...
Page 46 - To cancel Repeat Play,
46 ENGLISH • For DVD: • For CD/VCD: • Chapter: Current (or specified) chapter willbe repeated.• indicator appears on the display. • Title: Current title will be repeated.• indicator appears on the display. • Off: Repeat Play is canceled. • Track: Current (or specified) track willbe repeated.• indica...
Page 47 - To cancel Intro Scan,; To cancel Random Play,
47 ENGLISH To cancel Intro Scan, select “Intro Off” by pressing number button 1 repeatedly or pressnumber button 4 in step 2 . • For MP3: • For CD: • Track: The beginnings of all the tracksin the disc will be played.• indicator appears on the display. • Off: Intro Scan is canceled. • Track: The begi...
Page 48 - Prohibiting disc ejection; While pressing SRC, press and hold; To cancel the prohibition and unlock the disc
48 ENGLISH Prohibiting disc ejection You can prohibit disc ejection and can lock a discin the loading slot. While pressing SRC, press and hold for more than 2 seconds. “No Eject” flashes on the display for about 5seconds, and the disc is locked and cannot beejected. To cancel the prohibition and unl...
Page 50 - DVD SETUP MENU; Basic setting procedure; AUDIO
ENGLISH 50 DVD DVD SETUP MENU SETUP 7 2 DISC + DISC – 8 5 ENTER You can store the initial selection for subtitlelanguages, audio languages, and other settingsusing the Setup Menu.• DVD Setup menu can only be displayed while a disc, except MP3 disc, is inserted and selectedfor the playback source. Th...
Page 51 - LANGUAGE; To set other items on other menu screens; To return to the normal screen
ENGLISH 51 DVD 5 ENTER LANGUAGE PICTURE AUDIO To set other items on the same menuscreen Repeat steps 3 to 6 . To set other items on other menu screens Repeat steps 2 to 6 . To return to the normal screen Press SETUP. You can select the desired options concerningpicture size on the monitor. You can s...
Page 52 - LANGU
ENGLISH 52 DVD Items For what and options MENU LANGUAGE * 1 Select the initial disc menu language. ENGLISH, SPANISH, FRENCH, CHINESE, GERMAN, ITALIAN,JAPANESE, and language codes from AA to ZU (see page 79). AUDIO LANGUAGE * 1 Select the initial audio language. ENGLISH, SPANISH, FRENCH, CHINESE, GER...
Page 53 - UDIO
ENGLISH 53 DVD Items For what and options DIGITAL AUDIO OUTPUT Select the signal format to be emitted through the DIGITAL OUT(Optical) terminal on the rear. • PCM ONLY Select this when connecting an amplifier or a decoder incompatible with Dolby Digital and DTS, or connecting to arecording device. •...
Page 54 - SOUND ADJUSTMENTS; Adjusting the sound; Indication; • To adjust the input level of each source; METER; Vol Adj
54 ENGLISH SOUND ADJUSTMENTS Operations of this section are explained usingthe buttons on the control panel unlessmentioned otherwise. Adjusting the sound You can adjust the sound characteristics to yourpreference.• “Vol Adj” setting is required for each source except FM. Before starting “Vol Adj,” ...
Page 56 - Make adjustments as you like.; Store the adjustment you made.; If you want to cancel the adjustments,; Enter the sound adjustment mode.
56 ENGLISH 4 Make adjustments as you like. 1) Press ¢ or 4 to select the frequency band—60Hz, 150Hz, 400Hz,1kHz, 2.4kHz, 6kHz, 12kHz. 2) Press 5 (up) or ∞ (down) to adjust the level of the selected band within therange of –05 to +05. 3) Repeat steps 1) and 2) to adjust theother frequency bands. 5 St...
Page 57 - Basic Procedure; Adjust the PSM item selected.; OTHER MAIN FUNCTIONS
57 ENGLISH Operations of this section are explained usingthe buttons on the control panel unlessmentioned otherwise. Changing the general settings(PSM) You can change the items listed in the table onpages 58 and 59 by using the PSM (PreferredSetting Mode) control.• The PSM items are grouped into six...
Page 59 - COLOR
59 ENGLISH To set the movie demonstration—Graphics When shipped from the factory, the movie hasbeen activated. • All Demo: If no operation is done for about 20 seconds, the movie demonstrationstarts automatically. • Int Demo: If no operation is done for about 20 seconds, the movie demonstrationand p...
Page 60 - To turn the tag display on or off—Tag
60 ENGLISH To turn on/off the key-touch tone—Beep You can deactivate the key-touch tone if you donot want it to beep each time you press a button. • On: Activates the key-touch tone. • Off: Deactivates the key-touch tone. To select the telephone muting—Telephone This mode is used when a cellular pho...
Page 61 - Selecting the dimmer mode
61 ENGLISH Selecting the dimmer mode You can dim the display at night automatically oras you set the timer.When shipped from the factory, Auto Dimmermode is activated. Note: Auto Dimmer supplied with this unit may not workcorrectly on some vehicles, particularly on thosehaving a control dial for dim...
Page 62 - Changing the display color; Select the display color.; All SRC
62 ENGLISH Changing the display color You can set the display color using the PSMcontrol. You can select your favorite color foreach source (or for all sources).You can also create your own colors, and setthem as the display color. Setting the desired color for eachsource Once you have set the color...
Page 63 - Creating your own color—User
63 ENGLISH Creating your own color—User You can create your own colors—“Day” and“Night,” and select them as the display color forany desired source.• Day: Can be used as your user color duringthe day time (while the headlights areturned off), or as set by the timer—“From – To.” • Night: Can be used ...
Page 64 - To erase entered characters; Assigning names to the sources; Sources
64 ENGLISH 4 Select a character. • About the available characters, see page78. 5 Move the cursor to the next(or previous) character position. 6 Repeat steps 3 to 5 until you finish entering the name. 7 Finish the procedure while the lastselected character is flashing. To erase entered characters Ins...
Page 65 - Detaching the control panel; Unlock the control panel.; Attaching the control panel; Note on cleaning the connectors:
65 ENGLISH Detaching the control panel You can detach the control panel when leavingthe car.When detaching or attaching the control panel,be careful not to damage the connectors on theback of the control panel and on the panelholder. Detaching the control panel Before detaching the control panel, be...
Page 66 - CD CHANGER OPERATIONS; Playing discs; When the current disc is an MP3 disc:
66 ENGLISH CD CHANGER OPERATIONS Playing discs Select the CD changer (CD-CH). Each time you press the button, thesource changes as described onpage 8. When you select a source,the power automatically comes on. Notes: • You can also use the CH button on the remote controller. • If you have changed th...
Page 67 - When the current disc is a CD:; To change the display information; To fast-forward or reverse the track; To go to a particular disc directly
67 ENGLISH • When the current disc is a CD: Playback starts from the first track of thecurrent disc. Note: If you change the source, CD changer play also stops.Next time you select the CD changer as the source,CD changer play starts from where playback has beenstopped previously. To change the displ...
Page 68 - How to go to the desired track quickly
68 ENGLISH This operation is only possible when usingJVC MP3-compatible CD changer (CH-X1500). To go to a track quickly 1 Press MODE (M) to enter the functions modewhile playing a disc. “Mode” appears on the display. 2 Press 5 (up) or ∞ (down). * The first time you press 5 (up) or ∞ (down) button, t...
Page 69 - While playing a disc, press and hold; While playing an MP3 disc,; Disc list
69 ENGLISH To select a disc using the disc lists If you forget what discs are loaded in the CDchanger, you can show the disc title list andselect a disc in the list shown on the display.• The display can show only six disc names at a time. 1 While playing a disc, press and hold 5 (up) or ∞ (down) un...
Page 70 - Repeat Disc; Selecting the playback modes; Repeat Off
70 ENGLISH Repeat Disc Repeat Folder Repeat Track Repeat Off M MODE REPEAT +10 To cancel Repeat Play, select “Repeat Off” by pressing number button 2 repeatedly or pressnumber button 4 in step 2 . To play back tracks at random(Random Play) From the remote controller: Press RANDOM (R) repeatedly unti...
Page 71 - Intro Off
71 ENGLISH Mode Active Plays at random indicator Random All tracks of the Folder* indicator current folder, then lights up. tracks of the nextfolder and so on. Random All tracks of the Disc indicator current (or lights up. specified) disc. Random All tracks of all All indicator discs inserted in lig...
Page 72 - EXTERNAL COMPONENT OPERATIONS; Playing an external component; Before operating the external component,
72 ENGLISH EXTERNAL COMPONENT OPERATIONS Operations of this section are explained usingthe buttons on the control panel unlessmentioned otherwise. Playing an external component You can connect the external component to theCD changer jack on the rear using the Line InputAdapter KS-U57 (not supplied)....
Page 73 - DAB TUNER OPERATIONS; Select the DAB tuner.
73 ENGLISH DAB TUNER OPERATIONS Tuning in to an ensemble andone of the services A typical ensemble has 6 or more programmes(services) broadcast at the same time. Aftertuning in to an ensemble, you can select aservice you want to listen to. 1 Select the DAB tuner. 1 Press SRC (source)repeatedly to se...
Page 74 - Storing DAB services in memory; Tune in to an ensemble you want.
74 ENGLISH Press 5 (up) to select the next service. (If a primaryservice has some secondaryservices, they are selectedbefore the next primaryservice is selected.) Press ∞ (down) to select the previous service (either primary or secondary). Press 5 (up) to select the next service. Press ∞ (down) to s...
Page 76 - While receiving a DAB service:; To use Alternative Reception
76 ENGLISH What you can do more withDAB With the DAB tuner connected, you can tracingthe same program (service) automatically whiledriving where the same DAB ensemble is notreceived. Tracing the same programautomatically (Alternative Reception) You can keep listening to the same program.• While rece...
Page 78 - ADDITIONAL INFORMATION; Sound modes (preset frequency level settings); Sound; Available characters; Accented letters
78 ENGLISH ADDITIONAL INFORMATION Sound modes (preset frequency level settings) The list below shows the preset frequency level settings for each sound mode. • You can adjust the preset sound modes temporarily. However, your temporary adjustments will be reset when you select another sound mode. Sou...
Page 79 - LANGUAGE CODES
79 ENGLISH LANGUAGE CODES Code Language SN Shona SO Somali SQ Albanian SR Serbian SS Siswati ST Sesotho SU Sundanese SV Swedish SW Swahili TA Tamil TE Telugu TG Tajik TH Thai TI Tigrinya TK Turkmen TL Tagalog TN Setswana TO Tonga TR Turkish TS Tsonga TT Tatar TW Twi UK Ukrainian UR Urdu UZ Uzbek VI ...
Page 80 - GLOSSARY
80 ENGLISH 4:3 Letterbox Screen This is one method for displaying a wide screenpicture on a conventional sized (4:3) TV. Whileviewing a wide screen picture, the black barsappear on the top and the bottom of the screen. 4:3 Pan-Scan Screen This is one method for displaying a wide screenpicture on a c...
Page 81 - TROUBLESHOOTING; Remedies; Disc Pla
81 ENGLISH TROUBLESHOOTING What appears to be trouble is not always serious. Check the following points before calling a servicecenter. Remedies Adjust it to the optimum level. Check the cords andconnections. Press the reset button on thepanel holder after detaching thecontrol panel. (The clock sett...
Page 83 - CD Changer; Output signals through the DIGITAL OUT terminal; Playback Disc
83 ENGLISH Remedies Insert discs into the magazine. Insert discs correctly. Insert playable discs. Insert a disc that containsMP3 files. Insert the magazine. Connect this unit and theCD changer correctly andpress the reset button on theCD changer. Press the reset button on theCD changer. Press the r...
Page 84 - MAINTENANCE; Handling discs; • This unit is also compatible with MP3 discs.; How to handle discs; When storing a disc into its case,; To keep discs clean
84 ENGLISH MAINTENANCE Center holder Handling discs This unit has been designed to reproduce DVD-Videos, VCDs, CDs, CD-Rs (Recordable), CD-RWs (Rewritable), and CD Texts. • This unit is also compatible with MP3 discs. How to handle discs When removing a discfrom its case, press down the center holde...
Page 85 - SPECIFICATIONS; AUDIO AMPLIFIER SECTION
85 ENGLISH SPECIFICATIONS AUDIO AMPLIFIER SECTION Maximum Power Output: Front: 50 W per channel Rear: 50 W per channel Continuous Power Output (RMS): Front: 19 W per channel into 4 Ω , 40 Hz to 20 000 Hz at no more than0.8% total harmonic distortion. Rear: 19 W per channel into 4 Ω , 40 Hz to 20 000...
Page 86 - Having TROUBLE with operation?; Please reset your unit; Refer to page of How to reset your unit; Haben Sie PROBLEME mit dem Betrieb?; Bitte setzen Sie Ihr Gerät zurück; Siehe Seite Zurücksetzen des Geräts; Vous avez des PROBLÈMES de fonctionnement?; Réinitialisez votre appareil; Hebt u PROBLEMEN met de bediening?; Stel het apparaat terug; Zie de pagina met de paragraaf Het apparaat terugstellen; © 2003 VICTOR COMPANY OF JAPAN, LIMITED
VICTOR COMPANY OF JAPAN, LIMITED Having TROUBLE with operation? Please reset your unit Refer to page of How to reset your unit Haben Sie PROBLEME mit dem Betrieb? Bitte setzen Sie Ihr Gerät zurück Siehe Seite Zurücksetzen des Geräts Vous avez des PROBLÈMES de fonctionnement? Réinitialisez votre appa...
Page 89 - RACCORDEMENTS ELECTRIQUES; • When using the optional stay / Beim Verwenden der; ELECTRICAL CONNECTIONS
3 • When installing the unit without using the sleeve / Beim Einbau des Geräts ohne Halterung / Lors de l’installation de l’appareil scans utiliser de manchon / Wanneer uhet apparaat zonder huis installeert In a Toyota for example, first remove the car radio and install the unit in its place. Zum Be...
Page 90 - If the speaker wiring in your car is as; • VOR dem Anschließen der; NE CONNECTEZ PAS; • VOORDAT u de speakerdraden van de; Als de bedrading van de speakers; – Als u twijfels hebt over de speakerbedrading in; Connectez les connecteurs ISO comme montré sur l’illustration.; Sluit de ISO-connectoren aan zoals op het voorbeeld is aangegeven.
4 R L 15 FRANÇAIS DEUTSCH NEDERLANDS ENGLISH PRECAUTIONS on power supply andspeaker connections: • DO NOT connect the speaker leads of thepower cord to the car battery; otherwise,the unit will be seriously damaged. • Connect the black lead (ground), yellow lead (to car battery, constant 12 V), and r...
Page 91 - zonder ISO-connectoren; Die Verdrahtung im; Avant de commencer la connexion:; Moet u de bedrading in de auto
5 3 1 2 3 4 5 7 8 6 2 (ILLUMINATION) (PARKING BRAKE) P L O M N J A B G H C D E F 4 15 1 Left speaker (rear) Linker Lautsprecher (hinten) Enceinte gauche (arrière) Linkerspeaker (achterin) Right speaker (front) Rechter Lautsprecher (vorne) Enceinte droit (avant) Rechterspeaker (voorin) Left speaker (...
Page 92 - Aansluitingen voor het toevoegen van andere apparatuur; Tuner DAB JVC
6 E F B D H G A C INPUT R L LINE OUT (FRONT) LINE OUT (REAR) L R L R L R INPUT R L L R You can connect an amplifier and other equipment toupgrade your car stereo system.• Connect the remote lead (blue with white stripe) to the remote lead of the other equipment so that it canbe controlled through th...
Page 93 - About Tag of MP3; A Guide to MP3; Questions and Answers; An MP3 disc requires a long readout time...?
ENGLISH What are MP3? MP3 (MPEG Audio Layer 3) is one of digitalaudio compression standards.• This player cannot play back MP3i and MP3 PRO formats. About Tag of MP3 This player can show the names of albums,artists (performer), and tracks of MP3 Tag.• This player can handle only one-byte characters....
Page 94 - Table of playable disc types; Multiple session
2 ENGLISH KD-DV5000 Discs containing MP3 files MP3 playback Mixed-CD MP3 + CD-DA CD-DA playback Other files + CD-DA CD-DA playback Enhanced-CD CD-DA + MP3 CD-DA playback File name system ISO9660 Level1 Up to 12 characters (8.3 format) ISO9660 Level2 Up to 31 characters ISO9660 Level3 Not available R...


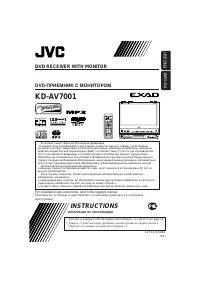 JVC KD-AV7001
User Manual
JVC KD-AV7001
User Manual
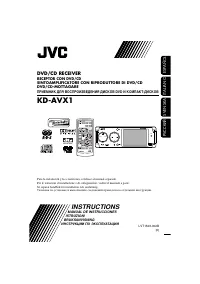 JVC KD-AVX1
Manual
JVC KD-AVX1
Manual
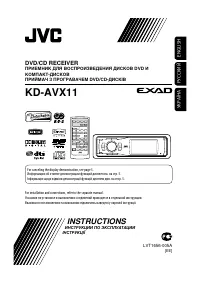 JVC KD-AVX11
User Manual
JVC KD-AVX11
User Manual
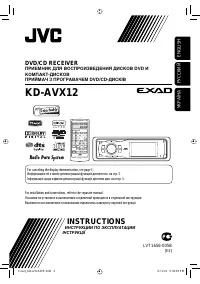 JVC KD-AVX12
User Manual
JVC KD-AVX12
User Manual
 JVC KD-AVX2
User Manual
JVC KD-AVX2
User Manual
 JVC KD-AVX20
User Manual
JVC KD-AVX20
User Manual
 JVC KD-AVX22
User Manual
JVC KD-AVX22
User Manual
 JVC KD-AVX33
User Manual
JVC KD-AVX33
User Manual
 JVC KD-AVX40
User Manual
JVC KD-AVX40
User Manual
 JVC KD-AVX44
User Manual
JVC KD-AVX44
User Manual
 JVC KD-AVX55
User Manual
JVC KD-AVX55
User Manual
 JVC KD-AVX77
User Manual
JVC KD-AVX77
User Manual
 JVC KD-BT1
User Manual
JVC KD-BT1
User Manual