Page 2 - Safety Precautions; CAUTION; Caution on Replaceable lithium battery
EN Safety Precautions CAUTION RISK OF ELECTRIC SHOCK DO NOT OPEN CAUTION: TO REDUCE THE RISK OF ELECTRIC SHOCK, DO NOT REMOVE COVER (OR BACK). NO USER-SERVICEABLE PARTS INSIDE. REFER SERVICING TO QUALIFIED SERVICE PERSONNEL. The lightning flash with arrowhead symbol, within an equilateral triangle, ...
Page 3 - IMPORTANT SAFETY INSTRUCTIONS
EN IMPORTANT SAFETY INSTRUCTIONS 1. Read these instructions.2. Keep these instructions.3. Heed all warnings.4. Follow all instructions.5. Do not use this apparatus near water.6. Clean only with dry cloth.7. Do not block any ventilation openings. Install in accordance with the manufacturer’s instruct...
Page 4 - Grip Adjustment; Compatible SD/SDHC cards; Charge the battery before recording; Access lamp; JVC battery packs, safety and performance can not be guaranteed.
EN Easy Start Guide Inserting an SD card Prepare an SD card (commercially available). Turn off the camera and insert an SD card. SD card (label) Q Open the slot cover R Insert Grip Adjustment NOTE • Fasten the strap when you grip the camera. • When carrying the camera, please be careful not to drop ...
Page 5 - Set the date and time; Touch sensor: Sets the date and time
EN Date/Time Setting Q Open the LCD monitor to turn on the camera DISPLAY/ < button LCD monitor R Select [YES] within 10 seconds Slide your finger up and down on the sensor. Then touch OK. • When the message disappears, press the DISPLAY/ < button for at least 2 seconds to turn off the power, ...
Page 6 - Video recording; Set the recording dial to
EN Video recording CAUTION Before recording an important scene, it is recommended to conduct a trial recording. Q Select recording mode (REC) The mode changes when you press the button. Recording Mode Indicator R Set the recording dial to ! (AUTO) mode S Start recording Remaining space on the SD car...
Page 7 - Still Image Recording
EN Still Image Recording Q Select recording mode (REC) The mode changes when you press the button. R Set the recording dial to # (AUTO) mode S Set the focus The ? indicator becomes green when the captured image is focused. Press and hold SNAPSHOT halfway. T Take a still image Press SNAPSHOT fully to...
Page 8 - Playing back; Select video or still image mode; Select a file and touch OK; To perform operations such as forward search or reverse search (; Do not forget to make copies after recording!
EN Playing back Q Select playback mode (PLAY) The mode changes when you press the button. R Select video or still image mode The mode changes when you press the button. S Select a file and touch OK Index screen Playback screen To perform operations such as forward search or reverse search ( Z p. 23)...
Page 9 - Accessories; Everio Dock; Attaching the Camera to the Dock
EN Accessories CU-VC10 AP-V21U BN-VF908U CR2025 Everio Dock AC Adapter Battery Pack Lithium Battery Pre-installed in the remote control. • CD-ROM • Hand Strap • USB Cable • Remote Control (RM-V751U) • Component Cable • AV Cable NOTE Make sure to use the provided cables for connections. Do not use an...
Page 10 - Contents
10 EN GETTING ST AR TED Contents GETTING STARTED Index ........................................................12 Tripod Mounting ............................................ 13 Indications on LCD Monitor ...................14 Preparing the Remote Control ...................... 15 Necessary Settings...
Page 11 - How to use the Touch
11 EN GETTING ST AR TED How to use the Touch Sensor After the menu is displayed on the LCD monitor: Q Slide your finger up and down on the sensor. R Select [SET]. (Touch OK.) A To select an on-screen button appearing on the left side, touch the portion of the sensor next to the on-screen button. B T...
Page 12 - Index
1 EN GETTING ST AR TED Index NOTE • Be careful not to cover 3 , 4 , 8 and 9 during shooting. • The LCD monitor can rotate 270°. GETTING STARTED
Page 13 - Remote Control; Tripod Mounting; Camera
1 EN GETTING ST AR TED Remote Control Q Infrared Beam Transmitting Window R ZOOM (T/W) Buttons (Zoom in/out) S UP Button T SKIP BACKWARD Button U LEFT Button V BACK Button W PLAYLIST Button X START/STOP Button Y S.SHOT (Snapshot) Button Z INFO Button a SKIP FORWARD Button b PLAY/PAUSE/SET Button c R...
Page 14 - Indications on LCD Monitor; During Video Recording Only; MQ; During Still Image Recording Only
1 EN GETTING ST AR TED Indications on LCD Monitor During both Video and Still Image Recording 4 : 5 5 P M D E C . 2 4 . 2 0 0 9 ! Selected Recording Mode Indicator ( Z p. 21) @ : Auto Mode 3 : Manual Mode # White Balance Indicator $ Macro Mode Indicator % Zoom Indicator ( Z p. 20) & SD card Indi...
Page 15 - During Video Playback
1 EN GETTING ST AR TED During Video Playback 8 4 : 5 5 P M D E C . 2 4 . 2 0 0 9 ! Mode Indicator # High Speed Recording Indicator $ Playlist Playback Indicator (Appears when playing back a playlist.) % Quick Review Indicator ( Z p. 18) & Video Quality ( Counter ) Playback Mode F : Playback Q : ...
Page 16 - Charging the Battery Pack; To check the remaining battery power; Open the LCD monitor to turn on the; Select [ON] if daylight saving time is; Necessary Settings before Use
1 EN GETTING ST AR TED Charging the Battery Pack Attach the battery pack.( Z p. 4) • You can also connect the AC adapter using the Everio dock connector. ( Z p. 9) • The power/charge lamp blinks to indicate charging has started. • When the lamp goes out, charging is finished. • Unplug the AC adapter...
Page 17 - Select the city closest to the area you
1 EN GETTING ST AR TED Setting the clock to local time when traveling After performing steps 1 - 4 ( Z p. 16) 5 Select [AREA SETTING]. 6 Select the city closest to the area you are traveling. To return to the previous screen Select @ . To quit the screen Select [QUIT]. Language Setting The language ...
Page 18 - Recording Files; Press PLAY/REC to select the; Video Recording
1 EN RECORDING/PLA YB A CK Recording Files Q Press PLAY/REC to select the recording mode. The lens cover opens automatically. R Set the recording dial to ! mode. S Press START/STOP to start recording. Approximate remaining time for recording You can also start/stop recording by selecting [REC] on th...
Page 19 - To view the last recorded image
1 EN RECORDING/PLA YB A CK Q Press PLAY/REC to select the recording mode. The lens cover opens automatically. R Set the recording dial to # mode. S Press and hold SNAPSHOT halfway. The ? indicator becomes green when the captured image is focused. T Press SNAPSHOT fully to take a still image. NOTE • ...
Page 20 - Zooming
0 EN RECORDING/PLA YB A CK Zooming Preparation: • Select the recording mode. • Select ! or # mode. Zoom out Zoom in W: Wide angle T: Telephoto You can also zoom out/zoom in by selecting [W] or [T] on the LCD monitor. (On-screen zoom control)Zoom ratio (factory-preset) ! mode # mode [8X/DYNAMIC] [5X/...
Page 21 - Capturing Still Images in a Movie; Manual Recording; Changing to Manual Recording Mode
1 EN RECORDING/PLA YB A CK Capturing Still Images in a Movie You can capture still images while recording a video.Preparation: • Select the recording mode. 1 Set the recording dial to ! mode. 2 Touch the shutter mode and select RECORD ONE SHOT or CONTINUOUS SHOOTING. • RECORD ONE SHOT: Records one s...
Page 22 - Manual Setting in Menu; To return to the previous screen; High Speed Recording; Scene Select
EN RECORDING/PLA YB A CK Manual Setting in Menu Preparation: • Select the manual recording mode. 1 Touch MENU. 2 Select [MANUAL SETTING]. 3 Select the desired menu. 4 Select the desired setting. Depending on the kind of settings you select, you can set the value by using the touch sensor. To return ...
Page 23 - Playing Back Files; Video Playback
EN RECORDING/PLA YB A CK Playing Back Files Video Playback Q Press PLAY/REC to select the playback mode. R Press ! / # and set to ! mode. The index screen appears. The lens cover closes automatically. S Select the desired file. The ! / # button is used for switching between video and still image in ...
Page 24 - Still Image Playback
EN RECORDING/PLA YB A CK Still Image Playback Q Press PLAY/REC to select the playback mode. R Press ! / # and set to # mode. The index screen appears. The lens cover closes automatically. S Select the desired file. The ! / # button is used for switching between video and still image in the playback ...
Page 25 - Viewing Files on TV; Connection with TV; To connect using the HDMI mini; To connect using the COMPONENT
EN USING WITH TV Viewing Files on TV This camera is designed to be used with high-definition or NTSC-type color television signals. It cannot be used with a television of a different standard. Connection with TV You can output videos from the HDMI connector, COMPONENT connector, or AV connector. Sel...
Page 26 - Playback Operation; After the connection with TV is completed; Turn on the camera and the TV.; To display camera’s on-screen display; Attaching the Core Filter to the DC cord; Wind twice
EN USING WITH TV To connect using the AV connector AV Input Connector AV Cable To AC Outlet AC Adapter DC Connector AV Connector NOTE Change the settings in [VIDEO OUTPUT] to suit the screen size of your television. Playback Operation After the connection with TV is completed 1 Turn on the camera ...
Page 27 - Managing Files; Capturing a Still Image from a Video; Deleting Files; Deleting the Currently Displayed File
EN EDITING Managing Files CAUTION Do not remove the recording medium or perform any other operation (such as turning off the power) while accessing files. Also, be sure to use the provided AC adapter, as the data on the recording medium may be corrupted if the battery becomes exhausted during operat...
Page 28 - Copying Files; Using a BD/DVD Burner
EN COPYING Copying Files Types of Copying and Connectable Device The Camera DVD Burner CU-VD50/CU-VD3 You can copy files recorded on this camera onto discs. BD Burner LaCie Model No. 301828 You can copy files recorded on this camera onto discs. USB External Hard Disk Drive You can copy files recorde...
Page 29 - Backup All Files; Select the desired menu.; To switch between video and still image
EN COPYING • You can also connect the cables using the Everio dock connectors. NOTE • Refer also to the optional BD/DVD burner’s instruction manual. • When connecting to a DVD burner, use the USB cable that came with the DVD burner. • When connecting to a BD burner, use a USB cable with Mini-A(Male)...
Page 30 - Dubbing Files to a VCR/DVD Recorder; To connect using the AV connectors; To stop dubbing
0 EN COPYING Dubbing Files to a VCR/DVD Recorder Preparation: • Create a playlist. • Turn off all units. To connect using the AV connectors (analog dubbing) AV Cable DC Connector AC Adapter To AC Outlet AV Connector VCR/DVD Recorder AV Connector (Input) • When other devices such as a DVD burner are ...
Page 31 - To check the PC specification; To see the Instruction Guide for Everio; Creating a Disc using a PC
1 EN PC OPERA TION You can copy the data from the camera and create a disc using a PC. Q Installing the software to the PC System Requirements Windows VistaOS: Windows Vista ® Home Basic (SP1) Home Premium (SP1) (32-bit, pre-installed) CPU: Intel ® Core TM Duo, 1.66 GHz or higher (Intel ® Core TM 2 ...
Page 32 - To disconnect the camera from the PC
EN PC OPERA TION R Making Backup on the PC Preparation: • Install the software to the PC. • Make sure that enough free space is left in the PC’s HDD. • Close the LCD monitor to turn off the camera. USB Connector USB Cable USB Connector Open the cover 1 Open the LCD monitor to turn on the camera. 2 S...
Page 33 - Double-click the icon to open the
EN PC OPERA TION S Making User Lists to Arrange the Files You can make a user list of a certain subject (such as Travel, Athletic meet) and put the files related to the subject into the user list.Preparation: Make backup on the PC. 1 Double-click the icon to open the calendar. 2 Select [Movies only]...
Page 34 - Select the user list and click [Create
EN PC OPERA TION T Copying Files to a disc Everio MediaBrowser supports 3 disc formats. Select the one that suits your purpose.DVD-Video disc: Suitable if you will give the disc to your friends and relatives. AVCHD disc: Suitable for high quality video. BD: Suitable for high quality video with long ...
Page 35 - JVC
EN PC OPERA TION Folder Structure and Extensions EVERIO_SD X = number [DCIM] Contains the still image folders. [XXXJVCSO] ... [EXTMOV] Video files with defective management information are saved. [DEM_XXXX.MTS][MOV_XXXX.MTS] [PRIVATE] [JVC] Contains management information files of event and/or disc ...
Page 36 - Turning on the Export Mode; To turn off the export mode; Changing the Export Setting; To cancel the export setting; Transferring the Files to PC; If you cannot export the file to iTunes; Using with a Portable Media Player
EN PC OPERA TION Turning on the Export Mode You can easily transfer videos recorded in export mode to iTunes ® . All the files with the export setting turned on are transferred to PC. For details on transferring, refer to the operation guide of MediaBrowser in the CD- ROM. Preparation: • Select the ...
Page 37 - Turning on the Upload Mode; Uploading Files; If you cannot upload the file to YouTube; Uploading Files to Websites; Changing the Menu Settings
EN FUR THER INFORMA TION Turning on the Upload Mode You can upload the file to video sharing websites (YouTube ™ ) quickly after recording. Preparation: • Select the recording mode. • Select ! mode. Press UPLOAD twice. If you record a file with the upload mode set on, the recording stops automatical...
Page 38 - Troubleshooting; Trouble
EN FUR THER INFORMA TION Troubleshooting Trouble Action Card Cannot insert the SD card. • Check that the SD card is facing the right direction. P o wer No power is supplied. • Connect the AC adapter correctly. • Recharge the battery pack. Displa y The remaining battery display is not correct. • Full...
Page 39 - Warning Indications; Indication
EN FUR THER INFORMA TION Trouble Action Other pr oblems Something appears to be shaking at the lens. • When OIS is turned on, shaking may be observed at the lens. This is not a malfunction. The SD card cannot be removed from the camera. • Push the SD card in a few more times. Cannot upload the file ...
Page 40 - Specifications
0 EN FUR THER INFORMA TION General Power supply DC 11 V (Using AC adapter) DC 7.2 V (Using battery pack) Power consumption Approx. 3.7 W* * When the monitor backlight is set to [STANDARD] mode. Rated Current Consumption: 1 A Dimensions (W x H x D) 37 mm x 66 mm x 124 mm (1-1/2" x 2-5/8" x 4-...
Page 42 - Cautions; AC Adapter
EN FUR THER INFORMA TION Cautions AC Adapter When using the AC adapter in areas other than the USA The provided AC adapter features automatic voltage selection in the AC range from 110 V to 240 V. USING HOUSEHOLD AC PLUG ADAPTER In case of connecting the unit’s power cord to an AC wall outlet other ...
Page 44 - Terms
A AC Adapter ........................................................ 42 AV Cable ............................................... 25, 26, 30 B Battery Pack ................................................ 16, 42 BD/DVD Backup ................................................ 29 BD/DVD Burner ...........
Page 45 - MEMO


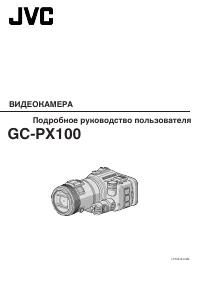 JVC GC-PX100
Manual
JVC GC-PX100
Manual
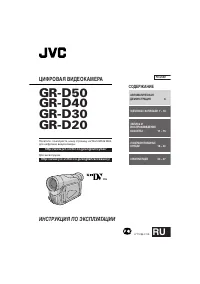 JVC GR-D20
Manual
JVC GR-D20
Manual
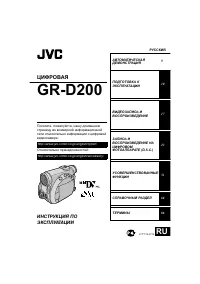 JVC GR-D200
User Manual
JVC GR-D200
User Manual
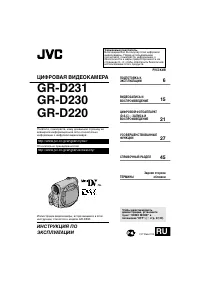 JVC GR-D220
Manual
JVC GR-D220
Manual
 JVC GR-D225
Manual
JVC GR-D225
Manual
 JVC GR-D240
Manual
JVC GR-D240
Manual
 JVC GR-D246
User Manual
JVC GR-D246
User Manual
 JVC GR-D290
Manual
JVC GR-D290
Manual
 JVC GR-D33
Manual
JVC GR-D33
Manual
 JVC GR-D340EK
User Manual
JVC GR-D340EK
User Manual
 JVC GR-D70
Manual
JVC GR-D70
Manual
 JVC GR-D90
Manual
JVC GR-D90
Manual
 JVC GR-DF420
Manual
JVC GR-DF420
Manual
 JVC GR-DF470
Manual
JVC GR-DF470
Manual
 JVC GR-DF570
Manual
JVC GR-DF570
Manual