Page 2 - Simply pressing the; BACKLIGHT; button; Data Battery; DATA; Direct Printing
2 EN Wipe/Fader Effects You can use the wipe/fader effects to make pro-style scene transitions. ( 墌 pg. 44) Program AE and Special Effects For example, “SPORTS” mode allows fast-moving images to be captured one frame at a time, for vivid, stable slow-motion. ( 墌 pg. 44, 45) Flash The flash fires aut...
Page 3 - SAFETY PRECAUTIONS; Caution on Replaceable lithium battery; CAUTION
EN 3 SAFETY PRECAUTIONS WARNING: TO PREVENT FIRE OR SHOCK HAZARD, DO NOT EXPOSE THIS UNIT TO RAIN OR MOISTURE. CAUTIONS: ● This camcorder is designed to be used with NTSC-type color television signals. It cannot be used for playback with a television of a different standard. However, live recording ...
Page 4 - IMPORTANT SAFETY INSTRUCTIONS
4 EN IMPORTANT SAFETY INSTRUCTIONS 1. Read these instructions.2. Keep these instructions.3. Heed all warnings.4. Follow all instructions.5. Do not use this apparatus near water.6. Clean only with dry cloth.7. Do not block any ventilation openings. Install in accordance with the manufacturer’s instru...
Page 5 - CONTENTS; GETTING STARTED; Dubbing Still Images Recorded on a Tape to a; ADVANCED FEATURES
EN 5 CONTENTS GETTING STARTED 6 Index ................................................................. 6Provided Accessories ..................................... 10LCD Monitor.................................................... 12Power.............................................................. ...
Page 6 - Index; b c
6 EN GETTING STARTED Index a d e f ghi b c W j k lm n o p qrs t u v l m j k n o X YZ a b c p f g h i q r s t d
Page 7 - GETTING; Controls
EN 7 GETTING STARTED GETTING ST AR TED Controls A Set Button [SET] ( 墌 pg. 33) B Play/Pause Button [ 4 / 9 ] ( 墌 pg. 20) Night-Alive Button [NIGHT] ( 墌 pg. 40) Up Button C Fast-Forward Button [ 5 ] ( 墌 pg. 20) Flash Button [FLASH] ( 墌 pg. 39) D Rewind Button [ 3 ] ( 墌 pg. 20) Quick Review Button [QU...
Page 8 - Indications on LCD Monitor; During Video Recording Only; REC; AM; PHOTO
GETTING STARTED 8 EN Indications on LCD Monitor During Video Recording Only A Selected Wipe/Fader Effect Indicator ( 墌 pg. 44) B Tape Running Indicator ( 墌 pg. 18) (Rotates while tape is running.) C Selected Wide Mode Indicator ( 墌 pg. 35) D Recording Speed Mode (SP/LP) ( 墌 pg. 34) E Tape Remaining ...
Page 9 - During Video Playback; BLANK; VOLUME
EN 9 GETTING STARTED GETTING ST AR TED G : Spot Exposure Control Indicator ( 墌 pg. 42) : Backlight Compensation Indicator ( 墌 pg. 42) ±: Exposure Adjustment Indicator ( 墌 pg. 41) H Iris Lock Indicator ( 墌 pg. 42) I Approximate Zoom Ratio ( 墌 pg. 19) J Zoom Indicator ( 墌 pg. 19) K Self-Timer Recordin...
Page 10 - Before Using This Camcorder; Provided Accessories
GETTING STARTED 10 EN Before Using This Camcorder Make sure you only use cassettes with the Mini DV mark . Make sure you only use memory cards with the mark or . This camcorder is designed exclusively for the digital video cassette, SD Memory Card and MultiMediaCard. Only cassettes marked “ ” and me...
Page 11 - Attaching the Lens Hood; How to Attach the Lens Cap
EN 11 GETTING STARTED GETTING ST AR TED a AC Adapter AP-V16U or AP-V14U b Battery Pack BN-VF707U c S-Video/Audio/Video Cable d USB Cable e Audio Extension Cable (for optional microphone, see page 12 for connection) f Audio Extension Cable (for optional headphone, see page 12 for connection) g Core F...
Page 12 - Attaching the Core Filter; How to Use the Audio Extension Cable; LCD Monitor
GETTING STARTED 12 EN Attaching the Core Filter Attach the core filters to the cables. The core filter reduces interference. 1 Release the stoppers on both ends of the core filter. 2 Run the cable through the core filter, leaving approx. 3 cm of cable between the cable plug and the core filter. S-Vi...
Page 13 - Charging the Battery Pack; To detach the battery pack; Using the Battery Pack; Maximum continuous recording time; Power
EN 13 GETTING STARTED GETTING ST AR TED This camcorder’s 2-way power supply system lets you choose the most appropriate source of power. Do not use provided power supply units with other equipment. Charging the Battery Pack 1 Set the power switch to “OFF”. 2 With the arrow on the battery pack pointi...
Page 14 - Data Battery System; Using AC Power; Operation Mode; Power Switch Position
GETTING STARTED 14 EN NOTES: ● Recording time is reduced significantly under the following conditions: • Zoom or record-standby mode is engaged repeatedly. • The LCD monitor is used repeatedly. • The playback mode is engaged repeatedly. ● Before extended use, it is recommended that you prepare enoug...
Page 15 - Power-Linked Operation; Language Setting
EN 15 GETTING STARTED GETTING ST AR TED Power-Linked Operation When the power switch is set to “ A ” or “ M ”, you can also turn on/off the camcorder by opening/closing the LCD monitor. The language on the display can be changed. ( 墌 pg. 33, 36, 38) 1 Set the power switch to “ M ” while pressing dow...
Page 16 - Tripod Mounting; Loading/Unloading a Cassette
GETTING STARTED 16 EN 1 Set the power switch to “ M ” or “PLAY” while pressing down the lock button located on the switch. 2 Open the LCD monitor fully. ( 墌 pg. 12) 3 Press MENU . The menu screen appears. 4 Press Up ( 4 / 9 ) or Down ( 8 ) to select “ n ”, and press SET . The CAMERA DISPLAY or VIDEO...
Page 17 - Make sure the camcorder’s power is off.; To load a memory card; , firmly insert it with; To unload a memory card; Close the card cover.; Loading/Unloading a Memory Card
EN 17 GETTING STARTED GETTING ST AR TED To protect valuable recordings Slide the erase protection tab on the back of the tape in the direction of “SAVE”. This prevents the tape from being recorded over. To record on this tape, slide the tab back to “REC” before loading it. NOTES: ● If you wait a few...
Page 18 - VIDEO RECORDING; Approximate recording time; Tape Remaining Time; Basic Recording
18 EN VIDEO RECORDING NOTE: Before continuing, perform the procedures listed below: ● Power ( 墌 pg. 13) ● Loading A Cassette ( 墌 pg. 16) 1 Remove the lens cap. ( 墌 pg. 11) 2 Open the LCD monitor fully. ( 墌 pg. 12) 3 Set the VIDEO/MEMORY switch to “VIDEO”. 4 Set the power switch to “ A ” or “ M ” whi...
Page 19 - DEO R; Zooming; To zoom in; Slide the power zoom lever towards “T”.; To zoom out; Slide the power zoom lever towards “W”.; Journalistic Shooting
EN 19 VIDEO RECORDING VI DEO R E CO RD ING & PLA YBACK Zooming Produces the zoom in/out effect, or an instantaneous change in image magnification. To zoom in Slide the power zoom lever towards “T”. To zoom out Slide the power zoom lever towards “W”. ● The further you slide the power zoom lever, ...
Page 20 - Quick Review; QUICK REVIEW; Recording from the Middle of a Tape; To control the speaker volume; Normal Playback; VIDEO PLAYBACK
20 EN NOTES: ● The time code cannot be reset. ● During fast-forwarding and rewinding, the time code indication does not move smoothly. ● The time code is displayed only when “TIME CODE” is set to “ON”. ( 墌 pg. 36) Quick Review Enables to check the end of the last recording. 1) Press QUICK REVIEW ( 3...
Page 21 - Shuttle Search; Blank Search; MENU
EN 21 VIDEO PLAYBACK VI DEO R E CO RD ING & PLA YBACK Shuttle Search Allows high-speed search in either direction during video playback. 1) During playback, press 5 for forward search, or 3 for reverse search. 2) To resume normal playback, press 4 / 9 . ● During playback, press and hold 5 or 3 ....
Page 22 - If using a VCR; Connections to a TV or VCR
VIDEO PLAYBACK 22 EN A Black to S-VIDEO IN (Connect when your TV/VCR has S-VIDEO IN and A/V input connectors. In this case, it is not necessary to connect the yellow video cable.) B Yellow to VIDEO IN (Connect when your TV/VCR has only A/V input connectors.) C Red to AUDIO R IN* D White to AUDIO L I...
Page 23 - Installing the Battery; SNAPSHOT; Playback Using the Remote Control
EN 23 VI DEO R E CO RD ING & PLA YBACK VIDEO PLAYBACK The full-function remote control unit can operate this camcorder from a distance as well as the basic operations (playback, stop, pause, fast-forward and rewind) of your VCR. It also makes additional playback functions possible. ( 墌 pg. 24) I...
Page 24 - Playback Zoom
VIDEO PLAYBACK 24 EN . Slow-Motion Playback During normal video playback, press SLOW ( Y I or I U ) more than approx. 2 seconds. ● After approx. 10 minutes, normal playback resumes. ● To pause slow-motion playback, press PAUSE ( 9 ). ● To stop slow-motion playback, press PLAY ( U ). NOTES: ● You can...
Page 25 - Continuous Shooting; Bracket Shooting; To cancel bracket shooting mode
EN 25 D IGIT A L STILL CAMER A (D.S .C.) R E CO RD ING & PLA Y BACK D.S.C. RECORDING You can use your camcorder as a Digital Still Camera for taking snapshots. Still images are stored in the memory card. NOTE: Before continuing, perform the procedures listed below: ● Power ( 墌 pg. 13) ● Loading ...
Page 26 - Interval Shooting; Normal Playback of Images
26 EN Interval Shooting During interval shooting mode, the camcorder continues to take snapshots automatically with an interval of your desired setting. 1 Set “INT.SHOT” to “ON”. ( 墌 pg. 33, 37) ● “INTERVAL” and “ ” appear. 2 Set “INT.TIME” to the desired shooting interval. ( 墌 pg. 33, 37) 3 Set the...
Page 27 - Index Playback of Files; Removing On-Screen Display
EN 27 D.S.C. PLAYBACK D IGIT A L STILL CAMER A (D.S .C.) R E CO RD ING & PLA Y BACK You can view several different files stored in the memory card at a time. This browsing capability makes it easy to locate a particular file you want. 1 Perform steps 1 – 3 in “Normal Playback of Images” ( 墌 pg. ...
Page 29 - To Remove Protection; Deleting Files
EN 29 ADDITIONAL FEATURES FOR D.S.C. D IGIT A L STILL CAMER A (D.S .C.) R E CO RD ING & PLA Y BACK To Remove Protection Before doing the following, perform steps 1 – 3 in “Protecting Files”. To remove protection from the currently displayed file 4 Press Up ( 4 / 9 ) or Down ( 8 ) to select “CURR...
Page 30 - To Print All Still Images (One Print For Each)
ADDITIONAL FEATURES FOR D.S.C. 30 EN This camcorder is compatible with the DPOF (Digital Print Order Format) standard in order to support future systems such as automatic printing. You can select one of the 2 print information settings for images stored in the memory card: “To Print All Still Images...
Page 31 - To Reset the Number of Prints
EN 31 ADDITIONAL FEATURES FOR D.S.C. D IGIT A L STILL CAMER A (D.S .C.) R E CO RD ING & PLA Y BACK To Reset the Number of Prints 1 Perform steps 1 – 3 in “To Print All Still Images (One Print For Each)”. 2 Press Up ( 4 / 9 ) or Down ( 8 ) to select “RESET”, and press SET . The DPOF screen appear...
Page 32 - Initializing a Memory Card
ADDITIONAL FEATURES FOR D.S.C. 32 EN To print using the DPOF setting If the printer is compatible with DPOF, you can use the DPOF setting. ( 墌 pg. 30) 1 Perform steps 1 – 3 in “Normal Playback of Images” ( 墌 pg. 26). 2 Press MENU . The menu screen appears. 3 Press Up ( 4 / 9 ) or Down ( 8 ) to selec...
Page 33 - MENUS FOR DETAILED ADJUSTMENT; Menus without Sub Menus; Changing the Menu Settings
EN 33 AD V A N C ED F E A T UR ES MENUS FOR DETAILED ADJUSTMENT This camcorder is equipped with an easy-to-use, on-screen menu system that simplifies many of the more detailed camcorder settings. ( 墌 pg. 34 – 38) 1 For Video and D.S.C. Recording Menus: ● Set the VIDEO/MEMORY switch to “VIDEO” or “ME...
Page 34 - CAMERA; Recording Menus
MENUS FOR DETAILED ADJUSTMENT 34 EN CAMERA The “ m CAMERA” settings are effective when the power switch is set to both “ A ” and “ M ”. However, the menu settings can be changed only when the power switch is set to “ M ”. [ ] = Factory-preset [SP] : To record in the SP (Standard Play) mode LP : Long...
Page 35 - AD; SYSTEM
EN 35 MENUS FOR DETAILED ADJUSTMENT AD V A N C ED F E A T UR ES 墌 pg. 40, “Self-Timer” [OFF] : Disables 5-second recording. 5S : Enables 5-second recording. ( 墌 pg. 40) Anim. : Allows you to record a few frames only. By using an inanimate object and changing its position between shots, you can recor...
Page 36 - CAMERA DISPLAY; DSC
MENUS FOR DETAILED ADJUSTMENT 36 EN OFF : Automatic demonstration will not take place. [ON] : Demonstrates certain functions such as program AE or special effects, etc., and can be used to confirm how these functions operate. Demonstration starts in the following cases: ● When the menu screen is clo...
Page 37 - VIDEO; IMAGE SIZE; Playback Menus; SOUND MODE
EN 37 MENUS FOR DETAILED ADJUSTMENT AD V A N C ED F E A T UR ES 640 x 480 / 1280 x 960 / 1600 x 1200 / 2048 x 1536 / [2560 x 1920] The image size mode can be selected to best match your needs. ( 墌 pg. 61) NOTE: The setting can be changed only when the VIDEO/ MEMORY switch is set to “MEMORY”. [OFF] :...
Page 39 - FEATURES FOR RECORDING; Snapshot Flash
EN 39 AD V A N C ED F E A T UR ES FEATURES FOR RECORDING The flash can be used when a snapshot is taken in Record-Standby mode. ( 墌 pg. 25, 39) ● You can select the flash setting. Press FLASH ( 5 ) repeatedly to select the desired mode. [ ±0A ]: Fires automatically if it is dark. C ±0A : Fires autom...
Page 41 - Manual Focus; Exposure Control
EN 41 FEATURES FOR RECORDING AD V A N C ED F E A T UR ES The camcorder’s full range AF system offers continuous shooting ability from close-up (as close as approx. 5 cm (2") to the subject) to infinity.However, correct focus may not be obtained depending on the shooting condition. In this case, ...
Page 42 - Iris Lock
FEATURES FOR RECORDING 42 EN Like the pupil of the human eye, the iris contracts in well-lit environments to keep too much light from entering, and dilates in dim environments to allow in more light.Use this function in the following situations: ● When shooting a moving subject. ● When the distance ...
Page 43 - White Balance Adjustment
EN 43 FEATURES FOR RECORDING AD V A N C ED F E A T UR ES The white balance refers to the correctness of color reproduction under various lighting. If the white balance is correct, all other colors will be accurately reproduced.The white balance is usually adjusted automatically. However, more advanc...
Page 44 - Wipe or Fader Effects
FEATURES FOR RECORDING 44 EN These effects let you make pro-style scene transitions. Use them to spice up the transition from one scene to the next.Wipe or fader works when video recording is started or stopped. 1 Set the VIDEO/MEMORY switch to “VIDEO”. 2 Set the power switch to “ M ”. 3 Set “ v ” t...
Page 45 - Special Effects
EN 45 FEATURES FOR RECORDING AD V A N C ED F E A T UR ES A PRIORITY (F1.8 – F8.0): After selecting “A PRIORITY” (Aperture Priority) in step 3 , rotate the manual focus dial to select the desired value, and press SET . You can set the aperture value (F-number) manually. The larger the aperture value ...
Page 46 - EDITING; To use this camcorder as a player; To use this camcorder as a recorder; Dubbing to or from a VCR; S IN
46 EN EDITING A To S-VIDEO IN or OUT* B Yellow to VIDEO IN or OUT C Red to AUDIO R IN or OUT D White to AUDIO L IN or OUT * Connect when your TV/VCR has an S-VIDEO IN/ OUT connector. In this case, it is not necessary to connect the yellow video cable. To use this camcorder as a player 1 Following th...
Page 47 - DV IN
EN 47 EDITING AD V A N C ED F E A T UR ES It is also possible to copy recorded scenes from the camcorder onto another video unit equipped with a DV connector. Since a digital signal is sent, there is little if any image or sound deterioration. To use this camcorder as a player 1 Make sure all units ...
Page 48 - Windows; Connection to a Personal Computer; ” appears on the; ” is displayed on the LCD
EDITING 48 EN [A] Using USB cable You can transfer still images stored on a memory card to a PC. [B] Using DV cable You can also transfer still or moving images recorded on a tape to a PC with a DV connector by using the provided software, software equipped with the PC or commercially available soft...
Page 49 - Insert Editing
EN 49 EDITING AD V A N C ED F E A T UR ES ● Never connect the USB cable and the DV cable simultaneously to the camcorder. Connect only the cable you wish to use to the camcorder. ● When using a DV cable, be sure to use the optional JVC VC-VDV206U or VC-VDV204U DV cable depending on the type of DV co...
Page 50 - Audio Dubbing
EDITING 50 EN The audio track can be customized only when recorded in the 12-BIT and SP modes. ( 墌 pg. 34) ● Use the provided remote control. 1 Play back the tape to locate the point where editing will start, then press PAUSE ( 9 ). 2 While holding A. DUB ( D ) on the remote control, press PAUSE ( 9...
Page 51 - TROUBLESHOOTING
EN 51 R EFE RE NCES TROUBLESHOOTING If, after following the steps in the chart below, the problem still exists, please consult your nearest JVC dealer. Power ● The power is not connected properly. H Connect the AC adapter securely. ( 墌 pg. 14) ● The battery pack is not attached firmly. H Detach the ...
Page 52 - Advanced features
TROUBLESHOOTING 52 EN Advanced features ● Focus is set to the manual mode. H Set focus to the auto mode. ( 墌 pg. 41) ● The lens is dirty or covered with condensation. H Clean the lens and check the focus again. ( 墌 pg. 56) ● The 5-second mode is set to “Anim.”. H Set “5S” to “5S”. ( 墌 pg. 33, 40) ● ...
Page 53 - EFE; Other problems
EN 53 TROUBLESHOOTING R EFE RE NCES Other problems ● Charging is difficult in places subject to extremely high/low temperatures. H To protect the battery, it is recommended to charge it in places with a temperature of 10°C to 35°C (50°F to 95°F). ( 墌 pg. 57) ● The battery pack is not attached firmly...
Page 54 - Warning Indications
TROUBLESHOOTING 54 EN Warning Indications Displays the battery remaining power. Remaining power level As the battery power comes close to nil, the battery remaining power indicator blinks.When the battery power is exhausted, power turns off automatically.The battery remaining power indicator display...
Page 55 - Appears if; INSERT; ) on the remote control
EN 55 TROUBLESHOOTING R EFE RE NCES Appears if insert editing is attempted on a blank portion of a tape. ( 墌 pg. 49) ● Appears if insert editing is attempted on a blank portion of a tape. ● Appears if insert editing is attempted on a tape recorded in the LP mode. ( 墌 pg. 49) ● Appears if INSERT ( I ...
Page 56 - Cleaning The Camcorder; USER MAINTENANCE
56 EN The error indications (01, 02 or 06) show what type of malfunction has occured. When an error indication appears, the camcorder turns off automatically. Remove the power supply (battery, etc.) and wait a few minutes for the indication to clear. When it does, you can resume using the camcorder....
Page 57 - CAUTIONS; AC Adapter; USING HOUSEHOLD AC PLUG ADAPTER; Battery Packs; To avoid hazards; Cassettes; During use; Store cassettes
EN 57 R EFE RE NCES CAUTIONS AC Adapter When using the AC adapter in areas other than the USA The provided AC adapter features automatic voltage selection in the AC range from 110 V to 240 V. USING HOUSEHOLD AC PLUG ADAPTER In case of connecting the unit’s power cord to an AC wall outlet other than ...
Page 58 - Memory Cards
CAUTIONS 58 EN Memory Cards To properly use and store your memory cards, be sure to read the following cautions: ● During use ... make sure the memory card bears the SD or MultiMediaCard mark. ... make sure the memory card is positioned properly when inserting. ● While the memory card is being acces...
Page 59 - How To Handle A CD-ROM; Serious malfunctioning; Model Number
EN 59 CAUTIONS R EFE RE NCES How To Handle A CD-ROM ● Take care not to soil or scratch the mirror surface (opposite to the printed surface). Do not write anything or put a sticker on either the front or back surface. If the CD-ROM gets dirty, gently wipe it with a soft cloth outward from the centre ...
Page 60 - SPECIFICATIONS; Camcorder; stereo; For General
60 EN SPECIFICATIONS Camcorder Power supply DC 11 V (Using AC adapter)DC 7.2 V (Using battery pack) Power consumption Approx. 4.8 W (LCD backlight off)Approx. 5.8 W (LCD backlight on)Approx. 6.5 W (Maximum; when charging the battery pack) Dimensions (W x H x D) 88 mm x 89 mm x 93 mm (3-1/2" x 3-...
Page 61 - REF; Approximate Number of Storable Images
EN 61 SPECIFICATIONS REF E R E NC ES Approximate Number of Storable Images The number increases or decreases depending on the picture quality/image size, etc. * Provided Image Size/Picture Quality SD Memory Card MultiMediaCard 32* MB 64 MB 128 MB 256 MB 512 MB 1 GB 32 MB 640 x 480/ 185 385 780 1555 ...
Page 62 - TERMS
62 EN A AC Adapter .................................................... 14Animation ....................................................... 35Audio Dubbing ............................................... 50 B Backlight Compensation ................................ 42Battery Pack .......................
Page 63 - RMS
EN 63 TERMS TE RMS S Self-Timer ...................................................... 40Slow-Motion Playback ................................... 24Snapshot Mode .............................................. 34Sound Mode ............................................ 34, 37Speaker Volume ...............


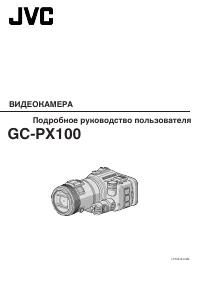 JVC GC-PX100
Manual
JVC GC-PX100
Manual
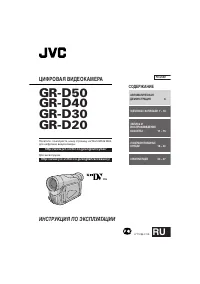 JVC GR-D20
Manual
JVC GR-D20
Manual
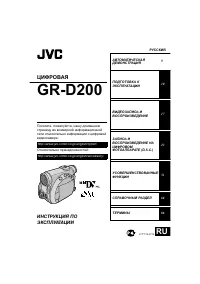 JVC GR-D200
User Manual
JVC GR-D200
User Manual
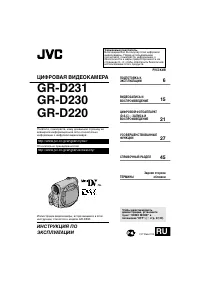 JVC GR-D220
Manual
JVC GR-D220
Manual
 JVC GR-D225
Manual
JVC GR-D225
Manual
 JVC GR-D240
Manual
JVC GR-D240
Manual
 JVC GR-D246
User Manual
JVC GR-D246
User Manual
 JVC GR-D290
Manual
JVC GR-D290
Manual
 JVC GR-D33
Manual
JVC GR-D33
Manual
 JVC GR-D340EK
User Manual
JVC GR-D340EK
User Manual
 JVC GR-D70
Manual
JVC GR-D70
Manual
 JVC GR-D90
Manual
JVC GR-D90
Manual
 JVC GR-DF420
Manual
JVC GR-DF420
Manual
 JVC GR-DF470
Manual
JVC GR-DF470
Manual
 JVC GR-DF570
Manual
JVC GR-DF570
Manual