Page 2 - EN; Using This Instruction Manual; SAFETY PRECAUTIONS; HAZARD, DO NOT EXPOSE; DO NOT
2 EN NOTES: ● The rating plate (serial number plate) and safetycaution are on the bottom and/or the back ofthe main unit. ● The rating plate (serial number plate) of the ACPower Adapter/Charger is on its bottom. Dear Customer, Thank you for purchasing this digital video camera. Before use, please re...
Page 4 - PROVIDED ACCESSORIES
4 EN • AC Power Adapter/Charger AA-V67EG or AA-V67EK • Remote Control Unit RM-V716U • DC Cord • CD-ROM The CD ROM contains thefollowing 7 software programs: • JLIP Video Capture • JLIP Video Producer • Picture Navigator (for Windows ® ) • Picture Navigator (for Macintosh ® ) Presto! • Mr. Photo • Ph...
Page 5 - AUTOMATIC DEMONSTRATION; How To Attach Core Filters
EN 5 AUTOMATIC DEMONSTRATION Automatic Demonstration takes place when “DEMO. MODE”is set to “ON” (factory-preset). n Available when the Power Switch is set to “ ” or “ ” and no cassette is in the camcorder. n Performing any operation during the demonstration stops thedemonstration temporarily. If no...
Page 6 - GETTING STARTED; Power; CHARGING THE BATTERY PACK; About Batteries
6 EN GETTING STARTED Power This camcorder’s 2-way power supply system lets youchoose the most appropriate source of power. Do not useprovided power supply units with other equipment. CHARGING THE BATTERY PACK 1 Make sure you unplug the camcorder’s DC cord fromthe AC Power Adapter/Charger. Plug the A...
Page 7 - USING THE BATTERY PACK; Approximate recording time; USING AC POWER
EN 7 1 2 3 To batterypack mount To DC OUTconnector To AC outlet AC PowerAdapter/ChargerAA-V67EG orAA-V67EK DC cord ATTENTION: Before detaching the power source,make sure that the camcorder’s poweris turned off. Failure to do so can resultin a camcorder malfunction. USING THE BATTERY PACK 1 Tilt the ...
Page 8 - Grip Adjustment; Shoulder Strap Attachment
8 EN PAUS E 3 1 2 Grip Adjustment 1 Separate the Velcro strip. 2 Pass your right hand through the loop and graspthe grip. 3 Adjust so that your thumb and fingers can easilyoperate the Recording Start/Stop Button andPower Zoom Lever. Refasten the Velcro strip. Viewfinder Adjustment 1 1 Set the Power ...
Page 9 - Built-in Clock’s Rechargeable Lithium Battery
EN 9 OFF DS CPL A Y P LA Y 4 F AD WW RO FFF E II A F AAA R PPNFDDD / EED EEE W –– O RRR I SS M ––– P CH W BB E RU H L. O T I A W LT T C LE EK R 1 OD T C RNA I L DE T M OA I TSEE CD S UC / K J PRR T C . L NE I O A E M D Y NEE MEN 1 U . 1 12 . : 00 00 Date/Time Settings The date/time is recorded onto ...
Page 10 - Loading/Unloading A Cassette
10 EN Loading/Unloading A Cassette The camcorder needs to be powered up to load or eject acassette. 1 Slide OPEN/EJECT in the direction of the arrow then swing the cassette holder cover open until it locks.The cassette holder opens automatically.• Do not touch internal components. 2 Insert or remove...
Page 11 - Recording Mode Setting
EN 11 OFF DS CPL A Y P LA Y 1 R SZ GBQ I DS R E OOA EUDE I E C UO I EA M D C T N M NP L NOE A U M D /I U . M R O U TT M L EN D M PAYB M E R E O L E OD A D L RD E Y E MEN S L U P P Recording Mode Setting Set the tape recording mode depending on your preference. 1 Set the Power Switch to “ ” while pre...
Page 12 - Loading A MultiMediaCard; MEMORY CARD
12 EN GETTING STARTED (cont.) MultiMediaCard Clipped edge Card Cover PUSH-OPEN Button Loading A MultiMediaCard The provided MultiMediaCard is already inserted in thecamcorder when you receive the camcorder. 1 Make sure the camcorder’s power is off. 2 Press PUSH-OPEN and open the LCD monitor, then op...
Page 13 - Picture Quality Mode Setting; BRIGHT
EN 13 MultiMediaCard 4 MB (provided) 25 50 75 MultiMediaCard 4 MB (provided) 12 24 36 1 RS Z GB Q I DS REOOAE U DE I ECU O I E A M D C T N M NP L NOE A U M D / I U . M RO U T T M L EN D M PA Y B M E R E O L E OD A D L RD E Y E ME F S E N I T C U N A O E N N D O A M R Y D OFF DS CPL A Y P LA Y Pictur...
Page 14 - Operation Mode; If the Power Switch is set to “; Function
14 EN OFF D SC P LA YP LA Y F . AU T O MANUA L Operation Mode Turning the Power Switch and Shooting Mode Dial allowsyou to choose the appropriate operation mode fromamong the following table and the one on pg. 15: According to the Power Switch position youhave selected, “F.AUTO” or “MANUAL”appears i...
Page 15 - unction
EN 15 DUA L DUAL VG A XGA PS VID EO Shooting Mode Dial F unction • Allows you to record video on a tape and store still images in aMultiMediaCard simultaneously( Z pg. 26). • File size of still images: 640 x 480 pixels • Video quality is the same as in the VIDEO mode. • Allows you to record video an...
Page 16 - RECORDING; Basic Recording For Video; To Adjust The Brightness Of The Display
16 EN 2 5 OFF D SC P LA YP LA Y 90 min 89 min 3 min 2 min 1 min 0 min min PUSH 180 ° 90 ° BR I GH T – + DU AL VG A XGA PS VIDEO RECORDING Basic Recording For Video Power lamp Tally lamp(lights while recordingis in progress) Lock Button Shooting Mode Dial RecordingStart/Stop Button Tape remainingtime...
Page 17 - To turn the tally lamp off during recording,
EN 17 Self-Recording JOURNALISTIC SHOOTING In some situations, different shooting angles may providemore dramatic results. Hold the camcorder in the desiredposition and tilt the LCD monitor in the most convenientdirection. It can rotate 270° (90° downward, 180°upward). INTERFACE SHOOTING The person ...
Page 18 - SNAPSHOT MODE SELECTION; SNAP MODE; SNAPSHOT RECORDING; Motor Drive Mode; SNAPSHOT
18 EN F U L L DU AL VG A XGA PS VIDEO OFF D SC P LA YP LA Y RECORDING Basic Recording For Video (cont.) Snapshot (For Video Recording) Use your camcorder like a regular camera and take asnapshot, or several of them in succession.This feature lets you record still images that look likephotographs ont...
Page 19 - Snapshot Search; INDEX SCREEN
EN 19 NOTES: ● To remove the shutter sound, Z “BEEP/TALLY” on pg. 31. ● If Digital Zoom is used while in the “MULTI-4” or “MULTI-9” mode, Snapshot recording will be performedwith 10X magnification. ● In Multi-Analyser 4 or Multi-Analyser 9, the flash isdisabled ( Z pg. 34). ● If Snapshot recording i...
Page 22 - Zooming; Zoom In; Zoom Out
22 EN 1 0 xW T 1 xW T 1 0 xW T 20xW T 40xW T RECORDING Basic Recording For Video And D.S.C. Zoom in (T: Telephoto) Zoom out (W: Wide angle) Power Zoom Lever Zoom display FEATURE: Zooming PURPOSE: To produce the zoom in/out effect, or an instantaneouschange in image magnification. OPERATION: Zoom In ...
Page 23 - NOTE: Recording From The Middle Of A Tape; Time Code; When a blank portion is recorded on a tape
EN 23 NOTE: Recording From The Middle Of A Tape Time Code During recording, a time code is recorded on the tape. This code is to confirm the location of the recordedscene on the tape during playback.If recording starts from a blank portion, the time code begins counting from “00:00:00”(minute:second...
Page 24 - Progressive Mode Recording
24 EN OFF D SC P LA YP LA Y DU AL VG A XGA PS VID EO Progressive Mode Recording This mode lets you record moving images (successivejitter-free still images) onto a tape. Images can then playedback jitter-free, with superior quality. High-resolution stillimages can also be processed on a personal com...
Page 25 - Description of Progressive Scan CCD; Regular shooting of moving images; a still image is displayed on a TV or PC monitor the
EN 25 Description of Progressive Scan CCD Progressive Scan is a special image sensing method which, unlike conventional interlace scanning, is able topick up all the lines of picture information in one Scan. Since the Progressive Scan CCD is capable ofoutputting 50 full Frames* per second — twice th...
Page 26 - Dual Shooting
26 EN RECORDING Advanced Features For Video And D.S.C. (cont.) OFF D SC P LA YP LA Y DUAL VG A XGA PS VID EO Dual Shooting Lets you record images on a tape and store still images in aMultiMediaCard simultaneously. In other words, it ispossible to store still images in the MultiMediaCardwithout inter...
Page 27 - FOCUS
EN 27 While focusing on a nearersubject While focusing on a furthersubject FEATURE: Auto Focus PURPOSE: The camcorder’s Full Range AF system offers continuous shooting ability from close-up (as close as approx.5 cm to the subject) to infinity.However, correct focus may not be obtainable in the situa...
Page 28 - High Speed Recording; HIGH SPEED
28 EN OFF DS CPL A Y P LA Y PAUS E DU AL VG A XGA PS VIDEO Normal Record-Standby High Speed Recording The images recorded in High Speed Recording mode canbe played back with high density in slow-motion. Thisfeature is an effective way to capture fast-moving action.Also refer to “Progressive Slow-Mot...
Page 29 - PROGRESSIVE SLOW-MOTION PLAYBACK; SLOW
EN 29 OFF D S C PL AY PL AY Playback image on a video unit other than theGR-DVL9800/DVL 9700 or when the camcorder isconnected to a monitor via DV OUT. Play/Pause Button ( 4 / 6 ) Power Switch Lock Button RM-V716U(provided) PLAY SLOW Rewind/Forward Button Stop Button ( 5 ) PROGRESSIVE SLOW-MOTION PL...
Page 30 - Using Menus For Detailed Adjustment; If you have selected “
30 EN 4 F AD WW RO FFF E II A F AAA R PPNFDDD / EED EEE W –– O RRR I SS M ––– P CH W BB E RU H L. O T I A W LT T C LE EK R END OFF DS CPL A Y P LA Y 1 R SZ GBQ I DS R E OOA EUDE I E C UO I EA M D C T N M NP L NOE A U M D /I U . M R O U TT M L EN D M PAYB M E R E O L E OD A D L RD E Y E MEN S L U P P...
Page 31 - Menu Screen Explanations; CONTINUED ON NEXT PAGE
EN 31 Menu Screen Explanations : Factory-preset Refer to “Fade/Wipe Effects” ( Z pg. 38, 39). Refer to “Programme AE With Special Effects” ( Z pg. 40, 41). Refer to “Exposure Control” and “Iris Lock” ( Z pg. 42). Refer to “White Balance Adjustment” and “Manual White Balance Operation”( Z pg. 43). Al...
Page 32 - DIS
32 EN Menu Screen Explanations (cont.) RECORDING Advanced Features For Video And D.S.C. (cont.) DIS 5S TELEMACRO WIDEMODE MANUAL MENU CAMERA MENU SELF-TIMER Demonstrates certain functions such as Programme AE with special effects, etc., and can be used to confirm how these functions operate. When “D...
Page 34 - Snapshot Flash; If “AUTO
34 EN 1 DS 5T WW F F R I ESE II L L ESL L DN A A M T F EED S S A U – H H NR T MM C UN I A OU A A M C D T D L E RE J R O . ME A A O N U UN U T T O O OFF DS CPL A Y P LA Y RECORDING Advanced Features For Video And D.S.C. (cont.) Snapshot Flash The flash can be used when a snapshot is taken in Record-S...
Page 35 - Flash Brightness Adjustment
EN 35 OFF DS CPL A Y P LA Y 1 DS 5T WW F F R I ESE II L L ESL L DNA A M T F EEDS S A U – H H NR T MM C UN I A OU A A M C D T D L E RE J R O . ME + N 2 U Flash Brightness Adjustment When a snapshot ( Z pg. 18, 20) is taken in the dark the camcorder fires the flash ( Z pg. 34) and adjusts the brightne...
Page 36 - OR
36 EN MANUA L OFF DS CPL A Y P LA Y 1 D S 5T WW FF R I E SE II L L ES L L DNA A M T F EEDSS A U – HH NR T MM C UN I A OU A A M C D T D L E RE J R O . ME O O N F N U F Self-Timer Once the camcorder is set, the camcorder operator canbecome part of the scene in a more natural way, addingthe final touch...
Page 38 - and
38 EN RECORDING Advanced Features For Video And D.S.C. (cont.) DU AL VG A XGA PS VIDEO Fade/Wipe Effects These effects let you make pro-style scenetransitions. Use them to spice up the transitionfrom one scene to the next. You can also varytransitions from scene to scene. IMPORTANT: Some Fade/Wipe E...
Page 39 - Fader And Wipe Menu; Menu
EN 39 Fader And Wipe Menu Menu Effect Fade in or out with a white screen. Fade in or out with a black screen. Fade in to a colour screen from a black and white screen, or fade outfrom colour to black and white. Wipe in on a black screen from the upper right to the lower leftcorner, or wipe out from ...
Page 40 - Programme AE With Special Effects
40 EN OFF DS CPL A Y P LA Y DU AL VG A XGA PS VIDEO 1/501/1001/250 1/501/1001/250 4 P . A SSV SSS E LL I O HHH / OOD F UUU E WW E F TTT F O TTT F 1 EEE E 40E RRR C xx C T HO RECORDING Advanced Features For Video And D.S.C. (cont.) Programme AE With Special Effects 1 Set the Power Switch to “ ” while...
Page 42 - Exposure Control; Iris Lock
42 EN Exposure Control Manual exposure adjustment is recommended in thefollowing situations:• When shooting using reverse lighting or when the background is too bright. • When shooting on a reflective natural background such as at the beach or when skiing. • When the background is overly dark or the...
Page 44 - PLAYBACK; Basic Playback For Video
44 EN PLAYBACK Basic Playback For Video OFF D S C PL AY PL AY Power Switch Rewind Button ( 2 ) Fast-Forward Button ( 3 ) Play/Pause Button ( 4 / 6 ) Stop Button ( 5 ) 1 Load a tape ( Z pg. 10). 2 Set the Power Switch to “ ” while pressing down the Lock Button located on the switch. To startplayback,...
Page 45 - Playback Zoom and Playback Special
EN 45 PUSH Slow-Motion Playback: Allows slow-speed search in the forward direction. 1) To change from normal to Slow-Motion Playback,press SLOW more than approx. 2 seconds. After approx. 2 minutes, normal playback resumes.• You can also engage Slow-Motion Playback from Still Playback by pressing SLO...
Page 46 - Advanced Features For Video; ON; DISPLAY
46 EN PLAYBACK Advanced Features For Video OFF D S C PL AY PL AY 1 OD T RNA I DE T M I T S E E S U C / PRRT C L NE I O A E M D Y NE E MEN O O U N F F 1 S 1S A R O 2Y V E U BN / VT N I C S I U D T H – DR RCV EN M MOO I O O O PD D D YE M E E O ENU S SS T OO E UU R NN E DD O L R Using Menus For Detaile...
Page 47 - Playback Sound
EN 47 1 2 B I T / SOUND 1 S P 4 2 5 . 1 1 27 . : 03 00 T C 1 2 : 3 4 : 2 4 Playback Sound During playback, the camcorder detects the sound mode in which the recording was made, and plays thesound back. Select the type of sound to accompany your playback picture. According to the menu accessexplanati...
Page 48 - Normal Playback
48 EN OFF DS C PL AY PLAY 13 / 24 100 – 0013 12 / 24 100 – 0012 11 / 24 100 – 0011 10 / 24 100 – 0010 Power Switch Lock Button Normal Playback Images shot with the camcorder are automaticallynumbered, then stored in numerical order in theMultiMediaCard. You can view the stored images, one at atime, ...
Page 49 - E X I T; I N D E X; INDEX Screen; Selected Image; Index Playback
EN 49 0 0 1 F 0 0 2 S 0 0 3 E 0 0 5 F 0 0 4 F E X I T 100-DVC00003 VGA 0 0 6 F I N D E X OFF DS C PLA Y PLAY Index number Selected image Picture Quality mode Protect icon Lock Button Power Switch Playback Screen INDEX Screen The images you shot can be displayed together with theirindex information. ...
Page 50 - Protecting Images; TO PROTECT AN IMAGE
50 EN 0 0 1 F 0 0 2 S 0 0 3 E 0 0 5 F 0 0 4 F 0 0 6 F E X I T P R O T E C T 0 0 1 F 0 0 2 S 0 0 3 E 0 0 5 F 0 0 4 F 0 0 6 F E X I T P R O T E C T OFF DS C PLA Y PLAY 1 P I FF D R R M RO P E O AARO T T GMM F DU E EEA SR C T CN T DD EE M LL E .. NU Display Power Switch MENU/BRIGHTWheel Lock Button If ...
Page 51 - Deleting Images; TO DELETE ALL IMAGES
EN 51 0 0 1 F 0 0 2 S 0 0 3 E 0 0 5 F 0 0 4 F 0 0 6 F D E L E T E E X I T OFF DS C PLA Y PLAY C E A X N E C C E U L T E Deleting Images Previously shot images can be deleted either one at a timeor all at once. 1 Set the Power Switch to “ ” while pressing down the Lock Button. Open the LCD monitor fu...
Page 52 - Superimposing A Print Frame; PRINT FRAME
52 EN PLAYBACK Advanced Features For D.S.C. (cont.) PUSH E X I T 0 0 1 0 0 2 0 0 3 0 0 5 0 0 4 0 0 6 E X I T FRAME 5 I N D E X Superimposing A Print Frame A selection of print frames are stored in the camcorder. Aframe can be superimposed over a still image. 1 Play back an image stored in the MultiM...
Page 53 - Initialising A MultiMediaCard
EN 53 OFF DS C PLA Y PLAY 1 P I F F D RR M R O P E OAA R O TT GM M F DUEEE A SRC T CN T DD EE M LL E .. NU C E A X N E C C E U L T E MENU/BRIGHTWheel Lock Button Power Switch Display Initialising A MultiMediaCard You can initialise a MultiMediaCard anytime. After initialising, all images and data st...
Page 54 - Print Frame Deletion
54 EN 0 1 3 F 0 1 4 F 0 1 5 F 0 1 7 F 0 1 6 F 0 1 8 F OFF DS C PLA Y PLAY D E L E T E E X I T C E A X N E C C E U L T E Print Frame Deletion A print frame created on a PC can be transferred to aMultiMediaCard using the provided software. Print framesthat have been transferred to a MultiMediaCard can...
Page 55 - TO DELETE ALL PRINT FRAMES
EN 55 OFF DS C PLA Y PLAY 1 P I F F D RR M R O P E OA A RO TT G M M F DUEE E A SRC T CN T D D E E M L L E . . NU C A S A L E N L L C E E C L T ED C E A X N E C C E U L T E TO DELETE ALL PRINT FRAMES 1 Perform steps 1 through 4 on pag. 54. 2 Rotate MENU/BRIGHT to select “ALL” and press it. The Deleti...
Page 56 - PLAYALCK
56 EN PUSH C E A X N E C C E U L T E 1 P I FF D RR M RO P E OAAR O TT GMM F DUEEEA SRC T CN T DD EE M LL E .. NU S A R E L E L L S E E C T T ED Setting Print Information (DPOF Setting) This camcorder is compatible with the DPOF (Digital PrintOrder Format) standard in order to support future systemss...
Page 58 - CONNECTIONS; Basic Connections; signal
58 EN CONNECTIONS Basic Connections These are some basic types of connections. When making the connections, refer also to your VCR and TVinstruction manuals. * When connecting the cables, open this cover. ** The Audio cable is not required for watching still images with the Power Switch s et to “ ”....
Page 60 - Advanced Connections
60 EN CONNECTIONS Advanced Connections Connection To A PersonalComputer This camcorder can transfer still images to a PC by usingthe provided software when connected as shown in theillustration. It is also possible to transfer still images to a PCwith a DV connector-equipped capture board installed....
Page 62 - DUBBING; TV
62 EN DUBBING Dubbing Images/Sounds Recorded On ATape To Another Tape [To use this camcorder as a player] 1 Make sure all units are turned off, then connect thecamcorder and the VCR as shown in the illustration.Also refer to pg. 58 and 59. 2 Set the camcorder’s Power Switch to “ ” while pressing dow...
Page 68 - Installing The Batteries; USING THE REMOTE CONTROL UNIT
68 EN 5m 30 ° 30 ° 1 3 2 + – + – The Full-Function Remote Control Unit can operate thiscamcorder from a distance as well as the basic operations(Playback, Stop, Pause, Fast-Forward and Rewind) of yourVCR. It also makes additional playback functions possible. Installing The Batteries The remote contr...
Page 70 - Playback Zoom
70 EN SHIFT PAUSE PLAY STOP USING THE REMOTE CONTROL UNIT (cont.) Press T Normal playback Left or SLOW Rewind Button To move image,press (Right) while keepingSHIFT held down. RM-V716U (provided) Zoom Buttons Remote sensor Right or SLOW Forward Button Up Button DownButton FEATURE: Slow-Motion Playbac...
Page 71 - Playback Special Effects; PLAY
EN 71 P 4 L O A F12345 Y F BACK CMSSV L O ET I E ANPRD F S O I O E F STAB O E I O E C CN E T E C F H I O LM EFFECT PLAY EFFECT ON/OFF PLAYBACKEFFECT SelectMenu Remote sensor RM-V716U (provided) FEATURE: Playback Special Effects PURPOSE: To allow you to add creative effects to the playbackimage. OPER...
Page 72 - MBR SET; SHIFT
72 EN VCR CODE LIST 6 26 47 7 MITSUBISHI 6 76 8 NEC 3 73 8 GRUNDIG 1 43 4 HITACHI 6 66 3 PANASONIC 1 31 71 19 41 8 JVC 9 19 69 3 BLAUPUNKT AKAI 9 79 83 2 FERGUSON 1 3 ABC VCR BRANDNAME BUTTONS (A) (B) SANYO 3 63 5 SHARP 1 51 ` TOSHIBA 6 96 1 SONY 6 56 `3 93 1 THOMSON,TELEFUNKEN,SABA,NORDMENDE 9 19 6...
Page 73 - MAKE CONNECTIONS; A JVC VCR equipped with a remote pause; ATTENTION FOR EDITING CABLE; VCR
EN 73 MAKE CONNECTIONS Also refer to pg. 58 and 59. 1 A JVC VCR equipped with a remote pause connector . . . ... connect the editing cable to the Remote PAUSE connector. A JVC VCR not equipped with a remotepause connector but equipped with an R.A.EDIT connector . . . ... connect the editing cable to...
Page 74 - SELECT SCENES
74 EN 1 2345678 – – TOT – T A I – C L N : – – ~ ~~~~~~~ O –0 U –0 T :: –0 –0 MODE PLAY R.A.EDITON/OFF EFFECT FADE/WIPE EDIT IN/OUT CANCEL SELECT SCENES 4 Point the remote control at the camcorder’s remotesensor. Press PLAY ( 4 ) and then press R.A.EDIT ON/ OFF on the remote control. The Random Assem...
Page 75 - AUTOMATIC EDITING TO VCR; PAUSE
EN 75 12345 6 78 – – – – TOT 00001– T A I 07395– C L N :::::: 21335– 58305– ~~~~~~~~ O 00011 1 U 28536 69 T ::::: :: 03512 33 51350 09 M – – O – – DE –– – –– – STOP REW PAUSER.A.EDITON/OFF VCR RECSTBY FADE/WIPE EFFECT EDIT IN/OUT CANCEL AUTOMATIC EDITING TO VCR 11 Rewind the tape in the camcorder to...
Page 76 - For More Accurate Editing; DIAGNOSING VCR/CAMCORDER TIMING
76 EN 1 2345678 – – TOT – T A I – C L N : – – ~ ~~~~~~~ O –0 U –0 T :: –0 –0 MODE R.A.EDITON/OFF USING THE REMOTE CONTROL UNIT (cont.) For More Accurate Editing Some VCRs make the transition from Record-Pause toRecord mode faster than others. Even if you begin editingfor the camcorder and the VCR at...
Page 78 - Audio Dubbing
78 EN 6e STOP PAUSE A.DUB DISPLAY PLAY USING THE REMOTE CONTROL UNIT (cont.) Audio Dubbing The audio track can be customized only when recorded inthe 12-bit mode ( Z pg. 31). NOTES: ● Audio Dubbing is not possible on a tape recorded in 16-bit audio, on a tape recorded in the LP mode or on ablank por...
Page 79 - TROUBLESHOOTING
EN 79 SYMPTOM POSSIBLE CAUSES CORRECTIVE ACTION TROUBLESHOOTING 1. No power is supplied. 2. “SET DATE/TIME!”appears. 3. Recording cannot beperformed. 4. There is no picture. 5. Some functions are not available using MENU/ BRIGHT . 6. The focus does not adjust automatically. 7. The cassette will not ...
Page 80 - SYMPTOM; FLASH OPEN
80 EN TROUBLESHOOTING (cont.) SYMPTOM POSSIBLE CAUSES CORRECTIVE ACTION 10. Snapshot mode cannot beused. 11. The colour of Snapshot looks strange. 12. Although Snapshot isattempted, flash does not take place. 13. Although a Snapshot is taken with the flash, Red-Eye Reduction does not take place. 14....
Page 81 - SPOTLIGHT
EN 81 SYMPTOM POSSIBLE CAUSES CORRECTIVE ACTION 15. The image taken usingSnapshot is too bright. 16. Digital Zoom does not work. 17. Programme AE with special effects and Fade/ Wipe Effects do not work. 18. The Black & White Fader does not work. 19. The Dissolve function does not work. 15. • “FL...
Page 86 - INDEX; Controls, Connectors And Indicators; t y u i o; a s
86 EN INDEX Controls, Connectors And Indicators U OFF D SC P LA YP LA Y ( ) W 1 E R T Y p 2 w e r 3 I 8 6 7 4 5 P O f d g t y u i o * %^& $ a s 9 # 0 @ ! q Q
Page 88 - Indications; Appears when in the Squeeze, Cinema or; T C
88 EN INDEX Indications LCD Monitor/Viewfinder IndicationsDuring Video Recording Only No. Function 1 Displays the selected Fade/Wipe effect. ( Z pg. 38, 39) 2 Appears when in the Squeeze, Cinema or PS Wide mode. ( Z pg. 32) 3 * Appears when in the Record-Standby mode. ( Z pg. 16) 4 * Displays the re...
Page 90 - LCD Monitor/Viewfinder Indications During Video Playback; H T
90 EN LCD Monitor/Viewfinder Indications During Video Playback No. Function 1 Displays the sound mode. ( Z pg. 46, 47) 2 Appears blinking during Snapshot Search. ( Z pg. 19) 3 Displays the tape speed. ( Z pg. 11) 4 Appears while a tape is running. 4 : Playback 3 : Fast-Forward/Shuttle search 2 : Rew...
Page 91 - Warning Indications; TAPE END
EN 91 Indications Function Displays the battery remaining power. Remaining power level: high Remaining power level: exhausted As the battery power comes close to nil, the battery indicator blinks. When the battery power is exhausted, power turns off automatically. Appears when no tape is loaded. ( Z...
Page 92 - USER MAINTENANCE; Cleaning The Camcorder
92 EN 1 2 USER MAINTENANCE 1 2 3 Cassette holdercover OPEN/EJECTSwitch PUSH HERE Cassette holder Cover Cleaning The Camcorder 1 To clean the exterior, wipe gently with a softcloth.Put the cloth in diluted mild soap and wring itwell to wipe off heavy dirt. Then wipe againwith a dry cloth. 2 Press PUS...
Page 93 - CAUTIONS; General Battery Precautions
EN 93 CAUTIONS General Battery Precautions If the remote control is not functioning even if it isbeing operated correctly, the batteries are ex-hausted. Replace them with fresh ones. Use only the following batteries: R03 (AAA) size x 2 Please make note of the following rules for batteryuse. When mis...
Page 94 - Cassettes; While the MultiMediaCard is being accessed; LCD Monitor; Be aware of the following phenomena for LCD; Main Unit
94 EN CAUTIONS (cont.) Cassettes To properly use and store your cassettes, be sure toread the following cautions: 1. During use . . . .... make sure the cassette bears the Mini DV mark..... be aware that recording onto prerecorded tapes automatically erases the previously recordedvideo and audio sig...
Page 95 - Serious malfunctioning; How To Handle A CD-ROM; Dirty heads can cause the following problems:
EN 95 Serious malfunctioning If malfunctioning occurs, stop using the unitimmediately and consult your local JVC dealer. The camcorder is a microcomputer-controlleddevice. External noise and interference (from aTV, a radio, etc.) might prevent it from function-ing properly. In such cases, first disc...
Page 96 - TERMS
96 EN TERMS F Fade-In/Out ........................................ Z pg. 38, 39 Fast-Forward The Tape .............................. Z pg. 44 5-second recording mode ......................... Z pg. 37 Flash .................................................. Z pg. 34, 35 Frame-By-Frame Playback ........
Page 98 - SPECIFICATIONS; Camcorder; For General; For Digital Video Camera
98 EN SPECIFICATIONS Camcorder For General Power supply : DC 6.3 V (Using AC Power Adapter/Charger) DC 7.2 V (Using battery pack) Power consumption LCD monitor off, viewfinder on : Approx. 4.4 W LCD monitor on, viewfinder off : Approx. 5.2 W Dimensions (W x H x D) : 77 mm x 94 mm x 142 mm (with the ...
Page 99 - For Connectors
EN 99 For Connectors S-VIDEO Output : Y : 1 V ( p-p ) , 75 Ω , analogue C : 0.29 V ( p-p ) , 75 Ω , analogue Input (GR-DVL9800 only) : Y : 0.8 V ( p-p ) – 1.2 V ( p-p ) , 75 Ω , analogue C : 0.2 V ( p-p ) – 0.4 V ( p-p ) , 75 Ω , analogue AV Video output : 1 V ( p-p ) , 75 Ω , analogue Video input (...


 JVC GC-PX100
Manual
JVC GC-PX100
Manual
 JVC GR-D20
Manual
JVC GR-D20
Manual
 JVC GR-D200
User Manual
JVC GR-D200
User Manual
 JVC GR-D220
Manual
JVC GR-D220
Manual
 JVC GR-D225
Manual
JVC GR-D225
Manual
 JVC GR-D240
Manual
JVC GR-D240
Manual
 JVC GR-D246
User Manual
JVC GR-D246
User Manual
 JVC GR-D290
Manual
JVC GR-D290
Manual
 JVC GR-D33
Manual
JVC GR-D33
Manual
 JVC GR-D340EK
User Manual
JVC GR-D340EK
User Manual
 JVC GR-D70
Manual
JVC GR-D70
Manual
 JVC GR-D90
Manual
JVC GR-D90
Manual
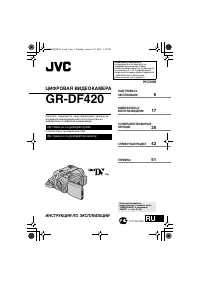 JVC GR-DF420
Manual
JVC GR-DF420
Manual
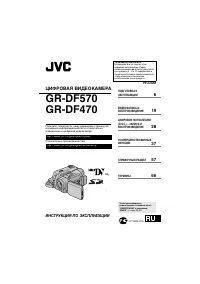 JVC GR-DF470
Manual
JVC GR-DF470
Manual
 JVC GR-DF570
Manual
JVC GR-DF570
Manual