Page 2 - EN; Using This Instruction Manual; SAFETY PRECAUTIONS; Warning on lithium cell battery (for remote control unit)
2 EN Dear Customer, Thank you for purchasing this digital video camera. Before use, please read the safety information andprecautions contained in the following pages to ensure safe use of this product. Using This Instruction Manual • All major sections and subsections are listed in the Table Of Con...
Page 4 - can be used with this unit.; PROVIDED ACCESSORIES
4 EN SAFETY PRECAUTIONS Do not point the lens or the viewfinder directly intothe sun. This can cause eye injuries, as well as leadto the malfunctioning of internal circuitry. There isalso a risk of fire or electric shock. CAUTION! The following notes concern possible physical damage to the camcorder...
Page 5 - ABOUT DV; Audio Area; The digital audio signal is recorded here.; Video Area; The digital video signal is recorded here.
EN 5 ABOUT DV The digital camcorder converts incoming audio and video signals into digital form for recording. A video signal is composed of a luminance signal (Y) and colour signals (R-Y and B-Y). These signals areidentified and recorded digitally (Digital Component Recording). The A/D (Analogue to...
Page 6 - GETTING STARTED; CHARGING THE BATTERY PACK; SUPPLY POWER TO CHARGER; Power; About Batteries; Charging time
6 EN GETTING STARTED CHARGING THE BATTERY PACK 1 SUPPLY POWER TO CHARGER Make sure you unplug the camcorder's DC cord from theAC Power Adapter/Charger.Plug the AC Adapter/Charger’s power cord into an ACoutlet. The power lamp comes on. 2 ATTACH BATTERY/BATTERIES Attach while making sure the marks are...
Page 7 - USING THE BATTERY PACK; TILT VIEWFINDER UPWARD; USING AC POWER; Approximate recording time
EN 7 1 2 2 1 2 NOTES: ● The provided AC Power Adapter/Charger featuresautomatic voltage selection in the AC range from 110 Vto 240 V. ● For other notes, Z pg. 6. To batterypack mount DC OUT terminal To AC outlet AC PowerAdapter/ChargerAA-V68EA DC Cord ATTENTION: Before detaching the power source,mak...
Page 8 - SELECT OPERATION MODE; MENU; ACCESS DATE/TIME MENU
8 EN 5S PL AY OF F ON SCREEN OFFON DISPLAY 4 DATE / TIME 1 . 1 . 00 00 : 00 RETURN – – – – – 6 – – – – – REC MODEWIDE MODE OFF40X SP ZOOM FLASH GAIN UP DIS 4 T O D A T E / T I M E M E N U T O S Y S T E M M E N U END OFFAGCAUTO Date/Time Settings Date and time will automatically be recorded on tape a...
Page 9 - Loading/Unloading A Cassette; OPEN CASSETTE COVER; CLOSE CASSETTE COVER
EN 9 Loading/Unloading A Cassette The camcorder needs to be powered up to load or eject acassette. 1 OPEN CASSETTE COVER Slide OPEN/EJECT in the direction of the arrow then swing the cover open until it locks. The holder opensautomatically. • Do not touch internal components. 2 INSERT/REMOVE TAPE In...
Page 10 - Recording Mode Setting; SET RECORDING MODE
10 EN 5S PL AY OF F – – – – – 6 – – – – – REC MODE WIDE MODE OFF40X SP ZOOM FLASH GAIN UP DIS 4 T O D A T E / T I M E M E N UT O S Y S T E M M E N U END OFFAGCAUTO – – – – – 6 – – – – – REC MODEWIDE MODE OFF40X SP ZOOM FLASH GAIN UP DIS 4 T O D A T E / T I M E M E N UT O S Y S T E M M E N U END OFFA...
Page 11 - Grip Adjustment; Viewfinder Adjustment
EN 11 5S PL AY OF F PAUSE 1 3 2 Grip Adjustment 1 EXPAND LOOP Separate the Velcro strip. 2 INSERT HAND Pass your right hand through the loop and grasp thegrip. 3 ADJUST STRAP LENGTH Adjust so that your thumb and fingers can easilyoperate the Recording Start/Stop Button and PowerZoom Lever. Refasten ...
Page 12 - Shoulder Strap Attachment; ATTACH STRAP; Tripod Mounting; ALIGN AND TIGHTEN
12 EN 1 2 4 3 Shoulder Strap Attachment 1 ATTACH STRAP Make sure the battery pack or DC cord is removed.As shown in the illustration on left, thread the strapthrough the low eyelet 1 , then fold it back and thread it through the buckle 2 . 2 ADJUST LENGTH Adjust as shown in the illustration on left ...
Page 13 - Operation Mode; Camera Position
EN 13 PAUSE F . AUTO PAUSE MANUAL 5S PL AY OFF Operation Mode Tuning the Power Switch allows you to choose theappropriate operation mode among the following modes:Full Auto mode ( ), Manual mode ( ), 5 second recording mode (5S), Progressive mode ( ) and Playback mode ( ). According to the Power Swi...
Page 14 - RECORDING; Basic Recording; LOAD A CASSETTE; Shooting While Watching The Viewfinder; ENTER RECORD-STANDBY MODE
14 EN 5S PL AY OFF RECORDING Basic Recording NOTE: You should already have performed the procedures listedbelow. If not, do so before continuing. ● Power ( Z pg. 6) ● Recording Mode Setting ( Z pg. 10) ● Grip Adjustment ( Z pg. 11) ● Viewfinder Adjustment ( Z pg. 11) 1 LOAD A CASSETTE Slide OPEN/EJE...
Page 15 - min; STOP RECORDING; LCD Monitor/Viewfinder Indications
EN 15 25 min 90min 89min 3min 2min 1min 0min min 4 STOP RECORDING Press the Recording Start/Stop Button again to stoprecording. • The camcorder re-enters the Record-Standby mode. NOTES: ● The image will not appear simultaneously in the LCDmonitor and the viewfinder. No image appears on theLCD monito...
Page 16 - Shooting While Watching The LCD Monitor; ENTER RECORD–STANDBY MODE
16 EN RECORDING Basic Recording (cont.) Shooting While Watching The LCD Monitor Before the following steps, perform step 1 ( Z pg. 14). 2 ENTER RECORD–STANDBY MODE Make sure the viewfinder is fully tilted downwardand pushed back in. Set the Power Switch to thecamera position (“ ”, “ ”, “5S” or “ ”) ...
Page 17 - Journalistic Shooting; OPEN LCD MONITOR; Interface Shooting; TILT LCD MONITOR UPWARD; Brightness Control; ADJUST BRIGHTNESS
EN 17 BRIGHT – – – – – 6 – – – – – Journalistic Shooting In some situations different angles of shooting may berequired for more dramatic results. 1 OPEN LCD MONITOR Make sure the LCD monitor is fully open. 2 TILT LCD MONITOR Tilt the LCD monitor in the most convenientdirection. • The LCD monitor ca...
Page 18 - Zooming; Zoom In; Zoom Out
18 EN 5S PL AY OF F 10X D T W T D W 1X T D W 10X T D W 20X T D W 40X RECORDING Basic Recording (cont.) Zoom in (T: Telephoto) Zoom out (W: Wide angle) Power Zoom Lever Zoom display Power Switch FEATURE: Zooming PURPOSE: To produce the zoom in/out effect, or an instantaneouschange in image magnificat...
Page 19 - NOTE: Recording From The Middle Of A Tape; Time Code; Recording From The Middle Of A Tape; When blank portion is recorded on a tape
EN 19 NOTE: Recording From The Middle Of A Tape Time Code During recording, a time code is recorded on the tape. This code is to confirm the location of the recordedscene on the tape during playback.If recording starts from a blank portion, the time code begins counting from “00:00:00”(minute:second...
Page 20 - Advanced Features
20 EN 5S PL AY OF F – – – – – 6 – – – – – REC MODEWIDE MODE OFF40X SP ZOOM FLASH GAIN UP DIS 4 T O D A T E / T I M E M E N U T O S Y S T E M M E N U END OFFAGCAUTO ON SCREEN OFFON DISPLAYDATE / TIME 25 . 12 . 99 16 : 40 4 RETURN RECORDING Advanced Features Displaying The Date And Time DuringRecordin...
Page 21 - SNAPSHOT
EN 21 5S P L AY O FF PAUSE 5S MODE 444 REC MANUAL 444 REC PAUSE 5S MODE MANUAL Scene (5-second recording) Record a vacation or an important event in 5-second clipsto keep the action moving. The 5-Second function mayalso be activated during Full Auto operation. But the WhiteBalance remains in the pre...
Page 22 - Progressive Mode Recording
22 EN 5S P L A Y O FF PAUSE MANUAL – – – DEC 25 ’ 99 PM 5 : 30 35 min 6w 444 REC PS MANUAL Progressive Mode Recording Recording a high-resolution still image. If an image isrecorded using the Progressive Mode, it is possible to playback a jitter-free still image with superior quality. A high-resolut...
Page 23 - Description of Progressive Scan CCD; Regular shooting of moving images; a still image is displayed on a TV or PC monitor the
EN 23 Description of Progressive Scan CCD Progressive Scan is a special image sensing method which, unlike conventional interlace scanning, is able topick up all the lines of picture information in one Scan. Since the Progressive Scan CCD is capable ofoutputting 50 full Frames* per second — twice th...
Page 24 - Pro Snapshot; PRO SNAPSHOT MODE SELECTION; PRO SNAPSHOT RECORDING; TAKE PRO SNAPSHOT
24 EN 5S PL AY OFF PHOTO SN A PS H O T RECORDING Advanced Features (cont.) Pro Snapshot Use your camcorder like a regular camera and take asnapshot, or several of them in succession. PRO SNAPSHOT MODE SELECTION 1 SELECT OPERATION MODE Set the Power Switch to “ ”, “ ” or “ ” while pressing down the L...
Page 25 - Motor Drive Mode; Progressive Mode
EN 25 ,,, ,,,, ,,, ,,,, ,,,,, ,,,, ,,,, ,,,,, ,,,, ,,,,, ,,,, ,,,, ,,, ,,,, Motor Drive Mode Keeping SNAPSHOT pressed provides an effect similar to serial photography. (The interval between the still images:approx. 0.7 seconds.)The flash lights only during the first snapshot ( Z pg. 26). To Remove T...
Page 26 - ENGAGE RECORD-STANDBY; If the Power Switch is set to “; ACCESS RECORDING MENU; SELECT FUNCTION
26 EN PAUSE 5S PL AY OFF – – – – – 6 – – – – – REC MODEWIDE MODE OFF40X SP ZOOM FLASH GAIN UP DIS T O D A T E / T I M E M E N UT O S Y S T E M M E N U 4 END OFFAGCAUTO Snapshot Flash (Auto Flash) During Full Auto mode, or Manual mode when “FLASH”is set to “AUTO” in the Recording Menu, the flashautom...
Page 27 - Flash Brightness Adjustment; ACCESS MANUAL MODE ITEM MENU
EN 27 5S PL AY OF F FOCUSEXPOSURE AUTO OFF OFF AUTO AUTO W. BALANCE FLASH ADJ. FADER / WIPE P. AE / EFFECT 4 END 0 FOCUSEXPOSURE AUTO OFF OFF AUTO AUTO W. BALANCEFADER / WIPE P. AE / EFFECT 4 END 0 FLASH ADJ. FLASH 0 Flash Brightness Adjustment When a snapshot ( Z pg. 24) is taken in the dark the ca...
Page 28 - Using Menu For Detailed Adjustment; MAKE SETTING
28 EN 5S PL AY OF F 4 ON SCREEN OFFON DISPLAYDATE / TIME 25 . 12 . 99 16 : 40 4 RETURN – – – – – 6 – – – – – REC MODE WIDE MODE OFF40X SP ZOOM FLASH GAIN UP DIS 4 T O D A T E / T I M E M E N UT O S Y S T E M M E N U END OFFAGCAUTO TELE MACRO SCENE 5S OFF 06OFF ON OFF BEEP / TALLYWIND CUT 32kHz SOUND...
Page 29 - Recording Menu Explanations
EN 29 REC MODE ZOOM GAIN UP TO DATE/TIME MENU WIDE MODE Recording Menu Explanations TO SYSTEM MENU FLASH : Factory-preset OFF ON AUTO OFF ON DIS OFF SQUEEZE CINEMA Allows you to set the recording mode (SP or LP) depending on your preference ( Z pg. 10). Select “OFF” when you want to use neither “SQU...
Page 30 - System Menu Explanations
30 EN RECORDING Advanced Features (cont.) System Menu Explanations : Factory-preset OFF ON DATE/TIME ON SCREEN Date/Time Menu Explanations ON OFF DISPLAY Keeps the camcorder’s display from appearing on the connected TVscreen. Makes the camcorder's display appear on screen when the camcorderis connec...
Page 31 - EFFECT SELECTION; and; START OR END RECORDING
EN 31 5S PL AY OF F MANUAL PAUSE W H 4 FADER / WIPE SEL. FADER – BLACK WIPE–CORNER WIPE – SHUTTERRANDOMOFF FADER – WHITE P R ? W H B K B W FADER – B.W FOCUSEXPOSURE AUTO OFF AUTO AUTO W. BALANCE 4 FADER / WIPE END OFF FLASH ADJ. P. AE / EFFECT 0 Fade/Wipe Effects IMPORTANT: If certain modes of Progr...
Page 32 - STORE SCENE IN MEMORY
32 EN ,,,, ,,,, ,,,, ,,, ,,,, ,,,, ,,,, ,,, ,,,, ,,,, ,,,, ,,, RECORDING Advanced Features (cont.) PICTURE WIPE OR DISSOLVE SELECTION( , , , , , and ) Combine the Picture Wipe and Dissolve functions for aprofessional transition effect. There are 6 Picture Wipeeffects and 1 Dissolve effect. The Pictu...
Page 33 - Effect; Menu; Fader And Wipe Menu
EN 33 Effect Fade in or out with a white screen. Fade in or out with a black screen. Fade in to a colour screen from a black and white screen, or fade outfrom colour to black and white. Wipe in on a black screen from the upper right to the lower left corner,or wipe out from lower left to upper right...
Page 34 - Program AE With Special Effects
34 EN 5S PL AY OF F PAUSE 4 P. AE / EFFECT SLOW 4X 1 SLOW 10X 2 B/W STROBE TWILIGHT SEPIA MONOTONE CLASSIC FILM SEL. FOCUSEXPOSURE AUTO OFF OFF AUTO AUTO W. BALANCE 4 FADER / WIPE P. AE / EFFECT END FLASH ADJ. 0 Program AE With Special Effects IMPORTANT: If certain Fades or Wipes ( Z pg. 33) are act...
Page 36 - Focusing; AUTO FOCUS
36 EN RECORDING Advanced Features (cont.) Focusing AUTO FOCUS The camcorder’s Full Range AF system offers continuousshooting ability from close-up (as close as approx. 1.5 cmto the subject) to infinity. However, correct focus may notbe obtainable in the situations listed below (in these casesuse man...
Page 37 - MANUAL FOCUS
EN 37 5S PL AY OF F FOCUS FOCUS FOCUSEXPOSURE AUTO OFF OFF AUTO MANUAL W. BALANCEFADER / WIPE P. AE / EFFECT 4 END FLASH ADJ. 0 MANUAL FOCUS NOTE: You should already have made the necessary viewfinderadjustments ( Z pg. 11). If you have not, do so before continuing. 1 SELECT OPERATION MODE Set the P...
Page 38 - Exposure Control
38 EN 5S PL AY OF F EXP. 0 EXP. 6 EXP. 6 FOCUSEXPOSURE MANUAL OFF AUTO AUTO W. BALANCEFADER / WIPE 4 END OFF FLASH ADJ. P. AE / EFFECT 0 RECORDING Advanced Features (cont.) Exposure Control This feature automatically adjusts the iris for the bestavailable picture quality, but you can override and ma...
Page 39 - Iris Lock
EN 39 5S PL AY OF F EXP. 0 L FOCUSEXPOSURE MANUAL OFF AUTO AUTO W. BALANCEFADER / WIPE END 4 OFF FLASH ADJ. P. AE / EFFECT 0 Iris Lock Use this function when shooting a moving subject, whenzooming, when the subject changes its distance (thus itssize in the LCD monitor or the viewfinder), or when you...
Page 40 - White Balance Adjustment; AUTO; CLOSE WHITE BALANCE ADJUSTMENT
40 EN 5S PL AY OF F W . BAL . AUTO FOCUSEXPOSURE AUTO OFF AUTO AUTO W. BALANCEFADER / WIPE 4 END OFF FLASH ADJ. P. AE / EFFECT 0 FOCUSEXPOSURE AUTO OFF AUTO W. BALANCE FADER / WIPE 4 END AUTO OFF FLASH ADJ. P. AE / EFFECT 0 White Balance Adjustment A term that refers to the correctness of colour rep...
Page 41 - Manual White Balance Operation
EN 41 5S PL AY OF F MANUAL FOCUSEXPOSURE AUTO OFF AUTO W. BALANCE FADER / WIPE 4 END AUTO OFF FLASH ADJ. P. AE / EFFECT 0 Manual White Balance Operation If the camera is operating in Manual mode “ ” or “ ”, perform a Manual White Balance when shooting undervarious types of lighting. 1 SELECT OPERATI...
Page 42 - High Speed Recording; START RECORDING; END RECORDING; HIGH SPEED
42 EN 5S PL AY OF F PAUSE HIGH SPEED HIGH SPEED PAUSE 444 REC High Speed Recording Records 100 frames per second. The images recorded inHigh Speed Recording mode can be played back withhigh density in slow-motion. This feature is an effectiveway to capture fast-moving action. Also refer to “Progres-...
Page 43 - PLAYBACK; Basic Playback; STOP; Rewind or Fast-forward the tape; REW; ADJUST VOLUME
EN 43 5 S PLAY O FF PLAYBACK Basic Playback 1 LOAD A CASSETTE First press PUSH-OPEN and open the LCD monitor fully.Slide OPEN/EJECT in the direction of the arrow, then swing the cassette cover open until it locks. Theholder opens automatically.Insert a tape and press “PUSH HERE” to close thecassette...
Page 44 - Still Playback; Shuttle Search; FF; Playback Zoom
44 EN 5 S PLAY O FF FEATURE: Still Playback PURPOSE: To pause during playback. OPERATION: 1) Press PLAY/PAUSE ( 6 / 4 ) during playback. 2) To resume normal playback, press PLAY/PAUSE ( 6 / 4 ) again. NOTES: ● If still playback continues for more than about 3minutes, the camcorder’s Stop mode is aut...
Page 45 - Progressive Slow-Motion Playback; SELECT MODE; END PLAYBACK
EN 45 5 S PLAY O FF T W 64 64 4 WIDE WIDE ZOOM Progressive Slow-Motion Playback Images recorded in High Speed Recording mode will offer less blurthan normal images when played back in slow-motion. You canwatch fast-moving action in slow-motion with superior quality. 1 SELECT OPERATION MODE Set the P...
Page 46 - Playback Menu
46 EN 5 S PLAY O FF SOUND10 . 0ONOFF FULL SOUND 48kHz MODE32kHz MODE DISPLAYTIMECODE SYNCHRO END 4 SOUND10 . 0ONOFF FULL SOUND 48kHz MODE 32kHz MODE DISPLAYTIMECODE SYNCHRO END 4 ON OFF ON OFF SOUND1 SOUND2 FULL SOUND SOUND1 SOUND2 FULL SOUND Playback Menu The Playback Menu allows you to set the fol...
Page 47 - (Displaying The Time Code During Playback); DISPLAY
EN 47 Playback Sound During playback, the camcorder detects the sound mode in which the recording was made, and plays thesound back. Select the type of sound to accompany your playback picture. (32 kHz is preset to “SOUND 1”and 48 kHz is preset to “FULL SOUND”.) TIME CODE (Displaying The Time Code D...
Page 48 - Basic Connections; TV; TV; A. Connection to a TV or VCR equipped with an S-VIDEO IN and A/V input
48 EN PLAYBACK Basic Connections These are some basic types of connections. When making the connections, refer also to your VCR and TVinstruction manuals. A. Connection to a TV or VCR equipped with an S-VIDEO IN and A/V input connectors To AV OUT To S-VIDEO OUT Audio/Videocable (provided) Connector ...
Page 50 - Advanced Connections; CONFIRM POWER-OFF STATUS; PC
50 EN PLAYBACK Advanced Connections Connection To A Personal Computer This camcorder can transfer still images to a personalcomputer by using the provided software when connectedas shown in the illustration. It is also possible to transferstill images to a personal computer with a DV connector-equip...
Page 52 - TAPE DUBBING; Tape Dubbing
52 EN TAPE DUBBING Tape Dubbing 1 CONNECT EQUIPMENT Following the illustration at left, connect thecamcorder and the VCR. Also refer to pg. 48 and 49. 2 PREPARE FOR DUBBING Set the camcorder’s Power Switch to “ ”, turn on the VCR’s power, and insert the appropriate cassettesin the camcorder and the ...
Page 53 - Digital Dubbing; MAKE CONNECTIONS
EN 53 5 S PLAY O FF T W Digital Dubbing It is also possible to copy recorded scenes from thecamcorder onto other video unit equipped with a DVconnector. Since a digital signal is sent, there is little if anyimage or sound deterioration. 1 CONFIRM POWER-OFF STATUS Make sure the camcorder’s power is o...
Page 54 - USING THE REMOTE CONTROL UNIT; Installing The Battery; PULL OUT BATTERY HOLDER
54 EN 5m 15 ° 15 ° 30 ° 30 ° USING THE REMOTE CONTROL UNIT The Full-Function Remote Control Unit can operate thiscamcorder from a distance as well as the basic operations(Playback, Stop, Pause, Fast-Forward and Rewind) of yourVCR. This remote control unit makes additional playbackfunctions possible....
Page 57 - Playback Special Effects
EN 57 T W PLAYBACK EFFECT STROBE CLASSIC FILMMONOTONESEPIA 4 123 OFF 4 B/W VIDEO ECHO 5 5 S PLAY O FF Power Switch PLAY EFFECT EFFECT ON/OFF PLAYBACK EFFECTSelect Menu Remote sensor PLAY ( 4 ) Button RM-V711U(provided) FEATURE: Playback Special Effects PURPOSE: To allow you to add creative effects t...
Page 58 - SET REMOTE TO OPERATE VCR; IMPORTANT
58 EN T W 3 16 7 8 9 ` 5 4 2 VCR BRANDNAME BUTTONS (A) (B) 6 26 47 7 MITSUBISHI 6 76 8 NEC 3 73 8 GRUNDIG 1 43 4 HITACHI 6 66 3 PANASONIC 1 31 71 19 41 8 JVC 9 19 69 3 BLAUPUNKT AKAI 9 79 83 2 FERGUSON 1 3 SANYO 3 63 5 SHARP 1 51 ` TOSHIBA 6 96 1 SONY 6 56 `3 93 1 THOMSON,TELEFUNKEN,SABA,NORDMENDE 9...
Page 59 - VCR OTHER THAN TYPE; SELECT SCENES; START SOURCE PLAYBACK; VCR
EN 59 T W MAKE CONNECTIONS Also refer to pg. 48, 49 and 51. 1 CONNECT TO . . . JVC VCR EQUIPPED WITH REMOTE PAUSETERMINAL Connect the editing cable to the Remote PAUSEterminal. JVC VCR NOT EQUIPPED WITH REMOTEPAUSE TERMINAL BUT EQUIPPED WITHR.A.EDIT CONNECTOR Connect the editing cable to the R.A.EDI...
Page 60 - EFFECT; REGISTER ADDITIONAL SCENES; CANCEL
60 EN T W 4 1 – – – – : – – ~ 2 3 ~ 4 ~ 5 ~ 6 ~ 7 ~ 8 ~ TIME CODE I N OUT MODE – – : – –0 0 : 0 0 TOTAL 5 S PLAY O FF SELECT SCENES (cont.) 6 SET EDIT-IN POINT At the beginning of the scene, press EDIT IN/OUT on the remote control. The Edit-In position appears onthe Random Assemble Editing Menu. 7 S...
Page 61 - AUTOMATIC EDITING TO VCR; PREPARE SOURCE TAPE; ENGAGE VCR’S RECORD-PAUSE MODE; VCR REC STBY; START EDITING
EN 61 4 1 0 0 : 2 5 ~ 0 2 : 0 5 – – 2 0 7 : 1 8 ~ 0 8 : 3 1 – – 3 – – 0 3 : 3 3 ~ 0 5 : 5 3 4 0 9 : 3 0 ~ 1 3 : 1 5 5 1 5 : 5 5 ~ 1 6 : 2 0 – – – – 6 – – – – : – – ~ 7 ~ 8 ~ TIME CODE I N OUT MODE 1 6 : 3 0 9 : 3 9 TOTAL W H B/W P P T W AUTOMATIC EDITING TO VCR 11 PREPARE SOURCE TAPE Rewind the tape...
Page 62 - For More Accurate Editing; CHOOSE A SCENE
62 EN T W 4 1 – – – – : – – ~ 2 ~ 3 ~ 4 ~ 5 ~ 6 ~ 7 ~ 8 ~ TIME CODE I N OUT MODE – – : – –0 0 : 0 0 TOTAL 5 S PLAY O FF USING THE REMOTE CONTROL UNIT (cont.) For More Accurate Editing Some VCRs make the transition from Record-Standby toRecord mode faster than others. Even if you begin editingfor the...
Page 63 - ACCESS PLAYBACK MENU; CLOSE MENU
EN 63 SOUND10 . 0ONOFF FULL SOUND 48kHz MODE32kHz MODE DISPLAYTIMECODE SYNCHRO END 4 SOUND1 0 . 0 ONOFF FULL SOUND 48kHz MODE32kHz MODE DISPLAYTIMECODE SYNCHRO END 4 5 S PLAY O FF ADJUSTMENT OF VCR’S AGAINSTCAMCORDER TIMING 4 ACCESS PLAYBACK MENU Point the remote control at the camcorder’s remotesen...
Page 64 - Audio Dubbing; ENGAGE AUDIO DUB STANDBY; BEGIN DUBBING; PAUSE DURING DUBBING; STOP DUBBING
64 EN 5 S PLAY O FF T W USING THE REMOTE CONTROL UNIT (cont.) Audio Dubbing The audio track can be customized only when recordedon the 32 kHz mode ( Z pg. 30). NOTES: ● Audio Dubbing is not possible on a tape recorded at48 kHz, on a tape recorded in the LP mode or on a blankportion of a tape. ● To p...
Page 65 - Insert Editing
EN 65 5 S PLAY O FF T W TC 6w 12 : 34 : 15 Insert Editing You can record a new scene into a previously recordedtape, replacing a section of the original recording withminimal picture distortion at the in- and out-points. Theoriginal audio remains unchanged. NOTES: ● Insert Editing is not possible on...
Page 66 - SYMPTOM; TROUBLESHOOTING
66 EN SYMPTOM POSSIBLE CAUSES CORRECTIVE ACTION TROUBLESHOOTING 1. No power is supplied. 2. “SET DATE/TIME!” appears. 3. Recording cannot be performed. 4. There is no picture. 5. Some functions are not available using MENU . 6. During shooting, some functions are not available using the Select Dial....
Page 71 - USER MAINTENANCE; After Use
EN 71 4 5 6 7 USER MAINTENANCE After Use 1 Turn off the camcorder. 2 Slide OPEN/EJECT in the direction of the arrow, then swing the cover open until it locks. The cassetteholder opens automatically. Remove the cassette. 3 Press “PUSH HERE” to close the cassette cover. 4 Press the Battery Release But...
Page 72 - INDEX; Controls, Connectors And Indicators
72 EN INDEX Controls, Connectors And Indicators 1 2 3 4 u y i opQ W r 8 ! T Y I 0 7 6 5 * ( 9 ) q w e & $%^ R # I U t @ 5S PL AY OF F E
Page 74 - Indications; Function; LCD Monitor/Viewfinder Indications During Recording
74 EN INDEX Indications No. Function 1 * Displays the operation mode position. ( Z pg. 13) 2 Appears when Auto Slow Shutter is engaged (“GAIN UP” is set to “AUTO”). ( Z pg. 29) 3 * Appears when in the Squeeze or Cinema mode. ( Z pg. 29) 4 Appears when Digital Image Stabiliser (“DIS”) is engaged. ( Z...
Page 75 - LCD Monitor/Viewfinder Indications During Playback; HIGH SPEED
EN 75 Indications Function Displays the battery remaining power. Remaining power level: high Remaining power level: exhausted As the battery power comes close to nil, the battery indicator blinks. When the battery power is exhausted, power turns off automatically. Appears when no tape is loaded, or ...
Page 76 - Terms
76 EN INDEX Terms M Manual Focus ........................................... Z pg. 37 Monotone ................................................ Z pg. 35 Motor Drive Mode .................................... Z pg. 25 P Picture Wipe/Dissolve ............................... Z pg. 32 Playback Menu ........
Page 77 - CAUTIONS; Battery Packs; Cassettes; LCD Monitor
EN 77 CAUTIONS Battery Packs The supplied battery pack is alithium-ion battery. Before usingthe supplied battery pack or anoptional battery pack, be sure toread the following cautions: 1. To avoid hazard . . . .... do not burn. .... do not short-circuit the terminals. .... do not modify or disassemb...
Page 78 - Serious malfunctioning; How To Handle A CD-ROM
78 EN CAUTIONS (cont.) Serious malfunctioning If malfunctioning occurs, stop using the unitimmediately and consult your local JVC dealer. The camcorder is a microcomputer-controlleddevice. External noise and interference (from aTV, a radio, etc.) might prevent it from function-ing properly. In such ...
Page 79 - SPECIFICATIONS; Camcorder; General; Connectors
EN 79 SPECIFICATIONS Camcorder General Power supply : DC 6.3 V (Using the AC Power Adapter/Charger) DC 7.2 V (Using battery pack) Power consumption LCD monitor off, viewfinder on : Approx. 5.3 W LCD monitor on, viewfinder off : Approx. 6.5 W LCD monitor on, viewfinder on : Approx. 7.1 W Format : DV ...


 JVC GC-PX100
Manual
JVC GC-PX100
Manual
 JVC GR-D20
Manual
JVC GR-D20
Manual
 JVC GR-D200
User Manual
JVC GR-D200
User Manual
 JVC GR-D220
Manual
JVC GR-D220
Manual
 JVC GR-D225
Manual
JVC GR-D225
Manual
 JVC GR-D240
Manual
JVC GR-D240
Manual
 JVC GR-D246
User Manual
JVC GR-D246
User Manual
 JVC GR-D290
Manual
JVC GR-D290
Manual
 JVC GR-D33
Manual
JVC GR-D33
Manual
 JVC GR-D340EK
User Manual
JVC GR-D340EK
User Manual
 JVC GR-D70
Manual
JVC GR-D70
Manual
 JVC GR-D90
Manual
JVC GR-D90
Manual
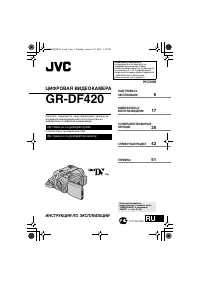 JVC GR-DF420
Manual
JVC GR-DF420
Manual
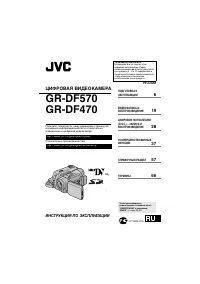 JVC GR-DF470
Manual
JVC GR-DF470
Manual
 JVC GR-DF570
Manual
JVC GR-DF570
Manual