Page 2 - EN; SAFETY PRECAUTIONS; HAZARD, DO NOT EXPOSE
2 EN NOTES: ● The rating plate (serial number plate) and safetycaution are on the bottom and/or the back ofthe main unit. ● The rating plate (serial number plate) of the ACPower Adapter/Charger is on its bottom. Dear Customer, Thank you for purchasing this digital video camera. Before use, please re...
Page 3 - can be used with this unit.
EN 3 This camcorder is designed to be used with PAL-type colour television signals. It cannot be usedfor playback with a television of a differentstandard. However, live recording and LCDmonitor/viewfinder playback are possibleanywhere. Use the BN-V607U/V615U/V628Ubattery packs and, to recharge them...
Page 4 - PROVIDED ACCESSORIES
4 EN PROVIDED ACCESSORIES • Cleaning Cloth • Cable Adapter • Core Filter (for optional DV cable) • Core Filter x 2 (For optional externalmicrophone andheadphones) • AC Power Adapter/Charger AA-V67EG or AA-V67EK • Remote Control Unit RM-V716U • DC Cord • AAA (R03) Battery x 2 (for remote control unit...
Page 5 - How To Attach Core Filters
EN 5 How To Attach Core Filters Attach the provided Core Filters to optional DV cable, external microphone or headphones.Core Filters reduce interference. n When connecting cables, attach the end with the Core Filter to the camcorder. 3 cm Stopper Release the stoppers on both ends of the Core Filter...
Page 6 - GETTING STARTED; Power; CHARGING THE BATTERY PACK; About Batteries
6 EN GETTING STARTED Power This camcorder’s 2-way power supply system lets youchoose the most appropriate source of power. Do not useprovided power supply units with other equipment. CHARGING THE BATTERY PACK 1 Make sure you unplug the camcorder’s DC cord fromthe AC Power Adapter/Charger. Plug the A...
Page 7 - Approximate recording time; USING AC POWER; USING THE BATTERY PACK
EN 7 GETTING ST ARTED 1 2 3 To batterypack mount To DC OUTconnector To AC outlet AC PowerAdapter/ChargerAA-V67EG orAA-V67EK DC cord ATTENTION: Before detaching the power source,make sure that the camcorder’s poweris turned off. Failure to do so can resultin a camcorder malfunction. Power cord Approx...
Page 8 - Rotate MENU/BRIGHT to select “; Built-in Clock’s Rechargeable Lithium Battery
8 EN OFF P LA Y 5S END 1 R W Z DGS F D S RE I O I AE L A Y ECD O S I L A T S T E M N FS E T DUM – H / E AROM U T T M T NDO P I I 4 E ED M M / E E E T R 4 I ME 1 I ODD RNN I A ED ST T I SPE DUCC L / ARARA T T N TEY I E I E M / ON E T N I ME 1 . 1 22 . : 00 00 Date/Time Settings The date/time is recor...
Page 9 - Loading/Unloading A Cassette
EN 9 GETTING ST ARTED Loading/Unloading A Cassette The camcorder needs to be powered up to load or eject acassette. 1 Slide OPEN/EJECT in the direction of the arrow thenswing the cassette holder cover open until it locks.The cassette holder opens automatically.• Do not touch internal components. 2 I...
Page 10 - Grip Adjustment; Recording Mode Setting
10 EN 1 R W Z DGS F DS R E I O I AE L AY E C DOS I L A TS T E M N FSET MU M – H / E OR O M U T T M DN D O P I I 4 E E D M M E E E M R 4 EN S L U P P OFF P LA Y 5S Grip Adjustment 1 Separate the Velcro strip. 2 Pass your right hand through the loop and grasp thegrip. 3 Adjust so that your thumb and f...
Page 11 - Viewfinder Adjustment; Shoulder Strap Attachment
EN 11 GETTING ST ARTED 3 2 1 PAUS E Viewfinder Adjustment 1 Set the Power Switch to “5S”, “ ” or “ ” while pressing down the Lock Button located on the switch. 2 Pull out the viewfinder fully and adjust it manually forbest viewability. 3 Slide the Diopter Adjustment Control until theindications in t...
Page 12 - RECORDING; Basic Recording; To Adjust The Brightness Of The Display; Power Switch Position; : Allows you to record in 5-second clips to
12 EN 2 5 90 min 89 min 3 min 2 min 1 min 0 min min 180 ° 90 ° OFF P L A Y 5S RECORDING Basic Recording NOTE: You should already have performed the procedures listedbelow. If not, do so before continuing. ● Power ( Z pg. 6) ● Load A Cassette ( Z pg. 9) ● Recording Mode Setting ( Z pg. 10) ● Grip Adj...
Page 13 - JOURNALISTIC SHOOTING; To turn the tally lamp off during recording,
EN 13 RECORDING Self-Recording JOURNALISTIC SHOOTING In some situations, different shooting angles may providemore dramatic results. Hold the camcorder in the desiredposition and tilt the LCD monitor in the most convenientdirection. It can rotate 270° (90° downward, 180°upward). INTERFACE SHOOTING T...
Page 14 - Zooming
14 EN 1 0 xW T 1 xW T 1 0 xW T 20xW T 40xW T RECORDING Basic Recording (cont.) Zoom in (T: Telephoto) Zoom out (W: Wide angle) Power Zoom Lever Zoom display FEATURE: Zooming PURPOSE: To produce the zoom in/out effect, or an instantaneouschange in image magnification. OPERATION: Zoom InSlide the Powe...
Page 15 - When a blank portion is recorded on a tape; NOTE: Recording From The Middle Of A Tape; Time Code; Set the Power Switch to “
EN 15 RECORDING T C 1 2 : 3 4 : 2 4 Shooting start point Newly recorded scene Blank Already recorded scene Time code05:43:21 Time code00:00:00 Tape Time code00:00:00 Shooting start point Shooting stop point Display When a blank portion is recorded on a tape Shooting start point Time code05:43:21 Tim...
Page 16 - Snapshot; SNAPSHOT MODE SELECTION; Motor Drive Mode
16 EN NOTES: ● To remove the shutter sound, Z “BEEP/TALLY” on pg. 20. ● Even if “MULTI-4” or “MULTI-9” is engaged, Snapshot recording will be performed in the FULL mode duringDigital Zoom. However, the flash will not fire. ● In Multi-Analyser 4 or Multi-Analyser 9, the flash is disabled ( Z pg. 22)....
Page 17 - * There is a momentary camera shutter-type; Multi Screen Mode
EN 17 RECORDING MULTI-9Multi-Analyser 9 FULLSnapshot modewith no frame* PIN-UPPin-Up mode* FRAMESnapshot modewith frame* MULTI-4Multi-Analyser 4 * There is a momentary camera shutter-type blackout together with the sound effect of ashutter closing, which is recorded togetherwith the image. Multi Scr...
Page 18 - Using Menus For Detailed Adjustment; Advanced Features
18 EN OFF P LA Y 5S END END 1 R W Z DGS F DS R E I O I AE L AY E CDOS I L A TS T E M N FSET M U M – H / E O R OM U T T M D N DO P I I 4 E ED M M E E E M R 4 ENU 1 I OD D RNN I A ED S T T I SP E DUCC L / ARARA T T N TEY I E I E M / ON E T N I ME 1 . 1 22 . : 00 00 1 TS B W S I D RECE I O DE ELEEN U M...
Page 19 - Menu Screen Explanations; MODE MENU
EN 19 RECORDING Menu Screen Explanations Refer to “Focusing” ( Z pg. 28). Refer to “Exposure Control” and “Iris Lock” ( Z pg. 29). Refer to “White Balance Adjustment” and “Manual White Balance Operation”( Z pg. 30). Refer to “Fade/Wipe Effects” ( Z pg. 26, 27). Refer to “Program AE With Special Effe...
Page 20 - SYSTEM
20 EN : Factory-preset RECORDING Advanced Features (cont.) Refer to “Self-Timer” ( Z pg. 21). Refer to “Snapshot Flash” ( Z pg. 22). Refer to DATE/TIME Menu Explanations below. Refer to SYSTEM Menu Explanations below. Makes all the indications appear in the camcorder ( Z pg. 60). Keeps all the indic...
Page 21 - OR
EN 21 RECORDING MANUA L R 4 E 4 C 4 OFF P LA Y 5S 1 R W Z DG S F DS RE I O I A E L AY ECD O S I L A TS T E M N F SET MUM – H / E OROM U T T M DNDO P I I 4 E ED M M E E E M R 4 EN O U F F Self-Timer Once the camcorder is set, the camcorder operator canbecome part of the scene in a more natural way, a...
Page 22 - Snapshot Flash; If “AUTO
22 EN 1 R W Z DGS F DS RE I O I AE L AY ECD O S I L A TS T E M N F S ET MUM – H / E OROM U T T M DNDO P I I 4 E ED M M E E E M R 4 EN A U U TO OFF P LA Y 5S RECORDING Advanced Features (cont.) Snapshot Flash The flash can be used when a snapshot is taken in Record-Standby ( Z pg. 16). • In Full Auto...
Page 23 - Flash Brightness Adjustment
EN 23 RECORDING + 2 F L ASH AD J . OFF P LA Y 5S END Flash Brightness Adjustment When a snapshot ( Z pg. 16) is taken in the dark the camcorder fires the flash ( Z pg. 22) and adjusts the brightness automatically. You can also adjust the flashbrightness manually. When you find that the snapshotsyou ...
Page 25 - Program AE With Special Effects
EN 25 RECORDING Program AE With Special Effects 1 Set the Power Switch to “ ” while pressing down the Lock Button located on the switch, then pull outthe viewfinder fully or open the LCD monitor fully. 2 Press MENU/BRIGHT. The Menu Screen appears. 3 Rotate MENU/BRIGHT to select “ ”, then press it. 4...
Page 26 - and; Follow steps 1 through 4 above.
26 EN Recording Start/Stop Button MENU/BRIGHT Dial Power Switch FADE/WIPE SELECTION ( , , , , , , , , , and ) Fade or Wipe works when recording is started or whenyou stop recording. 1 Set the Power Switch to “ ” while pressing down the Lock Button located on the switch. Pull out theviewfinder fully ...
Page 27 - Fader And Wipe Menu; Menu
EN 27 RECORDING Fader And Wipe Menu Menu Effect Fade in or out with a white screen. Fade in or out with a black screen. Fade in or out with a full-screen mosaic effect. Fade in to a colour screen from a black and white screen, or fade outfrom colour to black and white. Wipe in on a black screen from...
Page 28 - Focusing; AUTO FOCUS
28 EN FOCUS FOCUS Focusing AUTO FOCUS The camcorder’s Full Range AF system offers continuousshooting ability from close-up (as close as approx. 5 cm tothe subject) to infinity. However, correct focus may not beobtainable in the situations listed below (in these cases usemanual focusing):• When two s...
Page 29 - Exposure Control; Iris Lock
EN 29 RECORDING Exposure Control Manual exposure adjustment is recommended in thefollowing situations:• When shooting using reverse lighting or when the background is too bright. • When shooting on a reflective natural background such as at the beach or when skiing. • When the background is overly d...
Page 30 - White Balance Adjustment
30 EN White Balance Adjustment A term that refers to the correctness of colourreproduction under various lighting. If the whitebalance is correct, all other colours will beaccurately reproduced.The white balance is usually adjusted automatically.However, more advanced camcorder operatorscontrol this...
Page 31 - PLAYBACK; Basic Playback; Playback, Playback Zoom and
EN 31 PLA YBACK OFF PL AY 5S PowerSwitch Rewind Button ( 2 ) Fast-Forward Button ( 3 ) Play/Pause Button ( 4 / 6 ) Stop Button ( 5 ) 1 Load a tape ( Z pg. 9). 2 Set the Power Switch to “ ” while pressing down the Lock Button located on the switch. To startplayback, press 4 / 6 . • To stop playback, ...
Page 32 - MENU/BRIGHT twice to close the Menu Screen.
32 EN OFF PL AY 5S 1 I D T R N II DE D S M A T I PE T U C L ER A AC / N T Y O D I D I O E S N P L O O A N F Y F 1 S 1S R O 2Y E U BN T N I C PU D T H L R R AN M MO Y O O D D M E E OD S SS E T OO E UU R NN E DD O L R Using Menus For Detailed Adjustment The following procedure applies to all except Sy...
Page 33 - Playback Sound; SOUND MODE
EN 33 PLA YBACK Playback Sound During playback, the camcorder detects the sound mode in which the recording was made, and plays thesound back. Select the type of sound to accompany your playback picture. According to the menu accessexplanation on pg. 32, select “SOUND MODE” or “12BIT MODE” from the ...
Page 34 - Basic Connections; signal
34 EN PLAYBACK Basic Connections These are some basic types of connections. When making the connections, refer also to your VCR and TVinstruction manuals. Core filter When connecting the S-Videocable, open the LCD monitor. TV VCR Audio/Video cable[mini-plug to RCA plug](provided) Yellow to VIDEO Whi...
Page 36 - Advanced Connections; PC
36 EN PLAYBACK Advanced Connections Connection To A Personal Computer This camcorder can transfer still images to a PC by usingthe provided software when connected as shown in theillustration. It is also possible to transfer still images to a PCwith a DV connector-equipped capture board installed. 1...
Page 38 - TAPE DUBBING; Tape Dubbing; TV
38 EN TAPE DUBBING Tape Dubbing 1 Following the illustration, connect the camcorder andthe VCR. Also refer to pg. 34 and 35. 2 Set the camcorder’s Power Switch to “ ” while pressing down the Lock Button located on the switch,turn on the VCR’s power, and insert the appropriatecassettes in the camcord...
Page 39 - Digital Dubbing
EN 39 Digital Dubbing It is also possible to copy recorded scenes from thecamcorder onto another video unit equipped with a DVconnector. Since a digital signal is sent, there is little if anyimage or sound deterioration. 1 Make sure the camcorder’s power is off. 2 Connect the camcorder to your video...
Page 40 - Installing The Batteries; USING THE REMOTE CONTROL UNIT
40 EN 5m 30 ° 30 ° 1 3 2 + – + – The Full-Function Remote Control Unit can operate thiscamcorder from a distance as well as the basic operations(Playback, Stop, Pause, Fast-Forward and Rewind) of yourVCR. It also makes additional playback functions possible. Installing The Batteries The remote contr...
Page 42 - Playback Zoom
42 EN USING THE REMOTE CONTROL UNIT (cont.) Press T Normal playback Left or SLOW Rewind Button To move image,press (Right) while keepingSHIFT held down. RM-V716U (provided) PAUSE PLAY Zoom Buttons SHIFT Remote sensor Right or SLOW Forward Button Up Button DownButton STOP FEATURE: Slow-Motion Playbac...
Page 43 - Playback Special Effects; ) Point the remote control at the camcorder's remote
EN 43 P 4 L O A F12345 Y F BACK CMSSV L O ET I E ANPRD F S O I O E F STAB O E I O E C CN E T E C F H I O LM PLAY EFFECT EFFECTON/OFF PLAYBACKEFFECT SelectMenu Remote sensor RM-V716U (provided) FEATURE: Playback Special Effects PURPOSE: To allow you to add creative effects to the playbackimage. OPERA...
Page 44 - IMPORTANT
44 EN MBR SET SHIFT 3 16 7 8 9 ` 4 25 VCR CODE LIST 6 26 47 7 MITSUBISHI 6 76 8 NEC 3 73 8 GRUNDIG 1 43 4 HITACHI 6 66 3 PANASONIC 1 31 71 19 41 8 JVC 9 19 69 3 BLAUPUNKT AKAI 9 79 83 2 FERGUSON 1 3 ABC VCR BRANDNAME BUTTONS (A) (B) SANYO 3 63 5 SHARP 1 51 ` TOSHIBA 6 96 1 SONY 6 56 `3 93 1 THOMSON,...
Page 45 - MAKE CONNECTIONS; VCR; ATTENTION FOR EDITING CABLE
EN 45 MAKE CONNECTIONS Also refer to pg. 34 and 35. 1 To connect to: A JVC VCR equipped with a remote pauseconnector . . . ... connect the editing cable to the Remote PAUSE connector. A JVC VCR not equipped with a remotepause connector but equipped with an R.A.EDIT connector . . . ... connect the ed...
Page 46 - SELECT SCENES
46 EN 1 2345678 – T – I T MO ET – A I – C L N : O – D – E ~~~~~~~~ O –0 U –0 T :: –0 –0 MODE SELECT SCENES 4 Point the remote control at the camcorder’s remotesensor. Press PLAY ( 4 ) and then press R.A.EDIT ON/ OFF on the remote control.The Random Assemble Editing Menu appears. 5 If using a Fade/Wi...
Page 47 - AUTOMATIC EDITING TO VCR
EN 47 12345 6 78 – – T – – I T MO ET 00001– A I 07395– C L N :::::: O 21335– D 58305– E ~~~~~~~~ O 00011 1 U 28536 69 T ::::: :: 03512 33 51350 09 M – – O – – DE –– – –– – AUTOMATIC EDITING TO VCR 11 Rewind the tape in the camcorder to the beginning ofthe scene you want to edit and press PAUSE ( 6 )...
Page 48 - For More Accurate Editing; DIAGNOSING VCR/CAMCORDER TIMING
48 EN 1 2345678 – T – I T MO ET – A I – C L N : O – D – E ~~~~~~~~ O –0 U –0 T :: –0 –0 MODE USING THE REMOTE CONTROL UNIT (cont.) For More Accurate Editing Some VCRs make the transition from Record-Pause toRecord mode faster than others. Even if you begin editingfor the camcorder and the VCR at exa...
Page 50 - Audio Dubbing
50 EN 6e USING THE REMOTE CONTROL UNIT (cont.) Audio Dubbing The audio track can be customized only when recorded inthe 12-bit mode ( Z pg. 20). NOTES: ● Audio Dubbing is not possible on a tape recorded in 16-bit audio, on a tape recorded in the LP mode or on ablank portion of a tape. ● To perform A...
Page 51 - TROUBLESHOOTING; CONTINUED ON NEXT PAGE
EN 51 SYMPTOM POSSIBLE CAUSES CORRECTIVE ACTION TROUBLESHOOTING 1. No power is supplied. 2. “SET DATE/TIME!” appears. 3. Recording cannot be performed. 4. There is no picture. 5. Some functions are not available using MENU/BRIGHT. 6. The focus does not adjust automatically. 7. The cassette will not ...
Page 52 - SYMPTOM
52 EN TROUBLESHOOTING (cont.) SYMPTOM POSSIBLE CAUSES CORRECTIVE ACTION 10. The colour of Snapshot looks strange. 11. Although Snapshot is attempted, flash does nottake place. 12. Although a Snapshot is taken with the flash, Red-EyeReduction does not takeplace. 13. The image taken using Snapshot is ...
Page 57 - USER MAINTENANCE; Cleaning The Camcorder; After Use
EN 57 1 2 3 1 2 USER MAINTENANCE Cassette holdercover OPEN/EJECTSwitch PUSH HERE Cassette holder Cover Cleaning The Camcorder 1 To clean the exterior, wipe gently with a softcloth.Put the cloth in diluted mild soap and wring itwell to wipe off heavy dirt. Then wipe againwith a dry cloth. 2 Press PUS...
Page 58 - INDEX; Controls, Connectors And Indicators; w e r; Y U
58 EN INDEX Controls, Connectors And Indicators OFF P L A Y 5S W ^ & u 1 o p Q y ( ) q 2 E 7 5 6 3 4 T R O I w e r t % @#$ ! Y U 8 0 9 * i
Page 60 - Indications; I T; • Approximate zoom ratio: Appears during
60 EN INDEX Indications LCD Monitor/Viewfinder Indications During Recording M B A 2 R N 4 I U 0 P G A x 3 H A S H L W O N O T T I U – O M N . D P T A M 1 U O 2 + S DB E E I T 3 1 S . P 11 26 3 R 4 . : 5 E 4 04 C 4 00 y * t r e q ( & w ) ^ * 7 * @ 8 0 ! 9 # $ % 1 2 4 3 5 * 6 * No. Function 1 • Ap...
Page 61 - Warning Indications; LCD Monitor/Viewfinder Indications During Playback; Function; Indikator
EN 61 Warning Indications Function Displays the battery remaining power. Remaining power level: high Remaining power level: exhausted As the battery power comes close to nil, the battery indicator blinks. When the battery power is exhausted, power turns off automatically. Appears when no tape is loa...
Page 62 - General Battery Precautions; Battery Packs; CAUTIONS; Cassettes; LCD Monitor; Be aware of the following phenomena for LCD
62 EN General Battery Precautions If the remote control is not functioning even if it isbeing operated correctly, the batteries are ex-hausted. Replace them with fresh ones.Use only the following batteries: R03 (AAA) size x 2Please make note of the following rules for batteryuse. When misused, the b...
Page 63 - Main Unit; Dirty heads can cause the following problems:; How To Handle A CD-ROM; Serious malfunctioning
EN 63 Main Unit 1. For safety, DO NOT . . . .... open the camcorder’s chassis..... disassemble or modify the unit..... short-circuit the terminals of the battery pack. Keep it away from metallic objects when not inuse. .... allow inflammables, water or metallic objects to enter the unit. .... remove...
Page 64 - TERMS
64 EN TERMS F Fade-In/Out .............................................. Z pg. 26 Fast-Forward The Tape .............................. Z pg. 31 5-second recording mode ......................... Z pg. 24 Flash .................................................. Z pg. 22, 23 Frame-By-Frame Playback ......
Page 66 - SPECIFICATIONS; Camcorder; For General; For Connectors
66 EN SPECIFICATIONS Camcorder For General Power supply : DC 6.3 V (Using AC Power Adapter/Charger) DC 7.2 V (Using battery pack) Power consumption LCD monitor off, viewfinder on : Approx. 4.0 W LCD monitor on, viewfinder off : Approx. 5.3 W Format : DV Format (SD mode) Signal format : PAL Standard ...


 JVC GC-PX100
Manual
JVC GC-PX100
Manual
 JVC GR-D20
Manual
JVC GR-D20
Manual
 JVC GR-D200
User Manual
JVC GR-D200
User Manual
 JVC GR-D220
Manual
JVC GR-D220
Manual
 JVC GR-D225
Manual
JVC GR-D225
Manual
 JVC GR-D240
Manual
JVC GR-D240
Manual
 JVC GR-D246
User Manual
JVC GR-D246
User Manual
 JVC GR-D290
Manual
JVC GR-D290
Manual
 JVC GR-D33
Manual
JVC GR-D33
Manual
 JVC GR-D340EK
User Manual
JVC GR-D340EK
User Manual
 JVC GR-D70
Manual
JVC GR-D70
Manual
 JVC GR-D90
Manual
JVC GR-D90
Manual
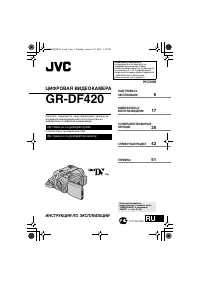 JVC GR-DF420
Manual
JVC GR-DF420
Manual
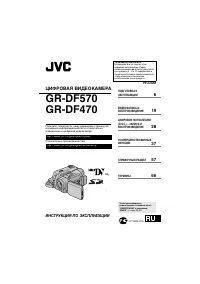 JVC GR-DF470
Manual
JVC GR-DF470
Manual
 JVC GR-DF570
Manual
JVC GR-DF570
Manual