Page 2 - TABLE OF CONTENTS/ TABLE DES MATIÈRES
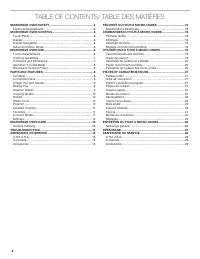
2 TABLE OF CONTENTS/ TABLE DES MATIÈRES MICROWAVE OVEN SAFETY .......................................................3 Electrical Requirements ...............................................................5 MICROWAVE OVEN CONTROL ....................................................5 Touch Panel ......
Page 3 - MICROWAVE OVEN SAFETY; Your safety and the safety of others are very important.; DANGER
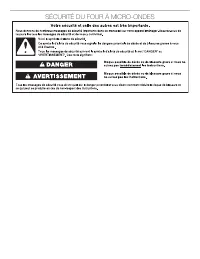
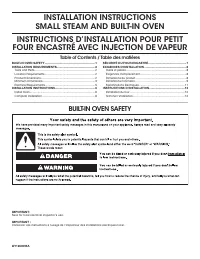
3 MICROWAVE OVEN SAFETY You can be killed or seriously injured if you don't immediately You can be killed or seriously injured if you don't follow All safety messages will tell you what the potential hazard is, tell you how to reduce the chance of injury, and tell you what canhappen if the instructi...
Page 4 - PRECAUTIONS TO AVOID POSSIBLE EXPOSURE TO
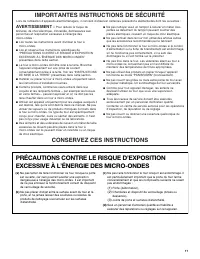
4 SAVE THESE INSTRUCTIONS IMPORTANT SAFETY INSTRUCTIONS ■ Liquids, such as water, coffee, or tea are able to be overheated beyond the boiling point without appearing to be boiling. Visible bubbling or boiling when the container is removed from the microwave oven is not always present. THIS COULD RES...
Page 5 - Electrical Requirements; MICROWAVE OVEN CONTROL; GROUNDING INSTRUCTIONS
5 Electrical Requirements The microwave oven is connected to a 110 V side of the 240 V circuit required for the lower oven. If the incoming voltage to the microwave oven is less than 110 V, cooking times may be longer. Have a qualified electrician check your electrical system. MICROWAVE OVEN CONTROL...
Page 6 - MICROWAVE OVEN USE; Food Characteristics
6 Touch Panel The touch panel houses the control menu and function controls. The touch keypads are very sensitive and require only a light touch to activate. Scroll up, down, left, or right to explore the different options and features.For more information about the individual controls, see their re...
Page 8 - Aluminum Foil and Metal; Microwave Cooking Power; PARTS AND FEATURES; Turntable
8 Aluminum Foil and Metal Always use oven mitts or pot holders when removing dishes from the microwave oven.Aluminum foil and some metal can be used in the microwave oven. If not used properly, arcing (a blue flash of light) can occur and cause damage to the microwave oven. OK for Use Racks and bake...
Page 10 - Cooking Modes; Defrost; WARNING
10 Cooking Modes To set a Cooking Mode, follow these steps: 1. Press the Home Button or touch the display. 2. Select the Cooking Modes option. 3. Select the desired cooking function from the list. See the following table for descriptions. 4. Follow the on-screen prompts to set the time, temperature ...
Page 12 - Settings
12 Settings The Settings keypad allows you access to functions and customization options for your oven. These settings allow you to set the clock, change the oven temperature between Fahrenheit and Celsius, turn the audible signals and prompts on and off, adjust the oven calibration, change the lang...
Page 13 - MICROWAVE OVEN CARE; General Cleaning
13 MICROWAVE OVEN CARE General Cleaning IMPORTANT: Before cleaning, make sure all controls are off and the oven is cool. Always follow label instructions on cleaning products.Soap, water, and a soft cloth or sponge are suggested first unless otherwise noted. Microwave Oven Door And Exterior The area...
Page 14 - TROUBLESHOOTING
14 TROUBLESHOOTING First try the solutions suggested here. If you need further assistance or more recommendations that may help you avoid a service call, refer to the warranty, or visit producthelp.jennair.com . In Canada, visit www.jennair.ca . Contact us by mail with any questions or concerns at t...
Page 15 - ASSISTANCE OR SERVICE; In Canada
15 ASSISTANCE OR SERVICE If you need service Please refer to the warranty. If you need replacement parts If you need to order replacement parts, we recommend that you use only factory specified parts. These factory specified parts will fit right and work right because they are made with the same pre...
Page 16 - SÉCURITÉ DU FOUR À MICRO-ONDES
Page 18 - Spécifications électriques; COMMANDES DU FOUR À MICRO-ONDES; Panneau tactile; INSTRUCTIONS DE LIAISON
18 Spécifications électriques Le four à micro-ondes doit être connecté au côté 110 V du circuit à 240 V requis de l’alimentation électrique du four inférieur. Si la tension d’entrée du four à micro-ondes est de moins de 110 V, les temps de cuisson peuvent être prolongés. Demander à un électricien qu...
Page 19 - UTILISATION DU FOUR À MICRO-ONDES; Caractéristiques des aliments
19 Affichage du menu Si le four à micro-ondes est fermé, appuyer sur Oven Power (alimentation) ou sur la touche d’alimentation du four à micro- ondes pour activer le menu du four désiré. À partir de cet écran, tous les programmes de cuisson automatique peuvent être activés; tous les programmes de cu...
Page 20 - Ustensiles de cuisson et vaisselle; Papier d’aluminium et métal; Puissance de cuisson des
20 Ustensiles de cuisson et vaisselle La vaisselle et les ustensiles de cuisson doivent pouvoir être placés sur le plateau rotatif. Toujours utiliser des mitaines de four ou des poignées lors de la manipulation, car les plats peuvent devenir chauds puisqu’ils sont en contact avec des aliments. Ne pa...
Page 21 - PIÈCES ET CARACTÉRISTIQUES; Plateau rotatif; Grille de convection
21 PIÈCES ET CARACTÉRISTIQUES Plateau rotatif Le plateau rotatif tourne dans les deux sens pour permettre une cuisson plus uniforme. Ne pas faire fonctionner le four à micro-ondes lorsque le plateau rotatif est enlevé. Voir la section “Assistance ou service” pour commander de nouvelles pièces.Insére...
Page 22 - Modes de cuisson; AVERTISSEMENT
22 Cuiseur-vapeur ■ Le cuiseur-vapeur deviendra chaud. Toujours utiliser des mitaines de four ou des maniques lors de l’utilisation. ■ Le cuiseur-vapeur est conçu pour être utilisé uniquement dans un four à micro-ondes. Pour éviter d’endommager le cuiseur-vapeur, ne pas utiliser dans un four convent...
Page 25 - Réglages
25 Réglages La touche des réglages permet d’accéder aux fonctions et de personnaliser les options du four. Ces réglages permettent de régler l’horloge, de faire passer la température du four des Fahrenheit aux Celsius, d’activer et de désactiver les signaux et avertissements sonores, d’effectuer la ...
Page 26 - ENTRETIEN DU FOUR À MICRO-ONDES; Nettoyage général
26 ENTRETIEN DU FOUR À MICRO-ONDES Nettoyage général IMPORTANT: Avant le nettoyage, s’assurer que toutes les commandes sont désactivées et que le four est froid. Toujours suivre les instructions figurant sur les étiquettes des produits de nettoyage.L’usage de savon, d’eau et d’un chiffon doux ou d’u...
Page 27 - DÉPANNAGE
27 DÉPANNAGE Essayer d’abord les solutions suggérées ici. Pour obtenir de l’aide ou des conseils qui permettront peut-être d’éviter une intervention de dépannage, consulter la page de garantie ou visiter le http://www.whirlpool.com/product_help . Au Canada, visiter le http://www.whirlpool.ca . Il es...
Page 28 - ASSISTANCE OU SERVICE
ASSISTANCE OU SERVICE If you need service Please refer to the warranty. If you need replacement parts If you need to order replacement parts, we recommend that you use only factory specified parts. These factory specified parts will fit right and work right because they are made with the same precis...