Page 2 - Table of Contents; Safety Information; WORK AREA SAFETY
Table of Contents Table of Contents .......................................................... 2 Safety Information ......................................................... 2 Work Area Safety ......................................................................2Personal Safety .......................
Page 3 - ELECTRICAL SAFETY
M O C . S L O O T Y K S U H 3 . e c n a t s i s s a r e h t r u f r o f Y K S U H - D H - 8 8 8 - 1 t c a t n o c e s a e l P Safety Information (continued) AIR COMPRESSOR AND PNEUMATIC TOOL SAFETY WARNING: Do not attempt to modify this tool or create accessories not recommended for use with this to...
Page 5 - Warranty; HUSKY AIR COMPRESSOR LIMITED THREE-YEAR WARRANTY; Specifications; AIR COMPRESSOR
M O C . S L O O T Y K S U H 5 . e c n a t s i s s a r e h t r u f r o f Y K S U H - D H - 8 8 8 - 1 t c a t n o c e s a e l P Warranty HUSKY AIR COMPRESSOR LIMITED THREE-YEAR WARRANTY This warranty covers defects in workmanship or materials in this Husky air compressor for the three-year period from...
Page 7 - ASSEMBLING THE ACCESSORY STORAGE BAG
M O C . S L O O T Y K S U H 7 . e c n a t s i s s a r e h t r u f r o f Y K S U H - D H - 8 8 8 - 1 t c a t n o c e s a e l P Assembly N1N ASSEMBLING THE ACCESSORY STORAGE BAG - Align the holes in the bag bracket (N1) with the threaded holes in the frame.- Attach the accessory storage bag (N) to the...
Page 8 - Operation Instruction; Starting up
8 K drain valve drain valve air pressure regulator Operation Instruction Starting up Close the air tank drain valve (B) by turning clockwise.Plug in the power cord (C).Set the ON/OFF switch (L) to the ON position and allowtank pressure to build. The motor will stop when tank pressurereaches “cut-out...
Page 9 - Maintenance
9 drain valve drain valve Maintenance OPEN CLOSE K L ON OF B
Page 10 - Troubleshooting
10 Troubleshooting Problem n o it u l o S e s u a C e l b i s s o P There is low pressure, notenough air, or thecompressor does not stop. The tank drain valve is open.There is a leak in the fittings. There is a prolonged orexcessive use of air.The compressor is not largeenough. There is a hole in th...
Page 11 - Service Parts; EXPLODED VIEW
11 Service Parts EXPLODED VIEW PARTS LIST Part Description Qty Part Description Qty 1 Screw M5x12 4 2 Regulator Knob 1 3 Bolt M4 X 12 3 Control PanelSafety Valve 4 112 112 111 11 5 Pressure Gauge 67 Quick Coupler 1 1 1 8 Rubber Hose 9 Pressure Regulator Capacitor Fixing Ring 0 1 Overload Protector 1...
Page 13 - Núm. de artículo XXXXXXXXX; GUÍA DE USO Y CUIDADO; COMPRESOR DE AIRE SILENCIOSO DE 1 GALONE
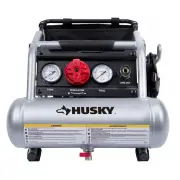
Núm. de artículo XXXXXXXXX Núm. de modelo 3300113 GUÍA DE USO Y CUIDADO COMPRESOR DE AIRE SILENCIOSO DE 1 GALONE ¿Tiene preguntas, problemas, o faltan piezas?Antes de regresar a la tienda, llame aServicio al Cliente de Huskyde lunes a viernes de 8 a.m. a 7 p.m.,sábado de 9 a.m. a 6 p.m., hora local ...
Page 14 - SEGURIDAD DEL ÁREA DE TRABAJO
2 Tabla de contenido Tabla de contenido ................................................................. 2Información de seguridad ...................................................... 2 Seguridad del área de trabajo ............................................................ 2Seguridad personal....
Page 15 - SEGURIDAD ELÉCTRICA
M O C . S L O O T Y K S U H 3 . l a n o i c i d a a i c n e t s i s a a r a p Y K S U H - D H - 8 8 8 - 1 l e n o c o t c a t n o c n e e s a g n ó P Información de seguridad (continuación) COMPRESOR DE AIRE Y SEGURIDAD DE LA HERRAMIENTA NEUMÁTICA ADVERTENCIA: No intente modificar esta herramienta n...
Page 17 - Especificaciones; COMPRESOR DE AIRE; Garantía; GARANTÍA LIMITADA DE TRES AÑOS DEL COMPRESOR DE AIRE HUSKY
Especificaciones COMPRESOR DE AIRE Garantía M O C . S L O O T Y K S U H 5 . l a n o i c i d a a i c n e t s i s a a r a p Y K S U H - D H - 8 8 8 - 1 l e n o c o t c a t n o c n e e s a g n ó P GARANTÍA LIMITADA DE TRES AÑOS DEL COMPRESOR DE AIRE HUSKY Esta garantía cubre defectos en mano de obra y ...
Page 19 - MONTAJE DE LA BOLSA DE ALMACENAMIENTO DE ACCESORIOS
Ensamblaje 7 M O C . S L O O T Y K S U H . l a n o i c i d a a i c n e t s i s a a r a p Y K S U H - D H - 8 8 8 - 1 l e n o c o t c a t n o c n e e s a g n ó P MONTAJE DE LA BOLSA DE ALMACENAMIENTO DE ACCESORIOS - Alinee los agujeros en el soporte de la bolsa (N1) con los agujeros roscados en el ma...
Page 20 - Instrucción de operación; Empezando
Instrucción de operación Empezando Cierre la válvula de drenaje del tanque de aire (B) girándola en dirección de las manecillas del reloj.Enchufe el cable de alimentación (C).Coloque el interruptor de ENCENDIDO/APAGADO (L) en la posición encendido y deje que se acumule presión en el tanque. El motor...
Page 21 - Mantenimiento
Mantenimiento 9 M O C . S L O O T Y K S U H .l a n o i c i d a a i c n e t s i s a a r a p Y K S U H - D H - 8 8 8 - 1 l e n o c o t c a t n o c n e e s a g n ó P ABRIR CERARR K L ENCENDIDO APAGADO B
Page 22 - SOLUCIÓN DE PROBLEMAS
M O C . S L O O T Y K S U H 0 1 . l a n o i c i d a a i c n e t s i s a a r a p Y K S U H - D H - 8 8 8 - 1 l e n o c o t c a t n o c n e e s a g n ó P SOLUCIÓN DE PROBLEMAS Problem n o it u l o S e s u a C e l b i s s o P Hay poca presión, aire insuficiente o el compresor no se detiene. La válvula ...
Page 23 - LISTA DE PARTES; Piezas de servicio; VISTA ESQUEMÁTICA
LISTA DE PARTES 1 1 Piezas de servicio VISTA ESQUEMÁTICA M O C . S L O O T Y K S U H .l a n o i c i d a a i c n e t s i s a a r a p Y K S U H - D H - 8 8 8 - 1 l e n o c o t c a t n o c n e e s a g n ó P Pieza Descripción Cantidad Pieza Descripción Cantidad 1 Tronillo M5x12 2 Perilla Reguladora 3 To...