Page 2 - WORK AREA SAFETY
2 Safety Information Table of Contents Safety Information ....................................2 Work Area Safety ...................................2Personal Safety .....................................3Moving the Compressor .........................3Air Compressor and Pneumatic Tool Safety ...........
Page 3 - PERSONAL SAFETY; Do not use on a ladder or unstable support.; MOVING THE AIR COMPRESSOR
3 HUSKYTOOLS.com Please contact 1-888-43-HUSKY for further assistance. Safety Information (continued) PERSONAL SAFETY □ Keep proper footing and balance at all times. Proper footing and balance enables better control of the tool in unexpected situations. □ Do not use on a ladder or unstable support. ...
Page 6 - WHAT IS NOT COVERED; Warranty
6 LIMITED WARRANTYWHAT IS COVERED The manufacturer warrants to the original retail purchaser that this product is free from defect in material and workmanship and agrees to repair or replace, at the manufacturer’s discretion, any defective product free of charge within these time periods from the da...
Page 7 - SPECIFICATIONS; Oil lube; DUTY CYCLE
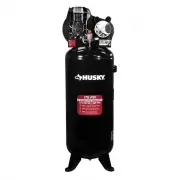
7 HUSKYTOOLS.com Please contact 1-888-43-HUSKY for further assistance. Pre-Operation SPECIFICATIONS Running horsepower 3.7 HP Air tank capacity 60 gallons Air pressure 175 psi maximum Air delivery 13.4 SCFM at 40 psi11.5 SCFM at 90 psi Tank fill time 7.5 minutes Lubrication Oil lube Input 240V, 60 H...
Page 8 - pressure switch and “Off (O)” to remove power at the end of each use.; Tank Pressure Gauge:; allowing air pressure to remain inside the air tank.; Pressure Relief Valve:; SYSTEM COMPONENTS
8 Part Description A AUTO (I) / OFF (0) Switch: Turn this switch in the “Auto (I)” position to provide automatic power to the pressure switch and “Off (O)” to remove power at the end of each use. B Pressure Switch: The pressure switch automatically starts the motor when the air tank pressure drops b...
Page 9 - mounting to the floor.; Pump Oil Sight Glass:; PLACEMENT OF THE AIR COMPRESSOR
9 HUSKYTOOLS.com Please contact 1-888-43-HUSKY for further assistance. Pre-Operation (continued) Part Description I Thermal Overload Reset: This motor has a manual thermal overload protector. If the motor overheats for any reason, the overload protector will shut off the motor. The motor must be all...
Page 10 - AIR DISTRIBUTION SYSTEM
10 Pre-Operation (continued) AIR DISTRIBUTION SYSTEM The diagram on the following page represents a typical air distribution system. The following are tips to remember when setting up the air compressor’s air distribution system. □ Use a pipe that is the same size as the air tank outlet. Piping that...
Page 11 - TYPICAL COMPRESSED AIR DISTRIBUTION SYSTEM
11 HUSKYTOOLS.com Please contact 1-888-43-HUSKY for further assistance. Pre-Operation (continued) TYPICAL COMPRESSED AIR DISTRIBUTION SYSTEM Part Description A Drain Legs B Drain Valves C Lubricator D Air Tool E Regulator F Filter / Moisture Trap G Air Usage Lines H Dirt Legs I Air Discharge Valve J...
Page 12 - TOOL USAGE
12 Pre-Operation (continued) Tool Inflation Finishing nailing Framing/ Roofing Bolting Inflator Brad nailer Stapler Finished/Roofing nailer Impact wrench Heavy duty 1/2 in. and 3/4 in. impact wrench Air ratchet Recommended Tool Use Tool Cutting/Drilling Surface Prep Painting HVLP Painting Grease Gun...
Page 13 - BREAKING IN THE PUMP; Check oil level in the pump. See the
13 HUSKYTOOLS.com Please contact 1-888-43-HUSKY for further assistance. BREAKING IN THE PUMP NOTICE: Risk of property damage. Serious damage may result if the following break-in instructions are not closely followed. NOTICE: Minor leaks can cause the air compressor to overwork, resulting in prematur...
Page 14 - Installation; Anchoring of the air compresor
14 Installation 1 Anchoring of the air compresor WARNING: Risk of bursting. Excessive vibration can weaken the air tank and cause an explosion. The compressor must be properly mounted. The air compressor must be bolted to a level, solid concrete surface. Use concrete anchors, nuts (for tightening th...
Page 15 - Preparing for start-up; Visually inspect air lines and fittings for leaks.; Starting the compressor; Plug the power cord into a proper receptacle.; Operation
15 HUSKYTOOLS.com Please contact 1-888-43-HUSKY for further assistance. 1 Preparing for start-up WARNING: Risk of unsafe operation. Firmly grasp air hose in hand when installing or disconnecting to prevent hose whip. WARNING: Risk of unsafe operation. Do not use damaged or worn accessories. WARNING:...
Page 17 - Draining the tank
17 HUSKYTOOLS.com Please contact 1-888-43-HUSKY for further assistance. Operation (continued) 5 Draining the tank WARNING: Risk of unsafe operation. Air tanks contain high pressure air. Keep face and other body parts away from outlet of drain. Use eye protection [ANSI Z87.1 (CAN/CSA Z94.3)] when dra...
Page 18 - Maintenance; GENERAL MAINTENANCE
18 Maintenance GENERAL MAINTENANCE □ Condensate forms in the tank when there is humidity in the air. Depending on the environmental conditions, drain the condensate daily and/or every hour. For instructions, see Draining the tank . □ The safety valve automatically releases air when the receiver pres...
Page 19 - CHECKING THE OIL; CHANGING THE OIL
19 HUSKYTOOLS.com Please contact 1-888-43-HUSKY for further assistance. Maintenance (continued) CHECKING THE OIL WARNING: Drain the tank to release the air pressure before removing the oil fill cap or oil drain plug. CAUTION: Overfilling with oil will cause premature air compressor failure. Do not o...
Page 20 - Adjusting the Belt Tension
20 Maintenance (continued) CLEANING THE AIR FILTER From time to time, the air filter needs to be removed and cleaned. Do not operate without air filter installed. □ Turn the air compressor OFF (0). □ Unplug the air compressor. □ Allow unit to cool. □ Unsnap the air filter cover to remove (1). □ Chec...
Page 21 - ADJUSTING THE BELT TENSION; Downw
21 HUSKYTOOLS.com Please contact 1-888-43-HUSKY for further assistance. ADJUSTING THE BELT TENSION NOTICE : Once the engine pulley has been moved from its factory set location, the grooves of the flywheel and pulley must be aligned to within 1/16 in. (1.6 mm) to prevent excessive belt wear. Verify t...
Page 22 - MOTOR PULLEY/FLYWHEEL ALIGNMENT; Remove outer belt guard.
22 MOTOR PULLEY/FLYWHEEL ALIGNMENT The air compressor flywheel and motor pulley must be in-line (in the same plane) within 1/16 in. (1.6 mm) to assure belt retention within the flywheel belt grooves. To check the alignment, perform the following steps: □ Turn the air compressor off, lock out the pow...
Page 23 - Turn the air compressor Off and unplug unit.; Care and Cleaning; Drain the air tank of moisture after operation.
23 HUSKYTOOLS.com Please contact 1-888-43-HUSKY for further assistance. AIR COMPRESSOR INTAKE AND EXHAUST VALVES Once a year bring the compressor to a service center and have a trained service technician check the air compressor pump intake and exhaust valves. INSPECT AIR LINES AND FITTINGS FOR LEAK...
Page 24 - Troubleshooting
24 Problem Possible Cause Solution The compressor does not run. □ The tank has insufficient pressure. □ When the tank pressure drops, the compressor will turn on to cut-in pressure. □ There is no electrical power to the unit. □ Verify the wiring connection inside the pressure switch and the terminal...
Page 25 - Typical Compressed Air Distribution
25 HUSKYTOOLS.com Please contact 1-888-43-HUSKY for further assistance. Problem Possible Cause Solution There is excessive belt wear. □ The belt is too loose. □ Check the belt tension. □ The belt is too tight. □ Check the belt tension. □ The pulley is loose. □ Align the pulley/flywheel. Correct the ...
Page 27 - GRACIAS; ¡Gracias por elegir Husky!; GUÍA DE USO Y CUIDADO; llame a Servicio al Cliente de Husky de
GRACIAS Le agradecemos la preferencia y confianza que ha depositado en Husky a través de la compra de este compresor de aire. Nos esforzamos por crear continuamente productos de alta calidad diseñados para mejorar su hogar. Visítenos en Internet para ver nuestra línea completa de productos disponibl...
Page 28 - SEGURIDAD DEL ÁREA DE TRABAJO
28 Índice de materias Información de seguridad ......................28 Seguridad del área de trabajo .............28Seguridad personal .............................29Traslado del compresor .......................29Seguridad del compresor de aire y las herramientas neumáticas ....................30S...
Page 32 - QUÉ NO ESTÁ CUBIERTO; Garantía
32 GARANTÍA LIMITADAQUÉ ESTÁ CUBIERTO El fabricante garantiza al comprador minorista original que este producto está libre de defectos de material y de fabricación, y acuerda reparar o reemplazar, a discreción del fabricante, cualquier producto defectuoso, sin cargo alguno, dentro de estos períodos ...
Page 33 - ESPECIFICACIONES; Aceite Lubricante; CICLO DE SERVICIO; Preutilización
33 HUSKYTOOLS.com Sírvase llamar al 1-888-43-HUSKY para obtener asistencia adicional. ESPECIFICACIONES Potencia de funcionamiento 3.7 HP (745.7 W) Capacidad del tanque de aire 60 galones (227.12 L) Presión de aire 175 psi máximo (10.69 bar máximo) Suministro de aire 13.4 PCEM a 40 psi (2.76 bar)11.5...
Page 34 - COMPONENTES DEL SISTEMA
34 Pieza Descripción A Interruptor Auto(I)/Off(apagado)(0): Coloca el interruptor en la posición “Auto (I)” para suministrar energía automática al interruptor de presión y “Off (apagado) (O)” para quitar energía después de cada uso. B Interruptor de presión: El interruptor de presión arranca automát...
Page 36 - COLOCACIÓN DEL COMPRESOR DE AIRE
36 Preutilización (continuación) COLOCACIÓN DEL COMPRESOR DE AIRE ADVERTE NCIA: Si alguna pieza está dañada o falta, no utilice este producto hasta que se hayan reemplazado las piezas necesarias. Si no se hace caso de esta advertencia, el resultado podría ser lesiones corporales graves. PRECAUC IÓN:...
Page 37 - SISTEMA DE DISTRIBUCIÓN DE AIRE
37 HUSKYTOOLS.com Sírvase llamar al 1-888-43-HUSKY para obtener asistencia adicional. Preutilización (continuación) SISTEMA DE DISTRIBUCIÓN DE AIRE El diagrama de la página siguiente representa un sistema de distribución de aire típico. A continuación se dan consejos que hay que recordar cuando se i...
Page 38 - SISTEMA TÍPICO DE DISTRIBUCIÓN DE AIRE
38 Preutilización (continuación) SISTEMA TÍPICO DE DISTRIBUCIÓN DE AIRE Pieza Descripción A Patas de drenaje B Válvulas de drenaje C Lubricador D Herramienta de aire E Regulador F Filtro / Colector de humedad G Líneas de uso de aire H Colectores de sedimentos I Válvula de descarga de aire J Las líne...
Page 39 - USO DE HERRAMIENTAS
39 HUSKYTOOLS.com Sírvase llamar al 1-888-43-HUSKY para obtener asistencia adicional. Preutilización (continuación) USO DE HERRAMIENTAS Herramienta Inflado Clavado de clavos de acabado Armazonado/ techado Empernado Inflador Clava- dora de puntillas Grapadora Clavadora de clavos de acabado/techado Ll...
Page 40 - ASENTAMIENTO DE LA BOMBA
40 Preutilización (continuación) ASENTAMIENTO DE LA BOMBA NOTA: Riesgo de daño a la propiedad. No seguir estas instrucciones de purgado podría provocar daños graves. NOTA: Las mínimas pérdidas pueden provocar que el compresor de aire trabaje demasiado, pudiendo resultar en una avería prematura o ren...
Page 41 - Instalación; Anclaje del compresor de aire
41 HUSKYTOOLS.com Sírvase llamar al 1-888-43-HUSKY para obtener asistencia adicional. Instalación 1 Anclaje del compresor de aire ADVERTENCIA: Riesgo de reventón. La vibración excesiva puede debilitar el tanque de aire y causar una explosión. El compresor debe estar montado apropiadamente. Debe ator...
Page 42 - Preparación para el arranque; Cierre la salida de descarga de aire.; Utilización
42 1 Preparación para el arranque ADVERTENCIA: Riesgo de funcionamiento inseguro. Agarre firmemente la manguera de aire con la mano cuando instale o desconecte la unidad para evitar que la manguera dé latigazos. ADVERTENCIA: Riesgo de funcionamiento inseguro. No utilice accesorios dañados o desgasta...
Page 43 - Arranque del compresor
43 HUSKYTOOLS.com Sírvase llamar al 1-888-43-HUSKY para obtener asistencia adicional. 2 Arranque del compresor ADVERTENCIA: Riesgo de reventón. Si se nota cualquier ruido o vibración inusual, pare de inmediato el compresor de aire y haga que sea revisado por un técnico de servicio capacitado. NOTA: ...
Page 45 - Utilización del compresor de aire
45 HUSKYTOOLS.com Sírvase llamar al 1-888-43-HUSKY para obtener asistencia adicional. 4 Utilización del compresor de aire ADVERTENCIA: Asegúrese siempre de que el interruptor esté en la posición de APAGADO y que el manómetro del regulador dé una lectura de cero antes de cambiar las herramientas de a...
Page 46 - Drenaje del tanque
46 Utilización (continuación) 5 Drenaje del tanque ADVERTENCIA: Riesgo de funcionamiento inseguro. Los tanques de aire contienen aire a alta presión. Mantenga la cara y otras partes del cuerpo alejadas de la salida del drenaje. Use protección ocular [ANSI Z87.1 (CAN/CSA Z94.3)] cuando realice el dre...
Page 47 - Mantenimiento; MANTENIMIENTO GENERAL
47 HUSKYTOOLS.com Sírvase llamar al 1-888-43-HUSKY para obtener asistencia adicional. Mantenimiento MANTENIMIENTO GENERAL □ Cuando hay humedad en el aire, se forma condensación en el tanque. Dependiendo de las condiciones ambientales, drene la condensación diariamente y/o cada hora. Para obtener ins...
Page 48 - COMPROBACIÓN DEL ACEITE; CAMBIO DE ACEITE
48 COMPROBACIÓN DEL ACEITE ADVERTENCIA: VDrene el tanque para dejar escapar la presión de aire antes de retirar la tapa de llenado de aceite o el tapón de drenaje del aceite. PRECAUCIÓN: Un llenado excesivo con aceite causará una falla prematura del compresor de aire. No llene excesivamente el compr...
Page 49 - LIMPIEZA DEL FILTRO DE AIRE; Deje que se enfríe la unidad.; REEMPLAZO DE LA CORREA; Marque la posición del motor en el asiento.
49 HUSKYTOOLS.com Sírvase llamar al 1-888-43-HUSKY para obtener asistencia adicional. LIMPIEZA DEL FILTRO DE AIRE De vez en cuando es necesario retirar y limpiar el filtro de aire. No opere el compresor sin su filtro de aire. □ Mueva el interruptor Encendido/Apagado (Auto/Off) hacia la posición Apag...
Page 50 - AJUSTE DE LA TENSIÓN DE LA CORREA; Fuerza Descendente
50 Mantenimiento (continuación) AJUSTE DE LA TENSIÓN DE LA CORREA □ Deslice el motor hasta la posición original y alinee el motor con la marca que hizo antes en el asiento. □ Apriete los dos tornillos exteriores de montaje del motor lo suficiente como para sujetar el motor en su sitio con el fin de ...
Page 51 - ALINEACIÓN DE LA POLEA Y EL VOLANTE; Retire la protección externa de la correa.
51 HUSKYTOOLS.com Sírvase llamar al 1-888-43-HUSKY para obtener asistencia adicional. ALINEACIÓN DE LA POLEA Y EL VOLANTE El volante del compresor de aire y la polea del motor deben estar en línea (en el mismo plano) con una tolerancia máxima de 1/16 de pulgada (1.6 mm) para asegurar la retención de...
Page 52 - Cuidado y limpieza; Apague el compresor de aire y desenchufe la unidad.
52 Mantenimiento (continuación) Cuidado y limpieza □ Drene el tanque de aire para eliminar la humedad después de la utilización. □ Cuando no esté usando el compresor, almacénelo en un lugar fresco y seco. □ Desconecte la manguera de aire y cuelgue los extremos abiertos hacia abajo para dejar que la ...
Page 53 - Resolución de problemas; Problema
53 HUSKYTOOLS.com Sírvase llamar al 1-888-43-HUSKY para obtener asistencia adicional. Resolución de problemas Problema Causa posible Solución El compresor no funciona. □ El tanque tiene una presión insuficiente. □ Cuando la presión del tanque baje, el compresor se encenderá a la presión de conexión....
Page 55 - Utilice fusibles de acción retardada.
55 HUSKYTOOLS.com Sírvase llamar al 1-888-43-HUSKY para obtener asistencia adicional. Resolución de problemas (continuación) Problème Cause possible Solution Hay exceso de humedad en el aire de descarga. □ Hay exceso de agua en el tanque de aire. □ Es normal que las bombas de los compresores de aire...
Page 56 - Retenga este manual para uso futuro.
¿Preguntas, problemas, faltan piezas? Antes de devolver la unidad a la tienda, llame a Servicio al Cliente de Husky de 8 a.m. a 6 p.m., Hora del Este (EST), de lunes a viernes. 1-888-43-HUSKY HUSKYTOOLS.COM Retenga este manual para uso futuro. Número de documento: E113009 09/01/2020