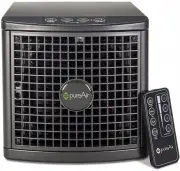
Greentech pureAir 1500 - Manuals
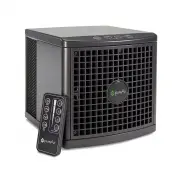
User Manual Greentech pureAir 1500


Summary
3 Do not operate this unit unless it is completely assembled. Eye damage may result from directly viewing the light produced by the lamp inside this unit for a continuous and extended period of time. Do not block the ventilation or filters. Do not use Away Mode in an occupied space. The unit should ...
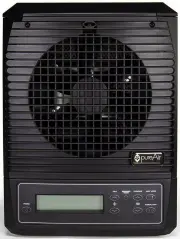
4 Diagrams Unit Front Power Plug Ioni zation B r ushes Fan Front G r i l le Powe r Adapte r Control Panel Rea r Panel Release Tab Unit Rear (Closed)
6 Getting Started 1. Remove the UNIT and POWER ADAPTER from the packaging. 2. Find a suitable location to place your unit. (Ideal location is an area of the room with good circulation, or near the source of pollution.) 3. Plug the POWER ADAPTER into a wall outlet and then plug the other end into the...
Greentech Air Purifiers Manuals
-
 Greentech 1X5825
User Manual
Greentech 1X5825
User Manual
-
 Greentech 1X5826
User Manual
Greentech 1X5826
User Manual
-
 Greentech GTEPA-1500
User Manual
Greentech GTEPA-1500
User Manual
-
 Greentech GTEPA-3000
User Manual
Greentech GTEPA-3000
User Manual
-
 Greentech GTEPA-50
User Manual
Greentech GTEPA-50
User Manual
-
 Greentech GTEPA-500
User Manual
Greentech GTEPA-500
User Manual
-
 Greentech GTEPA-MOTION-CH
User Manual
Greentech GTEPA-MOTION-CH
User Manual
-
 Greentech GTEPA-MOTION-RB
User Manual
Greentech GTEPA-MOTION-RB
User Manual
-
 Greentech PFRIDGE
User Manual
Greentech PFRIDGE
User Manual
-
 Greentech pureAir 3000
User Manual
Greentech pureAir 3000
User Manual
-
 Greentech pureAir 50
User Manual
Greentech pureAir 50
User Manual
-
 Greentech pureAir 500
User Manual
Greentech pureAir 500
User Manual
-
 Greentech PureAir Fridge
User Manual
Greentech PureAir Fridge
User Manual
-
 Greentech pureAir SOLO
User Manual
Greentech pureAir SOLO
User Manual