Page 2 - For more information on your refrigerator’s operation, visit; REFRIGERATOR SAFETY INFORMATION; SAFETY; IMPORTANT SAFETY INSTRUCTIONS; refrigerator follow these basic safety precautions:; CAUTION; State of California Proposition 65 Warnings:; WARNING
IMPORTANT SAFETY INFORMATION. READ ALL INSTRUCTIONS BEFORE USING. 2 GE Appliances website For more information on your refrigerator’s operation, visit www. GEAppliances.com This is the safety alert symbol. This symbol alerts you to potential hazards that can kill or hurt you and others. All safety m...
Page 3 - For personal safety, this appliance must be properly grounded.; CONNECTING ELECTRICITY; Electrical Shock Hazard.; Plug into a grounded 3-prong outlet; Explosion Hazard.; INSTALLATION
3 GEAppliances.com Do not, under any circumstances, cut or remove the third (ground) prong from the power cord. For personal safety, this appliance must be properly grounded. The power cord of this appliance is equipped with a 3-prong (grounding) plug which mates with a standard 3-prong (grounding) ...
Page 4 - Scalding Hazard.; disabled, and the elderly are at highest risk of being scalded.; HOT WATER DISPENSER; IMPORTANT SAFETY INFORMATION.; Suffocation and child entrapment hazard.; Refrigerants; PROPER DISPOSAL OF YOUR OLD REFRIGERATOR
WARNING Scalding Hazard. The hot water dispenser is capable of heating water to a temperature of approximately 185°F (85°C). Water temperatures above 125°F (52°C) can cause severe burns or death from scalding. Children, the disabled, and the elderly are at highest risk of being scalded. Use this app...
Page 6 - confirm if you live above 5000 feet (high; Filter Bypass Plug
6 Door ice bin* 1. Open left fresh food door. 2. Pull down latch to release bin door. 3. Using handhold lift ice bucket up and out to clear locators in bottom of bin. 4. To replace the ice bucket, set it on the guide brackets and push until the ice bucket seats properly. 5. If bucket cannot be repla...
Page 7 - About the controls with temperature settings.; Refrigerator; Actual Set; Door Alarm
About the controls with temperature settings. GEAppliances.com The temperature controls are preset in the factory at 37°F for the refrigerator compartment and 0°F for the freezer compartment. Allow 24 hours for the temperature to stabilize to the preset recommended settings.Control Style D: The temp...
Page 8 - Changing the Temperature for Control Style A
8 About the controls with temperature settings. NOTE: For optimal temperature performance, we recommend to avoid placing food items directly at the air flow vents of the fresh food air tower and thus blocking the air flow. Changing the Temperature for Control Style A To Change the Refrigerator Tempe...
Page 9 - Control Style A, External Controls
Ice 9 Hands-free Autofill* Hands-free Autofill uses sensors to monitor container height to automatically dispense filtered water without having to activate the paddle. Start Heating* The Start Heating button is used to initiate the water heating for the Single Serve feature. To abort the Start Heati...
Page 10 - Controls Style D, Internal Controls; Lock Controls
10 About the controls - features. Refrigerator Hold 3 Sec for °F/°C Hold 3 Seconds Hold 3 Seconds Recommended: 37 °F Actual Set Freezer Door Alarm Ice Maker Lock Controls Reset Filter Recommended: 0°F F Controls Style D, Internal Controls GNE29, PWE23 Door AlarmSounds to alert when the freezer or fr...
Page 11 - Important Facts About Your Dispenser; To Use the Internal Water Dispenser*
11 About the dispenser.* GEAppliances.com Dispenser tray Important Facts About Your Dispenser Do not add ice from trays or bags to the door ice maker bucket. It may not crush or dispense. Avoid overfilling glass with ice and use of narrow glasses. Backed-up ice can jam the chute or cause the doo...
Page 12 - To Use HANDS FREE AUTOFILL:; • Center container on Recess Dispenser Tray as far back as; To Stop AUTOFILL; • Press AUTOFILL to stop.; Important Facts about AUTOFILL
To Use HANDS FREE AUTOFILL: • Center container on Recess Dispenser Tray as far back as possible without activating paddle and remove hand from container • Press AUTOFILL To Stop AUTOFILL • Press AUTOFILL to stop. Important Facts about AUTOFILL • For optimum results, use a uniform container between 4...
Page 13 - Heating button for 3 seconds. To abort the brew dispense cycle,
*Select Models Only About the K-Cup Brewing System.* (Cont) GEAppliances.com 13 Push to open 1 2 3 Load the K-Cup Brewer Insert a Keurig K-Cup pod into the brewer and press down firmly (you will hear a popping sound). Two Ways To Brew 1. Press the Start Heating button. OR 2. Initiate heating with th...
Page 14 - Appliance Communication; GE WiFi Connect Optional *
14 Appliance Communication GE WiFi Connect (for customers in the United States)GE WiFi Connect Enabled* (PFE28P PYE22P, PFH models only) If your refrigerator has a Connected Appliance information label located on the inside as shown, your refrigerator can be connected to your WiFi network, allowing ...
Page 15 - Water Filter Cartridge; installed filter cartridge will cause water to spurt from the
15 *Select Models Only About the GE ® RPWFE water filter cartridge. GEAppliances.com Water Filter Cartridge The water filter cartridge is located in the fresh food interior on the left side wall, near the top.This product uses radio frequency identification (RFID) to detect leaks and monitor filter ...
Page 16 - About the fresh food storage options.
16 Rearranging the Shelves To remove: Remove all items from the shelf. Tilt the shelf up at the front. Lift the shelf up at the back and bring the shelf out. To replace: While tilting the shelf up, insert the top hook at the back of the shelf in a slot on the track. Lower the front of the shelf unti...
Page 17 - Adjustable Bins on the Door; Non-Dispense Models
17 GEAppliances.com Non-Adjustable Bins on the Door (Dispenser Models - Left Hand Door) To remove: Lift the bin straight up, then pull out.To replace: Engage the bin in the molded supports on the door and push down. It will lock in place.The ice maker door bins are not interchangeable, note the loca...
Page 18 - Laceration Hazard.; Do not store glass bottles at this setting. If; About the climate zone and temperature
ClimateZone Temperature Controlled Drawer* The Temperature Controlled Drawer is a full-width drawer with adjustable temperature control. This drawer can be used for large miscellaneous items.To change setting, press select button. Keep fruits and vegetables organized in separate compartments for eas...
Page 20 - Freezer Basket and Drawer; Basket Removal
20 About the freezer. Freezer Basket and Drawer Basket.Drawer Ice Bucket * (Available on Non-Dispense models only. Available as a IM Kit on some models) Non-Adjustable Bin in the Freezer* To remove: push in plastic tab on either left or right side To replace: slide bin into location until it locks i...
Page 21 - About the automatic ice maker.; How to Turn the Ice Maker On/Off; the refrigerator is plugged in.; Ice Bucket and Dispenser*; Ice Maker (Available on Non Dispense
21 About the automatic ice maker. GEAppliances.com A newly installed refrigerator may take 12 to 24 hours to begin making ice. Automatic Ice Maker*The ice maker will produce seven cubes per cycle approximately 100–130 cubes in a 24-hour period, depending on freezer compartment temperature, room temp...
Page 22 - Care and cleaning of the refrigerator.; Cleaning the Outside; The stainless steel panels, door handles and trim.; Cleaning the Inside; Behind the Refrigerator; Preparing for Vacation; Do not clean glass shelves or covers
22 Care and cleaning of the refrigerator. Cleaning the Outside The stainless steel panels, door handles and trim. The stainless steel doors and door handles (on some models) can be cleaned with a commercially available stainless steel cleaner. Cleaners with oxalic acid such as Bar Keepers Friend Sof...
Page 23 - Replacing the lights.
23 Replacing the lights. GEAppliances.com Refrigerator Lights (LEDs) Appearance may vary by model. There is LED lighting in fresh food compartment and on the bottom of the fresh food doors to light the freezer compartment.*An authorized technician will need to replace the LED light. If this assembly...
Page 24 - TOOLS YOU MAY NEED; Installation; GE and GE ProfileTM models; BEFORE YOU BEGIN; IMPORTANT; Observe all governing codes and; PREPARATION; Ȓμ
24 TOOLS YOU MAY NEED Installation Refrigerator Instructions GE and GE Profile™ models Questions? Call 800.GE.CARES (800.432.2737) or visit our Website at: GEAppliances.com In Canada, call 1.800.561.3344 or visit our Website at: www.GEAppliances.ca BEFORE YOU BEGIN Read these instructions completely...
Page 25 - Installation Instructions; MOVING THE REFRIGERATOR; DIMENSIONS
25 Installation Instructions • Using the chart below determine if the width of your passageway can accommodate the depth of the refrigerator. Ensure you have clearance to prevent damage to the refrigerator before safely moving it to the final location. • If passageways are large enough to accommodat...
Page 26 - REMOVE THE FREEZER DOOR HANDLE; INSTALLING THE REFRIGERATOR; REFRIGERATOR LOCATION; • Do not install the refrigerator in a location exposed to; CLEARANCES; NOTE: If the handle mounting fasteners need to be; REMOVING THE REFRIGERATOR DOORS
REMOVE THE FREEZER DOOR HANDLE Handle Design varies based on models, however Installation is same. Stainless steel and plastic handles: Loosen the set screws with the 1/8” Allen wrench and remove the handle. NOTE: If the handle mounting fasteners need to be tightened or removed, use a 1/4” Allen wre...
Page 27 - Single person lift could cause injury. Use assistance; REMOVE THE REFRIGERATOR DOORS
27 Installation Instructions REMOVE THE REFRIGERATOR DOORS (cont) Disconnect the water line from the back of the unit by pressing down on the dark grey collar while pulling up on the water line. Pull water line through case conduit from the top to free the line for door removal. The water line is mo...
Page 28 - REINSTALLING THE REFRIGERATOR DOORS
REINSTALLING THE REFRIGERATOR DOORS Reverse steps 1 through 4 to reinstall refrigerator doors, follow details below for critical alignments. A Reinstall center hinge first and torque the screws to 65 in-lbs. With the LH door at 90º to the front of the case, lower the refrigerator door onto the cente...
Page 29 - PREPARE FOR INSTALLATION; REPLACE FREEZER DOOR; Lifting Hazard; REMOVE FREEZER BASKET
Installation Instructions AB C 6 PREPARE FOR INSTALLATION Pull the freezer door open to full extension. Remove 3 attachment screws, located at the bottom on each side of the freezer door using 3/8” hex socket driver. CAUTION Lifting Hazard Freezer door is heavy Use both hands to secure the door befo...
Page 30 - RE-INSTALL FREEZER DRAWER; FREEZER: Place the ice bucket in the drawer and
RE-INSTALL FREEZER DRAWER Re-install freezer drawer by placing the drawer wheels onto the top of the track mounted to the side of the freezer walls. The wheels on the freezer drawer should be on top of the bottom basket sides. ON MODELS EQUIPPED WITH ICE MAKER IN THE FREEZER: Place the ice bucket in...
Page 31 - Instructions for adjusting freezer door gaps:
31 Installation Instructions Refer to 239D4144P001, Pub No. 31-45474-2 IMPORTANT! The 6 mounting screws (3 on each side) are NOT interchangeable with the center or top hinge screws. Drawer screws have flat washer heads, and other screws have lines/ribs on washer heads.After installation of the freez...
Page 32 - LEVEL THE FREEZER DOOR
Installation Instructions 32 LEVEL THE FREEZER DOOR Locate the height adjuster cam in the freezer door. Slightly loosen the three door attachment screws on both sides using a 3/8” hex socket driver. Locate and loosen the cam screw using the T-27 screw driver. 9 A B REMOVE PACKAGING A) Remove all tap...
Page 33 - LOCATING THE ANTI-TIP FLOOR; Anti-Tip Floor Bracket; Instructions; CWE, and ZWE Models Only
MEASURE CABINET OPENING AVAILABLE VS. REFRIGERATOR WIDTH Measure width of cabinet opening where refrigerator will be placed, W.Be sure to account for any countertop overhang, baseboard thickness and any clearance desired. Width, W, should not be less than 36”. The refrigerator will be placed approxi...
Page 34 - Figure 2 – Acceptable; ANTI-TIP BRACKET INSTALLATION; Figure 3 – Attachment to Wall and Floor
AT-2 LOCATING THE ANTI-TIP FLOOR BRACKET (cont.) Recommended Installation – Wood Recommended Installation – Concrete Minimum Acceptable #1 – Wall Plate Stud Minimum Acceptable #2 – Wood Floor Minimum Acceptable #3 – Concrete Floor Figure 2 – Acceptable Screw Placement Locations CONCRETE Wall and Flo...
Page 35 - CONNECTING THE REFRIGERATOR
35 Installation Instructions CONNECTING THE REFRIGERATOR TO THE HOUSE WATER LINE A cold water supply is required for automatic ice maker operation. If there is not a cold water supply, you will need to provide one. See Installing the Water Line section.NOTES:• Before making the connection to the ref...
Page 36 - TURN ON THE WATER SUPPLY; LEVEL THE REFRIGERATOR DOORS
Installation Instructions TURN ON THE WATER SUPPLY Turn the water on at the shutoff valve (house water supply) and check for any leaks. 12 PLUG IN THE REFRIGERATOR See the grounding information attached to the power cord. 13 LEVEL THE REFRIGERATOR The leveling legs have 2 purposes:1) Leveling legs a...
Page 37 - Refrigerator Assembly Instructions, suggested assembly.; To place bins into doors:
Installation Instructions Refrigerator Assembly Instructions, suggested assembly. G To place bins into doors: Match your bin with the letter shown. Position the bin hooks over the bin locator and push forward until inserted fully. Bin locator each side Bin hook rear each side Push bin down until loc...
Page 38 - INSTALLING THE WATER LINE
Installation Instructions 38 INSTALLING THE WATER LINE Recommended copper water supply kits are WX8X2, WX8X3 or WX8X4, depending on the amount of tubing you need. Approved plastic water supply lines are SmartConnect ™ Refrigerator Tubing (WX08X10006, WX08X10015 and WX08X10025).When connecting your r...
Page 39 - DQGIHUUXOHVVOHHYHV3WRFRQQHFWWKHFRSSHU; WHAT YOU WILL NEED
Installation Instructions NOTE: The only GE Appliances approved plastic tubing is that supplied in SmartConnect ™ Refrigerator Tubing kits. Do not use any other plastic water supply line because the line is under pressure at all times. Certain types of plastic will crack or rupture with age and caus...
Page 40 - CONNECT THE TUBING TO THE VALVE; NOTE: Commonwealth of Massachusetts; FASTEN THE SHUTOFF VALVE
Installation Instructions 40 Place the compression nut and ferrule (sleeve) for copper tubing onto the end of the tubing and connect it to the shutoff valve. Make sure the tubing is fully inserted into the valve. Tighten the compression nut securely.For plastic tubing from a SmartConnect ™ Refrigera...
Page 41 - Normal operating conditions.; Newer refrigerators sound different from older refrigerators.; CRACKS and SNAPS; Do you hear what I hear? These sounds are normal.; START UP COOLING
Normal operating conditions. GEAppliances.com Newer refrigerators sound different from older refrigerators. Modern refrigerators have more features and use newer technology. HUMMM... WHOOSH... The new high efficiency compressor may run faster and longer than your old refrigerator and you may hear ...
Page 42 - Before you call for service...; Problem
Troubleshooting Tips Save time and money! Review the charts on the following pages first and you may not need to call for service. Before you call for service… 42 Problem Possible Causes What to Do Water filter indicated as installed incorrectly or a leak is present on cap control panel. Water filte...
Page 45 - Truth or Myth; SERVICE
45 Truth or Myth? Answer Explanation The refrigerator water filter may require replacement prior to six months TRUE The water filter indicator will indicate the need to replace the water filter every six months or 170 gallons of water dispensed (select models only). Water quality varies from city to...
Page 47 - Refrigerator Warranty.; What GE Appliances Will Not Cover:; GE Appliances Will Replace; the data to GE Appliances at the time of service.
47 Refrigerator Warranty. Service trips to your home to teach you how to use the product. Improper installation, delivery or maintenance. Failure of the product if it is abused, misused, or used for other than the intended purpose or used commercially. Loss of food due to spoilage. Replace...
Page 48 - RPWFE Water Filter Cartridge Limited Warranty.; For Purchases Made In Iowa:; RPWFE
48 RPWFE Water Filter Cartridge Limited Warranty. Contact us at www.geapplianceparts.com,or call 800.GE.CARES. This warranty is extended to the original purchaser and any succeeding owner for products purchased for home use within the U.S.A. In Alaska, the warranty excludes the cost of shipping or s...


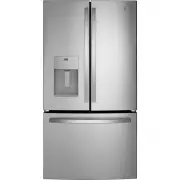
 GE GBE17HYRFS
User Manual
GE GBE17HYRFS
User Manual
 GE GBE21DYKFS
User Manual
GE GBE21DYKFS
User Manual
 GE GCE06GSHSB
User Manual
GE GCE06GSHSB
User Manual
 GE GDE03GGKBB
User Manual
GE GDE03GGKBB
User Manual
 GE GDE03GLKLB
User Manual
GE GDE03GLKLB
User Manual
 GE GDE21EGKWW
User Manual
GE GDE21EGKWW
User Manual
 GE GDE21EMKES
User Manual
GE GDE21EMKES
User Manual
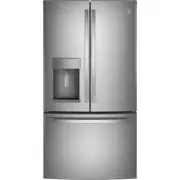
 GE GDE21EYKFS
User Manual
GE GDE21EYKFS
User Manual
 GE GDE25ESKSS
User Manual
GE GDE25ESKSS
User Manual
 GE GDE25EYKFS
User Manual
GE GDE25EYKFS
User Manual
 GE GFD28GELDS
User Manual
GE GFD28GELDS
User Manual
 GE GFD28GYNFS
User Manual
GE GFD28GYNFS
User Manual
 GE GFE24JYKFS
User Manual
GE GFE24JYKFS
User Manual
 GE GFE26JEMDS
User Manual
GE GFE26JEMDS
User Manual
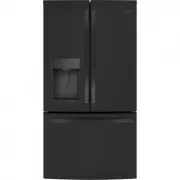
 GE GFE26JGMBB
User Manual
GE GFE26JGMBB
User Manual
 GE GFE26JGMWW
User Manual
GE GFE26JGMWW
User Manual
 GE GFE26JMMES
User Manual
GE GFE26JMMES
User Manual
 GE GFE26JYMFS
User Manual
GE GFE26JYMFS
User Manual
 GE GFE28GELDS
User Manual
GE GFE28GELDS
User Manual
 GE GFE28GYNFS
User Manual
GE GFE28GYNFS
User Manual