Fulgor Milano CHB 9012 X - Manuals
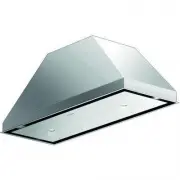
User Manual Fulgor Milano CHB 9012 X


Summary
DICHIARAZIONE DEL PRODUTTORE Con la presente il produttore dichiara che i prodotti da Voi acquistati rispondono, a secondo delle tipologie, ai requisiti fondamentali richiesti dalle Direttive Europee qui sotto riportate: - Direttiva Bassa Tensione 73/23/EEC - Direttiva di Compatibilità Elettromagnet...
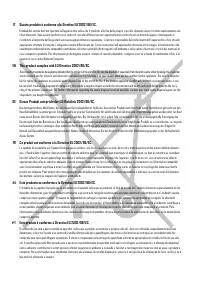
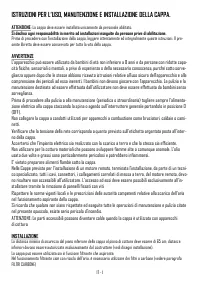
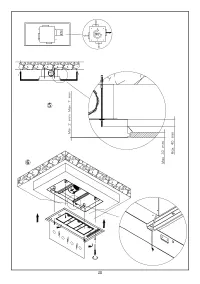
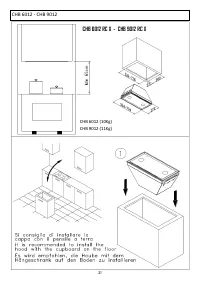
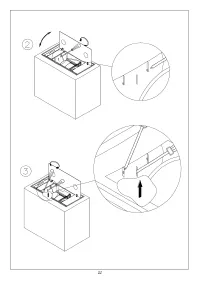
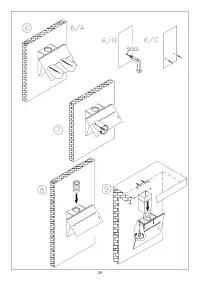
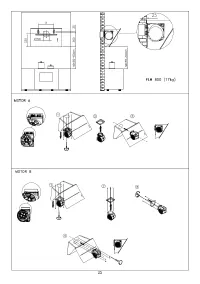
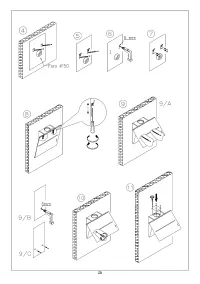
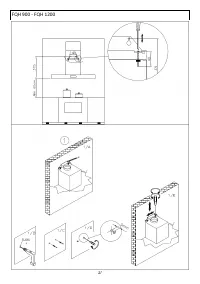
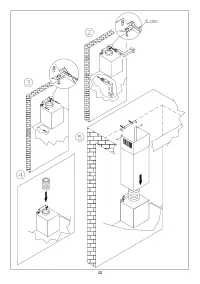
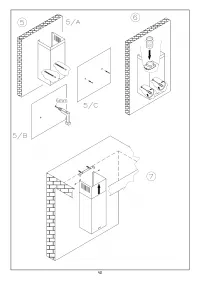
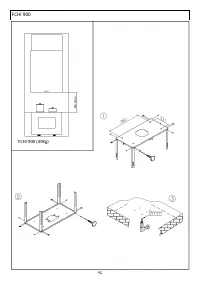
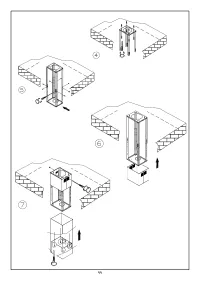
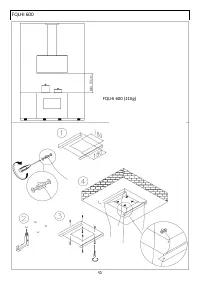
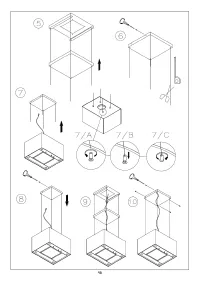
IT - 1 ISTRUZIONI PER L’USO, MANUTENZIONE E INSTALLAZIONE DELLA CAPPA. ATTENZIONE : La cappa deve essere installata unicamente da personale abilitato. Si declina ogni responsabilità in merito ad installazioni eseguite da persone prive di abilitazione. Prima di procedere con l'installazione della cap...
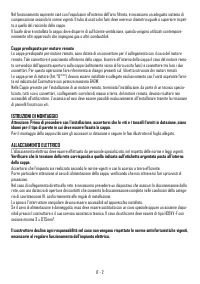
IT - 2 Nel funzionamento aspirante cioè con l'espulsione all'esterno dell'aria filtrata, è necessario un adeguato sistema di compensazione secondo le norme vigenti. Il tubo di uscita dei fumi deve avere un diametro uguale o superiore rispet-to a quello del raccordo della cappa. Il locale dove è inst...
Fulgor Milano Range Hoods Manuals
-
 Fulgor Milano CHB 6012 X
User Manual
Fulgor Milano CHB 6012 X
User Manual
-
 Fulgor Milano FBGHD 800 PT X
User Manual
Fulgor Milano FBGHD 800 PT X
User Manual
-
 Fulgor Milano FBGHD 850 TC X
User Manual
Fulgor Milano FBGHD 850 TC X
User Manual
-
 Fulgor Milano FBHD 900 PT X
User Manual
Fulgor Milano FBHD 900 PT X
User Manual
-
 Fulgor Milano FCH 600 X
User Manual
Fulgor Milano FCH 600 X
User Manual
-
 Fulgor Milano FCHI 900 X
User Manual
Fulgor Milano FCHI 900 X
User Manual
-
 Fulgor Milano FDDH 1120 TRC BK
User Manual
Fulgor Milano FDDH 1120 TRC BK
User Manual
-
 Fulgor Milano FDDH 1120 TRC WH
User Manual
Fulgor Milano FDDH 1120 TRC WH
User Manual
-
 Fulgor Milano FDDH 1120 TRC X
User Manual
Fulgor Milano FDDH 1120 TRC X
User Manual
-
 Fulgor Milano FDDH 900 TRC BK
User Manual
Fulgor Milano FDDH 900 TRC BK
User Manual
-
 Fulgor Milano FDDH 900 TRC WH
User Manual
Fulgor Milano FDDH 900 TRC WH
User Manual
-
 Fulgor Milano FDDH 900 TRC X
User Manual
Fulgor Milano FDDH 900 TRC X
User Manual
-
 Fulgor Milano FLH 800 TC
User Manual
Fulgor Milano FLH 800 TC
User Manual
-
 Fulgor Milano FLH 800 TC BK
User Manual
Fulgor Milano FLH 800 TC BK
User Manual
-
 Fulgor Milano FQH 1200 X
User Manual
Fulgor Milano FQH 1200 X
User Manual
-
 Fulgor Milano FQH 900 X
User Manual
Fulgor Milano FQH 900 X
User Manual
-
 Fulgor Milano FQHI 1200 X
User Manual
Fulgor Milano FQHI 1200 X
User Manual
-
 Fulgor Milano FQHI 900 X
User Manual
Fulgor Milano FQHI 900 X
User Manual
-
 Fulgor Milano LHDD 12010 RC
User Manual
Fulgor Milano LHDD 12010 RC
User Manual
-
 Fulgor Milano LHDD 9010 RC WH
User Manual
Fulgor Milano LHDD 9010 RC WH
User Manual