Page 3 - CONTENTS; SAVE THESE INSTRUCTIONS; Registration
1 CONTENTS Introduction 3 Safety and warnings 4 Installation instructions 5 Before you do your first wash 11 Getting started quickly 12 FabricSmart™ controls 14 FabricSmart™ safety features 15 Eco-Active™ wash 16 Sorting 17Loading 18Detergent 19Fabric softener 20 Wash cycles 21 Wash options 22 Custo...
Page 5 - INTRODUCTION; Welcome to FabricSmartTM
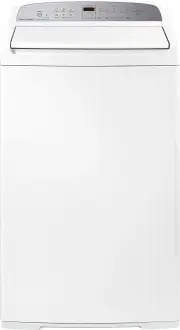
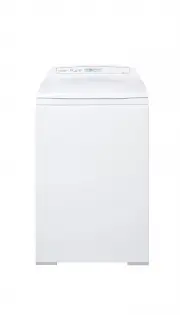
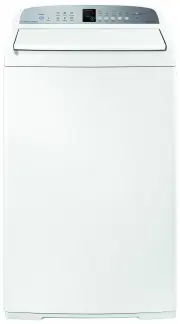
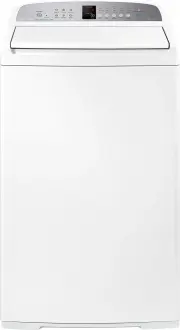
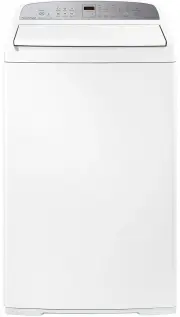
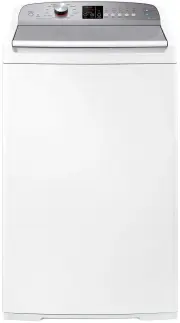
3 INTRODUCTION Welcome to FabricSmart™ Thank you for buying a Fisher & Paykel FabricSmart™ clothes washer. We are proud of this washer and trust it will serve you well for many years. At Fisher & Paykel we aim to provide innovative products that are simple to use, ergonomic and kind to the e...
Page 6 - SAFETY AND WARNINgS; IMPORTANT SAFETY INSTRUCTIONS
4 SAFETY AND WARNINgS ! WARNINg! Electric Shock Hazard If you are using an extension cord or a portable electrical outlet device (eg multi-socket outlet box), ensure that it is positioned so that it does not come into contact with water or moisture. Failure to do so may result in death or electrical...
Page 7 - INSTALLATION INSTRUCTIONS; FRONT VIEW
5 INSTALLATION INSTRUCTIONS Product and minimum clearance dimensions FRONT VIEW PROFILE VIEW A B D F C G E A H WA1068P PRODUCT DIMENSIONS mm A Overall height of product* (to highest point on console) 1060 – 1090 B Overall width of product 685 C Overall depth of product 700 D Height of product to top...
Page 8 - Removing the packaging
6 INSTALLATION INSTRUCTIONS Unpacking To ensure the best performance from your new washer please follow the instructions below. Removing the packaging 1 Remove the outer packaging. 2 Tilt the machine backwards and walk it off the base packer one foot at a time (ensure the lid is still taped down). 3...
Page 9 - Electrical; Adjustable between 35°C – 55°C
7 INSTALLATION INSTRUCTIONS Electrical This appliance must be supplied with a 220 – 240 V, 50 Hz, sinusoidal, 10 A electrical supply. Draining ● ● Regularly check that your standpipe or tub is free from lint or other obstructions, which may affect how your machine works or may cause flooding. ● ● In...
Page 10 - Inlet hoses; Connect the straight ends of the inlet hoses to the taps; Failure to do so may result in a flood and damage to property.
8 INSTALLATION INSTRUCTIONS Inlet hoses ImpORTANT! ● ● New hose sets provided with the washer shall be used to connect the washer to the water mains. ● ● Old hose sets should not be re-used. 1 Connect the straight ends of the inlet hoses to the taps (there are washers fitted in both ends). Connect t...
Page 11 - Levelling instructions
9 INSTALLATION INSTRUCTIONS Levelling instructions It is IMPORTANT to level the machine to ensure good spin performance and effective detergent and fabric softener dispensing. A spirit level is provided with your machine. Use this to level your machine, always placing it on a clean, flat surface. Th...
Page 12 - Completing your installation; Touch to activate your washer.; ACCESSORIES AND SPARE PARTS; Hose Inlet Large Bore
10 INSTALLATION INSTRUCTIONS Completing your installation ● ● Turn on the water and check all hose connections for leaks. Make sure there are no kinks in the hoses. Check the hose connections for leaks again after 24 hours. ● ● Uncoil power cord, remove and discard the plastic pin cover, and plug in...
Page 13 - BEFORE YOU DO YOUR FIRST WASH; FabricSmartTM capacity
11 BEFORE YOU DO YOUR FIRST WASH You owe it to yourself and your washer to have your machine installed correctly. Before you start, it is a good idea to go through the following checklist: 1 Has the base space packer been removed? Refer to page 6. 2 Is the drain hose threaded through the ‘U bend‘ (w...
Page 14 - gETTINg STARTED qUICKLY; Fabric softener; Sort lint givers and lint collectors (refer to the ‘Sorting’ section).; Detergent
12 gETTINg STARTED qUICKLY Fabric softener If you wish to use fabric softener, place it in the fabric softener dispenser cup on the top of the agitator (refer to the ‘Fabric Softener’ section). ImpORTANT! Fabric softener must not be used if you have selected the ‘quick’ cycle or the ‘Eco Rinse’ opti...
Page 15 - If you wish to stop your FabricSmartTM washer; Press; your expectations of wash performance may not be met.; The buttons require only a gentle touch to activate.
13 gETTINg STARTED qUICKLY If you wish to stop your FabricSmart™ washer ● ● Press . During a spray rinse or spin, there will be a slight delay while the bowl slows to a stop and the lid is unlocked. ImpORTANT! Failure to follow the advice in this guide may result in damage to your garments, and your...
Page 16 - FABRICSMARTTM CONTROLS; To turn ‘Keylock’ mode ON or OFF:
14 FABRICSMART™ CONTROLS SmartTouch™ Control Dial The SmartTouch™ Control Dial provides easy and efficient cycle selection. As you rotate the dial, the cycle selected will be illuminated, along with the default settings for that cycle on the right of the control panel. SmartTouch™ buttons The smooth...
Page 17 - FABRICSMARTTM SAFETY FEATURES; The ‘Lid locked’ light (above the; To unlock the lid at any time during the cycle press; A warning message
15 FABRICSMART™ SAFETY FEATURES Lid lock The lid of your FabricSmart™ washer is locked for some parts of the wash cycle, ensuring safety for you and your family while it is operating. The ‘Lid locked’ light (above the button) is illuminated when the lid lock is activated, letting you know at a glanc...
Page 19 - SORTINg; Sorting; LINT gIVERS
17 SORTINg Sorting To get the best wash results it pays to sort your clothes before washing. Care labels The care label will tell you about the fabric of the garment and how it should be washed. Machine Washable Warm 40°C maximum Rinse Well Normal Spin Do not bleach Tumble drying possible, maximum 6...
Page 20 - LOADINg; Loading; Loose items can damage both your washer and your clothes.; makes them brittle and they may disintegrate during washing.
18 LOADINg Loading Check pockets Loose items can damage both your washer and your clothes. Close zippers, hooks and eyes This is to make sure that these items do not snag on other clothes. Mend any torn garments or loose buttons Tears or holes may become larger during washing. Remove any loose bra w...
Page 21 - DETERgENT; Choosing the right detergent; Liquid or powdered detergents; seriously damage your machine.
19 DETERgENT Choosing the right detergent ● ● We recommend using domestic laundry detergent. Use powder or liquid detergent for ‘Top Loader’ machines. ● ● When washing wool items, remember to use a detergent specifically recommended for woollens. ● ● Soap flakes or granulated soap powders should not...
Page 22 - FABRIC SOFTENER; How the fabric softener is dispensed
20 FABRIC SOFTENER How the fabric softener is dispensed The fabric softener goes into the dispenser cup on the top of the agitator. During the rinse the machine spins to release the fabric softener, delivering it down the agitator stem as the machine fills for the final deep rinse. If fabric softene...
Page 23 - WASH CYCLES
21 WASH CYCLES CYCLE DESIgNED FOR WASH TIME * WASH ACTION WASH TEMP RINSE MAx SPIN SPEED SPIN TIME ** Regular *** For normally soiled everyday cotton loads, eg t-shirts, shorts, shirts. 11 – 15 minutes Regular Warm/Cold Spray/ Deep rinse 1100 rpm 6 minutes Heavy Recommended cycle for heavily soiled ...
Page 24 - WASH OPTIONS; Water Level; Auto water level
22 WASH OPTIONS Water Level Auto water level Your washer has the ability to automatically select the most efficient water level for the load. 1 Place your clothes in the machine. 2 Select the wash cycle (and select ‘Auto’ water level if not automatically selected). 3 Touch . The machine will automat...
Page 25 - Wash Temp; Use the ‘No Spin’ option to:
23 WASH OPTIONS Wash Temp FabricSmart™ offers 5 wash temperatures, and an additional setting, ‘Controlled Cold’. The wash temperature selected is used in the detergent activating part of the wash except for the ‘Sports’ cycle (refer to the ‘Eco-Active™ wash’ section). If Eco-Active™ is ‘On’ the temp...
Page 26 - Options; Stain Treatment
24 WASH OPTIONS Options Stain Treatment If you have stains in your wash load you can add a number of short soaks to the wash to help remove these by selecting the ‘Stain Treatment’ option. Soak Use the ‘Soak’ option to soak clothes during the wash phase. Ensure items are colourfast before using ‘Soa...
Page 27 - Delay Start; Clothes care safeguards
25 WASH OPTIONS Delay Start The ‘Delay Start’ option can delay the start of the wash cycle by 5 minutes up to 18 hours. This can be useful to time your washing to finish when you arrive home from work, or to start once you have finished in the shower. Simply touch the ‘More’ button to scroll through...
Page 28 - Washing bulky items; Check the care label.
26 WASH OPTIONS Washing bulky items Forcing large items into the machine may result in them being damaged during washing. Make sure there is enough room in the machine for items to move when being washed. Some items float up during the wash (eg duvets/doonas, water-proof and water-resistant items an...
Page 29 - CUSTOMISINg WASH CYCLES; To customise a cycle; Touch the
27 CUSTOMISINg WASH CYCLES To customise a cycle You can program your FabricSmart™ washer to remember the wash options you prefer for each wash cycle. For instance, you may want to set the ‘Regular’ cycle to default to a ‘Warm’ wash or set ‘Heavy’ cycle to include a ‘Soak’. 1 Touch . 2 Turn the dial ...
Page 30 - CHANgINg PRE-SET OPTIONS; Option Adjustment mode
28 CHANgINg PRE-SET OPTIONS Option Adjustment mode After using your washer a number of times you may want to fine tune some of the options to suit your wash needs. There are a number of pre-set options, which can be altered: 1 The wash temperatures, including changing the ‘Cold’ wash temperature to ...
Page 31 - Adjusting your options
29 CHANgINg PRE-SET OPTIONS Adjusting your options 1 Enter Option Adjustment mode (refer to the ‘Changing pre-set options’ section). 2 The diagram below shows how the wash cycle icons relate to the options you can change. It also shows what will be displayed when you first enter Option Adjustment mo...
Page 32 - Wash temperatures; Controlled Cold; Select the ‘Heavy’ cycle.; water is needed to help maintain the cleanliness of your machine.
30 CHANgINg PRE-SET OPTIONS Wash temperatures All wash temperatures can be individually adjusted if you think they are too hot or too cold.Note: the hot temperature will be the same as the hot water supply temperature. 1 Enter Option Adjustment mode (refer to page 28). 2 Select the ‘Heavy’ cycle. 3 ...
Page 33 - Out of balance recovery routine; Automatic recovery; End of cycle beeps; Select the ‘Wool’ cycle.
31 CHANgINg PRE-SET OPTIONS Out of balance recovery routine When your washer is spinning it can sense if the wash load is out of balance. If an out of balance load is detected, the machine will stop and re-try spinning one more time. If it still senses an unbalanced load there are two options the ma...
Page 34 - Factory reset
32 CHANgINg PRE-SET OPTIONS Factory reset You can reset your washer to the settings it left the factory with: 1 Enter Option Adjustment mode (refer to page 28). 2 Select the ‘Easy Iron’ cycle. 3 The display will show . Touch and hold for 3 seconds to reset your washer to its factory settings. Note: ...
Page 35 - CARINg FOR YOUR WASHER; When you have finished using your washer; Turn off the power at the wall.; Cold water washing; Cleaning steps
33 CARINg FOR YOUR WASHER When you have finished using your washer ● ● Turn off the taps to prevent the chance of flooding should a hose burst. ● ● Turn off the power at the wall. Cold water washing If you always wash with cold water, we recommend that a ‘Warm’ or ‘Hot’ wash be used at regular inter...
Page 36 - Products that might damage your washer; Water saving tips
34 CARINg FOR YOUR WASHER Products that might damage your washer ● ● Concentrated bleaches, nappy sanitisers and hydrocarbon solvents (eg petrol and paint thinners) can cause damage to the paintwork and components of your washer. Be careful when washing garments stained with solvents as they are fla...
Page 37 - BEFORE YOU CALL FOR SERVICE; Please read the following pages before you call for service.; warning on the screen:
35 BEFORE YOU CALL FOR SERVICE Please read the following pages before you call for service. Your washer is capable of diagnosing its own problems. If your washer gives a musical series of beeps every 5 seconds it is telling you that it has a problem which you can solve using the checklist below. You...
Page 38 - PROBLEM; The lid can’t
36 BEFORE YOU CALL FOR SERVICE PROBLEM DISPLAYED AS WHAT TO DO The lid can’t lock or the lid is open. Make sure the lid is closed. Press (refer to page 15). If the symptom persists call your Fisher & Paykel dealer or Authorised Repairer. The machine is overloaded. The machine is overloaded and c...
Page 39 - FAULT CODES; panel and a number appears on the display, a fault has occurred.
37 FAULT CODES When a continuous series of beeps is sounded, all the lights turn off on the control panel and a number appears on the display, a fault has occurred. The washer will automatically enter this mode if a fault occurs. The fault code will be displayed as followed by a number on the digita...
Page 40 - TROUBLESHOOTINg; Solving operating problems
38 TROUBLESHOOTINg The following is a list of problems you may encounter when using this appliance and some suggestions that may help to correct the problem. If you still have problems, please contact your Fisher & Paykel Authorised Repairer. Solving operating problems PROBLEM POSSIBLE CAUSES WH...
Page 41 - Machine may not be level.
39 TROUBLESHOOTINg Solving operating problems PROBLEM POSSIBLE CAUSES WHAT TO DO Machine is continually going out of balance. Machine may not be level. Check the machine is level and does not rock in any direction. Refer to page 9. Too much water for the load Ensure an appropriate water level is sel...
Page 42 - Solving wash problems; Overloading of the washer.
40 TROUBLESHOOTINg Solving wash problems PROBLEM POSSIBLE CAUSES WHAT TO DO Creasing. Overloading of the washer. Try reducing load size. Inappropriate cycle selection. Choose ‘Easy Iron’ or ‘Delicate’ cycle as these cycle have been designed to minimise creasing. Spin speed too high. Try selecting a ...
Page 43 - Black or grey
41 TROUBLESHOOTINg Solving wash problems PROBLEM POSSIBLE CAUSES WHAT TO DO Linting. Some items in load more likely to release or pick up lint. Wash lint givers (eg towels, flannelette sheets) separately from lint collectors (eg synthetic fabrics). Overloading the washer. Try reducing your load size...
Page 44 - MANUFACTURER’S WARRANTY; These Manufacturer’s Warranties DO NOT cover
42 MANUFACTURER’S WARRANTY You automatically receive a 2 year Manufacturer’s Warranty with the purchase of this clothes washer covering parts and labour for servicing within the country of purchase. Fisher & Paykel undertakes to: Repair or, at its option, replace without cost to the owner either...
Page 45 - Fisher & Paykel Authorised Repairer or the selling dealer.; For Australian customers; Please keep this user guide in a safe place.
43 MANUFACTURER’S WARRANTY F Repairs when the appliance has been dismantled, repaired or serviced by other than a Fisher & Paykel Authorised Repairer or the selling dealer. G Pick-up and delivery. H Transportation or travelling costs involved in the repair when the product is installed outside t...
Page 46 - CUSTOMER CARE; Your product is correctly installed.; In New Zealand if you need assistance...*; If you need service...*; In Australia if you need assistance...*; Fisher & Paykel Appliances Ltd, PO Box 798, Cleveland QLD 4163
44 CUSTOMER CARE Before you call for service or assistance... Check the things you can do yourself. Refer to your user guide and check: 1 Your product is correctly installed. 2 You are familiar with its normal operation. 3 You have read the ‘Before you call for service’, ‘Fault codes’ and ‘Troublesh...
Page 47 - Complete and keep for safe reference:
45 CUSTOMER CARE Registration Register your product with us so we can provide you with the best service possible. To register your product visit our website: www.fisherpaykel.com Complete and keep for safe reference: Model Serial No. Purchase Date Purchaser Dealer Suburb Town Country
Page 48 - NZ AU
424983 A 09.14 www.fisherpaykel.com Copyright © Fisher & Paykel 2014. All rights reserved. The product specifications in this booklet apply to the specific products and models described at the date of issue. Under our policy of continuous product improvement, these specifications may change at a...
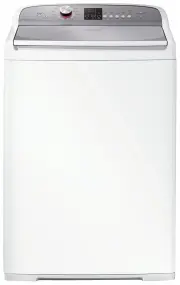


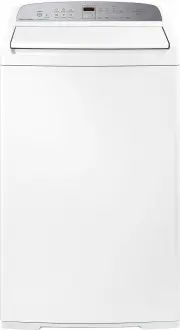
 Fisher & Paykel MW513
User Manual
Fisher & Paykel MW513
User Manual
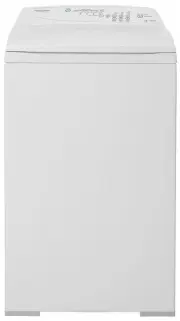
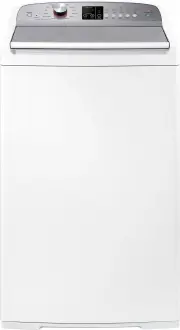
 Fisher & Paykel MW60
User Manual
Fisher & Paykel MW60
User Manual
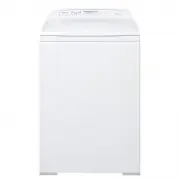
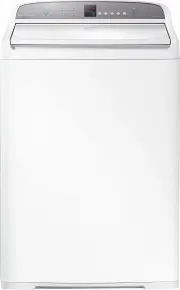 Fisher & Paykel WA1068G1
User Manual
Fisher & Paykel WA1068G1
User Manual
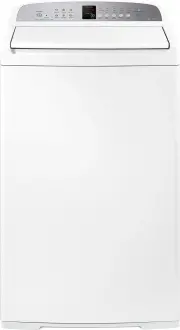
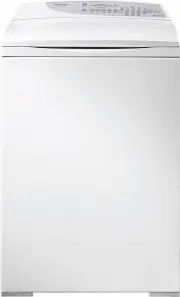
 Fisher & Paykel WA1068G2
User Manual
Fisher & Paykel WA1068G2
User Manual
 Fisher & Paykel WA7060E1
User Manual
Fisher & Paykel WA7060E1
User Manual
 Fisher & Paykel WA7060G1
User Manual
Fisher & Paykel WA7060G1
User Manual
 Fisher & Paykel WA7060G2
User Manual
Fisher & Paykel WA7060G2
User Manual
 Fisher & Paykel WA70T60FW1
User Manual
Fisher & Paykel WA70T60FW1
User Manual
 Fisher & Paykel WA70T60GW1
User Manual
Fisher & Paykel WA70T60GW1
User Manual
 Fisher & Paykel WA7560E1
User Manual
Fisher & Paykel WA7560E1
User Manual
 Fisher & Paykel WA8060E1
User Manual
Fisher & Paykel WA8060E1
User Manual
 Fisher & Paykel WA8060G1
User Manual
Fisher & Paykel WA8060G1
User Manual
 Fisher & Paykel WA8060P1
User Manual
Fisher & Paykel WA8060P1
User Manual
 Fisher & Paykel WA80T65FW1
User Manual
Fisher & Paykel WA80T65FW1
User Manual
 Fisher & Paykel WA80T65GW1
User Manual
Fisher & Paykel WA80T65GW1
User Manual
 Fisher & Paykel WA8560E1
User Manual
Fisher & Paykel WA8560E1
User Manual
 Fisher & Paykel WA8560G1
User Manual
Fisher & Paykel WA8560G1
User Manual
 Fisher & Paykel WA8560P1
User Manual
Fisher & Paykel WA8560P1
User Manual
 Fisher & Paykel WD7560P1
User Manual
Fisher & Paykel WD7560P1
User Manual
 Fisher & Paykel WD8560F1
User Manual
Fisher & Paykel WD8560F1
User Manual