Page 3 - CONTENTS; SAVE THESE INSTRUCTIONS
1 CONTENTS Introduction 2Safety and warnings 3 Installation instructions 6 Moving and storing your appliance 15 About your refrigerator – Ice & Water 16 About your refrigerator – Non Ice & Water 17 Operating instructions – Ice & Water control panel 18 Operating instructions – Non Ice &am...
Page 4 - INTRODUCTION
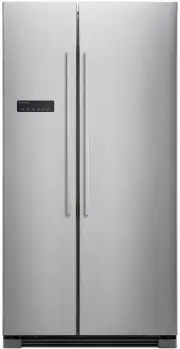
2 Thank you for buying a Fisher & Paykel side by side refrigerator. This refrigerator combines size and storage space with the latest features and functions. Many hours have been spent researching how you, our customer, use your refrigerator and what we can do to make life easier for you. As you...
Page 5 - SAfETy AND wARNINgS; IMPORTANT SAfETy INSTRUCTIONS
3 SAfETy AND wARNINgS ! wARNINg! Electric Shock Hazard Read and follow the SAfETy AND wARNINgS outlined in this user guide before operating this appliance. failure to do so can result in death, electric shock, fire or injury to persons. R600a This refrigerator contains flammable refrigerant Isobutan...
Page 6 - Electrical
4 SAfETy AND wARNINgS IMPORTANT SAfETy INSTRUCTIONS Electrical ● ● This appliance must be installed in accordance with the installation instructions before use. ● ● Never unplug your refrigerator by pulling on the power cord. ● ● Always grip the plug firmly and pull straight out from the outlet. ● ●...
Page 7 - Power failure – food safety; period than recommended.
5 IMPORTANT SAfETy INSTRUCTIONS Power failure – food safety ● ● Do not refreeze frozen foods that have thawed completely. The food may be dangerous to eat. follow the recommendations below if you discover food in your freezer has thawed: – Ice crystals still visible – food may be refrozen but should...
Page 8 - INSTALLATION INSTRUCTIONS; Power; The appliance must be installed so the plug is accessible.; Location
6 INSTALLATION INSTRUCTIONS Please follow the installation steps below to ensure your appliance operates correctly. Power ● ● The appliance must be installed so the plug is accessible. ● ● To ensure that the appliance is not accidentally switched off, connect your refrigerator to its own power point...
Page 9 - Product and cabinetry dimensions; Flush with refrigerator chassis – full door rotation; MINIMUM CLEARANCES
7 INSTALLATION INSTRUCTIONS Product and cabinetry dimensions PRODUCT DIMENSIONS mm A Overall height of product (to top of hinge) 1795 B Overall width of product 910 C Overall depth of product (excludes handle, includes rear cover) 700 CAbINETRy DIMENSIONS D Inside height of cavity 1845 Flush with re...
Page 10 - Positioning your appliance; Choosing the right location
8 INSTALLATION INSTRUCTIONS Positioning your appliance Choosing the right location This appliance should be installed in a room that is dry and well ventilated. To provide adequate ventilation, make sure the refrigerator is at least 20 mm clear on all sides from kitchen cabinetry, and 30 mm from the...
Page 11 - Removing and installing the doors; First step to removing fridge and freezer door; The freezer door
9 INSTALLATION INSTRUCTIONS Removing and installing the doors ImpORTANT! ● ● In the event that you need to remove the refrigerator doors, please follow the door removal and installation instructions below. ● ● It is suggested for your safety to have two or more people to assist you in completing the...
Page 12 - The fridge door; Refitting the doors
10 INSTALLATION INSTRUCTIONS The fridge door 1 Undo the hinge cover screw and remove the cover (Fig. 5), the clips holding the cover must be released first. Unclip the front section of the hinge cover, then push the cover towards the centre of the appliance and pull upwards to release. 2 Undo screws...
Page 13 - Levelling the refrigerator and
11 INSTALLATION INSTRUCTIONS Levelling the refrigerator and adjusting the doors Make sure that the appliance is on solid level flooring. If the refrigerator is placed on a plinth, the plinth must be flat and constructed from strong, fire resistant materials. The refrigerator may require some alignme...
Page 17 - MOVINg AND STORINg yOUR APPLIANCE; Moving your appliance; Turn the ice maker off on the control panel.
15 MOVINg AND STORINg yOUR APPLIANCE If your refrigerator is turned off for any reason, wait 10 minutes before turning it back on. This will allow the refrigeration system pressures to equalise before restarting. Moving your appliance ● ● Turn off the appliance and unplug from the power point. Remov...
Page 18 - AbOUT yOUR REfRIgERATOR – ICE & wATER
AbOUT yOUR REfRIgERATOR – ICE & wATER 1 Ice maker/ice box 2 Freezer main shelves 3 Ice & water dispenser 4 Freezer light 5 Freezer drawers 6 Freezer door shelves 7 Fridge light 8 Fridge door shelves 9 Fridge main shelves !0 Vegetable drawers !1 Fridge drawer 1 2 3 4 5 6 7 8 9 !0 !1 Internal ...
Page 19 - AbOUT yOUR REfRIgERATOR – NON ICE & wATER
17 AbOUT yOUR REfRIgERATOR – NON ICE & wATER 1 Freezer light 2 Freezer door shelves 3 Freezer main shelves 4 Ice trays 5 Ice box 6 Freezer drawers 7 Fridge light 8 Fridge door shelves 9 Fridge main shelves !0 Vegetable drawers !1 Fridge drawer 1 2 3 4 5 6 7 8 9 !0 !1 Internal view RX628DX and RX...
Page 20 - OPERATINg INSTRUCTIONS – ICE & wATER CONTROL PANEL; To lock
18 OPERATINg INSTRUCTIONS – ICE & wATER CONTROL PANEL Ice & water control panel 1 3 5 2 4 6 7 7 7 8 9 !0 !1 !2 !3 1 Water and ice dispenser button 2 Ice maker on/off button 3 Freezer temperature button 4 Fridge temperature button 5 Function select button 6 Function set button 7 Dispenser sta...
Page 21 - To turn on
19 OPERATINg INSTRUCTIONS – ICE & wATER CONTROL PANEL Holiday function ImpORTANT! before selecting the holiday function remove all perishable food and drink from the fridge compartment as perishable items may become unsafe to consume. This feature allows you to leave the fridge section unused wh...
Page 22 - to indicate that the adjustment cannot be made at this time.
20 OPERATINg INSTRUCTIONS – ICE & wATER CONTROL PANEL ImpORTANT! you cannot adjust the temperature settings when in fast freeze or when Lock has been activated. If you try to adjust the settings under these conditions, the special function icon beside the freezer temperature display will blink, ...
Page 23 - Adjusting the fridge temperature.
21 OPERATINg INSTRUCTIONS – ICE & wATER CONTROL PANEL Adjusting the fridge temperature. 1 Press . The fridge temperature display will start blinking, indicating that the fridge is in the temperature setting mode. 2 Press to scroll though the fridge temperature range from 9°C to 1°C. When the des...
Page 24 - OPERATINg INSTRUCTIONS – NON ICE & wATER CONTROL PANEL; Non Ice & water control panel
22 OPERATINg INSTRUCTIONS – NON ICE & wATER CONTROL PANEL Non Ice & water control panel 1 Lock button 2 Fast Freeze button 3 Freezer temperature button 4 Fridge temperature button 5 Max Cool button 6 Holiday button Lock This feature will lock the temperature and function settings, preventing...
Page 26 - fast freeze; Adjusting the fridge temperature
24 OPERATINg INSTRUCTIONS – NON ICE & wATER CONTROL PANEL fast freeze This function is designed to freeze food quickly to ensure freshness, texture and taste are retained during the freezing process. The Fast Freeze function will automatically deactivate after a set time duration. Use this featu...
Page 27 - USINg yOUR wATER DISPENSER / ICE MAKER – ICE & wATER; Please discard the first few batches of ice after start up.; ImpORTANT
25 USINg yOUR wATER DISPENSER / ICE MAKER – ICE & wATER first use of the ice maker/water dispenser ● ● Check your refrigerator is switched on and has been cooling for at least 2 hours before use (refer to page 21 – The temperature of your refrigerator and freezer). ● ● Check that the water isola...
Page 29 - SPECIAL fEATURES; fruit and vegetable bins
27 SPECIAL fEATURES fruit and vegetable bins The fruit and vegetable bin provides a humid environment for your produce ensuring moisture and nutrients are retained, and your fruit and vegetables are kept fresher for longer. To remove the bin, pull it out until it stops, then lift and continue to sli...
Page 30 - Exterior; Stainless exterior doors; CLEANINg CARE – EXTERIOR
28 Exterior Stainless exterior doors ● ● It is important when cleaning the exterior door surface of your refrigerator, to only use liquid dishwashing detergent dissolved in warm water and a soft cloth. ● ● Dry the door with a clean, lint free cloth. ● ● The use of any abrasive or stainless steel cle...
Page 31 - CLEANINg CARE – INTERIOR; Interior; Glass shelves
29 CLEANINg CARE – INTERIOR Interior ● ● It is important to keep the interior of the refrigerator and freezer clean to help prevent food from becoming contaminated during storage. ● ● The amount and types of food stored determines how often cleaning should be carried out (ideally once every 1 to 2 w...
Page 32 - STORINg fOOD IN yOUR REfRIgERATOR; fresh food care; Select foods that are very fresh and of high quality.; Dairy foods and eggs
30 STORINg fOOD IN yOUR REfRIgERATOR Your refrigerator helps to extend the storage times of fresh perishable foods. The cold temperature slows down the major causes of food spoilage – namely, the growth of bacteria, moulds and yeasts, and any chemical and physical reactions. fresh food care The qual...
Page 33 - Red meat
31 STORINg fOOD IN yOUR REfRIgERATOR Red meat ● ● Place fresh red meat on a plate and loosely cover with waxed paper, plastic wrap or foil. ● ● Store cooked and raw meat on separate plates. This will prevent any juices lost from the raw meat contaminating the cooked product. ● ● Delicatessen meats s...
Page 34 - STORINg fOOD IN yOUR fREEZER; frozen food care; Choose only high quality foods that freeze well.; Recommended freezer storage times; These times should not be exceeded.; MONTHS
32 STORINg fOOD IN yOUR fREEZER We recommend the use of temperatures -18°C or colder to store food. This means that the food can be kept for longer periods than when refrigeration temperatures are used. This is because the growth of bacteria, moulds and yeasts are stopped, and chemical and physical ...
Page 35 - Meat, poultry and game
33 STORINg fOOD IN yOUR fREEZER Meat, poultry and game ● ● Do not try to freeze more than 1 kg meat per 25 L of freezer storage volume at any one time. Meat must be frozen quickly in order to maintain its texture. ● ● Do not stuff poultry before freezing. ● ● Red meat can be cooked from frozen, or f...
Page 36 - TROUbLESHOOTINg; All models
34 TROUbLESHOOTINg If there is a problem with your appliance, please check the following points before contacting your local Fisher & Paykel Authorised Repairer or the Customer Care Centre. Product parts and accessories can be purchased through Fisher & Paykel Customer Care or online at www....
Page 37 - Minimise door openings.
35 TROUbLESHOOTINg All models PRObLEM POSSIbLE CAUSES wHAT TO DO Water in the vegetable bins. Condensation is formed by the water produced by fruit and vegetables. A small amount of condensation is beneficial for fruit and vegetable storage.Wipe out water with a cloth. Exterior of cabinet is warm. T...
Page 38 - Ice & water models only; Automatic ice
36 TROUbLESHOOTINg Ice & water models only PRObLEM POSSIbLE CAUSES wHAT TO DO Automatic ice maker does not work. Ice maker has not been turned on. Switch on ice maker (refer to page 25). Water supply turned off or not connected. Connect water supply. Freezer compartment not working. Contact Cust...
Page 40 - MANUfACTURER’S wARRANTy; This warranty DOES NOT cover
38 MANUfACTURER’S wARRANTy You will receive a 2 year Manufacturer’s Warranty with the purchase of this refrigerator covering parts and labour for servicing within the countries New Zealand, Australia, Singapore and The republic of Ireland and Northern Ireland. All other countries are excluded. fishe...
Page 41 - for Australian Customers; Please keep this user guide in a safe place.
39 MANUfACTURER’S wARRANTy Service under this Manufacturer’s Warranty must be provided by a Fisher & Paykel Authorised Repairer (refer to the ‘Customer care’ section at the back of this book). Such service shall be provided during normal business hours. This warranty certificate should be shown ...
Page 42 - CUSTOMER CARE; Your product is correctly installed.; In New Zealand if you need assistance...*; If you need service...*; In Australia if you need assistance...*; Fisher & Paykel Appliances Ltd, PO Box 798, Cleveland QLD 4163
40 CUSTOMER CARE before you call for service or assistance... Check the things you can do yourself. Refer to the installation instructions and your user guide and check that: 1 Your product is correctly installed. 2 You are familiar with its normal operation. 3 You have read the ‘Troubleshooting’ se...
Page 43 - Complete and keep for safe reference:
41 CUSTOMER CARE Complete and keep for safe reference: Model Serial No. Purchase Date Purchaser Dealer Suburb Town Country
Page 44 - NZ AU
839705 B 08.14 www.fisherpaykel.com Copyright © Fisher & Paykel 2014. All rights reserved. The product specifications in this booklet apply to the specific products and models described at the date of issue. Under our policy of continuous product improvement, these specifications may change at a...