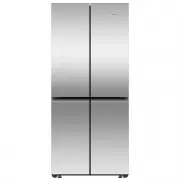
Fisher & Paykel RS3084WLUK1 - Manuals
Fisher & Paykel RS3084WLUK1 Refrigerator – User Manual in PDF format online.
Manuals:
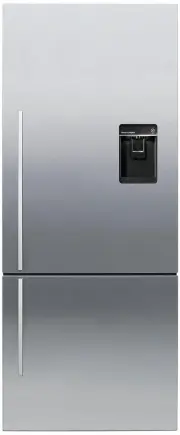
User Manual Fisher & Paykel RS3084WLUK1


Summary
3 CONTENTS Safety and warnings 4 Integrated refrigerator-Freezer 9 Before you begin 10 Control panel 11 Food modes 12 Storage features 13 Special features 14 Wifi connection 15 Care and cleaning 21 Food care 28 User warnings and sounds 29 Troubleshooting 30Service & warranty 34 Registration To r...
4 SAFETY AND WARNINGS ! WARNING! Electric Shock Hazard Failure to do so can result in death, electric shock, fire or injury to persons. • Read and follow the safety and warnings outlined in this user guide before operating this appliance. ! WARNING! This appliance contains flammable refrigerant is...
5 SAFETY AND WARNINGS READ AND SAVE THIS GUIDE WARNING! Read entire manual. Failure to follow all guides and rules could cause personal injury or property damage. When using this appliance, always exercise basic safety precautions including the following: General Use z This product has been designed...
Fisher & Paykel Refrigerators Manuals
-
 Fisher & Paykel E372BRE4
User Manual
Fisher & Paykel E372BRE4
User Manual
-
 Fisher & Paykel E442BRXFDU5
User Manual
Fisher & Paykel E442BRXFDU5
User Manual
-
 Fisher & Paykel E450LXFD1
User Manual
Fisher & Paykel E450LXFD1
User Manual
-
 Fisher & Paykel RB60V18
User Manual
Fisher & Paykel RB60V18
User Manual
-
Fisher & Paykel RB60V18
Manual
-
 Fisher & Paykel RF170ADJX4
User Manual
Fisher & Paykel RF170ADJX4
User Manual
-
Fisher & Paykel RF170ADUSX4N
User Manual
-
Fisher & Paykel RF170ADX4N
User Manual
-
 Fisher & Paykel RF172GDUX1
User Manual
Fisher & Paykel RF172GDUX1
User Manual
-
Fisher & Paykel RF201ADJSX5
User Manual
-
Fisher & Paykel RF201ADX5N
User Manual
-
 Fisher & Paykel RF203QDUVX1
User Manual
Fisher & Paykel RF203QDUVX1
User Manual
-
 Fisher & Paykel RF442BRPW6
User Manual
Fisher & Paykel RF442BRPW6
User Manual
-
 Fisher & Paykel RF442BRPX6
User Manual
Fisher & Paykel RF442BRPX6
User Manual
-
 Fisher & Paykel RF500QNUB1
User Manual
Fisher & Paykel RF500QNUB1
User Manual
-
 Fisher & Paykel RF500QNUX1
User Manual
Fisher & Paykel RF500QNUX1
User Manual
-
 Fisher & Paykel RF500QNX1
User Manual
Fisher & Paykel RF500QNX1
User Manual
-
 Fisher & Paykel RF522ADUB5
User Manual
Fisher & Paykel RF522ADUB5
User Manual
-
 Fisher & Paykel RF522ADUX5
User Manual
Fisher & Paykel RF522ADUX5
User Manual
-
 Fisher & Paykel RF522ADX5
User Manual
Fisher & Paykel RF522ADX5
User Manual