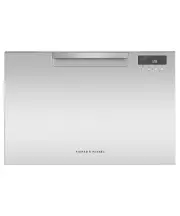
Page 3 - CONTENTS; Registration
3 CONTENTS Safety and warnings 5 First use 8 Loading suggestions 11 Wash programs 12 Wash modifiers 13 Setting a wash 14 Wi-Fi connection & remote mode 16 Delayed start 17 Keylock 18Sanitize 19Preferences 20Detergent 22Rinse aid 24 Racking features 25 Maintenance 28Troubleshooting 32Fault codes ...
Page 5 - READ AND SAVE THIS GUIDE; General; SAFETY AND WARNINGS
5 READ AND SAVE THIS GUIDE When using your Dishwasher, follow basic precautions, including the following: General z The information in this guide must be followed to minimise the risk of fire or explosion or to prevent property damage, personal injury or loss of life. z Use the Dishwasher only for i...
Page 6 - Installation
6 SAFETY AND WARNINGS z Household appliances are not intended to be used by children. Children of less than 8 years old must be kept away from the appliance unless continuously supervised. This appliance can be used by children aged from 8 years and above, and persons with reduced physical, sensory ...
Page 8 - FIRST USE; Dishwasher overview
8 FIRST USE z Ensure the installer has completed the ‘Final checklist’ in the Installation instructions. z Read this guide, taking special note of the 'Safety and warnings' section. z Remove all internal and external packaging and dispose of it responsibly. Recycle items that you can. Dishwasher ove...
Page 9 - Control panel features; Floor light logic; NO LIGHT; Floor light
9 FIRST USE Control panel features 1 Wash program selector 2 Wash modifier selector 3 Remote mode 4 Display 5 Delayed start indicator 6 Rinse aid indicator 7 Wi-Fi indicator 8 Delayed start selector 9 Key lock !0 Start !1 Cancel Control panel overview 1 4 2 6 7 9 !0 3 5 ORIGINAL SIZE LIGHT OFF LIGHT...
Page 10 - RINSE; Dishware; Avoid using too much detergent.
10 FIRST USE Cutlery & silverware Rinse cutlery and silverware immediately after use to prevent tarnishing. We recommend using the RINSE cycle. Silver should not come into contact with stainless steel, mixing these can cause staining. Remove silver cutlery from the dishwasher and hand dry immedi...
Page 11 - LOADING SUGGESTIONS; Ensure
11 LOADING SUGGESTIONS Ensure z Lower and middle spray arms can rotate freely. z Tall items do not obstruct the upper spray arm. z Glass and other fragile items are stable. z All dish openings are facing downwards. z Plates are evenly spaced. z All sharp objects are located securely to avoid injury ...
Page 12 - WASH PROGRAMS; WASH PROGRAM; Designed for heavily soiled pots, pans and dishes
12 WASH PROGRAMS WASH PROGRAM PROGRAM DESCRIPTION AUTO Suitable for any type of load. The dishwasher automatically selects the optimum wash program HEAVY Designed for heavily soiled pots, pans and dishes MEDIUM Best for dishes that are quite heavily soiled or to remove food soils that have been left...
Page 13 - WASH MODIFIERS; can be used in combination with the
13 WASH MODIFIERS WASH PROGRAM MODIFIER AVAILABLE AUTO 1/2 LOAD , DRY+ HEAVY 1/2 LOAD , SANITIZE , DRY+ , INTENSIVE MEDIUM 1/2 LOAD , SANITIZE , DRY+ , INTENSIVE LIGHT 1/2 LOAD , DRY+ ECO (default) - 60MIN 1/2 LOAD , DRY+ , INTENSIVE RINSE - GLASSWARE 1/2 LOAD , DRY+ After setting a wash program, yo...
Page 14 - SETTING A WASH; Select a wash program.
14 SETTING A WASH Remove all food scraps from dishware before carefully loading into the dishwasher.Ensure the spray arms are free from any obstructions and rotate freely. 1 2 3 4 If rinse aid is required fill the rinse aid dispenser. Refer to 'Rinse aid' for additional guidance. Add detergent to th...
Page 15 - Select a wash modifier if required.; CANCEL
15 Press to start the wash and close the door. If the door is not closed within 4 seconds the wash will be cancelled. 5 6 7 8 SETTING A WASH Select a wash modifier if required. Open the door carefully at any point during the wash to pause. Press and hold CANCEL to cancel the wash. After the wash the...
Page 16 - Connecting to your home Wi-Fi; Enabling remote mode; REMOTE
16 WI-FI CONNECTION & REMOTE MODE Your appliance may be connected to your home wireless network and operated remotely using the app. Getting started z Ensure your home Wi-Fi network is turned on. z You will be given step by step guidance on both your appliance and mobile device. z It may take up...
Page 17 - Cancelling Delayed Start; to enter; DELAYED START; and; Open the door to pause; DELAYED START
17 Set your dishwasher to start later in the day and run a selected wash program. DELAYED START can be set after a wash program has been selected and can be set for up to 12 hours. Cancelling Delayed Start Setting Delayed Start DELAYED START Add detergent and select a wash program, and wash modifier...
Page 18 - KEYLOCK; and together for; Locking the controls and setting a wash
18 KEYLOCK Open the door to pause the wash. Press and hold and together for 4 seconds to unlock. ORPress and hold CANCEL . Lock the dishwasher controls for cleaning or to prevent unintended use. Locking the controls and setting a wash Locking the controls Unlocking the controls Add detergent and sel...
Page 19 - Using; SANITIZE; SANITIZE; If sanitization has been successful
19 SANITIZE Using SANITIZE The SANITIZE wash modifier adjusts the wash program to meet the conditions required by Section 6, NSF 184 for sanitization to occur. While SANITIZE is running, the wash program is monitored to ensure that these conditions are met. Only programs utilising the SANITIZE wash ...
Page 20 - PREFERENCES; OPTION; Rinse aid; OFF; Cavity light
20 PREFERENCES You can adjust any of the below settings prior to starting a wash cycle. OPTION DESCRIPTION DEFAULT SETTINGS DISPLAY Rinse aid Controls the amount of rinse aid dispensed. Refer to 'Rinse aid' for further details. rA5 Off rA- Max: 6 rA6 Auto power-on Your dishwasher is set to automatic...
Page 21 - Changing the settings
21 PREFERENCES Changing the settings Ensure there is no wash in progress.Press and hold 1/2 LOAD and together for 4 seconds to enter the menu. Press 1/2 LOAD to scroll through the settings. Press to adjust the setting. 1 2 3 4 Press CANCEL to exit the menu and save your settings. ORIGINAL SIZE LIGHT...
Page 22 - DETERGENT; empty after each wash.; Using powdered detergent; Unsuitable detergents; Liquid detergents
22 DETERGENT WARNING: Dishwasher detergents are strongly alkaline. They can be extremely dangerous if swallowed. Avoid contact with the skin and eyes and keep children and infirm persons away from the dishwasher when it is open. Check the powdered detergent dispenser is empty after each wash. Using ...
Page 23 - *tablets are not recommended for the
23 Powdered detergent quantity recommendations z Use the table below to determine the optimal powdered detergent quantity for each wash program. z If you have hard water in your area, more detergent may be required. Refer to 'Water hardness' for more details. WASH PROGRAM PRE WASH COMPARTMENT MAIN W...
Page 24 - RINSE AID; Using rinse aid; MAX; Close the cover, ensuring it clicks shut.
24 RINSE AID Rinse aid provides a streak-free finish to glass and dishware as well as preventing metal from tarnishing. We recommend using a liquid rinse aid regularly for optimal drying results.The rinse aid dispenser is located on the inside of the door next to the detergent dispenser. Using rinse...
Page 25 - RACKING FEATURES; Removable anti-nesting grid; Cutlery basket; Features
25 RACKING FEATURES Removable anti-nesting grid Use the grid to separate cutlery items and stop them from nesting together. The grid clips onto the top of the cutlery basket. Cutlery basket To reduce the risk of injury, load knives and sharp utensils with handles facing up. Mix spoons, knives and fo...
Page 26 - Upper basket; To raise
26 RACKING FEATURES Cutlery/Utensil tray Use the tray to secure cutlery and utensils. Place cutlery into the notches to secure. Place larger utensils in the middle of the tray. Slide side sections to the middle to create more space for items below. Upper basket Adjust the height of the upper basket ...
Page 27 - Foldaway cup racks; To adjust height; Folding tine rack
27 Foldaway cup racks Adjust the height to suit or fold out of the way to make space for other items. Use the notches to support wine glass stems. To adjust height 1 Fold up to unlock. 2 Adjust the height to suit by sliding up or down. 3 Fold back down to lock in position. RACKING FEATURES All tines...
Page 28 - MAINTENANCE; Cleaning surfaces; Maintenance parts
28 MAINTENANCE Disconnect the dishwasher from the power supply and allow it to cool before undertaking any cleaning or maintenance. Cleaning surfaces Wipe with a damp cloth and dry using a lint-free cloth. We do not recommend using the following cleaning aids as they may damage the surfaces: z Plast...
Page 30 - Removing and cleaning the filter plate; Replacing the filter plate
30 MAINTENANCE With the filter removed, carefully lift the filter plate up and out. Clean under hot water and rinse thoroughly. Do not remove the upper spray arm for cleaning.Clean with a small, plastic-bristled brush. If heavily soiled or blocked use a dishwasher cleaner/descaler. Follow the manufa...
Page 31 - Cleaning the lower spray arm
31 MAINTENANCE Winterizing (cold climates) If the Dishwasher is installed in a cold climate where temperatures fall below freezing, we recommend winterizing. Turn off the water supply.Disconnect the drain hoses from the sink drain pipe and the water inlet pipe from the water valve. Drain the water f...
Page 32 - TROUBLESHOOTING
32 PROBLEM POSSIBLE CAUSE WHAT TO DO Dishwasher will not start No power. Ensure the dishwasher is plugged in and the power supply is turned on at the wall. The door is not properly closed. Close the door. has not been pressed. Press . Water tap not turned on. Ensure water is connected and turned on....
Page 33 - PROBLEM
33 TROUBLESHOOTING PROBLEM POSSIBLE CAUSE WHAT TO DO The dish washer stops suddenly during the wash Power or water supply has been interrupted. Check the power and water supplies. Knocking or rattling sound during wash Spray arm knocking against dishes. Pause the wash and rearrange dishes. Refer to ...
Page 35 - Water marks
35 TROUBLESHOOTING PROBLEM POSSIBLE CAUSE WHAT TO DO Water marks left on glasses and cutlery Rinse aid level or dosage setting is too low. Ensure there is rinse aid in dispenser. If necessary, increase the rinse aid setting or try using a wash program with a higher temperature. Refer to 'Rinse aid' ...
Page 36 - FAULT CODES; How do I know if there is a fault?; to stop the beeping, then again to clear the fault code.
36 FAULT CODES How do I know if there is a fault? Your dishwasher will beep continuously and a fault code will flash in the display. There are two types of fault codes – ‘F’ and ‘A’. To fix a fault First try to fix the issue and clear the code according to the steps in the following tables. If the p...
Page 37 - Drain fault; Follow the steps below to try and fix the issue.
37 FAULT CODES PROBLEM POSSIBLE CAUSE WHAT TO DO A20 Drain fault Drain hose is crimped or bent. Check the drain hose and straighten if needed. Blocked drain connection. Check that drain connection is free from blockages. The waste water is not draining out. Ensure that the drain hose is connected in...
Page 38 - MANUFACTURER’S WARRANTY AND SERVICE GUIDE; Before you call for service or assistance; Your product is correctly installed.; Wash program data and standards test; Complete and keep for safe reference:
38 MANUFACTURER’S WARRANTY AND SERVICE GUIDE Before you call for service or assistance Check the things you can do yourself. Refer to the installation instructions and your user guide and check that: 1 Your product is correctly installed. 2 You are familiar with its normal operation. If after checki...