Page 3 - CONTENTS; SAVE THESE INSTRUCTIONS; Registration
1 CONTENTS Introduction 2Safety and warnings 3 Installation instructions 6 Getting started quickly 12 Dryer controls 14 Sorting and loading 15 Drying cycles 18 Drying cycle options 19 Caring for your dryer 23 Before you call for service 26 Fault codes 27 Troubleshooting 28Manufacturer’s Warranty 34 ...
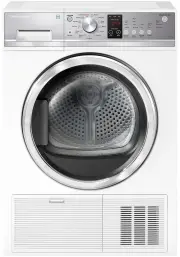
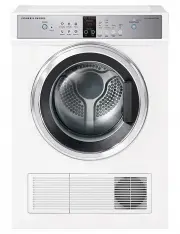
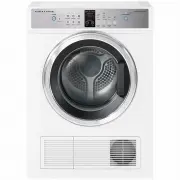
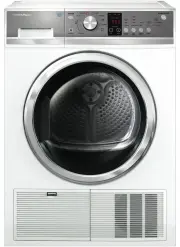
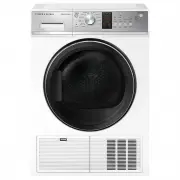
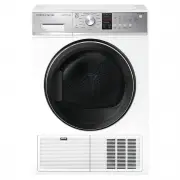
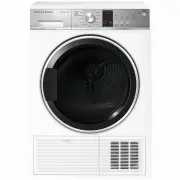
Page 4 - INTRODUCTION; Welcome to your new heat pump clothes dryer
2 INTRODUCTION Welcome to your new heat pump clothes dryer Thank you for purchasing a Fisher & Paykel clothes dryer. We are proud of this dryer and trust it will serve you well for many years. At Fisher & Paykel we aim to provide innovative products that are simple to use, ergonomic, energy ...
Page 5 - SAFETY AND WARNINGS; IMPORTANT SAFETY INSTRUCTIONS; Dryer use
3 SAFETY AND WARNINGS IMPORTANT SAFETY INSTRUCTIONS WARNING! When using this appliance always exercise basic safety precautions including the following: Dryer use ● ● The tumble dryer is intended only for drying textile material washed in water. ● ● Undergarments that contain metal reinforcements sh...
Page 6 - Lint
4 SAFETY AND WARNINGS ● ● This dryer is not intended for use by persons (including children) with reduced physical, sensory or mental capabilities, or lack of experience and knowledge, unless given supervision or instruction concerning the use of the dryer by a person responsible for their safety. ●...
Page 7 - should not be placed in a tumble dryer.; Disposal
5 SAFETY AND WARNINGS ● ● Items that have previously been cleaned in, washed in, soaked in or spotted with flammable liquids or solids, eg petrol/gasoline, kerosene, dry cleaning solvents, vegetable or cooking oil, acetone, denatured alcohol, some brands of spot removers, turpentine, waxes and wax r...
Page 8 - INSTALLATION INSTRUCTIONS; Removing the packaging
6 INSTALLATION INSTRUCTIONS Please read and follow the ‘Safety and warnings’ and ‘Installation instructions’ sections carefully before using your dryer! Moving your appliance If the dryer needs to be placed at an angle for moving, only tip towards the right hand side (when viewed from the front). If...
Page 9 - Installation options; A stacking kit MUST BE USED between the products and fitted; Have a minimum clearance on all sides of at least 20 mm.; Levelling the machine; back to front and
7 INSTALLATION INSTRUCTIONS Installation options Your dryer can be installed one of two ways, either freestanding, or stacked on top of a Fisher & Paykel front loading washer. 1 Free standing The dryer stands on the floor and can easily be moved into position. 2 Stacking Your dryer has been desi...
Page 10 - Draining; Connecting the drain hose:; machine. Check the connection and drain hose regularly.; Maximum standpipe height is 1.0 m from ground level.
8 INSTALLATION INSTRUCTIONS Draining The dryer is equipped with a condenser unit which accumulates water during the drying cycle. This water is collected in the removable water tank located at the top left of the dryer. The accumulated water must be emptied after each drying cycle. However you can a...
Page 11 - Electrical connection; This appliance must be connected to a 220 V – 240 V, 50 Hz, sinusoidal,; Do not touch or operate the machine with wet hands or with bare-feet.
9 INSTALLATION INSTRUCTIONS Electrical connection 1 This appliance must be connected to a 220 V – 240 V, 50 Hz, sinusoidal, 10 A electrical supply. 2 Uncoil the power cord, remove and discard the plastic pin cover and plug into a power socket. 3 Connect the appliance to an earthed outlet protected b...
Page 12 - Completing the installation; Installation test cycle
10 INSTALLATION INSTRUCTIONS Completing the installation Installation test cycle IMPORTANT! Ensure the installation test cycle is completed before you dry any items in your dryer. This is to check that your dryer is installed correctly and that it is functioning properly prior to use. 1 Turn your dr...
Page 13 - Machine specifications; Width; ELECTRICAL; Volts
11 INSTALLATION INSTRUCTIONS Machine specifications DH8060P Capacity (kg)* 8 DIMENSIONS (mm) Width 595 Depth 650 Height** 845 Length of drain hose 1300 ELECTRICAL Volts 220 – 240 HZ 50 Amps (maximum) 10 Heating Power (W) 900 * Capacity refers to the maximum dry weight of items the machine can dry at...
Page 14 - GETTING STARTED QUICKLY; when the machine is on as a reminder to check the lint filters.; Press ‘POWER’
12 GETTING STARTED QUICKLY ● ● Check the lint filter is clean and the water tank is empty before every load. Ensure both are replaced correctly before using your dryer. The lint filter indicator will be on when the machine is on as a reminder to check the lint filters. ● ● Sort and load items into t...
Page 15 - If you make an invalid selection the dryer will beep to alert you.; your expectations of drying performance may not be met.
13 GETTING STARTED QUICKLY ● ● If you make an invalid selection the dryer will beep to alert you. ● ● When the cycle finishes, your dryer will beep and then turn off automatically. If the ‘Wrinkle Free’ option has been selected the machine will rotate the drum periodically blowing cool air into the ...
Page 16 - DRYER CONTROLS
14 DRYER CONTROLS SmartTouch™ Control Dial The SmartTouch™ Control Dial provides easy and efficient drying cycle selection. As you rotate the dial, the icon of the drying cycle selected will be illuminated, along with the default settings for that cycle on the right side of the control panel. SmartT...
Page 17 - SORTING AND LOADING; Sorting; COMMENTS
15 SORTING AND LOADING When preparing your load there are some important things to consider: Sorting ● ● It is recommended that you sort your garments before placing them into the dryer. Sort into loads of similar items, and loads that will likely take similar times to dry. Heavier items (eg towels,...
Page 18 - Before you load; Load items individually.; To reduce creasing; Shake clothes out and load individually to help items dry evenly.; disintegrate during drying.
16 SORTING AND LOADING Before you load ● ● Check pockets for items that could damage your clothes or get caught in the dryer. ● ● Close zippers, hooks and eyes, and other fastenings (ie fasten the openings of duvet/doona covers), and remove loose bra wires. These may damage both your dryer and your ...
Page 20 - DRYING CYCLES
18 DRYING CYCLES Your dryer has a number of drying cycles to suit your laundry needs. Selecting the most appropriate cycle for each particular load will help ensure you get the best result. CYCLE DESIGNED FOR DESCRIPTION MAX. LOAD SIZE (KG) DEFAULT DRYNESS LEVEL* DEFAULT DRYING TEMP Everyday** Every...
Page 21 - DRYING CYCLE OPTIONS; Default options; the new setting or settings.; Dryness Level
19 DRYING CYCLE OPTIONS Timed programmes (Time Dry, Rack Dry, Wool) Timed programmes of 10 to 150 minutes can be selected using the ‘More’ and ‘Less’ buttons. The machine dries for the selected time regardless of the level of moisture in the load. It is important to check the clothes throughout the...
Page 22 - Dry Temp; There are four drying temperatures you can choose from:; Wrinkle Free; There are two wrinkle free options:; Signal
20 DRYING CYCLE OPTIONS Dry Temp There are four drying temperatures you can choose from: ● ● ‘High’ – clothes temperatures may reach up to 70°C. ● ● ‘Medium’ – clothes temperatures may reach up to 65°C. ● ● ‘Low’ – clothes temperatures may reach up to 60°C. ● ● ‘No Heat’ – cool air is blown through ...
Page 23 - and buttons. This option helps prevent accidental button touches.; Delay Start
21 DRYING CYCLE OPTIONS Indicators There are a number of indicators to alert you when you need to attend to your dryer, either to clean the lint filter, empty the water tank or to clean the condenser filter (refer to the ‘Caring for your dryer’ section for more information). Keylock This option enab...
Page 24 - Customising dryer cycles; To customise a cycle:; Factory reset
22 DRYING CYCLE OPTIONS Customising dryer cycles After using your dryer a few times you may discover there are some drying options you prefer for some cycles. You can programme your dryer to remember the drying options you prefer for each drying cycle. For instance, you may want to set the ‘Easy Iro...
Page 25 - CARING FOR YOUR DRYER; Unplug the machine from the power socket.
23 CARING FOR YOUR DRYER When you have finished using your dryer ● ● Unplug the machine from the power socket. ● ● Wipe around the door to remove any remaining condensation and foreign matter. ● ● Clear the lint filter and empty the water tank (if not set up to automatically drain). Cleaning your dr...
Page 26 - Emptying the water collection tank; To empty the water tank:; Empty the tank, replace it in the housing then touch
24 CARING FOR YOUR DRYER Emptying the water collection tank During the drying cycle steam condenses into water and is collected in the water tank, located at the top left of the dryer. It is important to empty the water tank after every load. There is an indicator light that will illuminate when the...
Page 27 - Cleaning the condenser filter; To clean the condenser filter:; Cleaning the sensors; To clean the sensors:
25 Cleaning the condenser filter If the ‘Condenser’ indicator light starts to flash this indicates that the condenser filter needs to be cleaned. The condenser filter should be cleaned after every five cycles. The light illuminates when you first turn the machine on, then turns off once the button h...
Page 28 - BEFORE YOU CALL FOR SERVICE; User warnings; Check this chart before you call for service.; PROBLEM; Empty the lint filter and then replace it.
26 BEFORE YOU CALL FOR SERVICE User warnings Your dryer is capable of diagnosing a number of its own problems. It will sound a continuous series of beeps and display a code when it has a problem that you can correct yourself. All control panel lights will turn off and a code will be displayed to inf...
Page 29 - FAULT CODES; panel and a number appears on the display, a fault has occurred.
27 FAULT CODES When a continuous series of beeps is sounded, all the lights turn off on the control panel and a number appears on the display, a fault has occurred. The dryer will automatically enter this mode if a fault occurs. The fault code will be displayed as followed by a number on the digital...
Page 30 - TROUBLESHOOTING
28 TROUBLESHOOTING The following is a list of problems you may encounter when using this appliance and some suggestions that may help to correct the problem. If you still have problems, please contact your Fisher & Paykel Authorised Repairer. PROBLEM POSSIBLE CAUSES WHAT TO DO Pressing ‘POWER’ d...
Page 31 - Dryer is taking too
29 TROUBLESHOOTING PROBLEM POSSIBLE CAUSES WHAT TO DO Dryer is taking too long/results were not satisfactory. Drying cycle selected not appropriate for the load. Select an appropriate cycle for the load. Refer to pages 15 and 18. Dryness level selected not appropriate for the load. Select a higher d...
Page 32 - Empty the water tank.
30 TROUBLESHOOTING PROBLEM POSSIBLE CAUSES WHAT TO DO Clothes getting too hot or damaged. Cycle selected not appropriate for the load. Ensure the cycle selected is appropriate for items in the load. Refer to pages 15 and 18. Items removed from dryer before the end of cycle cool down had finished. Re...
Page 33 - Remove some items from the dryer.
31 TROUBLESHOOTING PROBLEM POSSIBLE CAUSES WHAT TO DO Noises. Dryer is overloaded. Remove some items from the dryer. Dryer has a fault. Continuous beeping or a musical series of beeps with a message displayed on digital display. Refer to pages 26 and 27. Beeps signalling the end of a drying cycle. E...
Page 34 - Loads not sorted correctly.
32 TROUBLESHOOTING PROBLEM POSSIBLE CAUSES WHAT TO DO Linting. Lint filter not cleaned or replaced. Ensure the lint filter is cleaned after every cycle and replaced correctly. Refer to page 23. Loads not sorted correctly. Dry lint givers separately from lint receivers. Also, dry similar colours toge...
Page 35 - Incorrect cycle selection.
33 TROUBLESHOOTING PROBLEM POSSIBLE CAUSES WHAT TO DO Dye transfer. White/light and coloured items not separated before drying. Remember to separate white/light and coloured items before placing them in the dryer. Wet items left sitting in the dryer for long periods of time before drying. Do not lea...
Page 36 - MANUFACTURER’S WARRANTY; This Manufacturer’s Warranty DOES NOT cover
34 MANUFACTURER’S WARRANTY For New Zealand and Australia only. You automatically receive a 2 year Manufacturer’s Warranty with the purchase of this Heat pump clothes dryer covering parts and labour for servicing within the country of purchase. Fisher & Paykel undertakes to: Repair or, at its opt...
Page 37 - For Australian Customers; Please keep this user guide in a safe place.
35 MANUFACTURER’S WARRANTY Service under this Manufacturer’s Warranty must be provided by a Fisher & Paykel Authorised Repairer (refer to the ‘Customer Care’ section at the back of this book). Such service shall be provided during normal business hours. This Manufacturer’s Warranty certificate s...
Page 38 - CUSTOMER CARE; Your product is correctly installed.; In New Zealand if you need assistance...*; If you need service...*; In Australia if you need assistance...*; Fisher & Paykel Appliances Ltd, PO Box 798, Cleveland QLD 4163
36 CUSTOMER CARE Before you call for service or assistance... Check the things you can do yourself. Refer to your user guide and check: 1 Your product is correctly installed. 2 You are familiar with its normal operation. 3 You have read the ‘Before you call for service’, ‘Fault codes’ and ‘Troublesh...
Page 39 - To register your product visit our website:
37 CUSTOMER CARE Registration Register your product with us so we can provide you with the best service possible. To register your product visit our website: www.fisherpaykel.com Complete and keep for safe reference: Model Serial No. Purchase Date Purchaser Dealer Suburb Town Country
Page 40 - NZ AU
428104 A 08.15 www.fisherpaykel.com Copyright © Fisher & Paykel 2015. All rights reserved. The product specifications in this booklet apply to the specific products and models described at the date of issue. Under our policy of continuous product improvement, these specifications may change at a...


 Fisher & Paykel DE4560M1
User Manual
Fisher & Paykel DE4560M1
User Manual
 Fisher & Paykel DE50F56A2
User Manual
Fisher & Paykel DE50F56A2
User Manual
 Fisher & Paykel DE6060M2
User Manual
Fisher & Paykel DE6060M2
User Manual
 Fisher & Paykel DE7060G1
User Manual
Fisher & Paykel DE7060G1
User Manual
 Fisher & Paykel DE7060G2
User Manual
Fisher & Paykel DE7060G2
User Manual
 Fisher & Paykel DE8060P2
User Manual
Fisher & Paykel DE8060P2
User Manual
 Fisher & Paykel DE8060P3
User Manual
Fisher & Paykel DE8060P3
User Manual
 Fisher & Paykel DH8060P3
User Manual
Fisher & Paykel DH8060P3
User Manual
 Fisher & Paykel DH9060P2
User Manual
Fisher & Paykel DH9060P2
User Manual